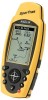
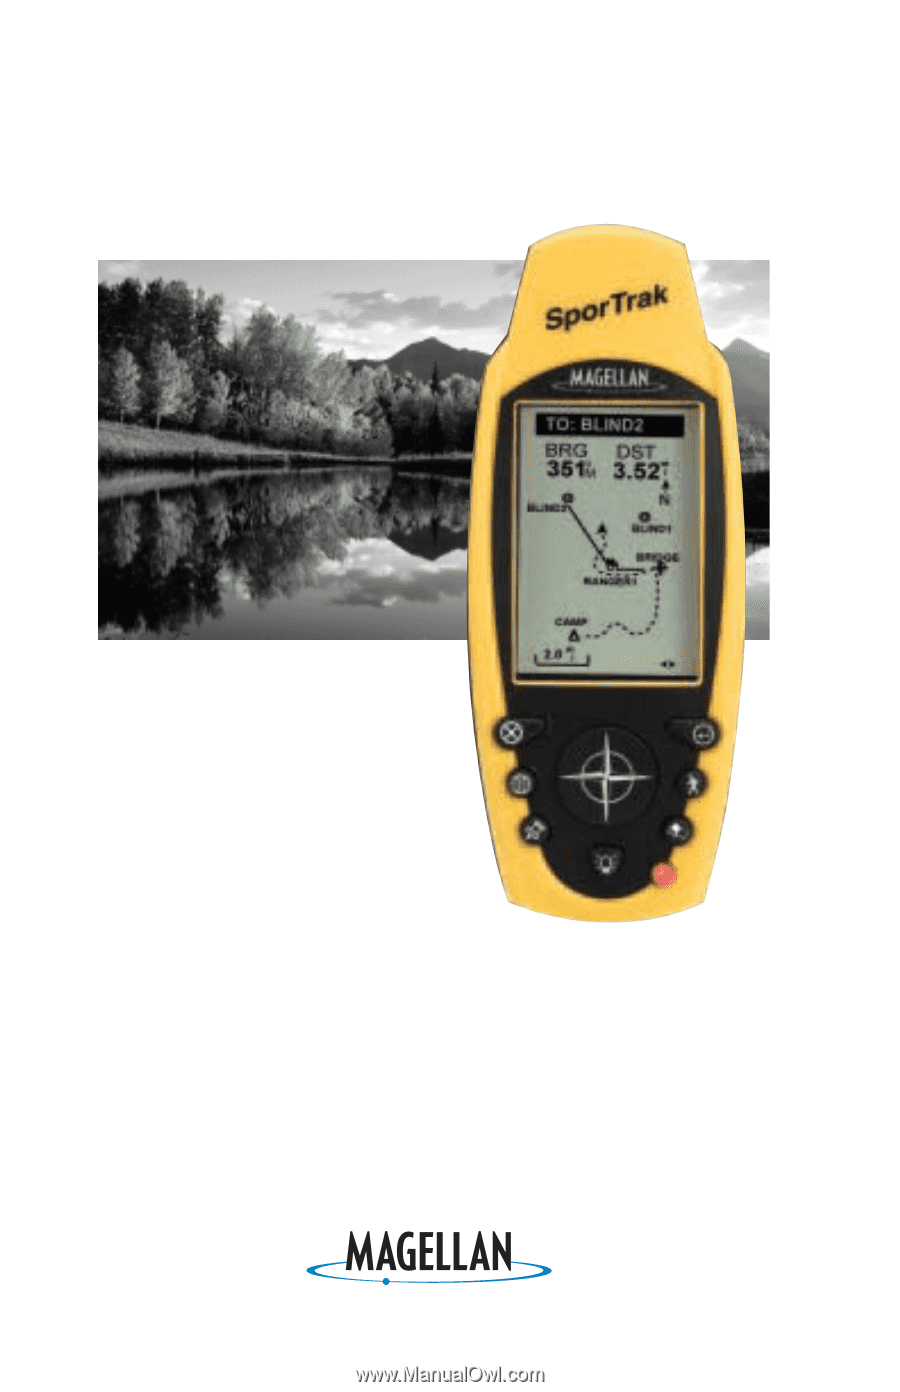
Magellan SporTrak User Manual
Magellan SporTrak Manual
 |
UPC - 763357103717
View all Magellan SporTrak manuals
Add to My Manuals
Save this manual to your list of manuals |
Magellan SporTrak manual content summary:
- Magellan SporTrak | User Manual - Page 1
User Manual - Magellan SporTrak | User Manual - Page 2
of Defense civil GPS user policy and the Federal Radionavigation Plan. Accuracy can also be affected by poor satellite geometry. USE PROPER ACCESSORIES Use only Magellan cables and antennas; the use of non-Magellan cables and antennas may severely degrade performance or damage the receiver, and will - Magellan SporTrak | User Manual - Page 3
Table of Contents Introduction 1 SporTrak User Manual 1 SporTrak GPS Receiver 2 Getting Started 3 Installing the Batteries 3 Proper Handling - Signal Reception 4 Power On 4 Initialize 5 Initialize for First Time Use 5 Select Language 5 Key Layout Screen 6 Initialize Alert 6 Select - Magellan SporTrak | User Manual - Page 4
Up the Plotter 19 Setting Hide Data/Show Data 20 Using the Road Screen 21 Customizing the Road Screen 21 Using the Speed Screen 22 Resetting the 27 Creating a User Waypoint 28 Editing a User Waypoint 28 Creating, Editing, Deleting a Message ..... 29 Deleting a User Waypoint 29 Finding - Magellan SporTrak | User Manual - Page 5
Multi-Leg Route 34 Viewing/Editing a Route 35 Inserting a Leg 35 Changing a Waypoint in a Route ..... 35 Adding a Waypoint at the End Route 36 Activating/Deactivating a Route ....... 36 Reversing a Route 37 Using Plot View in a Route 37 Deleting a Route 37 Working with GPS Fix Alarm 43 iii - Magellan SporTrak | User Manual - Page 6
Disabling NAV Screens 45 Selecting a Coordinate System 46 Selecting Map Datum 47 Selecting Elevation Mode 47 Selecting Time Format 48 50 Selecting Baud Rate 51 Troubleshooting 52 Frequently Asked Questions 53 Contacting Magellan 56 Connecting to the SporTrak ...... 57 WAAS 59 Available - Magellan SporTrak | User Manual - Page 7
Specifications 61 Accessories 62 Glossary 63 v - Magellan SporTrak | User Manual - Page 8
vi - Magellan SporTrak | User Manual - Page 9
functions. Following is the Customizing chapter, that allows you to establish options you want set in the receiver. The Troubleshooting chapter gives you a problem and answer series to guide you. The final chapter, Glossary, defines terms that may be unfamiliar to you. . Magellan SporTrak 1 - Magellan SporTrak | User Manual - Page 10
current position. LIGHT key turns the display backlight on and off. 2 ENTER key confirms data entries or menu selections. GOTO key creates a direct route to any waypoint stored in memory. MENU accesses waypoint, route and setup functions. POWER key turns the receiver on and off. Magellan SporTrak - Magellan SporTrak | User Manual - Page 11
This section shows you how to use your receiver for the first time and explains: • Battery Installation • Primary Usage • Getting a Fixed Position Installing the Batteries The Magellan SporTrak uses two AA batteries that are installed from the bottom through the battery cover. You can expect to get - Magellan SporTrak | User Manual - Page 12
initialize your receiver each time you use it unless the memory has been cleared or if it has been transported more than 300 miles while turned off. Power On If after powering the receiver on, you do not press ENTER within 10 seconds, the receiver will shut off automatically. 4 Magellan SporTrak - Magellan SporTrak | User Manual - Page 13
for. Follow these instructions to initialize the SporTrak. Select Language The first time you use your SporTrak (or if memory change the language at any time by accessing the Languages option of the Setup Menu. (See Changing Languages in the Reference Section of the User Manual.) Magellan SporTrak - Magellan SporTrak | User Manual - Page 14
your general region. REGION Press [ENTER]. ENTER COORD USA AMERICAS EUROPE ASIA EAST ASIA WEST AUSTRALIA AFRICA Use the Up/Down arrows on the keypad to highlight your area. Press [ENTER]. AREA ALABAMA ALASKA ARIZONA ARKANSAS CALIFORNIA COLORADO CONNECTICUT DELAWARE 6 Magellan SporTrak - Magellan SporTrak | User Manual - Page 15
have entered the correct time, press [ENTER]. Using the arrow keys, enter the present date. Press [ENTER]. A screen will be displayed asking your primary use for your receiver, MARINE or LAND. The default is LAND. Use the arrow keys to select usage and press [ENTER]. Magellan SporTrak 7 - Magellan SporTrak | User Manual - Page 16
elevation as well as your position. If "2D" is displayed, then the SporTrak is computing your position 001112 782385 POWER but not elevation. This could be either due to only three satellites have been acquired or you have set the elevation mode to 2D in the Setup Menu. 8 Magellan SporTrak - Magellan SporTrak | User Manual - Page 17
with a name that is more descriptive, such as "CAMP" or "HOME". Press Press Enter data Press Press Creating a GOTO A GOTO is a route that guides you from your current position to any waypoint in the receiver's memory. Press Select category Press Select waypoint Press Magellan SporTrak 9 - Magellan SporTrak | User Manual - Page 18
This completes the Getting Started section. The following Basic Operation section will familiarize you with the NAV screens and more detailed functions. 10 Magellan SporTrak - Magellan SporTrak | User Manual - Page 19
Basic Operation Entering Information Throughout this user manual there are some key presses that will be used often, so please keep them in mind while setting up and navigating. When entering data... • Use the for making selections and moving up or down. • Use the to move the cursor to the left - Magellan SporTrak | User Manual - Page 20
the inner circle represents 45˚ from the horizon. The center of the circle is 90˚. WAAS Satellite WAAS is described in the back of the user manual. 12 Magellan SporTrak - Magellan SporTrak | User Manual - Page 21
. While averaging, the receiver continuously takes fixes to create an average. Once you begin moving, averaging stops automatically. Viewing the Secondary Coordinate Screen From the POSITION screen, use the left/right ARROWs to view the Second Coordinate System access screen. Magellan SporTrak 13 - Magellan SporTrak | User Manual - Page 22
choose from BRG, DST, SOG, COG, VMG, CTS, ETA, ETE, XTE, TRN, ALT, TME and blank. Customizing the NAV 1 Screen The NAV 1 screen can be changed to show the navigation data that you prefer to view. From NAV 1 screen Select CUSTOMIZE FIG. Select A data type Choose field 14 Magellan SporTrak - Magellan SporTrak | User Manual - Page 23
Using the Compass Screen As well as displaying the customizable navigation data, the COMPASS screen provides a pointer compass can be changed to show the navigation data that you prefer to view. From COMPASS screen Select CUSTOMIZE Choose field FIG. Change B field Magellan SporTrak When the - Magellan SporTrak | User Manual - Page 24
choose from BRG, DST, SOG, COG, VMG, CTS, ETA, ETE, XTE, TRN, ALT, TME and blank. Customizing the NAV 2 Screen The NAV 2 screen can be changed to show the navigation data that you prefer to view. From NAV 2 screen Select CUSTOMIZE FIG. Change A field Choose field 16 Magellan SporTrak - Magellan SporTrak | User Manual - Page 25
Indicates the direction required to reach your destination. Plot Scale Can be changed by using the left/right arrows. The scale ranges from .1 to 200 miles. Track History Automatically records where you have been. The SporTrak can store up to 2000 track points. PAN-N-SCAN, an additional feature - Magellan SporTrak | User Manual - Page 26
storing locations, as "dropping bread crumbs" from your starting point as you travel. This is useful when you want to return to your starting point. From PLOT screen Select TRACK HIST Change field Clearing Track History From PLOT screen Select CLR TRACK Select 18 Magellan SporTrak - Magellan SporTrak | User Manual - Page 27
Setting Up the Plotter This menu allows you to change the orientation, turn the plot rings on or off, set the course projection and set the plotter choose from OFF, 1, 2, 5 and 10 minutes. A solid black line will appear starting from your position to the projected position. Magellan SporTrak 19 - Magellan SporTrak | User Manual - Page 28
navigation data fields or have the fields present. Under HIDE DATA/SHOW DATA, you can turn these fields on or off. Depending on which has been selected previously, you may need to select SHOW DATA to bring the fields into view. From PLOT screen Select HIDE DATA or SHOW DATA 20 Magellan SporTrak - Magellan SporTrak | User Manual - Page 29
the navigation data that you prefer to view. From ROAD screen Select CUSTOMIZE Choose field FIG. Change B field CWUPSTTONAMMIZEES BRG ---°m DST ---nm SOG ---KT COG ---°m VMG ---KT CTS ---°m BLANK Figure B. You can choose from BRG, DST, SOG, COG, VMG, CTS and blank. Magellan SporTrak 21 - Magellan SporTrak | User Manual - Page 30
Speed Screen While using the SPEED screen, you can view the graphical speedometer, odometer and trip odometer as well as the numerical bearing, course over ground and speed over ground. Destination Name Navigation Data TO: CAMP FIG. screen ODOM RESET A Select yes or no 22 Magellan SporTrak - Magellan SporTrak | User Manual - Page 31
Select yes or no Setting the Speed Average You may want to reset the Speed Average field in your receiver. From SPEED screen Select SPEED AVG FIG. Select B time The default is 30 seconds. SPEED AVG or 1 hour. TRIP option is for averaging speed over the entire trip. Magellan SporTrak 23 - Magellan SporTrak | User Manual - Page 32
AM/PM and UTC. 24 Selecting Time Format You may need to correct the current time or change the time format. From TIME screen Select FORMAT FIG. Select A format If LOCAL 24HR or LOCAL AM/PM Change fields If UTM is chosen you will not be prompted to make the time change. Magellan SporTrak - Magellan SporTrak | User Manual - Page 33
You have completed the basic operation for your receiver. From the information provided, you can now navigate from place to place quickly and easily. The following chapters provide you with additional information on using your receiver that build on what you have learned. Magellan SporTrak 25 - Magellan SporTrak | User Manual - Page 34
alarm and GPS Fix alarm. These alarms can be reset to the alarm default settings or can be cleared of defaults. Following, you will find the Customizing section. Customizing allows you to use the Setup menu to establish the options you would like to set in your receiver. 26 Magellan SporTrak - Magellan SporTrak | User Manual - Page 35
To help you understand the difference, the chart below shows the functions of the User and Non-User waypoints. You can store up to 10 Non-User waypoint categories. WPT Types User Non-User Available Functions • Create • Edit • Delete • Project • Sort • Find • Project • Sort Magellan SporTrak 27 - Magellan SporTrak | User Manual - Page 36
From any NAV screen Select WAYPOINTS Select User category Select waypoint Select FIG. EDIT WPT A Editing Waypoint Fields. Follow the instructions on selecting a waypoint and use the following to edit the desired fields. FIG. Select B data field Make changes 28 Magellan SporTrak - Magellan SporTrak | User Manual - Page 37
message. Follow the instructions on selecting a waypoint and use the following to create/edit/delete a waypoint. Select CREATE MSG Make changes To delete a message. Follow the instructions on selecting a waypoint you to select YES or NO in deleting the waypoint named. Magellan SporTrak 29 - Magellan SporTrak | User Manual - Page 38
Select category Select PROJECTION Select field Make changes You can change any of the three sections in the PROJECTION screen. Once you have the necessary information in the data fields and the receiver has projected the position, you can save the position by pressing [MARK]. Magellan SporTrak - Magellan SporTrak | User Manual - Page 39
software allows you to select a geographical area and enable waypoint categories for that location to be transferred into the receiver. Using DataSend™ After you have installed DataSend™ you are ready to view and send waypoints to the receiver. While running DataSend™ you will see a background map - Magellan SporTrak | User Manual - Page 40
route that guides you from your current position to any waypoint in the receiver's memory. As an example, you can save a waypoint at your home. No matter where you go, you will always be able to navigate back home by using GOTO. name is displayed at the top of the screen. 32 Magellan SporTrak - Magellan SporTrak | User Manual - Page 41
. If a MOB already exists, the receiver will give you the option of replacing point recorded in track history using the "bread crumbs" saved, 01 to 31. For example, your first backtrack will read B01P01. The backtrack waypoints will be listed in the menu just as other waypoints. Magellan SporTrak - Magellan SporTrak | User Manual - Page 42
WAYPOINTS ROUTES SETUP SUN/MOON FISH/HUNT CONTRAST ALARM/MSG Figure B. Use this menu as an option for saving your route. Creating a Multi of different categories in the same route. The receiver will display the selected waypoint in the starting location parts of the world. 34 Magellan SporTrak - Magellan SporTrak | User Manual - Page 43
route, highlight View/ Edit. Select INSERT Select category VIEW/EDIT HOME CAMP Select waypoint Changing a Waypoint in a Route. Using your home to campsite route, you want to go to the fishing spot on the existing route by highlighting the next available dotted line. Magellan SporTrak 35 - Magellan SporTrak | User Manual - Page 44
ROUTE WAYPOINTS ROUTES SETUP SUN/MOON FISH/HUNT CONTRAST ALARM/MSG Figure B. Use this menu as an option for saving the changes made to your route. MENU ACTIVATE VIEW/EDIT REVERSE DELETE BACKTRACK PLOT and begin navigating. Select ROUTE Select Abb. ACTIVATE C Select route Magellan SporTrak - Magellan SporTrak | User Manual - Page 45
LEGS DISTANCE 2 0.00 n m Figure D. The route title will change when you reverse a route. MENU ACTIVATE VIEW/EDIT REVERSE DELETE BACKTRACK PLOT VIEW WAYPOINTS ROUTES SETUP SUN/MOON FISH/HUNT CONTRAST ALARM/MSG Figure E. Use this menu for accessing Plot View in a route. Magellan SporTrak 37 - Magellan SporTrak | User Manual - Page 46
will indicate TO: LEGXXXX where XXXX is between 0 to 2000. As you navigate with the receiver and pass individual track points, the legs will switch and countdown until you reach LEG 0 which that are close to each other causing the receiver to skip 1 or more of these legs. 38 Magellan SporTrak - Magellan SporTrak | User Manual - Page 47
23MAR98 RISE/SET SUN RISE 06:55AM SET 05:08PM MOON RISE 07:32PM SET 01:49AM PHASE Figure A. You can change the location (AT) and/or the date (ON) for the calculation. SUN/MOON 37AM TO 10:05AM Figure B. You can change the location (AT) and/or the date (ON) for the calculation. Magellan SporTrak 39 - Magellan SporTrak | User Manual - Page 48
Simulated position being more than 300 miles from your actual present position. Selecting Contrast You may want to change the contrast of your receiver. You can adjust the brightness depending on your preference. From any Select FIG. screen CONTRAST B Adjust contrast 40 Magellan SporTrak - Magellan SporTrak | User Manual - Page 49
250FT 500FT Select range The alarm will sound when the GPS position is at a distance greater than the distance you have chosen. The alarm will sound until turned off or the condition is corrected. Default setting: OFF Figure C. You can choose from OFF, 100, 250 or 500 feet. Magellan SporTrak 41 - Magellan SporTrak | User Manual - Page 50
set course. While viewing Select FIG. Alarm/Msg screen XTE B Select range The alarm will sound when the GPS position is off your set course by the distance you have chosen. The alarm will sound until turned off waypoints you have chosen that are not on the active route. 42 Magellan SporTrak - Magellan SporTrak | User Manual - Page 51
used waypoint field. The alarm will sound and a pop-up window will appear when the GPS GPS FIX E Select on or off Default setting: OFF Figure D. You can select any saved waypoint to list on the Proximity waypoint screen. GPS ALARM OFF ON Figure E. You can choose from OFF or ON. Magellan SporTrak - Magellan SporTrak | User Manual - Page 52
FIG. Alarm/msg screen CLEAR MSG C Select yes or no Selecting Language Use the following steps to change the language (English, Spanish, German, Italian, Swedish, French, Norwegian, Finnish or Portuguese) of the Magellan SporTrak. From any navigation screen Select language Select LANGUAGES 44 - Magellan SporTrak | User Manual - Page 53
Setup. SETUP INITIALIZE NAV SCREENS COORD SYSTEM MAP DATUM ELEV MODE TIME FORMAT NAV UNITS NORTH REF LIGHT TIMER BEEPER PERSONALIZE CLEAR MEMORY NMEA BAUD RATE SIMULATE Figure E. If you need to initialize again, make this selection. The default for the TIME screen is off. Magellan SporTrak 45 - Magellan SporTrak | User Manual - Page 54
, TD, OSGB, Irish, Swiss, Swedish, Finnish, German, French, MGRS and User Grid. Selecting a Coordinate System A coordinate system is provided for you. This option be UTM. You will want the receiver to use position coordinates in the same map datum that is used by your maps. 46 Magellan SporTrak - Magellan SporTrak | User Manual - Page 55
selected, the receiver will ask for elevation. WELPETVNMAOMDEES O3FDF O2ND Figure E. You can choose from 2D or 3D. WELPETVNAATMIOENS OFF 0000FT ON Figure F. If you are at sea level, you can use 2D because your elevation is zero. FIG. Input F elevation Default setting: 3D Magellan SporTrak 47 - Magellan SporTrak | User Manual - Page 56
. You can change this to true north (good, if you are using a map) or back to magnetic north (default, good to use if you are using a compass), or mils true or mils mag under SETUP. Select SETUP Select NORTH REF FIG. Select D reference Default setting: MAGNETIC 48 Magellan SporTrak - Magellan SporTrak | User Manual - Page 57
Light Timer The light timer is a power saving function that automatically turns the light off until you turn the light or the receiver off. BEEPER OFF KEYS ONLY ALARM ONLY KEYS /ALARM Figure F. You can choose from OFF, KEYS ONLY, ALARM ONLY and KEYS/ALARM. Enter name Magellan SporTrak 49 - Magellan SporTrak | User Manual - Page 58
in the receiver's memory. Use caution when accessing receiver will clear everything and power itself off. Selecting NMEA Your receiver can be set to output GPS data to interface with your personal computer. Select SETUP Select NMEA FIG. Select B NMEA Default setting: OFF 50 Magellan SporTrak - Magellan SporTrak | User Manual - Page 59
Selecting Baud Rate Connection to external devices requires that the baud rate of the data being sent or received by the receiver be matched to the baud rate of the external device. Select SETUP Select BAUD RATE Select baud rate Default: 4800 baud Magellan SporTrak 51 - Magellan SporTrak | User Manual - Page 60
as the map you are using. Data was not saved or was corrupted. 1. This can be caused because you removed the batteries or removed external power while the SporTrak was turned on SporTrak turns off unexpectedly. 1. This is commonly caused by excessive static electricity. Turn the receiver back on - Magellan SporTrak | User Manual - Page 61
by the SporTrak. How long can I expect my SporTrak to run on a fresh set of batteries? Under normal operating conditions you should get up to 15 hours of use while the display backlight is turned off. This duration will drop significantly if you use the display backlight. Magellan SporTrak 53 - Magellan SporTrak | User Manual - Page 62
. As you are moving, the SporTrak automatically creates and stores hidden waypoints into memory. These waypoints are the ones that the SporTrak will use to retrace your steps. When you create a backtrack route, the SporTrak converts these hidden waypoints into User Waypoints. 54 Magellan SporTrak - Magellan SporTrak | User Manual - Page 63
check the baud rate that your software is using. If they don't match, change either the software's or the SporTrak's baud rate (See Setup - Changing the Baud Rate.) Can I interface my SporTrak with a Macintosh computer? Magellan does not supply cabling or software for the Macintosh line of computers - Magellan SporTrak | User Manual - Page 64
, please have your receiver with you. Packages should be sent to: Thales Navigation Magellan Products 960 Overland Court San Dimas, CA 91773 ATTN: Additional information regarding software updates to your SporTrak can be found in the Product Support section of the Magellan web site (www - Magellan SporTrak | User Manual - Page 65
Connecting to the SporTrak Available as accessories for your GPS receiver are the following cables: External Power Cable with Cigarette Lighter Adapter, Power/Data Cable, Data Cable and PC Cable with Cigarette Lighter Adapter. The instructions given below apply to all cables, unless otherwise stated - Magellan SporTrak | User Manual - Page 66
cables only) This is the pinout looking into the 9-pin female connector Pin 2: Data Out Pin 3: Data In Pin 5: Ground 5 1 9 6 Cable Wiring Color Code Power Red: Power + Black: GND Data (Power/Data, PC cable & Data cable only) Yellow: Data In Orange: Data Out Black: GND 58 Magellan SporTrak - Magellan SporTrak | User Manual - Page 67
may experience service outages. Even during these outages, your GPS receiver will still be working, computing position fixes and helping you get to where you want to go using the GPS signals. The website's section on their WAAS system: http://gps.faa.gov/programs/WAAS/waas.htm Magellan SporTrak 59 - Magellan SporTrak | User Manual - Page 68
, Vietnam) GUNSG G. Segara TIMBA Timbalai GUNSR TOKYO Tokyo HAWAI Hawaii USER DEFINED HERAT Herat North VOIRO HJORS Hjorsey 1955 WGS72 World Geodetic System HUTZU Hu-tzu-shan 1972 INDIA Indian (India, Nepal) YACAR Yacare IRAN Iran 60 ZANDE Zanderij Magellan SporTrak - Magellan SporTrak | User Manual - Page 69
EL backlit display Housing Weatherproof construction, wraparound rubber armor Temp. Range Operating Storage 14˚F to 140˚F to (-10˚C to 60˚C) -4˚F to 158˚F (-20˚C to 70˚C) Power: Source Battery Life 2 AA alkaline batteries or 9-18 VDC with power cable Up to 15 hours Magellan SporTrak 61 - Magellan SporTrak | User Manual - Page 70
for external power. PC Cable: Allows you to connect the SporTrak to a PC. DataSend™ CD-ROM: The software contains a database of points of interest that can be sent to your receiver. You can select from a number of geographical locations and download them into your receiver. 62 Magellan SporTrak - Magellan SporTrak | User Manual - Page 71
map you are using can be found in the legend of the map. If you are unsure of which datum to use, use WGS84. Default The value or setting automatically chosen by the unit unless otherwise directed. Can be changed in Setup. DST Distance. Distance from position to destination. Magellan SporTrak - Magellan SporTrak | User Manual - Page 72
position and velocity of the satellites in the sky. The receiver uses the ephemeris to calculate the precise distance from the GPS receiver to the satellite. ETA Estimated Time of Arrival. The with the first being from waypoint A to waypoint B. B A Leg 1 Leg 2 D Leg 3 C 64 Magellan SporTrak - Magellan SporTrak | User Manual - Page 73
Magellan SporTrak Landmark. A location saved in the unit's memory which is obtained by entering data, editing data, calculating data or saving a current position. Used . Used with GRB36 datum. Position coordinates as computed by the GPS receiver. Speed Over Ground. The speed at which the receiver is - Magellan SporTrak | User Manual - Page 74
which is obtained by entering data, editing data, calculating data or saving a current position. Used to create routes. Cross Track Error. The distance, left or right, of the desired courseline. The courseline is a straight line from your present position to your destination. 66 Magellan SporTrak
-
 1
1 -
 2
2 -
 3
3 -
 4
4 -
 5
5 -
 6
6 -
 7
7 -
8
-
9
-
10
-
11
-
12
-
13
-
14
-
15
-
16
-
17
-
18
-
19
-
20
-
21
-
22
-
23
-
24
-
25
-
26
-
27
-
28
-
29
-
30
-
31
-
32
-
33
-
34
-
35
-
36
-
37
-
38
-
39
-
40
-
41
-
42
-
43
-
44
-
45
-
46
-
47
-
48
-
49
-
50
-
51
-
52
-
53
-
54
-
55
-
56
-
57
-
58
-
59
-
60
-
61
-
62
-
63
-
64
-
65
-
66
-
67
-
68
-
69
-
70
-
71
-
72
-
73
-
74
 |
 |
User Manual