Magellan eXplorist 400 Manual - English (for the UK)
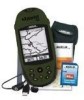
Magellan eXplorist 400 - Wilderness Bundle Manual
 |
UPC - 763357111613
View all Magellan eXplorist 400 manuals
Add to My Manuals
Save this manual to your list of manuals |
Magellan eXplorist 400 manual content summary:
- Magellan eXplorist 400 | Manual - English (for the UK) - Page 1
eXplorist 400 Reference Manual Topics: • eXplorist 400 GPS Receiver • Using the eXplorist 400 • Starting Up • Navigation Screens • File Structure • Points of Interest • Routes • Track Logs • Advanced Features • Magellan Geocache Manager • Using MapSend • Preferences • Specifications • Accessories - Magellan eXplorist 400 | Manual - English (for the UK) - Page 2
. USE PROPER ACCESSORIES Use only Magellan cables and antennas; the use of non-Magellan cables and antennas may severely degrade performance or damage the receiver, and will void the warranty. LICENSE AGREEMENT Thales Navigation grants you, the purchaser, the right to use the software supplied in - Magellan eXplorist 400 | Manual - English (for the UK) - Page 3
Table of Contents i eXplorist 400 GPS Receiver 1 Features of the Magellan eXplorist GPS Receiver 1 Button Descriptions 2 Installing and Charging the Battery 4 Installing an Optional SD Card 5 Connecting to a Personal Computer 5 Using the eXplorist 400 6 Going to a Destination 6 Saving Your - Magellan eXplorist 400 | Manual - English (for the UK) - Page 4
Than Your Present Position 33 Marking a Position by Entering Coordinates 33 Marking a Position using the Map Cursor 34 Marking a Position from a Map Object 34 The POI Database 35 Searching for a User-Entered POI 35 Searching for a Preloaded POI using Nearest 36 Searching for a Preloaded POI - Magellan eXplorist 400 | Manual - English (for the UK) - Page 5
Track Log 61 Creating a BackTrack Route 62 Clearing the Active Track 63 Converting the Track Log to a Route 64 Viewing the Track Log on the Map 65 Working with Saved Track Logs 66 Following Saved Track Logs 66 Reversing a Saved Track Log 66 Deleting a Saved Track Log 67 Moving a Saved Track - Magellan eXplorist 400 | Manual - English (for the UK) - Page 6
the Magellan Geocache Manager 79 Magellan Geocache Manager Tools 80 Working with Geocache Files 81 Adding Downloaded Files to the List 81 Uploading to the Magellan eXplorist 82 Using the eXplorist with MapSend 83 What is MapSend 83 Overview of Uploading Detailed Maps from MapSend to eXplorist - Magellan eXplorist 400 | Manual - English (for the UK) - Page 7
System 95 Selecting the Map Datum 96 Using the Power Management Tool 97 Setting the Power-Off Timer 97 Setting the Light Timer 98 Personalizing the eXplorist 99 Selecting Languages 100 Clearing Memory 101 Clearing Active Track History 101 Clearing User-Entered POIs and Routes 102 - Magellan eXplorist 400 | Manual - English (for the UK) - Page 8
the Magellan eXplorist GPS receiver: • Built-in background map (8 MB) • High-definition grayscale display • Preloaded points of interest • Rugged design, rubber-protected • 8 MB of usable memory • Superior tracking with 14 parallel channels • Rechargeable Li-Ion battery • TrueFix™ GPS technology - Magellan eXplorist 400 | Manual - English (for the UK) - Page 9
eXplorist 400 GPS Receiver 2 Button Descriptions: On/Off Backlight ENTER ESCAPE ZOOM IN ZOOM OUT MENU NAV MARK GOTO Arrow joystick Turns the eXplorist the navigation screens. Used on the Map screen to zoom in on the map displayed. The map display can be zoomed in to 100 ft. (35.0 m). Also used - Magellan eXplorist 400 | Manual - English (for the UK) - Page 10
eXplorist 400 GPS Receiver Wrist Lanyard Strap Mounting Hole Battery Door 3 Connector for external power and connection to a personal computer. Battery Door Fastener (Unscrew to open battery door to install batteries.) eXplorist 400 GPS Receiver (back) - Magellan eXplorist 400 | Manual - English (for the UK) - Page 11
eXplorist 400 GPS Receiver 4 Installing and Charging the Battery Installing the Battery: Remove the battery door by unscrewing the battery door fastener and lifting the battery door out. Insert the battery as shown and replace the battery door. Charging the Battery: Important: Charge the battery - Magellan eXplorist 400 | Manual - English (for the UK) - Page 12
eXplorist 400 GPS Receiver Installing an Optional SD Card Open the battery door and remove the LI-ION battery, eXplorist to external power using the external AC power adapter. The other end of the eXplorist data cable has a standard USB connector that you connect to your personal computer USB - Magellan eXplorist 400 | Manual - English (for the UK) - Page 13
The basic operation of your eXplorist is to use the GPS satellites to compute your present position. This is done internally in the software of your eXplorist. The only thing that you need to do is to give your eXplorist a clear view of the sky so that it can receive the signals from the satellites - Magellan eXplorist 400 | Manual - English (for the UK) - Page 14
preloaded into your eXplorist (Background Map). Creating a GOTO instructions to guide you along that straight path. Unless you are on a large body of water, it will be unlikely that you will be able to follow these instructions exactly. To compensate for that, your eXplorist automatically updates - Magellan eXplorist 400 | Manual - English (for the UK) - Page 15
eXplorist 400 8 A simpler example, and one you can do at just about any time, is finding your car in that ocean of other cars in the shopping mall parking lot. Just park your car, step outside and let your eXplorist No matter where you parked, your eXplorist will guide you back, simply and easily. - Magellan eXplorist 400 | Manual - English (for the UK) - Page 16
Using the eXplorist 400 9 Additional Features Your Magellan eXplorist contains all of the features that you would expect from a high-quality Magellan-brand handheld navigation device, as well as many more to make your outdoor experience more enjoyable. You have the ability to customize the - Magellan eXplorist 400 | Manual - English (for the UK) - Page 17
Starting Up Turning the eXplorist On To turn the eXplorist on, press the POWER button on the top right side. To prevent the eXplorist from being turned on accidentally, draining the batteries, you need to press ENTER when the Startup screen is displayed. You have approximately 30 seconds between - Magellan eXplorist 400 | Manual - English (for the UK) - Page 18
Starting Up 11 Using the eXplorist for the First Time Turn the eXplorist on. Press the Power button. When the Startup screen is displayed, press ENTER. Select Language. When you turn on the eXplorist for the first time, you are given the option of selecting one of the ten languages that can be - Magellan eXplorist 400 | Manual - English (for the UK) - Page 19
Up The Satellite Status screen will continuously update, and you will be able to graphically see how well your eXplorist is performing. 12 When the eXplorist has enough information to compute a position fix, the Satellite Status screen is replaced with the Map screen. The arrow cursor in the - Magellan eXplorist 400 | Manual - English (for the UK) - Page 20
Information. The Done button is highlighted at the bottom of the display. Review the information you entered; if correct, press ENTER. Tip: If the view of the sky. As before, when the eXplorist computes the initial position, the Map screen will be displayed, with your computed position indicated - Magellan eXplorist 400 | Manual - English (for the UK) - Page 21
eXplorist. Now with information on satellite availability, the eXplorist can begin setting its internal satellite channels to receive for more than 500 mi [804.7 km] with the eXplorist turned off, Magellan eXplorist 400. Once the Map screen is displayed, you have successfully initialized the eXplorist - Magellan eXplorist 400 | Manual - English (for the UK) - Page 22
Navigation Screens 15 Accessing the Navigation Screens The eXplorist has three navigation screens, as well as a to display your present position with the arrow cursor. • Press MENU and select Hide Map Info or Show Map Info to turn the information boxes at the bottom of the screen on or off. - Magellan eXplorist 400 | Manual - English (for the UK) - Page 23
the scale. The scale can be changed from 1700 mi (2700 km) to 100 ft (35.0 m). Tip: Press and hold the Zoom In or the Zoom Out buttons to rapidly step through the map scales. Map Screen Modes The Map screen has two modes that it can be in: position or cursor. In the - Magellan eXplorist 400 | Manual - English (for the UK) - Page 24
more of the map and may not need this information. The eXplorist gives you the capability to turn this information on or off. 1. While viewing the Map screen, press MENU. 2. With Hide Map Info or Show Map Info highlighted, press ENTER. The Map screen with map information shown The Map screen with - Magellan eXplorist 400 | Manual - English (for the UK) - Page 25
routes) • Time to End • Off Course • Direction • Elevation • Time • Date • Accuracy • Avg. Speed • Max. Speed To customize the map information: 1. While viewing the Map screen, press MENU. 2. Use the Arrow joystick to highlight Customize page. 3. Press ENTER. 4. Use the Arrow joystick to highlight - Magellan eXplorist 400 | Manual - English (for the UK) - Page 26
Press ENTER. 4. Use the Arrow joystick to highlight Street info. 5. Press ENTER. Changing the Map Orientation The default orientation for the Map screen is North Up. This means that the top of the display represents true north. This orientation can be changed so that the top of the display is more - Magellan eXplorist 400 | Manual - English (for the UK) - Page 27
in land usage, land areas are displayed as white areas on the display and water is displayed as gray. The opposite is true when the map is set for marine usage. (Water is white and land areas are displayed as gray.) This is provided as an option to provide you with - Magellan eXplorist 400 | Manual - English (for the UK) - Page 28
the display. To change the map detail: 1. While viewing the Map screen, press MENU. 2. Use the Arrow joystick to highlight Map Setup. 3. Press ENTER. 4. travels. The other options are fixed interval track points. This instructs your eXplorist to record a track point at the interval you specify. - Magellan eXplorist 400 | Manual - English (for the UK) - Page 29
This can reduce clutter and/or emphasis those items you are interested in. To customize the display: 1. While viewing the Map screen, press MENU. 2. Use the Arrow joystick to highlight Map Setup. 3. Press ENTER. 4. Push the Arrow joystick left or right to highlight the Display tab. 5. Push the Arrow - Magellan eXplorist 400 | Manual - English (for the UK) - Page 30
an easy-to-use graphical compass that should be familiar to most GPS users. Highlights of the Compass screen: • With an active route, the compass performs like a standard compass, indicating to your heading as referenced to true north. (Note: You must be moving at least 0.5 mph for the compass to - Magellan eXplorist 400 | Manual - English (for the UK) - Page 31
Navigation Screens 24 Customizing the Information Fields The information displayed at the top of the screen can be customized to information that is important to you. You can select from: • Bearing • Distance to Next (Next leg in multi-leg routes) [default] • Distance to End • Speed [default] • - Magellan eXplorist 400 | Manual - English (for the UK) - Page 32
indicator provides you with information on the current condition of the LI-Ion battery in the eXplorist. It also displays a 'charging' icon when you have the eXplorist connected to external power. Position Screen Overview Coordinates of present position Elevation of present position Trip Odometer - Magellan eXplorist 400 | Manual - English (for the UK) - Page 33
Navigation Screens 26 Resetting the Trip Odometer Whenever you begin a trip and you want to record how far you have travelled, you will want to reset the trip odometer to zero. To reset the trip odometer: 1. While viewing the Position screen, press MENU. 2. Use the Arrow joystick to highlight - Magellan eXplorist 400 | Manual - English (for the UK) - Page 34
Navigation Screens 27 Satellite Status Screen The Satellite Status screen is a handy way to visually see just how well the eXplorist is tracking and receiving satellite signals. Highlights of the Satellite Status screen: • Type of position fix and the number of satellites being tracked is - Magellan eXplorist 400 | Manual - English (for the UK) - Page 35
folders are empty until you upload a detailed map from mapping software, such as Magellan MapSend or geocache files from the Magellan Geocaching software. The files for POIs, routes, track logs and geocaching points are ASCII text files. When your eXplorist or SD card is connected to your personal - Magellan eXplorist 400 | Manual - English (for the UK) - Page 36
eXplorist 400 File Structure 29 Using the Filing System with POIs • When retrieving or saving a POI, the eXplorist automatically goes to the be stored in the new file and you will be returned to the last viewed Map screen. • Creating new Folders: You can also create new folders for your POI - Magellan eXplorist 400 | Manual - English (for the UK) - Page 37
eXplorist 400 File in the new file and you will be returned to the last viewed Map screen. • Creating new Folders: You can also create new folders for to access this folder. During the instruction portions of this manual, instructions will not describe all of the things you can do within the - Magellan eXplorist 400 | Manual - English (for the UK) - Page 38
.) There are four types of POIs available for your eXplorist 400: POIs that you have marked (saved), POIs that have been stored in your eXplorist as part of the built-in background map, POIs that have been uploaded using the geocaching software, and POIs that have been uploaded from a detailed - Magellan eXplorist 400 | Manual - English (for the UK) - Page 39
ENTER. To clear everything and start over, highlight CLEAR and press ENTER. When you are satisfied with the name, highlight OK and press ENTER. Note: User-saved POI names can be up to 20 characters long (including spaces). 4c. If the Message field is selected: Use the keypad displayed, just as - Magellan eXplorist 400 | Manual - English (for the UK) - Page 40
when you have gotten the coordinates for the position from a map or chart. It is also possible that you have gotten the coordinates from a friend and want to save this POI in your eXplorist database. Before beginning, make sure that your eXplorist has been set to use the same coordinate system of - Magellan eXplorist 400 | Manual - English (for the UK) - Page 41
marking a position, other than your present position, by moving the cursor around the map to a place where you want to create a POI. 1. While viewing the Map screen, use the Arrow joystick to put the eXplorist into Cursor mode. 2. Continue moving the crosshair cursor until you are over the location - Magellan eXplorist 400 | Manual - English (for the UK) - Page 42
map been preloaded into the eXplorist, nearest to your position map. • Provides another means to save a preloaded POI as a user- screen. Searching for a User-Entered POI When searching for 6. Press ENTER. for user-entered POIs using Nearest If The eXplorist will automatically open the default on the map the POI - Magellan eXplorist 400 | Manual - English (for the UK) - Page 43
. 2. Use the Arrow joystick to highlight Pts of Interest. 3. Press ENTER. 4. Use the Arrow joystick in an up/down motion to highlight Background Map. 5. Use the Arrow joystick in a left/right motion to select Nearest. 6. Press ENTER. 7. Use the Arrow joystick to select Position (POIs nearest to - Magellan eXplorist 400 | Manual - English (for the UK) - Page 44
. 4. Use the Arrow joystick in an up/down motion to highlight Background Map. 5. Use the Arrow joystick in a left/right motion to select Alphabetical desired and press ENTER. From here you can copy or view on the map the POI you have highlighted by pressing ENTER and selecting the desired function - Magellan eXplorist 400 | Manual - English (for the UK) - Page 45
the file where the POI has been saved and press ENTER. (The eXplorist will automatically open the default file.) 8. Highlight the POI and press press ENTER. Editing an existing POI with the Vis field highlighted Note: User-entered POI names can be up to 20 characters long (including spaces). 13c - Magellan eXplorist 400 | Manual - English (for the UK) - Page 46
a User-Created you will want it again. To prevent accidental deletion, a confirmation window will be displayed, confirming the deletion. 1. Press MENU. 2. Use POI to be deleted has been saved and press ENTER. (The eXplorist will automatically open the default file.) 8. Highlight the POI and press - Magellan eXplorist 400 | Manual - English (for the UK) - Page 47
Interest 40 Viewing a User-Created POI on the Map Screen POIs that you have saved can be viewed on the Map screen to assist you eXplorist will automatically open the default file.) 8. Highlight the POI and press ENTER. 9. Use the Arrow joystick to highlight View on Map. 10. Press ENTER. 11. The Map - Magellan eXplorist 400 | Manual - English (for the UK) - Page 48
Points of Interest 41 Copying a Preloaded POI POIs that have been preloaded as part of the background map can be saved as a user-entered POIs. Preloaded POIs cannot be deleted; it just copies it to the My Points of Interest portion of the database. 1. Press MENU. 2. Use the - Magellan eXplorist 400 | Manual - English (for the UK) - Page 49
Points of Interest 42 Viewing a Preloaded POI on the Map Screen POIs that have been preloaded as part of the background map can be viewed on the Map screen to assist you in locating a POI. 1. Press MENU. 2. Use the Arrow joystick to highlight Pts of Interest. 3. Press ENTER. 4. Use the Arrow - Magellan eXplorist 400 | Manual - English (for the UK) - Page 50
user-entered POI is displayed or hidden while viewing the Map screen. In the upper left corner of the POI Save screen (next to the icon field) is a checkbox that indicated if the POI will be visible on the map. When it is checked, the POI is visible. The instructions (The eXplorist will automatically - Magellan eXplorist 400 | Manual - English (for the UK) - Page 51
GPS receiver. The better you understand routes and how to use them, the more enjoyment you will receive from using your eXplorist in the eXplorist's memory manual because these routes are part of the Track Log functions of the eXplorist.) As you travel the eXplorist eXplorist. the eXplorist is turned - Magellan eXplorist 400 | Manual - English (for the UK) - Page 52
the destination. Note: Detailed instructions for searching the POI database can be found in the Points of Interest section of this manual. 3. With the POI displayed, updated as needed to provide information about the graphically displays the GOTO route you have created. On the Map screen - Magellan eXplorist 400 | Manual - English (for the UK) - Page 53
Routes 46 Creating a GOTO Route from the Map Cursor This will create a GOTO route to a point on the map that you have indicated by moving the crosshair cursor on the Map screen. 1. While viewing the Map screen, use the Arrow joystick, causing the eXplorist to go into Cursor mode. 2. Continue using - Magellan eXplorist 400 | Manual - English (for the UK) - Page 54
Object This will create a GOTO route to a map object (city, highway, user POI, etc.) that you have indicated by moving the crosshair cursor on the Map screen over the map object. 1. While viewing the Map screen, use the Arrow joystick, causing the eXplorist to go into Cursor mode. 2. Continue using - Magellan eXplorist 400 | Manual - English (for the UK) - Page 55
saved in internal memory or to an SD card. • Multi-leg routes remain active even after the eXplorist has been turned off. • Multi-leg routes can be edited, reversed, deleted, or viewed on the map. • When a multi-leg route is active, you can switch which leg will be used as the next - Magellan eXplorist 400 | Manual - English (for the UK) - Page 56
Routes 49 Creating a Multi-leg Route The eXplorist will provide you with an empty list for your route, and you can use the POIs saved in the POI database to create the route. - Magellan eXplorist 400 | Manual - English (for the UK) - Page 57
while multi-leg routes need to be activated manually. 1. Press MENU. 2. Use the Arrow you want to activate or deactivate. (The eXplorist will automatically open the default file.) 5. With ENTER. List of routes with route named "Magellan" active. 8. Highlight Activate Route or Deactivate - Magellan eXplorist 400 | Manual - English (for the UK) - Page 58
you want to go to the ranger station. Because the route is active (you can select legs only from active routes), you would follow the instructions below and tell the eXplorist to set the next leg to the ranger station. The route would be recomputed, eliminating the navigation - Magellan eXplorist 400 | Manual - English (for the UK) - Page 59
MENU. 2. Use the Arrow joystick to highlight Routes. 3. Press ENTER. 4. Locate the file that contains the route you want to edit. (The eXplorist will automatically open the default file.) 5. With the file highlighted press ENTER. 6. Highlight the name of the route. 7. Press ENTER. 8. Highlight Edit - Magellan eXplorist 400 | Manual - English (for the UK) - Page 60
. 2. Use the Arrow joystick to highlight Routes. 3. Press ENTER. 4. Locate the file that contains the route you want to reverse. (The eXplorist will automatically open the default file.) 5. Press ENTER. 6. Highlight the name of the route. 7. Press ENTER. 8. Highlight Reverse Route. 9. Press ENTER - Magellan eXplorist 400 | Manual - English (for the UK) - Page 61
MENU. 2. Use the Arrow joystick to highlight Routes. 3. Press ENTER. 4. Locate the file that contains the route you want to delete. (The eXplorist will automatically open the default file.) 5. With the file highlighted press ENTER. 6. Highlight the name of the route. 7. Press ENTER. 8. Highlight - Magellan eXplorist 400 | Manual - English (for the UK) - Page 62
Press MENU. 2. Use the Arrow joystick to highlight Routes. 3. Press ENTER. 4. Locate the file that contains the route you want to move. (The eXplorist will automatically open the default file.) 5. Press ENTER. 6. Highlight the name of the route. 7. Press ENTER. 8. Use the Arrow joystick to highlight - Magellan eXplorist 400 | Manual - English (for the UK) - Page 63
Press MENU. 2. Use the Arrow joystick to highlight Routes. 3. Press ENTER. 4. Locate the file that contains the route you want to copy. (The eXplorist will automatically open the default file.) 5. Press ENTER. 6. Highlight the name of the route. 7. Press ENTER. 8. Use the Arrow joystick to highlight - Magellan eXplorist 400 | Manual - English (for the UK) - Page 64
graphically seeing the legs of the route as they appear on the map. 1. Press MENU. 2. Use the Arrow joystick to highlight Press ENTER. 8. Use the Arrow joystick to highlight View on Map. 9. Press ENTER. The route is displayed with the map scaled to display the entire route. You can use the Zoom - Magellan eXplorist 400 | Manual - English (for the UK) - Page 65
back, the eXplorist leaves "electronic breadcrumbs" on the map. The advantage eXplorist more valuable to you out in the field or on the waters. You can save your active track as a track log or as a multi-leg route that you can use over and over. You can also create a backtrack route that will guide - Magellan eXplorist 400 | Manual - English (for the UK) - Page 66
the active track is not being recorded. Track Log List with 7. Press ENTER. information at the bottom for the number of legs and Note: The eXplorist will fill in a straight line from the point the distance of the track log highlighted where track logging was stopped to the point where it - Magellan eXplorist 400 | Manual - English (for the UK) - Page 67
Track Logs 60 Starting a New Active Track Log Before you can start a new active track log, you need to stop the one that is presently recording. 1. Press MENU. 2. Use the Arrow joystick to highlight Track Log. 3. Press ENTER. 4. Use the Arrow joystick to highlight Active Track. 5. Press ENTER. 6. - Magellan eXplorist 400 | Manual - English (for the UK) - Page 68
Track Logs 61 Saving an Active Track Log This will save your active track log with a name you enter that you can use at some time in the future. This does not erase your presently active route; only saves the current active track and adds it to the list of available track logs. 1. Press MENU. 2. - Magellan eXplorist 400 | Manual - English (for the UK) - Page 69
is turned off alert status] Press ENTER. After BackTrack has been activated, the last viewed navigation screen will be displayed. The eXplorist will now begin computing the navigation information needed to guide you back to your starting point. NOTE: When you have an active BackTrack route, the - Magellan eXplorist 400 | Manual - English (for the UK) - Page 70
Track Logs 63 Clearing the Active Track The active track can get to be very large, especially if you haven't cleared it in a while. It is recommended that if you plan to use BackTrack or to save the upcoming track log that you should clear the active track before beginning your journey. If you do - Magellan eXplorist 400 | Manual - English (for the UK) - Page 71
Track Logs 64 Converting the Track Log to a Route This function takes the track log and turns it into a multi-leg route that is saved in your route list. From here, the route can be edited if necessary. Note: Convert to Route is available for both active track logs and track logs you have saved. - Magellan eXplorist 400 | Manual - English (for the UK) - Page 72
log you have previously saved. 5. Press ENTER. 6. Highlight View on Map. 7. Press ENTER. The Map screen is displayed, in the Cursor mode, with the selected track log . The ZOOM IN and ZOOM OUT buttons can be used to change the map scale, and the cursor can be moved by using the Arrow joystick. When - Magellan eXplorist 400 | Manual - English (for the UK) - Page 73
saved track logs to a route and view saved track logs on the map. There are three functions unique to saved track logs that you can perform saved track as a multi-leg route. Once this function has been activated, the eXplorist will navigate you along your saved track. 1. Press MENU. 2. Use the Arrow - Magellan eXplorist 400 | Manual - English (for the UK) - Page 74
Track Logs 67 Deleting a Saved Track Log Use this function to remove track logs that have been previously saved and are no longer needed. 1. Press MENU. 2. Use the Arrow joystick to highlight Track Log. 3. Press ENTER. 4. Use the Arrow joystick to highlight any track log you have previously saved. - Magellan eXplorist 400 | Manual - English (for the UK) - Page 75
Track Logs 68 Moving a Saved Track Log Use this function to move a track log that has been saved to a new location. 1. Press MENU. 2. Use the Arrow joystick to highlight Track Log. 3. Press ENTER. 4. Use the Arrow joystick to highlight any track log you have previously saved. 5. Press ENTER. 6. - Magellan eXplorist 400 | Manual - English (for the UK) - Page 76
Track Logs 69 Copying a Saved Track Log Use this function to copy a track log that has been saved. 1. Press MENU. 2. Use the Arrow joystick to highlight Track Log. 3. Press ENTER. 4. Use the Arrow joystick to highlight any track log you have previously saved. 5. Press ENTER. 6. Highlight Copy - Magellan eXplorist 400 | Manual - English (for the UK) - Page 77
set up file transfers, transferring NMEA data, or just using the USB cable to power the eXplorist. Using Area Calculation Area Calculation uses three or more POIs that you select to create and display a region on a miniature map display. It then takes this region and computes its area and perimeter - Magellan eXplorist 400 | Manual - English (for the UK) - Page 78
you will first need to delete all of the POIs from the list. How to delete all of the POIs will be explained following these instructions. 8. Using the POI database, select a stored POI. 9. Repeat steps 6 through 8 until you have a region defined. 10. The bottom of the display will alternate between - Magellan eXplorist 400 | Manual - English (for the UK) - Page 79
Advanced Features 72 Computing Best Fish/Hunt Times This provides you with the means to view the good and excellent fishing and hunting times for any POI and date you select. Accessing Fishing and Hunting Times 1. Press MENU. 2. Use the Arrow joystick to highlight Adv. Features. 3. Press ENTER. 4. - Magellan eXplorist 400 | Manual - English (for the UK) - Page 80
Advanced Features 73 Displaying Sun and Moon Information Using the Sun/Moon feature you are able to view the sunrise, sunset, moonrise and moon setting times, as well as viewing the phase of the moon, for any POI in your database. Accessing the Sun/Moon Function 1. Press MENU. 2. Use the Arrow - Magellan eXplorist 400 | Manual - English (for the UK) - Page 81
a track log that you select. This can be your active track log or one you have saved. If you have loaded a detail map from one of the MapSend Topographic software packages, you can also view the vertical profile for routes you have created. 1. Press MENU. 2. Use the Arrow joystick to highlight Adv - Magellan eXplorist 400 | Manual - English (for the UK) - Page 82
Simulator When the eXplorist is placed in of a triangle with your present position as the starting point.) User - Uses the same predefined route as Auto, but provides a return to the last viewed Map screen. Simulating on a Saved Route 1. Follow the instructions above to turn the simulator on - Magellan eXplorist 400 | Manual - English (for the UK) - Page 83
NMEA Data Comm mode outputs the GPS data from the eXplorist in NMEA format for use with external software. Power Only mode turns off data communication with the personal computer and the eXplorist operates normally. 1. If the eXplorist has just been turned on, the USB File Transfer screen is already - Magellan eXplorist 400 | Manual - English (for the UK) - Page 84
USB cable it is automatically in the File Transfer mode using the internal memory of the eXplorist. To work with files on the SD you need to tell the eXplorist that you want to work from the SD card. 1. Follow the previous instructions to connect the eXplorist 6. Using normal window commands, you can - Magellan eXplorist 400 | Manual - English (for the UK) - Page 85
is a software application that runs in Windows® on your personal computer. It is a place to create, modify, store, and most importantly, upload geocache points to your eXplorist. There are two ways of adding geocache points to the Magellan Geocache Manager. You can enter the points manually by - Magellan eXplorist 400 | Manual - English (for the UK) - Page 86
Magellan Geocache Manager 79 Using the Magellan Geocache Manager 1. Access the Magellan Geocache Manager by using the Start button on the Windows toolbar. 2. Under "Programs" select 'Magellan > eXplorist 400 > Magellan Geocache Manager'. 3. The Magellan Geocache Manager will open and an empty list - Magellan eXplorist 400 | Manual - English (for the UK) - Page 87
or the entire list of geocache points to the eXplorist. This requires that the eXplorist is connected to the USB port of the computer and is in the USB File Transfer mode. Opens the 'About...' window with information about the version of the Magellan Geocache Manager software that you are using - Magellan eXplorist 400 | Manual - English (for the UK) - Page 88
points to it. You can also add other downloaded geocache point files to this list but you will need to follow the instructions provided below. Finally, instructions will be shown as to how to select files and upload them to your eXplorist. Adding Other Downloaded Files to the List It is possible to - Magellan eXplorist 400 | Manual - English (for the UK) - Page 89
Magellan eXplorist 1. Turn the eXplorist off and connect it to the USB port on your computer. 2. Turn the eXplorist on. If connected correctly, it will begin in the USB create a GOTO to any of the geocache points following the instructions for creating a GOTO. (Geocache points can also be used in - Magellan eXplorist 400 | Manual - English (for the UK) - Page 90
digital maps for Magellan hand-held GPS receivers. The core MapSend product line includes street maps for driving, topographic maps for hiking, camping, and hunting, and fresh/salt water maps for fishing and boating. MapSend maps will transform your eXplorist into an amazingly powerful solution - Magellan eXplorist 400 | Manual - English (for the UK) - Page 91
Files\Magellan\'MapSend Product Name'\Export\Images. Connect the eXplorist to the Personal Computer: (This applies only if you are uploading the detail map to the eXplorist or to an SD card installed in the eXplorist.) Turn off the eXplorist and connect the USB cable supplied with your eXplorist to - Magellan eXplorist 400 | Manual - English (for the UK) - Page 92
). It can be found under the 'Start' menu - Start > Programs > Magellan > eXplorist 400 > Magellan Conversion Manager. When first opened, on the Welcome window select 'Transfer Map Regions' and click Next. A reminder to connect the Magellan eXplorist to the computer is presented. Click Next. The - Magellan eXplorist 400 | Manual - English (for the UK) - Page 93
button on the Windows toolbar. 2. Under "Programs" select 'Magellan > eXplorist 400 > Magellan Conversion Manager'. 3. Click the radio button for 'Convert Waypoints / Routes / Tracks' and click Next >. 4. Turn off the eXplorist and connect the USB cable to the eXplorist and the personal computer - Magellan eXplorist 400 | Manual - English (for the UK) - Page 94
Start button on the Windows toolbar. Under "Programs" select 'Magellan > eXplorist 400 > Magellan Conversion Manager'. 6. Click the radio button for 'Convert Waypoints / Routes / Tracks' and click Next >. 7. Turn off the eXplorist and connect the USB cable to the eXplorist and the personal computer - Magellan eXplorist 400 | Manual - English (for the UK) - Page 95
either magnetic north or True North. • The coordinate system for position information and the map datum used to compute the coordinate information can be chosen. • Full control over the built-in power-management tools to assist in prolonging battery life. • Personalize your eXplorist. • Choose from - Magellan eXplorist 400 | Manual - English (for the UK) - Page 96
89 Restarting the GPS Restarting the GPS provides a means of giving the eXplorist information about its approximate position. Long time GPS receiver users will know this option as initializing. To understand when you would use this option, a brief explanation of how the eXplorist works will be - Magellan eXplorist 400 | Manual - English (for the UK) - Page 97
enter the coordinates for your present position, if you know them, by highlighting Enter Coord. This is rarely used and is not described in this manual. 7. Press ENTER. 8. Area. Use the Arrow joystick to highlight the area of your location. The list of areas is different for each region selected in - Magellan eXplorist 400 | Manual - English (for the UK) - Page 98
to access POIs, routes, and other saved data, the eXplorist automatically goes to the default file for the particular piece of also choose which background map or detailed map you want to use. Changing the Default Folders You can set the default for POI's, routes, and geocache files. 1. Press MENU - Magellan eXplorist 400 | Manual - English (for the UK) - Page 99
. Also, you can use one of the other MapSend software packages to define and save detailed maps to your eXplorist. These detailed maps can provide more detailed street information, additional POIs, and if using on of the MapSend topographic software packages, topo details. You can use Active Setup - Magellan eXplorist 400 | Manual - English (for the UK) - Page 100
option of Preferences you can select which units of measure for navigation data, the north reference, the coordinate system, and the map datum that will be used by the eXplorist. Selecting Navigational Units of Measure The eXplorist can be set to display navigation data in Miles/Yd/MPH, Miles/Ft - Magellan eXplorist 400 | Manual - English (for the UK) - Page 101
Preferences 94 Selecting the North Reference You can set the north reference used by the eXplorist to be either magnetic north or True North. 1. Press MENU. 2. Use the Arrow joystick to highlight Preferences. 3. Press ENTER. 4. Use the Arrow joystick to highlight Map Units. 5. Press ENTER. 6. Use - Magellan eXplorist 400 | Manual - English (for the UK) - Page 102
Grid is selected, additional information is required. This option will be used only by experienced users and is not described in this manual. 9. Press ENTER. The Map Units screen is displayed with the new Coord System shown. You can change other settings or press ESC to return to the Preferences - Magellan eXplorist 400 | Manual - English (for the UK) - Page 103
Datum When using the eXplorist in conjunction with a map or chart, you should make sure that the map datum in the eXplorist matches the map datum that the map or chart uses. This can usually be found in the legend block on the map or chart. The default map datum for the eXplorist is WGS84 and should - Magellan eXplorist 400 | Manual - English (for the UK) - Page 104
. Two areas that you can control to extend the battery life are turning the eXplorist off when not in use and setting how long the display backlight will be on. Setting the Power-Off Timer The eXplorist has a power-off timer that will turn the eXplorist off after a defined time period if no buttons - Magellan eXplorist 400 | Manual - English (for the UK) - Page 105
has been mentioned before, the display backlight makes the display easier to read in lowlight situations, but it also is the largest drain on the batteries. The Light Timer function provides you with the selection of how long you want the backlight to remain on while no buttons have been pressed - Magellan eXplorist 400 | Manual - English (for the UK) - Page 106
happen to lose it. The name you enter in the Name field will be displayed on the About screen. Steps to Personalize your eXplorist 1. Press MENU. 2. Use the Arrow joystick to highlight Preferences. 3. Press ENTER. 4. Use the Arrow joystick to highlight Personalize. 5. Press ENTER. 6. Use the Arrow - Magellan eXplorist 400 | Manual - English (for the UK) - Page 107
Preferences 100 Selecting Languages The eXplorist can be set to display information from any one of ten Português (Portuguese), Svenska (Swedish), and Norsk (Norwegian). Selecting the Language for Your eXplorist 1. Press MENU. 2. Use the Arrow joystick to highlight Preferences. 3. Press ENTER. 4. - Magellan eXplorist 400 | Manual - English (for the UK) - Page 108
[POIs/Routes] • all multi-leg routes [Routes] • all track history, user-entered POIs, and routes [All]. This resets the eXplorist to its original factory settings. It will erase all user-created files and folders from the internal memory. User created files and folders on the SD card will not be - Magellan eXplorist 400 | Manual - English (for the UK) - Page 109
Preferences 102 Clearing User-Entered POIs and Routes This will clear all of the POIs and routes you have entered that are saved in the default files used internally to the eXplorist. 1. Press MENU. 2. Use the Arrow joystick to highlight Preferences. 3. Press ENTER. 4. Use the Arrow joystick to - Magellan eXplorist 400 | Manual - English (for the UK) - Page 110
and routes you have entered that are saved in the default files used internally to the eXplorist, as well as the active track history. It will erase all usercreated files and folders from the internal memory. User created files and folders on the SD card will not be touched. 1. Press MENU. 2. Use - Magellan eXplorist 400 | Manual - English (for the UK) - Page 111
the 250 foot mark.) • Off Course - When a route is active, the eXplorist computes when you have moved left or right of the plotted route. You can set you will be alerted by an alarm. • GPS Fix - The GPS fix alarm will display when you have lost your GPS fix for more than 20 seconds. • Proximity - Magellan eXplorist 400 | Manual - English (for the UK) - Page 112
of available distances the distance that you want the alarm alert to come on or select Off to turn off the alarm. Note that the GPS Fix alarm does not offer any distance, just On or Off. 9. Press ENTER. 10. When all of the alarms have been set, press ESC to - Magellan eXplorist 400 | Manual - English (for the UK) - Page 113
usage, you should never need to change the clock setting unless you cross over into a new time zone. The eXplorist receives its clock information from the atomic clock located in the GPS satellite and is extremely accurate. Other then changing the time for when you cross time zones, you can also set - Magellan eXplorist 400 | Manual - English (for the UK) - Page 114
Preferences 107 Setting Daylight Savings Time 1. Press MENU. 2. Use the Arrow joystick to highlight Preferences. 3. Press ENTER. 4. Use the Arrow joystick to highlight Clock. 5. Press ENTER. 6. Use the Arrow joystick to highlight the Daylight Savings field. 7. Press ENTER. 8. Use the Arrow - Magellan eXplorist 400 | Manual - English (for the UK) - Page 115
Receiver 14 parallel-channel technology, tracks up to 14 satellites to compute and update information. Antenna Patch Acquisition Times (optimal conditions) Warm less than 1 minute Cold less than 2 minutes Update to 60°C) Power Source Battery Life 1 rechargeable LI-ION battery. Greater than - Magellan eXplorist 400 | Manual - English (for the UK) - Page 116
background map and 2 data fields (customizable) Includes graphical compass and 2 data fields (customizable) Includes position, elevation, accuracy, date and time, trip odometer, and battery life Alarms Anchor Alarm Off Course Alarm Arrival Alarm Proximity Alarm Alerts when moved a user-defined - Magellan eXplorist 400 | Manual - English (for the UK) - Page 117
cups conveniently secure your Magellan eXplorist to the windshield of your car, truck, or RV. Full-tilt and swivel positioning enables optimal viewing of your receiver wherever your adventure takes you. Part number: 702210 To order accessories, you can go to the Magellan Online Store at: www - Magellan eXplorist 400 | Manual - English (for the UK) - Page 118
so that if you need support for your Magellan eXplorist in North America, you can direct your questions/comments to the proper person at Thales Navigation. Customers in North America, Central America, South America, Asia, and South Pacific regions. Technical Support If you need technical assistance - Magellan eXplorist 400 | Manual - English (for the UK) - Page 119
East, or Africa regions Contacting Magellan in Europe Technical support and warranty service For Magellan product support and warranty service information in English, French, German, Spanish, Portuguese, Dutch, Norwegian, Finnish and Danish please dial FREE PHONE: 00800MAGELLAN* ( 00800 62435526
-
 1
1 -
 2
2 -
 3
3 -
 4
4 -
 5
5 -
 6
6 -
 7
7 -
8
-
9
-
10
-
11
-
12
-
13
-
14
-
15
-
16
-
17
-
18
-
19
-
20
-
21
-
22
-
23
-
24
-
25
-
26
-
27
-
28
-
29
-
30
-
31
-
32
-
33
-
34
-
35
-
36
-
37
-
38
-
39
-
40
-
41
-
42
-
43
-
44
-
45
-
46
-
47
-
48
-
49
-
50
-
51
-
52
-
53
-
54
-
55
-
56
-
57
-
58
-
59
-
60
-
61
-
62
-
63
-
64
-
65
-
66
-
67
-
68
-
69
-
70
-
71
-
72
-
73
-
74
-
75
-
76
-
77
-
78
-
79
-
80
-
81
-
82
-
83
-
84
-
85
-
86
-
87
-
88
-
89
-
90
-
91
-
92
-
93
-
94
-
95
-
96
-
97
-
98
-
99
-
100
-
101
-
102
-
103
-
104
-
105
-
106
-
107
-
108
-
109
-
110
-
111
-
112
-
113
-
114
-
115
-
116
-
117
-
118
-
119
 |
 |

Magellan eXplorist 400
Reference
Manual
Topics:
•
eXplorist 400 GPS Receiver
•
Using the eXplorist 400
•
Starting Up
•
Navigation Screens
•
File Structure
•
Points of Interest
• Routes
•
Track Logs
•
Advanced Features
•
Magellan Geocache Manager
•
Using MapSend
• Preferences
• Specifications
• Accessories
•
Contacting Magellan Support