Magnavox 19MF338B User Manual
Magnavox 19MF338B - 19" LCD TV Manual
 |
UPC - 053818540015
View all Magnavox 19MF338B manuals
Add to My Manuals
Save this manual to your list of manuals |
Magnavox 19MF338B manual content summary:
- Magnavox 19MF338B | User Manual - Page 1
Register your product and get support at www.magnavox.com/usasupport 19MF338B EN USER MANUAL EN: For further assistance, call the customer support service in your country. • 1-800-705-2000 Enter below the Serial No. located on the rear of the cabinet. ES: Para obtener más información, llame al - Magnavox 19MF338B | User Manual - Page 2
magnavox.com/usasupport Know these safety symbols CAUTION RISK OF ELECTRIC SHOCK DO NOT OPEN CAUTION: TO REDUCE THE RISK OF ELECTRIC SHOCK, DO NOT REMOVE COVER (OR BACK). NO USER-SERVICEABLE PARTS INSIDE. REFER SERVICING TO QUALIFIED SERVICE prevent operating and maintenance problems. WARNING: To - Magnavox 19MF338B | User Manual - Page 3
instructions. 2. Heed all warnings. 3. Follow all instructions. 4. Do not insert any strange object into the ventilation slots. This might lead to damage of the TV 18. Wall or Ceiling Mounting - The appliance should be mounted to a wall or ceiling only as recommended by the manufacturer. 19. - Magnavox 19MF338B | User Manual - Page 4
nor for any problems as a result of the content in this document. Errors reported to Philips will be adapted and published on the Philips support website as soon as possible. Warranty No components are user-serviceable. Do not open or remove covers to the inside of the product. Repairs may only be - Magnavox 19MF338B | User Manual - Page 5
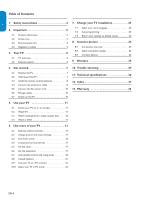
Safety instructions 2 2. Important 5 2.1 Product information 5 2.2 Screen care 5 2.3 Environmental care 5 2.4 Regulatory notices 5 3. Your TV 6 3.1 TV overview 6 3.2 Remote control 6 4. Get started 7 4.1 Position the TV 7 4.2 Wall mount the TV 7 4.3 Install the remote control batteries - Magnavox 19MF338B | User Manual - Page 6
Specifications and information are subject to change without notice. For further assistance, call the customer support service in your country. • TO OBTAIN ASSISTANCE IN THE U.S.A., PUERTO RICO, OR U.S. VIRGIN ISLANDS. Contact Magnavox the rear of the TV. 2.2 Screen care • Turn off and unplug the AC - Magnavox 19MF338B | User Manual - Page 7
5. Channel up/down Side connectors 75 Ω 75 Ω DD Note For more information about connections, see Section 7 Connect devices. 3.2 Remote control 1 9 2 3 8 4 5 7 MODE 6 75 Ω Use the TV side connectors to connect to mobile devices such as a camera or game console. You can also connect to the - Magnavox 19MF338B | User Manual - Page 8
the following wall brackets: TV screen size (inches) 19MF338B VESA-compatible wall bracket type (millimeters) 100 x 100 mm Screw type Metric 4 x 10mm Step 2 Remove the TV stand DD Note These instructions are only applicable to TV models with mounted stands. If your TV stand is not mounted, skip - Magnavox 19MF338B | User Manual - Page 9
to match the weight of your TV. DD Note Depending on your VESA-compatible wall bracket, you may need to separate the mounting plate from the wall bracket for easier installation. Refer to your VESA-compatible wall bracket documentation for instructions. 4.4 Connect the antenna or cable This - Magnavox 19MF338B | User Manual - Page 10
If the TV is connected to a cable box or satellite set-top box via a coaxial connection, set the TV to channel 3 and 4, or service provider. send them to the TV. The seANtT-EtNoNAp box ScAoTEnLLtITaEins a diCgAiBtLaEl TV tuner for receiving off-air digital television broadcasts. Contact your - Magnavox 19MF338B | User Manual - Page 11
or press power the remote control. The TV normally takes 10-15 seconds to start up and the following screen appears the first time you turn on the TV. Thank you for your purchase TV. Please proceed with the following steps to set-up your TV. For the BEST possible picture performance, contact your - Magnavox 19MF338B | User Manual - Page 12
channel. MODE DD Note You can also switch channels by pressing CH +/on the top of the TV Adjust volume 1. Press VOL+ or VOL- on your remote control. 2. Press MUTE on your remote control to mute the sound. Press MUTE again or press VOL or + to restore the sound. MODE To Switch to standby • Press - Magnavox 19MF338B | User Manual - Page 13
does not appear 1. Press SOURCE repeatedly to select the connected cable receiver box and wait a few seconds for the picture to appear. 2. Press OK. 3. Use the remote control of your set-top box to select channels. 5.4 Watch a DVD MODE 1. Insert a DVD disc in your player. 2. Press Play > on - Magnavox 19MF338B | User Manual - Page 14
features of your TV. 6.1 Remote control overivew 21 1 2 20 3 19 4 5 18 6 17 7 8 16 9 MODE 10 15 11 12 14 13 1. POWER Switches the TV on from standby or back to standby. 2. To add or remove a channel in the favorite channels list of TV. 3. FORMAT Selects a picture format. See - Magnavox 19MF338B | User Manual - Page 15
FRANÇAISE ESPAÑOL 6.2 Change picture and sound settings Change picture settings This section describes how to adjust your picture settings. 1. Press MENU on the remote control. 2. Press or to select the Picture menu. 3. Press or to select the one of the picture settings, and press to MeODnE ter - Magnavox 19MF338B | User Manual - Page 16
) Scales the classic 4:3 format to 16:9. • Super zoom (Not for HD and PC) Removes the black bars on the side of 4:3 broadcasts with minimal distortion. • 16:9 subtitle (Not for PC) Display 4:3 pictures using the full surface of the screen leaving the subtitles visible. • 4:3 (Not for HD) Displays - Magnavox 19MF338B | User Manual - Page 17
remote control and press to select Sound. Settings Picture Sound Features Parental control Installation Sound Sound setting Sound mode Alternate audio Digital , when it is available in digital channel. • Automatic volume leveling Reduces sudden volume changes, for example, during commercials - Magnavox 19MF338B | User Manual - Page 18
info SleePrpefteirmredecrhasnwneiltsches the TV to standby after a defined perRieosdet AoVfsettitminges. Sleeptimer 0 1. Press MENU on the remote control and select Features > Sleeptimer. Settings Features Closed captions Caption service Digital caption service Digital caption options - Magnavox 19MF338B | User Manual - Page 19
ratings lock Change PIN ENGLISH FRANÇAISE ESPAÑOL (or press SLEEP button on the remote control) 6.7 Use parental control and rating locks Lock TV channels or connected devices with a four digit code to prevent children from watching unauthorised content. Set or change your PIN 1. Press MENU on - Magnavox 19MF338B | User Manual - Page 20
For example, for rating TV-14, you can TV TV-14 Picture Association of AmUeSrTicVarat(inMgsPlAocAk ) rating. 1. PArlless MENU on the remote c(oD)nDtiraologl and select PNoanreental control. (L) Language 2. STeV-leY ct one of the menus for mo(Sv) iSeexratings lock. •TV control Channel lock US TV TV - Magnavox 19MF338B | User Manual - Page 21
you download a ratings table, ensure that regional ratings are broadcast. 1. Press MENU on the remote control and select Parental control > Region ratings lock.. Settings Parental control Channel lock US TV ratings lock US Movie ratings lock Canada English ratings lock Canada French ratings lock - Magnavox 19MF338B | User Manual - Page 22
confirm your choice. Not all caption services are necessarily being used by a TV channel during the transmission of a closed caption program. 3. Select a caption service for digital channels: • Press MENU on the remote control and select Features > Digital caption service. • Press or to select one - Magnavox 19MF338B | User Manual - Page 23
PC mode: Resolution Refresh rate 640 x 480 60Hz 800 x 600 60Hz 1024 x 768 60Hz 1280 x 768 60Hz 1440 x 900 60Hz If necessary, you can adjust the picture position to the center of the screen with the cursor buttons. 6.10 Select your TV in PC mode 1. Press MENU on the remote control and - Magnavox 19MF338B | User Manual - Page 24
to default values This section describes how to return picture and sound settings to their default values. The channel installation settings are not affected. 1. Press MENU on the remote control and select Installation > Reset AV settings. Settings Installation Language Autoprogram Source Clock - Magnavox 19MF338B | User Manual - Page 25
produces the best audio visual quality possible. HDMI Both audio and video signals are combined in one HDMI cable, providing an uncompressed, digital interface between your TV and HDMI devices.You must use HDMI to experience full high-definition video. EE Tip If the device only with a DVI connector - Magnavox 19MF338B | User Manual - Page 26
Pr) video provides better picture quality than composite video connections. Though component video supports high-definition signals, picture quality is lower than HDMI and Audio L/R input connectors on the side of the TV. S-vSi-dveidoeo CoCmopmopsiotesitaeuaduiod/ivoi/dvei yelyloewllo, wre,dre, - Magnavox 19MF338B | User Manual - Page 27
types of connectors may be used to connect a device to your TV. The following sections describe examples only, other configurations are possible. When HDMI-DVI and DIGITAL AUDIO OUT connectors Connect a DVD player/recorder via HDMI-DVI and DIGITAL CAoUnDnIOecOtUaT DcoVnnDectpolrasyer/recorder - Magnavox 19MF338B | User Manual - Page 28
- R Selected TV modAINeUlDsIOare capable of dAOUUisDTIpOlaying 1080i, 720p and 480i/p DTV signals when connected to a DTV tuner cable receiver box. DIGITAL AUDIO OUT L - AUDIO - R DIGITAL AUDIO OUT DIGITAL AUDIO IN VGA TO PC DIGITAL AUDIO IN VGA TO PC L - AUDIO - R L - AUDIO - R EN-27 - Magnavox 19MF338B | User Manual - Page 29
DOLBY Digital Digital Tuner HDTV NTSC Progressive Scan Resolution SPDIF The ratio between the width and height of the TV picture on the screen. In a normal TV set the aspect ratio is 4 to 3 (4:3). The new aspect ratio in HDTV is 16:9 which resembles the aspect ratio in a movie theatre (Widescreen - Magnavox 19MF338B | User Manual - Page 30
screen HDCP authentication with HDMI connection. fail. 1. Ensure that your HDMI cable is certified. 2. Press SOURCE on the remote control to switch to another source and then switch back to the HDMI source. 3. Reset the accessory device and the TV. Turn on the TV Select the HDMI channel Turn on - Magnavox 19MF338B | User Manual - Page 31
FRANÇAISE ESPAÑOL 11. Technical specifications Model no. Aspect Ratio 19MF338B PICTURE/DISPLAY 16:9 Resolution 1440x900p Brightness Response Time (on/ consumption Mains Power HDMI (Ver 1.3a HDMI support 480i/p, 720p, 1080i) SPDIF output (Digital audio out, support AC-3 & PCM) PC IN: VGA, - Magnavox 19MF338B | User Manual - Page 32
13 O Overview Connection 24 TV 6 P Parental control 18 PC mode 22 Picture 14 PIN code 18 Position the TV 7 R Recycling 5 Registration Card 1 S Screen resolutions 22 Sharpness 14 Side connectors 24 Sleeptimer 17 Sound 14 Super zoom 15 Switch on the TV 10 T Technical specifications 30 Tint 14 EN-31 - Magnavox 19MF338B | User Manual - Page 33
ENGLISH FRANÇAISE ESPAÑOL Trouble shooting 29 V V-chip 18 VESA wall bracket 7 Volume 13 W Warranty 33 Y Y Pb Pr 27 EN-32 - Magnavox 19MF338B | User Manual - Page 34
and no signature verification receipt can be provided. • Failure to operate per Owner's Manual. TO OBTAIN ASSISTANCE... Contact the Customer Care Center at: 1-800-705-2000 REPAIR OR REPLACEMENT AS PROVIDED UNDER THIS WARRANTY IS THE EXCLUSIVE REMEDY FOR THE CONSUMER, WITH THE ISSUING COMPANY NOT - Magnavox 19MF338B | User Manual - Page 35
-
 1
1 -
 2
2 -
 3
3 -
 4
4 -
 5
5 -
 6
6 -
 7
7 -
8
-
9
-
10
-
11
-
12
-
13
-
14
-
15
-
16
-
17
-
18
-
19
-
20
-
21
-
22
-
23
-
24
-
25
-
26
-
27
-
28
-
29
-
30
-
31
-
32
-
33
-
34
-
35
 |
 |

Register your product and get support at
www.magnavox.com/usasupport
19MF338B
EN
USER MANUAL
EN: For further assistance, call the customer support
service in your country.
•
1-800-705-2000
Enter below the Serial No. located on the rear of the cabinet.
ES: Para obtener más información, llame al servicio de soporte
al cliente de su país.
•
1-800-705-2000
Escriba a continuación el Nº de serie, el cual se encuentra en la
parte posterior del gabinete.
• Model / Modelo
• Serial / Serie: