Magnavox DP170MW8B User manual, English (US) - Page 9
Function Overview, Front Panel Indicator, Rear Terminals, HDMI Setup - 1080p
 |
UPC - 053818570944
View all Magnavox DP170MW8B manuals
Add to My Manuals
Save this manual to your list of manuals |
Page 9 highlights
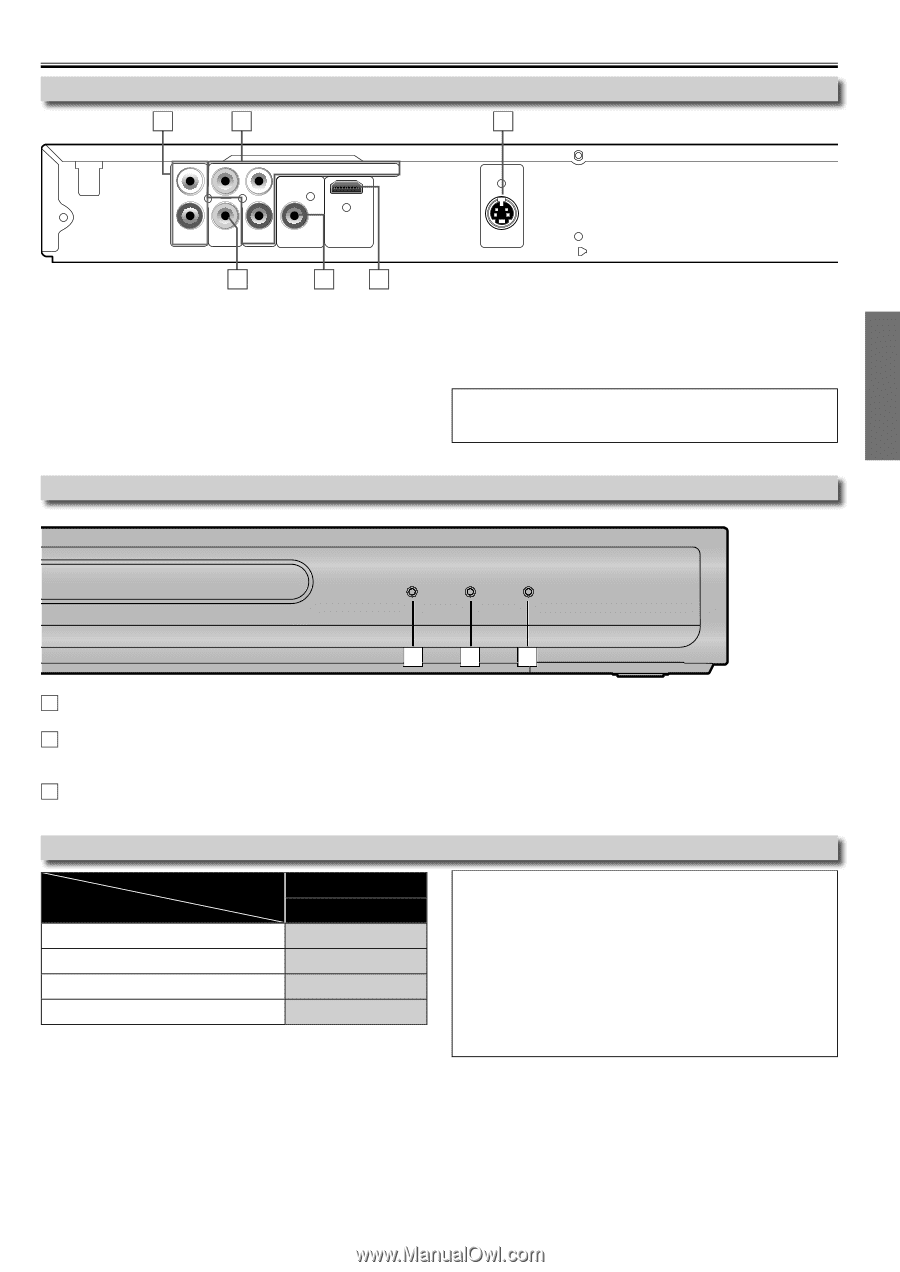
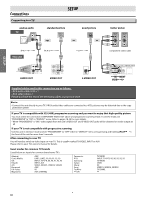
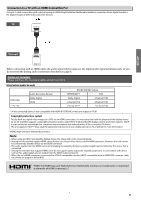
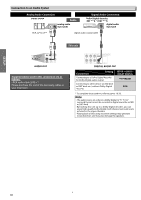
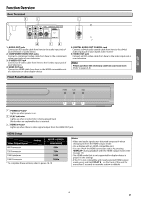
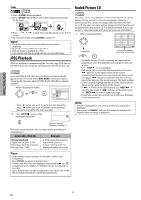
SETUP Function Overview Rear Terminals 1 2 3 L Y CR/PR COMPONENT VIDEO OUT COAXIAL R AUDIO OUT VIDEO OUT CB/PB DIGITAL AUDIO OUT HDMI OUT 6 54 1: AUDIO OUT jacks Connect an RCA audio cable from here to the audio input jack of your television or audio device. 2: COMPONENT VIDEO OUT jacks Connect a component video cable from here to the component video input jacks of your television. 3: S-VIDEO OUT jack Connect an S-video cable from here to the S-video input jack of your television. 4: HDMI OUT jack Connect an HDMI cable from here to the HDMI compatible port of a television or other display device. Front Panel Indicator S-VIDEO OUT 5: DIGITAL AUDIO OUT COAXIAL jack Connect a digital audio coaxial cable from here to the digital audio input jack of your digital audio receiver. 6: VIDEO OUT jack Connect an RCA video cable from here to the video input jack of your television. Note: • Please purchase the necessary cables at your local store. (Refer to pages 6-8.) POWER PLAY HDMI 1 2 3 1 POWER indicator Lights up when power is on. 2 PLAY indicator Lights up when inserted disc is being played back. Blinks when an unplayable disc is inserted. 3 HDMI indicator Lights up when there is video signal output from the HDMI OUT jack. HDMI Setup Video Output Signal Setting SETUP > QUICK> HDMI MODE 480 Progressive 480p 720 Progressive 720p 1080 Interlaced 1080i 1080 Progressive 1080p * To complete these settings, refer to pages 18-19. Note: • Video and audio signals may distorted temporarily when changing to/from the HDMI output mode. • Use a display with an HDMI-compatible port. • You can check the HDMI connection status by pressing [DISPLAY] during playback with the HDMI output mode (refer to page 14). • The HDMI mode that is not supported by display device is grayed in the settings. • If the TV is not compatible with newly selected HDMI output mode, press and hold [PLAY B] on the front of the unit for more than 5 seconds to reset the setting to default. -9- EN
-
 1
1 -
2
-
3
-
 4
4 -
 5
5 -
 6
6 -
 7
7 -
 8
8 -
 9
9 -
 10
10 -
 11
11 -
 12
12 -
 13
13 -
 14
14 -
15
-
16
-
17
-
18
-
19
-
20
-
21
-
22
-
23
-
24
-
25
-
26
-
27
-
28
 |
 |