Magnavox MR41807 Owners Manual
Magnavox MR41807 Manual
 |
View all Magnavox MR41807 manuals
Add to My Manuals
Save this manual to your list of manuals |
Magnavox MR41807 manual content summary:
- Magnavox MR41807 | Owners Manual - Page 1
- Magnavox MR41807 | Owners Manual - Page 2
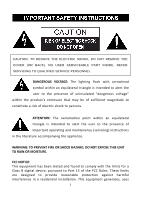
. ATTENTION: The exclamation point within an equilateral triangle is intended to alert the user to the presence of important operating and maintenance (servicing) instructions in the literature accompanying the appliance. WARNING: TO PREVENT FIRE OR SHOCK HAZARD, DO NOT EXPOSE THIS UNIT TO RAIN OR - Magnavox MR41807 | Owners Manual - Page 3
may generate or use radio frequency energy. Changes or modifications to this equipment may cause harmful interference unless the modifications are expressly approved in the instruction manual. Modifications not authorized by the manufacturer may void user's authority to operate this device. 2 - Magnavox MR41807 | Owners Manual - Page 4
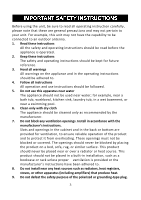
The appliance should be cleaned only as recommended by the manufacturer. 7. Do not block any ventilation openings. Install in accordance with the manufacturer's instructions. Slots and openings in the cabinet and in the back or bottom are provided for ventilation, to ensure reliable operation of the - Magnavox MR41807 | Owners Manual - Page 5
to lightning and power-line surges. 14. Refer all servicing to qualified service personnel. Servicing is required when the apparatus has been damaged in any operate from battery power, or other source, refer to the operation instructions. 16. Power lines An outside antenna system should not be - Magnavox MR41807 | Owners Manual - Page 6
70 provides information with respect to proper grounding of the mast and supporting structure, grounding of the lead- in wire to an antenna discharge product and requirements for the grounding electrodes. 20. Service Do not attempt to service this product yourself as opening or removing covers may - Magnavox MR41807 | Owners Manual - Page 7
normally by following the operating instructions. Adjust only those controls that are covered by the operating instructions, as an adjustment of point of cable entry as practical. NOTE: Refer all servicing to qualified service personnel. Servicing is required when the unit has been damaged in any - Magnavox MR41807 | Owners Manual - Page 8
LOCATION OF CONTROLS: 7 - Magnavox MR41807 | Owners Manual - Page 9
1. (Standby ) / MODE Button 2. ALARM/SLEEP Button 3. SET/MEM (Memory) Button 4. SNOOZE/DIMMER Button 5. VOL (Volume) Button 6. Button 7. Button 8. QI (Wireless Charging) Area 9. Speakers 10. AL 1 (Alarm 1) Indicator 11. AL 2 (Alarm 2) Indicator 12. PM Indicator 13. QI (Wireless - Magnavox MR41807 | Owners Manual - Page 10
POWER SOURCE Connect the small plug from the supplied AC/DC Adaptor to the DC 5V (In ) Jack on the rear of unit. Connect the AC/DC Adaptor into any convenient household outlet has AC 100-240V, 50/60Hz as the illustrated below: NOTES: If the AC power fails, this electronic clock is designed to - Magnavox MR41807 | Owners Manual - Page 11
possible battery leakage. 5. Do not try to recharge the battery not intended to be recharged; it can overheat and rupture. (Follow battery manufacturer's instructions.) 6. Do not dispose of battery in fire. Battery may explode or leak. 7. Clean the battery contacts and also those of the device prior - Magnavox MR41807 | Owners Manual - Page 12
OPERATION ACTUAL TIME SETTINGS: To set or reset the actual time: 1. Connect the unit to AC power as previous procedure. The LED Display will illuminate. 2. Press the SET/MEM Button, the digit of hour on the display will blink. Press the or Buttons repeatedly to set hour. 3. Press the SET/MEM - Magnavox MR41807 | Owners Manual - Page 13
3. Press and holding the or Buttons until the frequency on the display start running to auto search and play the previous or next available FM station. Repeated the same procedures until the desired FM Station is searched and play. 4. If the reception is not good, press and release the or - Magnavox MR41807 | Owners Manual - Page 14
Antenna: The FM Antenna Wire on the rear of unit is for FM reception. If reception is weak, unwind it to full length and/or relocation. AUX IN Listen music from the external Audio Player as follows: 1. Connected the external Audio Player by an audio connection cable with 3.5mm stereo plugs (Cable - Magnavox MR41807 | Owners Manual - Page 15
ALARM: Alarm 1 settings: 1. Press the ALARM/SLEEP Button once, the AL 1 (Alarm 1) Indicator on the display will illuminate. The Alarm 1 time will appear on the display and the hour digit will blink. Press the or Buttons repeatedly to set the hour of it. 2. Press the ALARM/SLEEP Button again, the - Magnavox MR41807 | Owners Manual - Page 16
3. Press the ALARM/SLEEP Button again; the alarm 2 status will appear on the display. Press the or Buttons repeatedly to activate alarm, turn off alarm and set wake up mode as desired as below. Wake up mode: Display or indicators Buzz "ON" appear on the display and AL 2 Indicator on display - Magnavox MR41807 | Owners Manual - Page 17
, the unit will save the settings and exit (showing actual time on the display) automatically. SNOOZE: The alarm can be temporarily turned off manually by press the SNOOZE/DIMMER Button. After press the button during alarm goes off, the correspondence alarm indicator will blink and the alarm will - Magnavox MR41807 | Owners Manual - Page 18
shut off. DIMMER: Press the SNOOZE/DIMMER Button repeatedly to set the brightness level of the display as desired. BUILT-IN QI WIRELESS CHARGER: 1. Place a supported mobile device on the center of the charging surface on the top of unit as the illustrated below. QI Indicator on the display will - Magnavox MR41807 | Owners Manual - Page 19
Do not place any other object between the mobile device and the QI wireless charger. The mobile device may not charge properly. If you connect a travel adaptor to the mobile device during wireless charging, the wireless charging feature may not be available. BUILT-IN USB CHARGER: To charging the - Magnavox MR41807 | Owners Manual - Page 20
TROUBLE SHOOTING GUIDE Symptom Possible Cause Solution Power No power Radio Connect the AC/DC Adaptor to the The AC/DC Adaptor had not connect to the unit - Magnavox MR41807 | Owners Manual - Page 21
- 108 MHz Output from USB Charger Port: DC 5V, 1000mA Maximum Output from QI Wireless Charger: DC 5V, 1000mA Maximum ACCESSORIES 1 x Owner's Manual 1 x AC/DC Adapter (Input: AC 100-240V~, 50/60Hz, 0.5A; Output: DC 5V, 2000mA, ) SPECIFICATIONS AND ACCESSORIES ARE SUBJECT TO CHANGE WITHOUT - Magnavox MR41807 | Owners Manual - Page 22
-
 1
1 -
 2
2 -
 3
3 -
 4
4 -
 5
5 -
 6
6 -
 7
7 -
8
-
9
-
10
-
11
-
12
-
13
-
14
-
15
-
16
-
17
-
18
-
19
-
20
-
21
-
22
 |
 |