Magnavox ZC320MW8 Owners Manual - Page 56
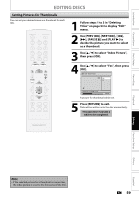
Putting Names on Titles
 |
View all Magnavox ZC320MW8 manuals
Add to My Manuals
Save this manual to your list of manuals |
Page 56 highlights
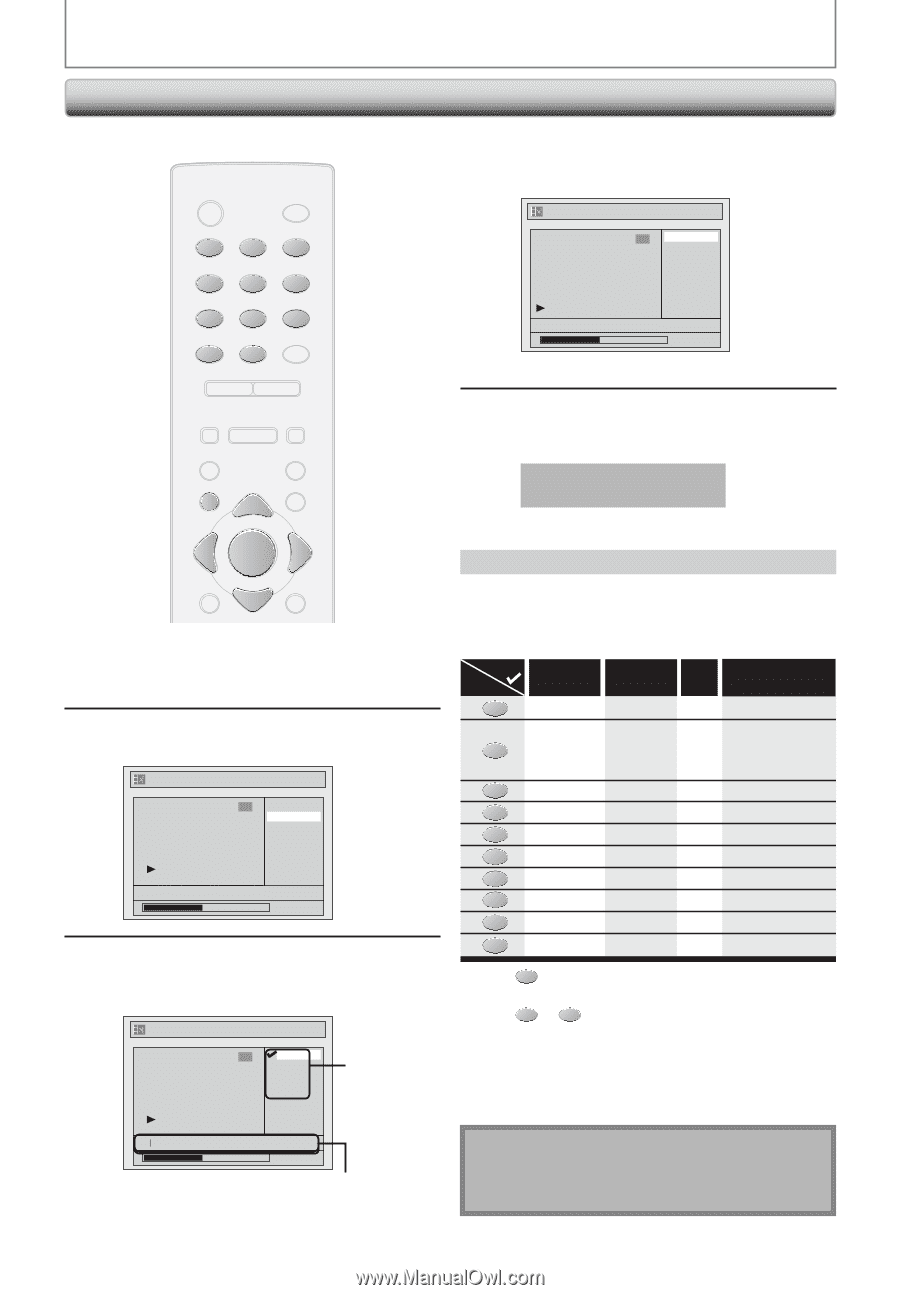
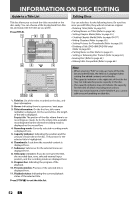
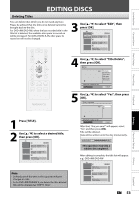
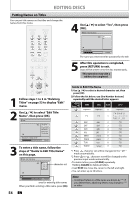
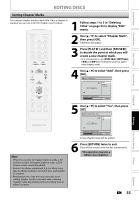
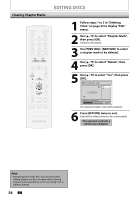
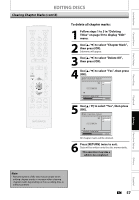
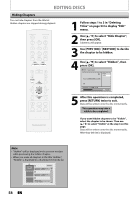
EDITING DISCS Putting Names on Titles You can put title names on the titles and change the names from this menu. STANDBY-ON y OPEN/CLOSE A .@/: ABC DEF 1 2 3 GHI JKL MNO 4 5 6 PQRS 7 TUV WXYZ 8 9 CLEAR SPACE 0 CM SKIP PREV H NEXT G PLAY E B STOP C RETURN K D PAUSE F TITLE 4 Use [K / L] to select "Yes", then press [OK]. Edit - Edit Title Name 1 Yes No MY FAVORITE 0:00:59 The name you entered will be activated for the title. 5 After this operation is completed, press [RETURN] to exit. Data will be written onto the disc momentarily. This operation may take a while to be completed. K K OK DISC SETUP K MENU 1 Follow steps 1 to 3 in "Deleting Titles" on page 53 to display "Edit" menu. 2 Use [K / L] to select "Edit Title Name", then press [OK]. Edit 1 Title Delete Edit Title Name Chapter Mark Hide Chapter Index Picture Title Dividing NOV/21/07 11:00AM E1 SP 0:00:59 3 To enter a title name, follow the steps of "Guide to Edit Title Name" on this page. Edit - Edit Title Name 1 ABC abc 123 @! ? character set Guide to Edit Title Name 1) Use [K / L] to select a desired character set, then press [OK]. 2) Follow the list below, use [the Number buttons] repeatedly until the desired letter appears. Select Press ABC abc 123 0 0 @ ! ? 1 (*1) (*1) 1 *+,-./:; 2 ABC abc 2 (*2) 3 DEF def 3 (*2) 4 GHI ghi 4 (*2) 5 JKL jkl 5 (*2) 6 MNO mno 6 (*2) 7 PQRS pqrs 7 (*2) 8 TUV tuv 8 (*2) 9 WXYZ wxyz 9 (*2) *1 Press 1 , character set will be changed to the " @!? " mode automatically. *2 Press 2 to 9 , character set will be changed to the previous input mode automatically. • To delete letters, press [CLEAR] repeatedly. Holding [CLEAR] to delete all letters. • Use [s / B] to move the cursor to the left and right. • You can enter up to 30 letters. M 0:00:59 area for entering title names When you finish entering a title name, press [OK]. Note • Undefined letters in a title name are shown by "*". If you delete them, adjoining letters may change to "*" or other. 54 EN
-
 1
1 -
2
-
3
-
4
-
5
-
6
-
7
-
8
-
9
-
10
-
11
-
12
-
13
-
14
-
15
-
16
-
17
-
18
-
19
-
20
-
21
-
22
-
23
-
24
-
25
-
26
-
27
-
28
-
29
-
30
-
31
-
32
-
33
-
34
-
35
-
36
-
37
-
38
-
39
-
40
-
41
-
42
-
43
-
44
-
45
-
46
-
47
-
48
-
49
-
50
-
 51
51 -
 52
52 -
 53
53 -
 54
54 -
 55
55 -
 56
56 -
 57
57 -
 58
58 -
 59
59 -
 60
60 -
 61
61 -
62
-
63
-
64
-
65
-
66
-
67
-
68
-
69
-
70
-
71
-
72
-
73
-
74
-
75
-
76
-
77
-
78
-
79
-
80
-
81
-
82
-
83
-
84
-
85
-
86
-
87
-
88
 |
 |