Magnavox ZC320MW8 Owners Manual - Page 74
Video cont'd
 |
View all Magnavox ZC320MW8 manuals
Add to My Manuals
Save this manual to your list of manuals |
Page 74 highlights
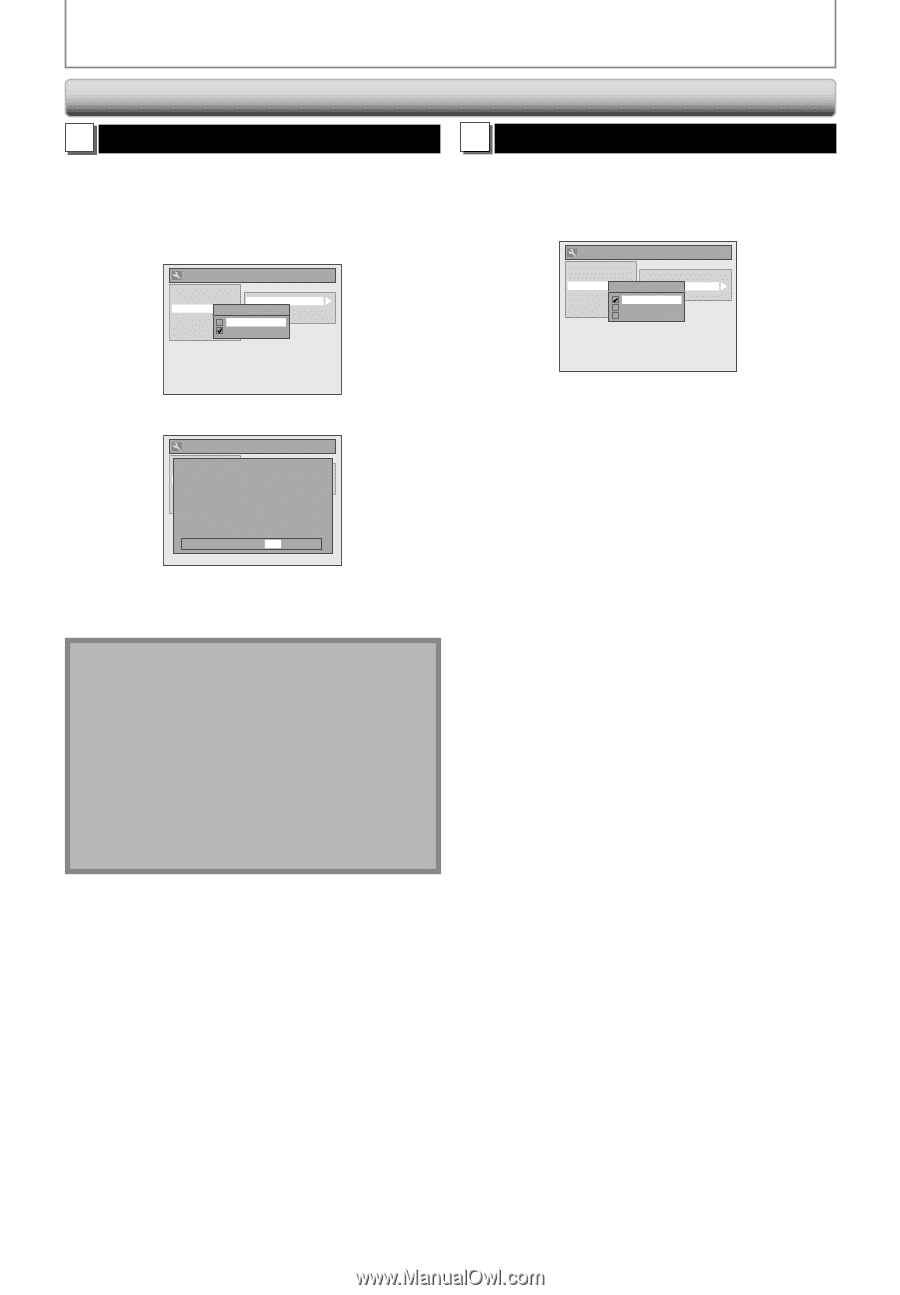
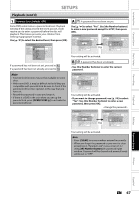
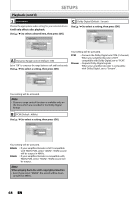
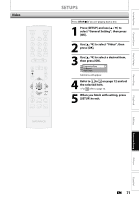
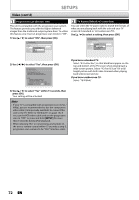
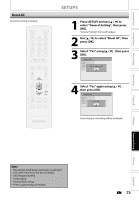
SETUPS Video (cont'd) 1 Progressive Scan (Default : OFF) This unit is compatible with the progressive scan system. The feature provides you with the higher definition images than the traditional output system does. To utilize this feature, you must set progressive scan mode to "ON". 1) Use [K / L] to select "ON", then press [OK]. General Setting Playback Display Video Recording Clock Reset All Progressive Scan ProgressivTeVScAasnpect Video Input ON OFF 2 TV Aspect (Default: 4:3 Letter Box) You can select the TV aspect ratio to match the formats of what you are playing back with the unit and your TV screen (4:3 standard or 16:9 widescreen TV). Use [K / L] to select a setting, then press [OK]. General Setting Playback Display Video Recording Clock Reset All Progressive Scan TV Aspect TV Aspect Video Input 4:3 Letter Box 4:3 Pan & Scan 16:9 Wide 2) Use [{ / B] to select "Yes", then press [OK]. General Setting PlAaycbtiavcakting progressive scan: DiCsphleacyk your TV has progrPersosgivreessscivaen Scan Viadnedo connect wPirtohgcreosmspivoTenVSencAtasnvpiedceto cable. Recording Select Video Clock ON ReNsOeTt EAl:l OFF If there is no picture or picture is distorted after selecting "Yes", Wait about 15 seconds for auto recovery. Activate? Yes No If you have a standard TV: Select "4:3 Letter Box", so that black bars appear on the top and bottom of the TV screen when playing back a wide-screen picture. Select "4:3 Pan & Scan" for a full height picture with both sides trimmed when playing back wide-screen picture. If you have a widescreen TV: Select "16:9 Wide". 3) Use [K / L] to select "Yes" within 15 seconds, then press [OK]. Your setting will be activated. Note • If your TV is compatible with progressive scan (525p / 480p), you are recommended to use the component video cable (commercially available) to connect this unit to the TV. (Refer to "Method 3" on page 14.) If not, use the RCA video cable and set the progressive scan to "OFF" or press and hold [SETUP] for more than 3 seconds during DVD playback. • When selecting "No" or not pressing any buttons on the unit or remote control within 15 seconds at step 3, progressive scan remains to be "OFF" (interlace scan). 72 EN
-
 1
1 -
2
-
3
-
4
-
5
-
6
-
7
-
8
-
9
-
10
-
11
-
12
-
13
-
14
-
15
-
16
-
17
-
18
-
19
-
20
-
21
-
22
-
23
-
24
-
25
-
26
-
27
-
28
-
29
-
30
-
31
-
32
-
33
-
34
-
35
-
36
-
37
-
38
-
39
-
40
-
41
-
42
-
43
-
44
-
45
-
46
-
47
-
48
-
49
-
50
-
51
-
52
-
53
-
54
-
55
-
56
-
57
-
58
-
59
-
60
-
61
-
62
-
63
-
64
-
65
-
66
-
67
-
68
-
 69
69 -
 70
70 -
 71
71 -
 72
72 -
 73
73 -
 74
74 -
 75
75 -
 76
76 -
 77
77 -
 78
78 -
 79
79 -
80
-
81
-
82
-
83
-
84
-
85
-
86
-
87
-
88
 |
 |