Magnavox ZV427MG9 User manual, English (US) - Page 41
Press [D.DUBBING]., Press [PLAY - how to record vcr to dvd
 |
UPC - 053818570722
View all Magnavox ZV427MG9 manuals
Add to My Manuals
Save this manual to your list of manuals |
Page 41 highlights
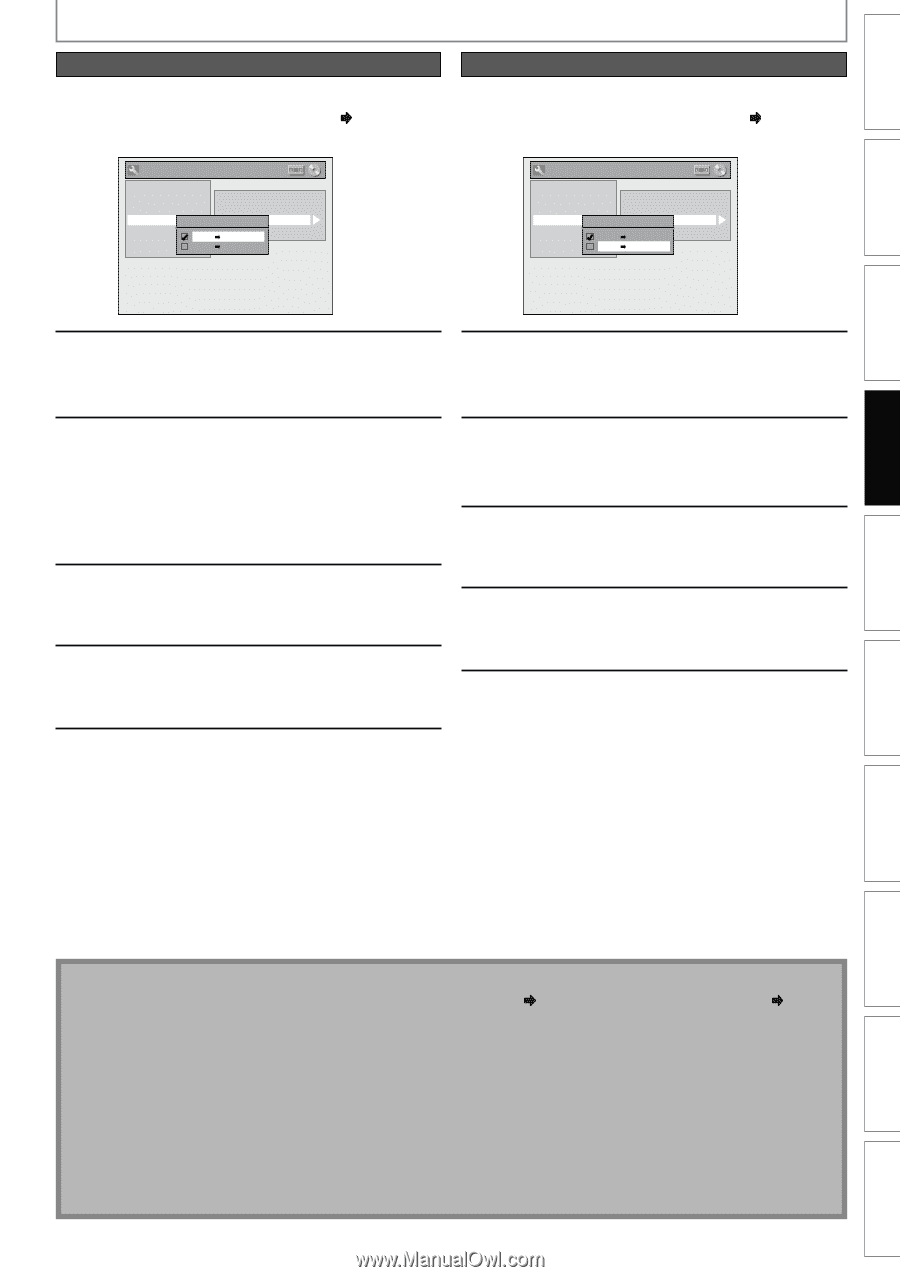
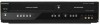
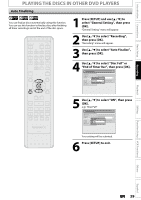
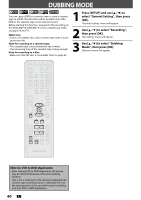
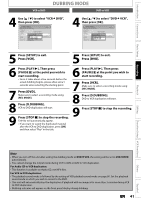
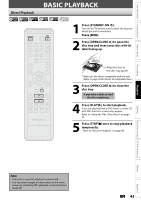
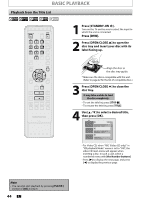
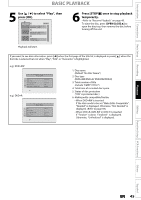
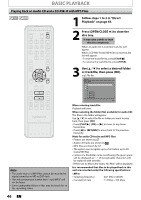
Introduction Connections Basic Setup Recording VCR to DVD DUBBING MODE DVD to VCR 4 Use [K / L] to select "VCR then press [OK]. General Setting Playback Display Video Recording Clock HDMI Reset All Auto Chapter Auto Finalize Dubbing MoDduebbing Mode Make Recording Compatible VCR DVD DVD VCR DVD", 4 Use [K / L] to select "DVD then press [OK]. General Setting Playback Display Video Recording Clock HDMI Reset All Auto Chapter Auto Finalize Dubbing MoDduebbing Mode Make Recording Compatible VCR DVD DVD VCR VCR", 5 Press [SETUP] to exit. Press [VCR]. 5 Press [SETUP] to exit. Press [DVD]. 6 Press [PLAY B]. Then press [PAUSE F] at the point you wish to start recording. • Since it takes about a few seconds before the actual dubbing begins, please allow extra 5 seconds when selecting the starting point. 7 Press [DVD]. Make sure to select a recording mode using [REC MODE]. 8 Press [D.DUBBING]. VCR to DVD duplication will start. 9 Press [STOP C] to stop the recording. Title list will automatically appear. • If you want to watch the duplicated material after the VCR to DVD duplication, press [OK] and then select "Play" in the title. 6 Press [PLAY B]. Then press [PAUSE F] at the point you wish to start recording. 7 Press [VCR]. Make sure to select a recording mode using [REC MODE]. 8 Press [D.DUBBING]. DVD to VCR duplication will start. 9 Press [STOP C] to stop the recording. Playback Editing Function Setup VCR Functions Others Note • When you turn off the unit after setting the dubbing mode to DVD VCR, the setting will be set to VCR DVD automatically. • You cannot change the output mode during VCR to DVD or DVD to VCR duplication. For Audio CD to VCR duplication: • This function is available on Audio CD, not MP3 files. For VCR to DVD duplication: • The playback sound mode is followed by the setting of VCR playback sound mode on page 80. Set the playback sound mode to which you wish to record to the DVD. • This unit will automatically stop the duplication if playback with no image is for more than 3 minutes during VCR to DVD duplication. • Dubbing indicator will appear on the front panel display during dubbing. EN 41 Español
-
 1
1 -
2
-
3
-
4
-
5
-
6
-
7
-
8
-
9
-
10
-
11
-
12
-
13
-
14
-
15
-
16
-
17
-
18
-
19
-
20
-
21
-
22
-
23
-
24
-
25
-
26
-
27
-
28
-
29
-
30
-
31
-
32
-
33
-
34
-
35
-
 36
36 -
 37
37 -
 38
38 -
 39
39 -
 40
40 -
 41
41 -
 42
42 -
 43
43 -
 44
44 -
 45
45 -
 46
46 -
47
-
48
-
49
-
50
-
51
-
52
-
53
-
54
-
55
-
56
-
57
-
58
-
59
-
60
-
61
-
62
-
63
-
64
-
65
-
66
-
67
-
68
-
69
-
70
-
71
-
72
-
73
-
74
-
75
-
76
-
77
-
78
-
79
-
80
-
81
-
82
-
83
-
84
-
85
-
86
-
87
-
88
-
89
-
90
-
91
-
92
 |
 |