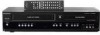
Magnavox ZV457MG9 User manual, English (US)
Magnavox ZV457MG9 - DVDr/ VCR Combo Manual
 |
UPC - 053818570746
View all Magnavox ZV457MG9 manuals
Add to My Manuals
Save this manual to your list of manuals |
Magnavox ZV457MG9 manual content summary:
- Magnavox ZV457MG9 | User manual, English (US) - Page 1
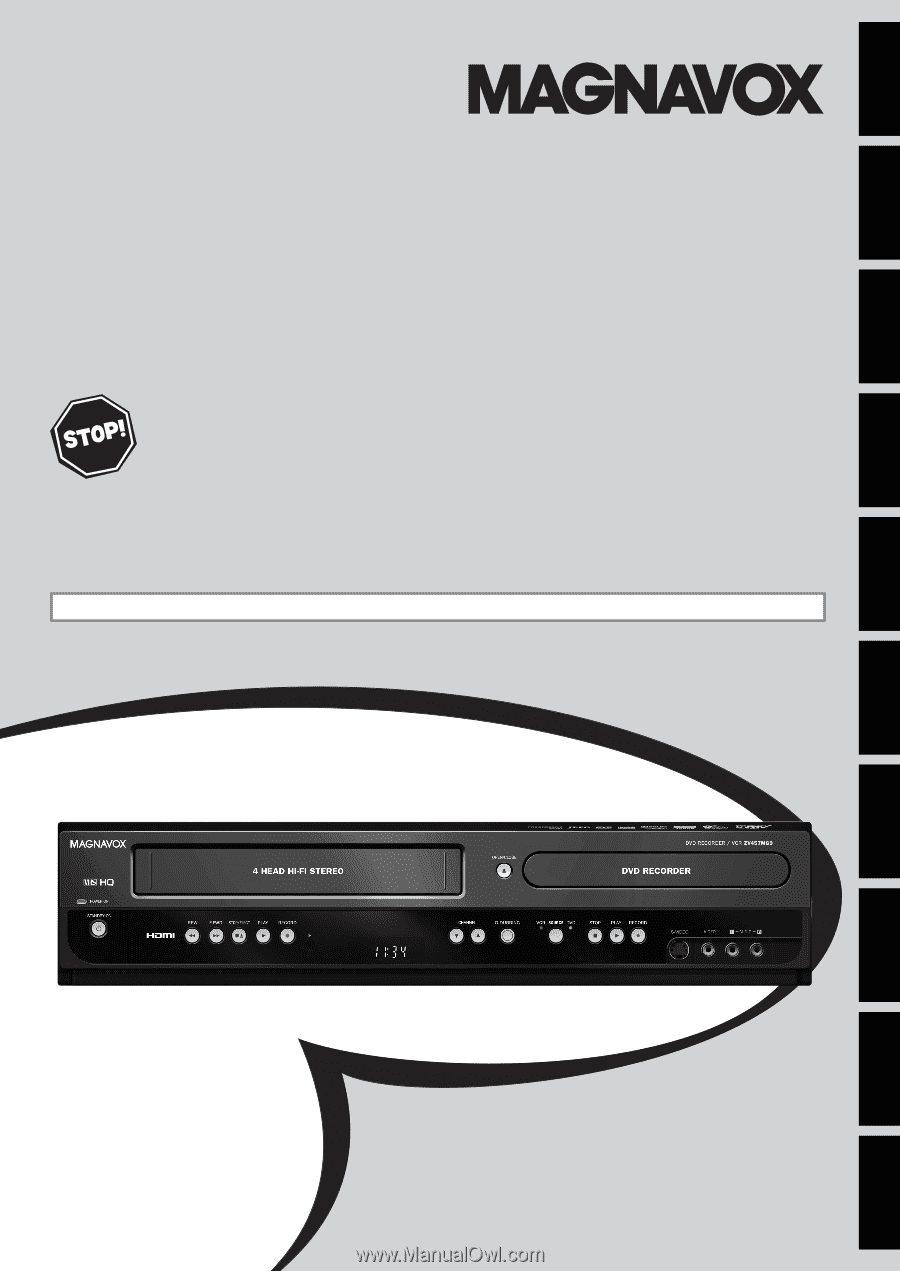
Connections Basic Setup Recording Playback Owner's Manual ZV457MG9 A DIGITAL VIDEO DISC RECORDER & VIDEO CASSETTE RECORDER WITH DIGITAL TUNER THANK YOU FOR CHOOSING MAGNAVOX. NEED HELP FAST? READ YOUR QUICK GUIDE AND/OR OWNER'S MANUAL FIRST FOR QUICK TIPS THAT MAKE USING YOUR MAGNAVOX - Magnavox ZV457MG9 | User manual, English (US) - Page 2
of this unit may be found on the cabinet. You should record and retain manual. The user could lose the authority to operate this equipment if an unauthorized change or modification is made. RADIO-TV INTERFERENCE This equipment has been tested and found to comply with the limits for a Class B digital - Magnavox ZV457MG9 | User manual, English (US) - Page 3
. In case of picture problems with 525(480) progressive scan output, it is recommended that the user switch the connection to the 'standard definition' output. If there are questions regarding your TV set compatibility with this 525p(480p) DVD player, please contact our customer service center. EN - Magnavox ZV457MG9 | User manual, English (US) - Page 4
• Remember to read the instructions along with the video head cleaner before use. • Clean video heads only when problems occur. Maintenance Servicing • Please refer to relevant topics on "TROUBLESHOOTING" on pages 97-100 before returning the product. • If this unit becomes inoperative, do not try - Magnavox ZV457MG9 | User manual, English (US) - Page 5
is true when the players are compatible with actual recordable DVD discs. HDMI, the HDMI logo and High-Definition Multimedia Interface are trademarks or registered trademarks of HDMI Licensing LLC. Recording Playback Editing Function Setup VCR Functions Others © 2010 Funai Electric Co., Ltd - Magnavox ZV457MG9 | User manual, English (US) - Page 6
to a Cable / Satellite Box 19 Connecting to a TV without Audio / Video Jacks . . . 20 Digital Audio Connection 21 Basic Setup BEFORE YOU START 22 Finding the Viewing Channel on Your TV 22 Guide to On-Screen Display / Menu 23 Main Menu 25 Switching DVD / VCR Mode 26 How to Insert a Disc - Magnavox ZV457MG9 | User manual, English (US) - Page 7
Playback 85 Display 88 Video 91 HDMI 92 Reset All 93 VCR Functions VCR FUNCTIONS 94 Information on VCR Functions 94 Playback 94 Recording 94 One-touch Timer Recording (OTR 95 Index Search 95 Time Search 96 Other Operations 96 Others TROUBLESHOOTING 97 LANGUAGE CODE 101 GLOSSARY 102 - Magnavox ZV457MG9 | User manual, English (US) - Page 8
to record. Automatic title list making: The unit makes a title list with the index automatically. Playback DVD Theater surround sound in your home: When connecting the unit to an amplifier or a decoder which is compatible with Dolby Digital, you can experience the theater surround sound from discs - Magnavox ZV457MG9 | User manual, English (US) - Page 9
Connections Basic Setup Recording Playback FEATURES Symbols Used in this Owner's Manual To specify for what disc type each function is, we put the following symbols at the beginning of each item to operate. * DVD-RW/-R recorded in VR mode or non compatible recording format are not playable. * DVD - Magnavox ZV457MG9 | User manual, English (US) - Page 10
window (DVD/VCR) Receive signals from your remote control so that you can control the unit from a distance. 17. IRECORD button (VCR) Press once to start a recording. Press repeatedly to start the one-touch timer recording. 18. BPLAY button (VCR) Press to start playback. 19. C ASTOP/EJECT button (VCR - Magnavox ZV457MG9 | User manual, English (US) - Page 11
input jack with a digital audio coaxial cable. Note • Do not touch the inner pins of the jacks on the rear panel. Electrostatic discharge may cause permanent damage to the unit. • This unit does not have the RF modulator. Caution on using S-video, component, or HDMI connection for VCR: • Only the - Magnavox ZV457MG9 | User manual, English (US) - Page 12
unit. • Remote control for different devices can interfere with each other. Avoid using remote control for other device located close to the unit and bursting. Please observe the following: • Do not mix new and old , please comply with governmental regulations or environmental public instruction's - Magnavox ZV457MG9 | User manual, English (US) - Page 13
Introduction Connections Basic Setup Recording Playback FUNCTIONAL OVERVIEW 1. DTV/TV button (DVD/VCR) • Press to switch between digital TV (DTV) mode and analog TV (TV) mode. 2. STANDBY-ON y button (DVD/VCR) • Press to turn on the unit, or to turn the unit to the standby mode. (To completely - Magnavox ZV457MG9 | User manual, English (US) - Page 14
for one-touch timer recording • Selected HDMI output mode • VCR tape counter Display Message Appears when the disc tray is opening. DVD Appears when the disc tray is closing. DVD Appears when a disc is loaded on the disc tray. DVD Appears when data is being recorded on a disc. DVD Appears when the - Magnavox ZV457MG9 | User manual, English (US) - Page 15
unit directly to the TV. If the RCA audio/video cables are connected to a VCR, pictures may be distorted due to the copy protection system. Antenna Connection (Required) Recording Playback Editing Function Setup VCR Functions rear of this unit HDMI OUT DIGITAL AUDIO OUT AUDIO OUT DVD/VCR - Magnavox ZV457MG9 | User manual, English (US) - Page 16
CONNECTION Connecting to a TV with an HDMI™ Compatible Port • HDMI outputs the video / audio signals without converting to analog signals. • No audio connection is required. HDMI OUT HDMI cable HDMI IN HDMI OUT rear of this unit DIGITAL AUDIO OUT AUDIO OUT DVD/VCR S-VIDEO COMPONENT S- - Magnavox ZV457MG9 | User manual, English (US) - Page 17
/ UHF antenna IN ANTENNA RF coaxial cable Connecting to a TV Using the S-Video Out Jack RCA audio cable or cable TV company AUDIO S-VIDEO OUT L OUT R S-video cable AUDIO IN L R S-VIDEO IN rear of this unit HDMI OUT DIGITAL AUDIO OUT AUDIO OUT DVD/VCR S-VIDEO COMPONENT S-VIDEO VIDEO OUT - Magnavox ZV457MG9 | User manual, English (US) - Page 18
CONNECTION Connecting to a TV Using Audio / Video Jacks IN ---AUDIO---OUT L R IN ---VIDEO---OUT RCA audio cable RCA video cable AUDIO IN L R VIDEO IN rear of this unit HDMI OUT DIGITAL AUDIO OUT AUDIO OUT DVD/VCR S-VIDEO COMPONENT S-VIDEO VIDEO OUT Y IN ---AUDIO---OUT L L OUT IN COAXIAL - Magnavox ZV457MG9 | User manual, English (US) - Page 19
/satellite box rear of this unit HDMI OUT RF coaxial cable DIGITAL AUDIO OUT AUDIO OUT DVD/VCR S-VIDEO COMPONENT S-VIDEO VIDEO OUT Y IN ---AUDIO---OUT L L OUT IN COAXIAL L OUT R PB /CB IN PR /CR ANTENNA R R IN ---VIDEO---OUT ANT. IN This connection is for TV loop through only ANT - Magnavox ZV457MG9 | User manual, English (US) - Page 20
CONNECTION Connecting to a TV without Audio / Video Jacks rear of this unit HDMI OUT ANT. IN Set channel 3 or 4 DIGITAL AUDIO OUT AUDIO OUT DVD/VCR S-VIDEO COMPONENT S-VIDEO VIDEO OUT Y IN ---AUDIO---OUT L L OUT IN COAXIAL L OUT R PB /CB IN PR /CR ANTENNA R R IN ---VIDEO---OUT RF - Magnavox ZV457MG9 | User manual, English (US) - Page 21
VCR Functions Cables not included. Please purchase the necessary cables at your local store. Actual Output Note • The audio source on a disc in a Dolby Digital multi channel surround format cannot be recorded as digital sound by an MD or DAT deck. • By connecting this unit to a Dolby Digital - Magnavox ZV457MG9 | User manual, English (US) - Page 22
on the TV's remote control that accesses the external input channel. It may be labeled "SOURCE", "AV", or "SELECT". In such case, press it repeatedly. Refer to your TV's user manual for details. • If more than 10 minutes have passed since you have turned on the unit, you may see the MAGNAVOX screen - Magnavox ZV457MG9 | User manual, English (US) - Page 23
Introduction Connections Basic Setup BEFORE YOU START This unit uses the following on-screen displays and menus to guide you to the easy operations. The on-screen displays give you the information on the loaded disc or the disc/file in playback, or the HDMI status, etc. The menus allow you to - Magnavox ZV457MG9 | User manual, English (US) - Page 24
. * During stop mode or pause, VCR information is not available with HDMI connection. 1. Indicates current video status. 2. Indicates Indicates the resolution of the HDMI output image. *2. Indicates the HDMI video format. *3. Indicates the HDMI audio format. 4. Indicates current disc status. * "- - - Magnavox ZV457MG9 | User manual, English (US) - Page 25
: To set up the video setting. 4. Recording: To set up the unit to record to discs as you prefer. 5. Clock: To set up the clock of the unit as you need. 6. Channel: To adjust the channel setting of the unit as you prefer. 7. HDMI: To set up the HDMI connection setting. 8. Reset All: To reset the - Magnavox ZV457MG9 | User manual, English (US) - Page 26
below. 4 HEAD HI-FI STEREO Cassette compartment Align the disc to the disc tray guide. 4) Press [OPEN/CLOSE A] to close the disc tray. It may take a while to load the disc. To eject the disc: Press [OPEN/CLOSE A] to open the disc tray, then remove the disc before turning the unit to the standby - Magnavox ZV457MG9 | User manual, English (US) - Page 27
is connected to "ANTENNA IN" jack. Antenna Cable (Analog) Cable (Analog / Digital) Auto Preset will scan all terrestrial channels. This may take a while to complete. The unit will start getting channels available in your area. Antenna: (When using antenna) The channels broadcasted in analog TV and - Magnavox ZV457MG9 | User manual, English (US) - Page 28
[ • ] (for digital TV channels). Note • If the auto channel preset is cancelled during presetting, some channels not yet preset may not be received. • You cannot change the channel when either VCR or DVD is in any recording mode (basic recording, onetouch timer recording or timer recording). 28 EN - Magnavox ZV457MG9 | User manual, English (US) - Page 29
Channel Preset", then press [OK]. Auto Channel Preset Manual Channel Preset TV Audio Select • If you are adding or deleting Analog Cable TV channels, go to 5 ANALOG to continue. • If you are deleting Digital TV channels, go to 5 DIGITAL to continue. ANALOG 5 Select the channel number to add or - Magnavox ZV457MG9 | User manual, English (US) - Page 30
in your area, follow "Auto Clock Setting" below. If not, follow "Manual Clock Setting" on page 32. Make sure • The cable TV connections are correct. • Channels are set. (Refer to page 28.) ANALOG AUTO CLOCK SETTING (Cable TV only) 1 Press [SETUP] and use [K / L] to select "General Setting", then - Magnavox ZV457MG9 | User manual, English (US) - Page 31
after this unit receives the antenna/cable signal and plug in the power cord. • If the clock is not set correctly, timer recording does not work properly. • Analog off the air broadcasts have ended. Analog auto clock setting will no longer be available except via Cable TV. Try digital auto clock - Magnavox ZV457MG9 | User manual, English (US) - Page 32
[SETUP] to exit. When "Daylight Saving Time" is "ON", the unit clock will automatically adjust the time in order to fit the daylight saving time either there is a power failure or this unit has been unplugged for more than 30 seconds when you set the clock manually. • For setting the day, year, - Magnavox ZV457MG9 | User manual, English (US) - Page 33
Connections Basic Setup Recording TUNER SETTINGS Switching Analog Mode / Digital Mode You can easily switch the analog TV (NTSC) and digital TV (ATSC) with the remote control. Press [DTV/TV] on the remote control. • The analog mode and digital technology, digital broadcasting offers a service that - Magnavox ZV457MG9 | User manual, English (US) - Page 34
TUNER SETTINGS This section describes how to switch the TV audio. When you record a TV program, only the audio selected here will be recorded. Selecting TV Audio Digital TV 1 Press [AUDIO] to cycle through available audio languages. English 1/2 • When you press [AUDIO], selected language will be - Magnavox ZV457MG9 | User manual, English (US) - Page 35
sub-audio. 5 Press [SETUP] to exit. Recording Playback Editing Function Setup VCR Functions Others Note on recording analog TV audio • When you record an analog TV program available in second audio or stereo, you have to select either "Stereo" or "SAP" in "General Setting" menu beforehand - Magnavox ZV457MG9 | User manual, English (US) - Page 36
DTV Closed Caption TUNER SETTINGS Digital TV Digital TV has its own closed captions called DTV CC. Use L] to select "Caption Service", then press [OK]. DTV CC Caption Service Recording 5 Use [K / L] to the desired DTV closed caption, then press [OK]. Caption Service OFF Service1 Service2 Service3 - Magnavox ZV457MG9 | User manual, English (US) - Page 37
Introduction Connections Basic Setup Recording Closed Caption Style TUNER SETTINGS Digital TV Digital TV can also change the DTV CC CC Style V-Chip 4 Use [K / L] to select "User Setting", then press [OK]. CC Style User Setting Font Size Font Style Font Opacity Font Color Edge Type Edge Color - Magnavox ZV457MG9 | User manual, English (US) - Page 38
TUNER SETTINGS 6 Use [K / L] to select the item and switch the setting for each item you want to set, then press [OK]. • When "User Setting" is set to "ON", you can set the following items. CC style set by "User Setting" will be displayed. • The setting description for each item is shown below. < - Magnavox ZV457MG9 | User manual, English (US) - Page 39
Connections Basic Setup Recording INFORMATION ON DVD RECORDING Before you make a recording, read the following information. Recordable Discs Recording Mode This unit can record to DVD+RW, DVD+R, DVD-RW and DVD-R. DVD+R/DVD-R can only be recorded to once. DVD+RW/ DVD-RW can be recorded - Magnavox ZV457MG9 | User manual, English (US) - Page 40
specified time for chapter marks. Use this feature to make the unfinalized +VR mode discs recorded on other unit recordable on this unit. When you make an additional recording on this unit with "Make Recording Compatible" set to "ON", the title menu is automatically converted to our style. 1) Press - Magnavox ZV457MG9 | User manual, English (US) - Page 41
Introduction Connections Basic Setup Recording BASIC RECORDING & ONE-TOUCH TIMER RECORDING Follow the steps to record TV programs. 1 Press [DVD] first. Insert a recordable disc (refer to page 26 on how to insert a disc). * Make sure the disc is compatible with this unit. (Refer to page 39 for - Magnavox ZV457MG9 | User manual, English (US) - Page 42
DVD players. Writing to Disc 90% 1 SP(2Hr) NOV/21/09 11:00AM CH12 SP NOV/21/09 0:20:44 2 EMPTY TITLE 1:41:17 SP(2Hr) • Press [STOP C] to exit the title list. Note • When you press [REC], recording starts immediately and continues until the disc is full or you stop recording. • This unit - Magnavox ZV457MG9 | User manual, English (US) - Page 43
Introduction Connections Basic Setup TIMER RECORDING You can program the unit to record up to 12 programs within a month in advance. Daily or weekly program recordings are also available. Before recording, make sure to • Set the clock before setting a timer programming. • Insert a recordable disc - Magnavox ZV457MG9 | User manual, English (US) - Page 44
be cut short when the available recording space of the disc is too limited. 8 Press [OK] when all items are entered. After displaying an instructive message for 10 seconds, timer program list will appear. Press TIMER SET to Timer Standby mode. When Timer set on DVD or VCR, it is not available in - Magnavox ZV457MG9 | User manual, English (US) - Page 45
decided as soon as you enter the channel number. Digital TV For channel number 1-9 press, press [B] or [ record additionally on a disc recorded by other units when setting " Make Recording Compatible" to "OFF". • E23, E27, E28, E31, E32, E33 and E34 are not displayed. • A program with the error - Magnavox ZV457MG9 | User manual, English (US) - Page 46
after you press [TIMER SET] at step 9 on page 44. • You cannot change the audio language for the timer recording of digital TV broadcasting. • The timer recording cannot be performed in DVD and VCR at the same time. If you set 2 programs with the same channel and time in both devices, the program - Magnavox ZV457MG9 | User manual, English (US) - Page 47
Connections Basic Setup Recording OVERWRITING UNNECESSARY TITLE Overwriting from the Beginning of the Title Overwriting in the Middle of the Title You can overwrite the existing title from the beginning. 1) Press [STANDBY-ON y]. Make sure that the TV input is set on the unit. 2) Load the disc - Magnavox ZV457MG9 | User manual, English (US) - Page 48
after overwriting 30 - 180 seconds will be cut off. title name : A title name : C When overwriting in the middle of the title: overwrite recording : A existing title : B after overwriting 30 - 180 seconds will be cut off. title name : B* title name : B *Overwritten section and the rest of the - Magnavox ZV457MG9 | User manual, English (US) - Page 49
L2 IN to L1 IN HDMI OUT front of this unit Supplied cables used in this connection are as follows: • RCA audio cable (L/R) x 1 • RCA video cable x 1 Please purchase the rest of the necessary cables at your local store. L1 DIGITAL AUDIO OUT AUDIO OUT DVD/VCR S-VIDEO COMPONENT S-VIDEO VIDEO OUT - Magnavox ZV457MG9 | User manual, English (US) - Page 50
from an external device, refer to the instructions for the connection on page 49. 1 Recording to a DVD Press [DVD]. Insert a recordable disc (refer to page 26 on how to insert a disc). It takes a while to load the disc. Recording to a Cassette Tape Press [VCR]. Insert the cassette tape with an - Magnavox ZV457MG9 | User manual, English (US) - Page 51
• You cannot change the output mode during VCR to DVD or DVD to VCR duplication. Note for recording to a tape: Make sure - the cassette tape's erase-protection tab is intact. - the cassette tape is long enough. Note for recording to a disc: Make sure - the disc is compatible (refer to page 39). EN - Magnavox ZV457MG9 | User manual, English (US) - Page 52
using HDMI / Component / S-Video connection. To display the VCR recording mode on the screen, the unit must be connected by the VIDEO OUT jack and the TV's input select should be set to the appropriate external input channel. Note for VCR to DVD duplication • After starting VCR to DVD duplication - Magnavox ZV457MG9 | User manual, English (US) - Page 53
completed. Recording Playback Editing Function Setup VCR Functions Others Note To cancel the disc protect: • When you insert a disc protected with this unit, "Disc Protect ON OFF" will appear instead of "OFF ON" at step 3. Disc Edit Edit Disc Name Erase Disc Make Edits Compatible Disc Protect - Magnavox ZV457MG9 | User manual, English (US) - Page 54
you have finalized a DVD+R/ DVD-R, you cannot edit or record anything on that disc. • There is no need to finalize DVD+RW. • When you insert a DVD-RW finalized with this unit, "Undo Finalize" will appear instead of "Finalize". Disc Edit Edit Disc Name Erase Disc Undo Finalize Disc Protect ON OFF To - Magnavox ZV457MG9 | User manual, English (US) - Page 55
Introduction Connections Basic Setup PLAYING THE DISCS ON OTHER DVD PLAYERS Auto Finalizing You can finalize discs automatically using this function. You can use this function to finalize discs after finishing timer recordings and at the end of the disc space. 1 Press [SETUP] and use [K / L] to - Magnavox ZV457MG9 | User manual, English (US) - Page 56
DVD-video DVD+RW Unplayable Discs The following discs will not play back on this unit. • CD-ROM • DVD-RAM • DVD-ROM • Compact Disc-Interactive (CD-I) • Video Single Disc (VSD) • DVD-audio • Unfinalized disc • DVD or CD contains Windows Media™ Audio/DivX® files • DVD-R or DVD-RW recorded - Magnavox ZV457MG9 | User manual, English (US) - Page 57
into chapters. DVD title 1 title 2 chapter 1 chapter 2 chapter 1 chapter 2 chapter 3 track 1 audio CD, video CD track 2 track 3 track 4 track 5 folder 1 file 1 file 2 MP3, JPEG folder 2 file 3 file 4 file 5 Recording Playback Editing Function Setup VCR Functions Others Espa - Magnavox ZV457MG9 | User manual, English (US) - Page 58
26 on how to insert a disc). Align the disc to the disc tray guide. * Make sure the disc is compatible with this unit. (Refer to page 56 for the list of compatible discs.) It may take a while to load the disc. 2 Press [PLAY B] to start playback. If you are playing back a DVD-video or video CD with - Magnavox ZV457MG9 | User manual, English (US) - Page 59
Recording Playback Editing Function Setup VCR Functions No Disc Name Disc Total Titles Disc Space Used Disc Protect Finalize DVD+R 5 1:30:48 OFF Finalized 1 Press [DVD] first. Insert a playable disc (refer to page 26 on how to insert a disc). * Make sure the disc is compatible with this unit - Magnavox ZV457MG9 | User manual, English (US) - Page 60
DVD] first. Insert a playable disc (refer to page 26 on how to insert a disc). * Make sure the disc is compatible with this unit. (Refer to page 56 for the list of compatible discs.) It may take a while to load the disc MP3 files cannot be recorded as digital sound by an MD or DAT deck. • Files whose - Magnavox ZV457MG9 | User manual, English (US) - Page 61
Introduction Connections Basic Setup Recording Playback BASIC PLAYBACK Playing Back an Audio CD and a CD-RW / -R with MP3 / JPEG Files (cont'd) Using the Title / Disc Menu Kodak Picture CD The Picture CD is a service to convert photographs taken by a conventional film camera into digital data - Magnavox ZV457MG9 | User manual, English (US) - Page 62
(language) setting cannot be changed while using this mode. • This feature may not work at some point in a disc. • Audio is PCM during rapid playback mode except when using digital audio connection. • When using digital audio connection (COAXIAL), the LPCM sound (2 channel) will be output. 62 EN - Magnavox ZV457MG9 | User manual, English (US) - Page 63
Introduction Connections Basic Setup Recording Playback SPECIAL menu. 2) Use [{ / B] to select menu. e.g.) DVD-video to display the selection 1/ 5 1/ 5 0:01:00 / 1:23:45 DVD Video 3) Use [K / L] to select a desired zoom files. Editing Function Setup VCR Functions Others Español EN 63 - Magnavox ZV457MG9 | User manual, English (US) - Page 64
0:01:00 / 1:23:45 DVD Video 2) Use [{ / B] to select e.g.) DVD-video to display the marker list. 1/ 5 1/ 5 0:01:00 / 1:23:45 DVD Video 3) Use [K / L] these operations listed below. - Opening the disc tray - Turning the unit to standby / off - Record on a recordable disc • You can mark up to 6 - Magnavox ZV457MG9 | User manual, English (US) - Page 65
Connections Basic Setup Recording Playback Random Playback SPECIAL PLAYBACK Program Playback You can play back a disc randomly instead of playing back in the original order. 1) Press [SETUP]. 2) Use [K / L] to select "DISC Playback Mode", then press [OK]. "DISC DISC Playback Mode DISC the TV screen - Magnavox ZV457MG9 | User manual, English (US) - Page 66
a time. Using [DISPLAY] 1) During playback, press [DISPLAY] to bring up the display menu . 2) Use [{ / B] to select e.g.) DVD-video , then press [OK]. 1/ 5 1/ 5 0:01:00 / 1:23:45 DVD Video The number next to will be highlighted. 3) Title: Use [K / L] or [the Number buttons] to enter a desired - Magnavox ZV457MG9 | User manual, English (US) - Page 67
Introduction Connections Basic Setup Time Search SEARCH 1) During playback, press [DISPLAY] to bring up the display menu. If the display menu is already shown, skip to step 2. 2) Use [{ / B] to select , then press [OK]. e.g.) DVD-video 1/ 5 1/ 5 0:01:00 / 1:23:45 DVD Video e.g.) audio CD 1/ - Magnavox ZV457MG9 | User manual, English (US) - Page 68
only allow you to change the subtitle from the disc menu. Press [TITLE] or [DISC MENU] to display the disc menu. • If a 4-digit language code appears in the subtitle menu, refer to "LANGUAGE CODE" on page 101. When playing back a DVD-video recorded with 2 or more soundtracks (these are often in - Magnavox ZV457MG9 | User manual, English (US) - Page 69
Introduction Connections Basic Setup Recording Playback SELECTING THE FORMAT OF AUDIO AND VIDEO Switching Virtual Surround System Switching Camera Angles You can enjoy stereophonic virtual space through your existing 2 channel stereo system. 1) During playback, press [DISPLAY] to bring up the - Magnavox ZV457MG9 | User manual, English (US) - Page 70
INFORMATION ON DISC EDITING Guide to a Title List Editing Discs Title list allows you to check the titles recorded on the disc easily. You can choose a title to play back from this list and easily edit the titles as you prefer. Press [DVD], then press [TITLE]. 1 234 1 SP (2Hr) Play Edit - Magnavox ZV457MG9 | User manual, English (US) - Page 71
and then press [OK]. Title will be deleted. Data will be written onto the disc momentarily. e.g.) DVD+R/DVD-RW/-R Please finalize the disc when the writing is completed before playing back on other DVD players. Writing to Disc 90% This operation may take a while to be completed. After editing is - Magnavox ZV457MG9 | User manual, English (US) - Page 72
operation is completed, press [RETURN] to exit. Data will be written onto the disc momentarily. This operation may take a while to be completed. 1 Follow steps 1 : 05 : 00 3 To enter a title name, follow the steps of "Guide to Edit Title Name" on this page. Edit - Edit Title Name 1 ABC abc - Magnavox ZV457MG9 | User manual, English (US) - Page 73
to add a new chapter mark. 4 Use [K / L] to select "Add", then press [OK]. Edit - Chapter Mark 1 Add Delete Delete All Chapter 2/ 3 Recording Playback Editing Function Setup VCR Functions Note • When the number of chapter marks in a title is 99 and the number of chapter marks in a disc is - Magnavox ZV457MG9 | User manual, English (US) - Page 74
number is displayed on the preview screen. e.g.) DVD Edit - Chapter Mark Chapter 2/ 3 1 disc momentarily. This operation may take a while to be completed. Note • Remaining time of the disc may decrease when adding chapter marks or increase when clearing chapter marks depending on the recording - Magnavox ZV457MG9 | User manual, English (US) - Page 75
Introduction Connections Basic Setup Recording EDITING DISCS Clearing Chapter Marks (cont'd) To delete all chapter marks: 1 VCR Functions Others Español Note • Remaining time of the disc may decrease when adding chapter marks or increase when clearing chapter marks depending on the recording - Magnavox ZV457MG9 | User manual, English (US) - Page 76
CH12 SP 1 : 05 : 00 The chapter is now hidden. 5 After this operation is completed, press [RETURN] twice to exit. Data will be written onto the disc momentarily. This operation may take a while to be completed. If you want hidden chapters to be "Visible", select the chapter to be shown. Then use - Magnavox ZV457MG9 | User manual, English (US) - Page 77
Introduction Connections Basic Setup EDITING DISCS Setting Pictures for Thumbnails You can set your desired scene Data will be written onto the disc momentarily. This operation may take a while to be completed. Recording Playback Editing Function Setup VCR Functions Others Español Note • If - Magnavox ZV457MG9 | User manual, English (US) - Page 78
into 2 new titles. Both title names are identical, and thumbnails are reset to the first scene at this point. Data will be written onto the disc momentarily. This operation may take a while to be completed. Note • You cannot divide a title of the disc when the number of recording titles reaches - Magnavox ZV457MG9 | User manual, English (US) - Page 79
+RW 3 0:30:48 OFF Needed ABC abc 123 @! ? Recording Playback Editing Function Setup VCR Functions Note • You cannot select "Disc Edit" when finalized DVD+R or DVD-R is inserted. 4 To enter a disc name, follow the steps of "Guide to Edit Title Name" on page 72. When you finish entering a title - Magnavox ZV457MG9 | User manual, English (US) - Page 80
[STOP C] if you are playing back a disc. 1 Follow steps 1 to 2 in "Putting Name on Disc" on page 79 to display "Disc Edit" menu. 2 Use [K / L] to select "Erase Disc", then press [OK]. e.g.) DVD+RW Disc Edit Edit Disc Name Erase Disc Make Edits Compatible Disc Protect OFF ON 3 Use [K / L] to select - Magnavox ZV457MG9 | User manual, English (US) - Page 81
Connections Basic Setup Making Edits Compatible EDITING DISCS If you have added or deleted chapters, or made chapters hidden, you must perform "Make Edits Compatible" to see those effects on other unit. Press [STOP C] if you are playing back a disc. 1 Follow steps 1 to 2 in "Putting Name on Disc - Magnavox ZV457MG9 | User manual, English (US) - Page 82
Audio Dynamic Range Control PCM Dolby Digital Disc Menu Language Audio Language Subtitle Language Angle Icon Still Mode Display OSD Language Pages 88-90 Screen Saver General Setting FL Dimmer DTV CC Caption Service page 36 Recording page 40 CC Style User Setting pages 37-38 Font - Magnavox ZV457MG9 | User manual, English (US) - Page 83
Introduction Connections Basic Setup Recording Playback LIST OF SETTINGS Setup Items (highlight is the default) Display CC Style Font interlace scan mode (set to "OFF"). Set a picture size according to aspect ratio of your TV. Editing Function Setup VCR Functions Others Español EN 83 - Magnavox ZV457MG9 | User manual, English (US) - Page 84
ON(MAR-NOV) ON(APR-OCT) OFF Channel Auto Channel Preset Pages 28-30 Antenna Cable (Analog) Cable (Analog / Digital) Manual Channel Preset TV Audio Select Page 35 Stereo SAP HDMI Page 92 Format RGB YCbCr HDMI Audio ON OFF RGB Range Normal Enhanced Reset All Page 93 Yes No Contents - Magnavox ZV457MG9 | User manual, English (US) - Page 85
Introduction Connections Basic Setup Recording Playback SETUPS Press [STOP C] if you are playing back a disc. 1 Press [SETUP] and use [K / L] to select " Video Recording Clock Channel HDMI Reset All 3 Use [K / L] to select a desired item, then press [OK]. 1 Parental Lock 2 Disc Audio 3 Disc Menu - Magnavox ZV457MG9 | User manual, English (US) - Page 86
yet. Use [K / L] to select "Yes". Use [the Number buttons] to enter a new password except for 4737, then press [OK]. Note • Dynamic range control function is available only on the discs which are recorded in the Dolby Digital format. Change Password? Yes No Yes Your setting will be activated - Magnavox ZV457MG9 | User manual, English (US) - Page 87
Introduction Connections Basic Setup Recording SETUPS Playback (cont'd) C Dolby Digital (Default : Stream) Use [K / L] to select a setting, then press [OK]. If "Other" is selected for 3 to 5 , press 4-digit code using [the Number buttons]. Dolby Digital PCM Stream Your setting will be - Magnavox ZV457MG9 | User manual, English (US) - Page 88
Display 88 EN SETUPS Press [STOP C] if you are playing back a disc. 1 Press [SETUP] and use [K / L] to select "General Setting", then press [OK (Default : 10 minutes) Set the time to activate the screen saver function on the TV screen. Use [K / L] to select a setting, then press [OK]. Screen Saver - Magnavox ZV457MG9 | User manual, English (US) - Page 89
Introduction Connections Basic Setup Recording Playback SETUPS Display (cont'd) 3 FL Dimmer ( chip system in this unit, you can set the viewing limitation for the analog/digital TV programs received from the tuner or recorded on DVDs to prevent your children VCR Functions Others Español EN 89 - Magnavox ZV457MG9 | User manual, English (US) - Page 90
TV-Y7 TV-PG TV-14 TV-MA TV-PG, TV-14 Note • Changing the main rating to block or view automatically changes all its sub ratings to the same (block or view). E Downloadable Rating Set the rating system via digital downloadable rating information, and the new information has not been downloaded since - Magnavox ZV457MG9 | User manual, English (US) - Page 91
cable (commercially available) to connect this unit to the TV. (Refer to pages 16-17.) If not, use the RCA video cable and set the progressive scan to "OFF" or press and hold [SETUP] for more than 3 seconds during DVD playback. • When selecting "No" or not pressing any buttons on the unit or remote - Magnavox ZV457MG9 | User manual, English (US) - Page 92
HDMI Audio (Default : ON) If you do not want to output the audio through HDMI (when you digitally output the audio through the COAXIAL DIGITAL only for HDMI RGB output. RGB Range Normal Enhanced Your setting will be activated. • You cannot select HDMI when an HDMI cable is not connected and the - Magnavox ZV457MG9 | User manual, English (US) - Page 93
Introduction Connections Basic Setup Reset All Reset the setting to default. SETUPS 1 Press [ press [OK]. Are you sure? Yes No Your setting in recording will be initialized. Recording Playback Editing Function Setup VCR Functions Others Note • The settings listed below will remain unchanged - Magnavox ZV457MG9 | User manual, English (US) - Page 94
listed below, the playback image cannot be viewed. Use the standard video connection, in such case; - during DVD recording. • HDMI video resolution cannot be changed when the unit is in VCR mode. Playback Recording Press [VCR] first. 1) Insert a prerecorded tape (refer to page 26 on how to insert - Magnavox ZV457MG9 | User manual, English (US) - Page 95
available only when the unit is connected by the VIDEO OUT jack. Note • The remaining recording time will be displayed on the front panel display during one-touch timer recording. Press [DISPLAY] to see it on the TV screen. • You cannot pause the one-touch timer recording. • If VCR one-touch timer - Magnavox ZV457MG9 | User manual, English (US) - Page 96
, stop and eject itself. When you playback a cassette tape recorded in Hi-Fi stereo: Press [AUDIO] on the remote control to select Hi-Fi or MONO for playback sound mode. • If you have connected a stereo TV to this unit, select "HIFI". • If you have connected a monaural TV to this unit, select "MONO - Magnavox ZV457MG9 | User manual, English (US) - Page 97
and then plug it in again. • If you are using HDMI connection to watch the TV programs through this unit, analog TV closed caption cannot be output. Try using another output connection to the TV. DVD • VCR Playback picture is distorted. • Keep devices which may cause electrical disturbances, such - Magnavox ZV457MG9 | User manual, English (US) - Page 98
. If you are using HDMI-DVI conversion cable, you must connect the RCA audio cable, too. • Check whether the output format of this unit (HDMI FORMAT) matches the supported input format of other connected device. • Setup menus cannot be called up during DVD recording or DVD playback. There is no - Magnavox ZV457MG9 | User manual, English (US) - Page 99
Introduction Connections Basic Setup DVD TROUBLESHOOTING Symptom The disc tray does not open when you press [OPEN/CLOSE A]. "Repairing" appears on the TV screen. Repairing In case you intend to cancel the repairing process. Do you want to cancel a repairing process? When selecting "Yes", the disc - Magnavox ZV457MG9 | User manual, English (US) - Page 100
rewrite the menu, after that you will record to disc (page 40). * If you are still having trouble with the unit after checking "TROUBLESHOOTING", write down the error code and the error description for calling our help line mentioned on the front page to locate an Authorized Service Center. 100 EN - Magnavox ZV457MG9 | User manual, English (US) - Page 101
Introduction Connections Basic Setup Recording Playback Language Abkhazian Afar Afrikaans Albanian Amharic Arabic Armenian Assamese Aymara Azerbaijani Bashkir Basque Bengali; 6669 6757 6764 6772 6855 6861 4971 6961 7054 5655 7161 7267 Editing Function Setup VCR Functions Others Español EN 101 - Magnavox ZV457MG9 | User manual, English (US) - Page 102
to play back in DVD players. With this unit, it is possible to finalize DVD+R, DVD-RW, and DVD-R. HDMI™ (high definition multimedia interface) A digital interface between audio and video source. It can transmit component video, audio, and control signal with one cable connection. JPEG (joint - Magnavox ZV457MG9 | User manual, English (US) - Page 103
Connections Basic Setup Recording Playback SPECIFICATIONS Rear Front General VCR video heads Power requirements Power consumption Dimensions (width x height x depth) Weight Operating temperature Operating humidity TV system Recording Recording format Recording discs Video recording - Magnavox ZV457MG9 | User manual, English (US) - Page 104
MP3 JPEG Soportes CD-RW/-R es una marca registrada de DVD Format/Logo Licensing Corporation. DVD+RW DVD+R DVD-RW DVD-R Disco de 8 cm / 12 cm, un solo Maxell SONY TDK DVD+R 8x, DVD+RW 4x, DVD-R 8x, DVD-RW 2x DVD-RW 4x DVD+R 4x/8x/16x, DVD-R 8x/16x DVD+R 4x/8x/16x, DVD+RW 4x DVD+R 4x/8x/ - Magnavox ZV457MG9 | User manual, English (US) - Page 105
Connections Basic Setup Conexión Básica IN ---AUDIO---OUT L R IN ---VIDEO---OUT cable RCA de audio cable RCA de video ESPAÑOL AUDIO IN L R VIDEO IN Recording Playback Editing Function Setup VCR Functions parte trasera de este aparato HDMI OUT DIGITAL AUDIO OUT AUDIO OUT DVD/VCR - Magnavox ZV457MG9 | User manual, English (US) - Page 106
que la antena esté conectada a la toma "ANTENNA IN". Antena Cable (Analógico) Cable (Analógico/Digital) Ajuste Auto escaneará los canales terrrestres. Esto tarda unos momentos en finalizar. Grabación Básica 1 Presione [DVD]. Presione [OPEN/CLOSE A] para abrir la bandeja de discos e insertar - Magnavox ZV457MG9 | User manual, English (US) - Page 107
Introduction Connections Basic Setup Recording Playback ESPAÑOL Grabación con Temporizador recording" en la página 45 del manual del usuario. ej.) modo digital Fcha ENE/02 CH DTV69. 1 Empieza 12 : 00AM GRAB a DVD Termina 1 : 00AM Modo SP SP 1h00m Seleccione un medio de grabación ("DVD" o "VCR - Magnavox ZV457MG9 | User manual, English (US) - Page 108
ANY ACCESSORIES (EXCEPT REMOTE CONTROL), ANY COSMETIC PARTS, COMPLETE ASSEMBLY PARTS, DEMO OR FLOOR MODELS. FUNAI CORP. AND ITS SERVICE CENTER or for general service inquiries, please contact us at: FUNAI SERVICE CORPORATION Customer Service Tel: 1-800-605-8610 www.magnavox.com/support
-
 1
1 -
 2
2 -
 3
3 -
 4
4 -
 5
5 -
 6
6 -
 7
7 -
8
-
9
-
10
-
11
-
12
-
13
-
14
-
15
-
16
-
17
-
18
-
19
-
20
-
21
-
22
-
23
-
24
-
25
-
26
-
27
-
28
-
29
-
30
-
31
-
32
-
33
-
34
-
35
-
36
-
37
-
38
-
39
-
40
-
41
-
42
-
43
-
44
-
45
-
46
-
47
-
48
-
49
-
50
-
51
-
52
-
53
-
54
-
55
-
56
-
57
-
58
-
59
-
60
-
61
-
62
-
63
-
64
-
65
-
66
-
67
-
68
-
69
-
70
-
71
-
72
-
73
-
74
-
75
-
76
-
77
-
78
-
79
-
80
-
81
-
82
-
83
-
84
-
85
-
86
-
87
-
88
-
89
-
90
-
91
-
92
-
93
-
94
-
95
-
96
-
97
-
98
-
99
-
100
-
101
-
102
-
103
-
104
-
105
-
106
-
107
-
108
 |
 |
T
HANK
YOU
FOR
CHOOSING
M
AGNAVOX
.
N
EED
HELP
FAST
?
R
EAD
YOUR
Q
UICK
G
UIDE
AND
/
OR
O
WNER
'
S
M
ANUAL
FIRST
FOR
QUICK
TIPS
THAT
MAKE
USING
YOUR
M
AGNAVOX
PRODUCT
MORE
ENJOYABLE
.
I
F
YOU
HAVE
READ
YOUR
INSTRUCTIONS
AND
STILL
NEED
ASSISTANCE
,
YOU
MAY
ACCESS
OUR
ONLINE
HELP
AT
WWW
.
MAGNAVOX
.
COM
/
SUPPORT
OR
CALL
1-800-605-8610
WHILE
WITH
YOUR
PRODUCT
.
INSTRUCCIONES EN ESPAÑOL INCLUIDAS.
© 2010 Funai Electric Co., Ltd.
Owner's Manual
ZV457MG9 A
D
IGITAL
V
IDEO
D
ISC
R
ECORDER
& V
IDEO
C
ASSETTE
R
ECORDER
WITH
D
IGITAL
T
UNER
Recording
Playback
Editing
Introduction
Connections
Basic Setup
Function Setup
VCR Functions
Others
Español