Maytag MAH5500BWW Service Manual - Page 63
Pump Accessory Kit
 |
View all Maytag MAH5500BWW manuals
Add to My Manuals
Save this manual to your list of manuals |
Page 63 highlights
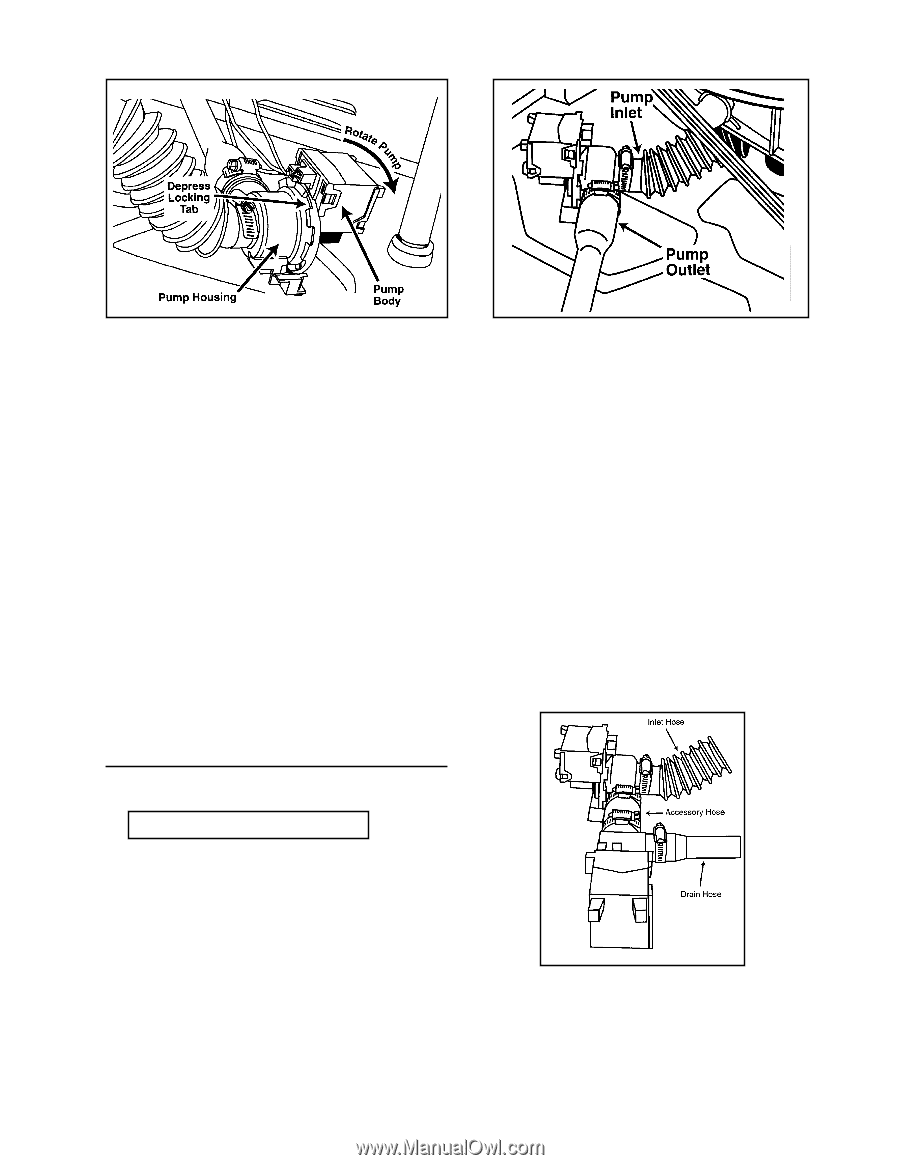
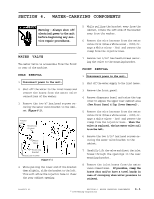
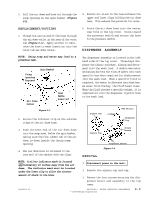
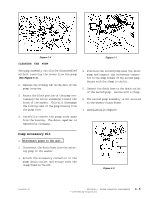
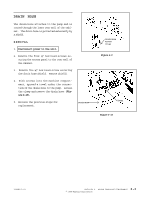
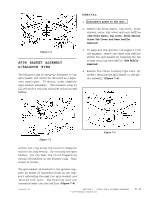
Figure 6-6 CLEANING THE PUMP Figure 6-7 The pump assembly can also be disassembled without removing the hoses from the pump (See Figure 6-6). 1. Depress the locking tab on the face of the pump housing. 2. Rotate the block portion of the pump containing the motor windings toward the front of the washer. This will disengage the locking tabs of the pump housing from the pump face. 4. Position the second pump near the first pump and connect the accessory connector to the sump intake of the second pump. Secure with the clamp in the kit. 5. Connect the drain hose to the drain outlet of the second pump. Secure with a clamp. 6. The second pump assembly is not secured to the washer's base frame. 7. Installation is complete. 3. Carefully remove the pump body away from the housing. The drain impeller is exposed for cleaning. Pump Accessory Kit 1. Disconnect power to the unit. 2. Disconnect the drain hose from the existing pump in the washer. 3. Attach the accessory connector to the pump drain outlet and secure with the clamp found in the kit. Figure 6-8 16008373-01 SECTION 6. WATER CARRYING COMPONENTS © 1998 Maytag Corporation 6-5
-
 1
1 -
2
-
3
-
4
-
5
-
6
-
7
-
8
-
9
-
10
-
11
-
12
-
13
-
14
-
15
-
16
-
17
-
18
-
19
-
20
-
21
-
22
-
23
-
24
-
25
-
26
-
27
-
28
-
29
-
30
-
31
-
32
-
33
-
34
-
35
-
36
-
37
-
38
-
39
-
40
-
41
-
42
-
43
-
44
-
45
-
46
-
47
-
48
-
49
-
50
-
51
-
52
-
53
-
54
-
55
-
56
-
57
-
 58
58 -
 59
59 -
 60
60 -
 61
61 -
 62
62 -
 63
63 -
 64
64 -
 65
65 -
 66
66 -
 67
67 -
 68
68 -
69
-
70
-
71
-
72
-
73
-
74
-
75
-
76
-
77
-
78
-
79
-
80
-
81
-
82
-
83
-
84
-
85
-
86
-
87
-
88
-
89
-
90
-
91
-
92
-
93
-
94
-
95
-
96
-
97
-
98
-
99
-
100
-
101
-
102
-
103
-
104
-
105
-
106
-
107
-
108
-
109
-
110
-
111
-
112
-
113
-
114
-
115
-
116
-
117
-
118
-
119
-
120
-
121
-
122
-
123
-
124
-
125
-
126
-
127
-
128
-
129
-
130
-
131
-
132
-
133
-
134
-
135
-
136
-
137
-
138
-
139
-
140
-
141
-
142
-
143
-
144
-
145
-
146
-
147
-
148
-
149
-
150
-
151
-
152
-
153
-
154
-
155
-
156
-
157
 |
 |