Maytag MEC9536BB Installation Guide
Maytag MEC9536BB Manual
 |
View all Maytag MEC9536BB manuals
Add to My Manuals
Save this manual to your list of manuals |
Maytag MEC9536BB manual content summary:
- Maytag MEC9536BB | Installation Guide - Page 1
REQUIREMENTS 2 Tools and Parts 2 Location Requirements 2 Electrical Requirements 3 INSTALLATION INSTRUCTIONS 4 Prepare Cooktop for very important. We have provided many important safety messages in this manual and on your appliance. Always read and obey all safety messages. This is the - Maytag MEC9536BB | Installation Guide - Page 2
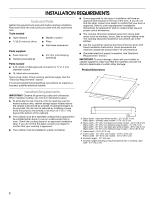
Gather the required tools and parts before starting installation. Read and follow the instructions provided with any tools listed here. Tools needed ■ Tape measure ■ Marker or pencil ■ ¼" (6.35 mm) nut driver ■ Pliers ■ Flat-blade screwdriver Parts supplied ■ Foam strip roll ■ Clamping brackets - Maytag MEC9536BB | Installation Guide - Page 3
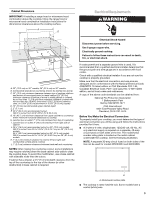
Hazard Disconnect power before servicing. Use 8 gauge copper wire. Electrically ground cooktop. Failure to follow these instructions can result in death, ANSI/NFPA 70-latest edition or CSA Standards C22.1-94, Canadian Electrical Code, Part 1 and C22.2 No. O-M91-latest edition, and all local codes and - Maytag MEC9536BB | Installation Guide - Page 4
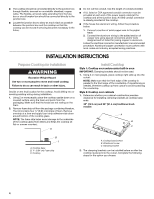
between the junction box and the cooktop so that the cooktop can be moved if servicing becomes necessary in the future. ■ Do not cut the conduit. Use the length codes and industry accepted wiring practices. INSTALLATION INSTRUCTIONS Prepare Cooktop for Installation WARNING Excessive Weight - Maytag MEC9536BB | Installation Guide - Page 5
Installing Brackets Before Placing Cooktop in Cutout 1. Using 2 or more people, place the cooktop upside down on a covered surface using the foam end posts from the packaging. Make sure that the knobs are not resting on the foam. 2. Remove the attachment screws for the bracket locations from the - Maytag MEC9536BB | Installation Guide - Page 6
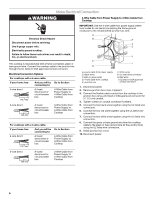
Wire Cable from Power Supply to 4-Wire Cable from Cooktop Electrical Shock Hazard Disconnect power before servicing. Use 8 gauge copper wire. Electrically ground cooktop. Failure to follow these instructions can result in death, fire, or electrical shock. This cooktop is manufactured with a frame - Maytag MEC9536BB | Installation Guide - Page 7
3-Wire Cable from Power Supply to 4-Wire Cable from Cooktop IMPORTANT: Use the 3-wire cable from power supply where local codes permit connecting the frame-ground conductor to the neutral (white) junction box wire: A E B F G H C I D 4-Wire Cable from Power Supply to 3-Wire Cable from Cooktop - Maytag MEC9536BB | Installation Guide - Page 8
Installation 1. Check that all parts are now installed. If there is an extra part, go back through the steps Troubleshooting" section in the Use and Care Guide for further information. If You Need Assistance or Service: Please reference the "Assistance or Service" section of the Use and Care Guide - Maytag MEC9536BB | Installation Guide - Page 9
four. Si vous ne trouvez pas cette étiquette, contactez votre marchand pour confirmer que le four est bien approuvé. Consulter les Instructions d'installation du fabricant du four pour déterminer si l'utilisation en encastrement est approuvée et pour obtenir les dimensions correctes de l'ouverture - Maytag MEC9536BB | Installation Guide - Page 10
du placard IMPORTANT : En cas d'installation d'une hotte ou d'un ensemble hotte/micro-ondes au-dessus de la cuisinière, suivre les instructions d'installation fournies avec la hotte concernant les dimensions de dégagement à respecter au-dessus de la surface de la table de cuisson. A D C B LE - Maytag MEC9536BB | Installation Guide - Page 11
de la ligne peut être utilisé pour les modèles W5CE3024 et G9CE3065. Relier la table de cuisson à la terre. Le non-respect de ces instructions peut causer un décès, un incendie ou un choc électrique. Si l'on utilise un conducteur distinct de liaison à la terre et lorsque les codes le permettent - Maytag MEC9536BB | Installation Guide - Page 12
AVERTISSEMENT Risque du poids excessif Utiliser deux ou plus de personnes pour déplacer et installer la table de cuisson. Le non-respect de cette instruction peut causer une blessure au dos ou d'autre blessure. Déterminer l'emplacement final de la table de cuisson. Éviter de percer dans le câblage - Maytag MEC9536BB | Installation Guide - Page 13
Installation des brides avant de positionner la table de cuisson dans l'ouverture 1. À l'aide de deux personnes ou plus, placer la table de cuisson à l'envers sur une surface couverte en utilisant les cornières en polystyrène de l'emballage. S'assurer que les boutons ne reposent pas sur le polystyrè - Maytag MEC9536BB | Installation Guide - Page 14
source de courant électrique avant l'entretien. Utiliser du fil en cuivre de calibre 8. Relier la table de cuisson à la terre. Le non-respect de ces instructions peut causer un décès, un incendie ou un choc électrique. Un conducteur vert ou nu de liaison à la terre est connecté au châssis de la - Maytag MEC9536BB | Installation Guide - Page 15
Câble à 3 conducteurs depuis le point de distribution jusqu'au câble à 4 conducteurs depuis la table de cuisson IMPORTANT : Utiliser le câble à 3 conducteurs depuis le point de distribution lorsque les codes locaux en vigueur permettent le raccordement entre le conducteur de liaison à la terre du ch - Maytag MEC9536BB | Installation Guide - Page 16
d'utilisation et d'entretien pour plus de renseignements. Si vous avez besoin d'assistance ou de service : Consulter la section "Assistance ou service" du Guide d'utilisation et d'entretien ou contacter le marchand auprès duquel la table de cuisson a été achetée. W10574205A ®/™ ©2013. Used under
-
 1
1 -
 2
2 -
 3
3 -
 4
4 -
 5
5 -
 6
6 -
 7
7 -
8
-
9
-
10
-
11
-
12
-
13
-
14
-
15
-
16
 |
 |
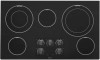
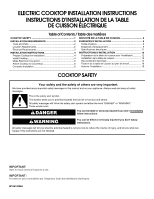
ELECTRIC COOKTOP INSTALLATION INSTRUCTIONS
INSTRUCTIONS D'INSTALLATION DE LA TABLE
DE CUISSON ÉLECTRIQUE
COOKTOP SAFETY
Table of Contents / Table des matières
COOKTOP SAFETY
......................................................................
1
INSTALLATION REQUIREMENTS
...............................................
2
Tools and Parts
...........................................................................
2
Location Requirements
...............................................................
2
Electrical Requirements
..............................................................
3
INSTALLATION INSTRUCTIONS
.................................................
4
Prepare Cooktop for Installation
.................................................
4
Install Cooktop
............................................................................
4
Make Electrical Connection
........................................................
6
Attach Cooktop to Countertop
...................................................
8
Complete Installation
..................................................................
8
SÉCURITÉ DE LA TABLE DE CUISSON
....................................
9
EXIGENCES D'INSTALLATION
...................................................
9
Outils et pièces
...........................................................................
9
Exigences d’emplacement
.........................................................
9
Spécifications électriques
........................................................
11
INSTRUCTIONS D’INSTALLATION
..........................................
12
Préparation de la table de cuisson pour l’installation
..............
12
Installation de la table de cuisson
............................................
12
Raccordement électrique
.........................................................
14
Fixation de la table de cuisson au plan de travail
....................
16
Achever l’installation
................................................................
16
IMPORTANT:
Save for local electrical inspector's use.
IMPORTANT :
À conserver pour consultation par l'inspecteur local des installations électriques.
W10574205A
You can be killed or seriously injured if you don't immediately
You
can be killed or seriously injured if you don't follow
All safety messages will tell you what the potential hazard is, tell you how to reduce the chance of injury, and tell you what can
happen if the instructions are not followed.
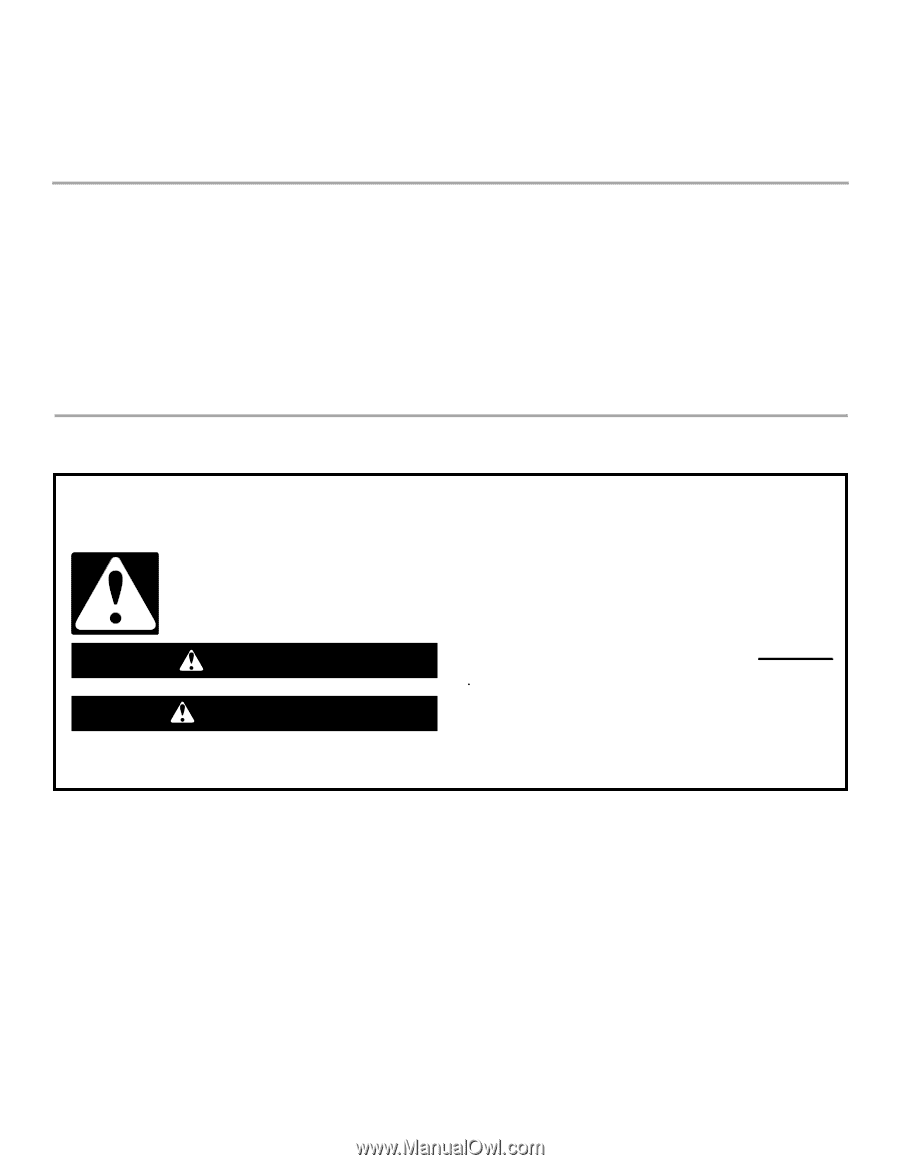
Your safety and the safety of others are very important.
We have provided many important safety messages in this manual and on your appliance. Always read and obey all safety
messages.
This is the safety alert symbol.
This symbol alerts you to potential hazards that can kill or hurt you and others.
All safety messages will follow the safety alert symbol and either the word “DANGER” or “WARNING.”
These words mean:
follow instructions.
instructions.
DANGER
WARNING