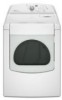
Maytag MED6400TQ Quick Start Guide
Maytag MED6400TQ - Bravos 7 cu. Ft. Electric Dryer Manual
 |
UPC - 883049043906
View all Maytag MED6400TQ manuals
Add to My Manuals
Save this manual to your list of manuals |
Maytag MED6400TQ manual content summary:
- Maytag MED6400TQ | Quick Start Guide - Page 1
BRAVOS TM dryer. You have made an exciting and rewarding investment, and we want to ensure your complete satisfaction. If you have any questions regarding the installation or use of your dryer, please refer to the Use and Care Guide. In the U.S., call a Maytag follow these instructions can result - Maytag MED6400TQ | Quick Start Guide - Page 2
40 Medium 24 Medium 20 J Drum Light On some models, press DRUM LIGHT anytime to turn the drum light ON or OFF. When the dryer door is opened, the drum light turns on. The drum light will turn off when the dryer door is closed or after the dryer door has been open for S minutes. Wrinkle Prevent - Maytag MED6400TQ | Quick Start Guide - Page 3
antes de utilizar su nueva secadora BRAVOS TM. Usted ha hecho una secadora, vea el Manual de use y cuidado. En EE.UU., Ilame a un experto en el cuidado de telas de Maytag ® al 1-800- de pelusa: El filtro de pelusa est_i ubicado en la parte superior de la secadora. Jale el filtro de pelusa hacia - Maytag MED6400TQ | Quick Start Guide - Page 4
Vea "Cambio de dclos, opciones y modificadores" en el Manual de uso y cuidado. W10114206A © 2006 Todoslosderechosreservados. Vea el Manual de uso y cuidado para obtener informaci6n detallada. MAYTAG y el sfmbolo "M" son marcas registradas de Maytag Limited en Canada. Todas las otras marcas son - Maytag MED6400TQ | Quick Start Guide - Page 5
s_cheuse, consultez le Guide d'utilisation et d'entretien. Aux F_tats-Unis, communiquez avec un expert en soin des tissus chez Maytag ® en composant produit inflammable (m_me apres un lavage). Le non-respect de ces instructions peut causer un d_ces, une explosion ou un incendie. Risque d'incendie - Maytag MED6400TQ | Quick Start Guide - Page 6
Avant de faire un appe[ de service ... v_rifier pas s&che ce qui suit Guide d'utilisation et d'entretien. Consulter le Guide d'utilisation renseignements complets. et d'entretien pour des W10114206A _ 2006 Tous droits r_serv_s. MAYTAG et le symbole "M" sont des marques d_pos_es de Maytag
-
 1
1 -
 2
2 -
 3
3 -
 4
4 -
 5
5 -
 6
6
 |
 |

Dryer
Quick
Start
Guide
Please
take
a moment
to
review
these
valuable
tips
before
using
your
new
BRAVOS
TM
dryer.
You
have
made
an
exciting
and
rewarding
investment,
and
we
want
to
ensure
your
complete
satisfaction.
If you
have
any
questions
regarding
the
installation
or use
of your
dryer,
please
refer
to
the
Use
and
Care
Guide.
In
the
U.S.,
call
a Maytag
® fabric
care
expert
at
1-800-688-9900;
in
Canada,
call
1-800-807-6777.
Explosion
Hazard
Keep flammable
materials
and vapors,
such
as
gasoline,
away
from
dryer.
Do net dry
anything
that
has ever
had anything
flammable
on it
(even after
washing).
Failure to
follow
these
instructions
can result
in
death,
explosion,
or
fire.
Fire Hazard
No washer
can completely
remove oil.
Do not dry anything
that has ever had any type
of
oil on
it (including
cooking
oils).
Items containing
foam,
rubber,
or plastic
must
be
dried
on a clothesline
or by using
an Air Cycle.
Failure
to follow
these
instructions
can result
in
death
or fire.
Getting
Started
in 4 Easy
Steps:
Clean
the
lint
screen:
--
The
lint
screen
is located
on
the
top
of the
dryer.
Pull the
lint
screen
toward
you.
Roll
lint
off the
screen
with
your
fingers.
Push the
lint
screen
firmly
back
into
place.
2_
3.
4o
START
®
Load
the
dryer:
Place laundry
in dryer and shut door.
Select
the
Dry
Cycle:
Press POWER,
then
turn
the
control
knob
to the
desired
Sensor
Dry
or Timed
cycle.
Select
the
drying
cycle
that
matches
the
type
of load
you
are
drying.
With
Sensor
Dry
cycles,
press
DRYNESS
to select
a dryness
level
of More,
Normal,
Less or
Damp.
With
Timed
cycles,
press
TEMP
to select
the
desired
temperature
and
press
the
TIMED
CYCLE ADJUST
up or down
arrows
to
select
the
desired
dlTing
time.
Select
desired
options.
For a complete
description
of
options,
please
see the
other
side
of this
Quick
Start
Guide.
Begin
the
Dry
Cycle:
Press START. The
estimated
(Sensor
Dry
Cycle)
or actual
(timed)
cycle
time
(in
minutes)
will
show
in the
display.
NOTE:
If you
do not
press
START within
5 minutes
of pressing
POWER,
the
dicer
will
automatically
shut
off.
W10114206A
Continued
on
Back