Maytag MED6600TQ Use and Care Guide
Maytag MED6600TQ - 27 Inch Electric Washer Manual
 |
UPC - 883049121048
View all Maytag MED6600TQ manuals
Add to My Manuals
Save this manual to your list of manuals |
Maytag MED6600TQ manual content summary:
- Maytag MED6600TQ | Use and Care Guide - Page 1
SYSTEM ELECTRIC DRYER USE & CARE GUIDE P P % SECHEUSE ELECTRIQUE BRAVOS TMAVEC SYSTEME DE SOIN DES TISSUS A LA VAPEUR GUIDE D'UTILISATION ET D'ENTRETIEN FOR QUESTIONS ABOUT FEAFURES, OPERATION/PERFORMANCE, CAI L: 1.800.688.9900 IN CANADA, CALl: 1.800.807.6777 PARTS, ACCESSORIES OR SERVICE - Maytag MED6600TQ | Use and Care Guide - Page 2
CONTENTS DRYER SAFETY... 3 INSTALLATION INSTRUCTIONS 4 Tools and Parts... 4 l.ocation Requirements ...4 Electrical Requirements - U.S.A. Only 5 Electrical Requirements - Canada Only 7 Electrical Connection - U.S.A. Only 8 Venting Requirements ... 14 Plan Vent System... 15 Install Vent - Maytag MED6600TQ | Use and Care Guide - Page 3
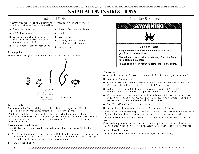
safety messages in this manual and on your appliance. install or store the dryer where it will be exposed to the weather. [] Do not repair or replace any part of the dryer or attempt any servicing unless specifically recommended in this Use and Care Guide or in published user-repair instructions - Maytag MED6600TQ | Use and Care Guide - Page 4
"Electrical Requirements" and "Venting Requirements" before purchasing parts. Mobile home installations require metal exhaust system hardware available for purchase from the dealer from whom you purchased your dryer. For information on ordering, please refer to the "Assistance or Service" section - Maytag MED6600TQ | Use and Care Guide - Page 5
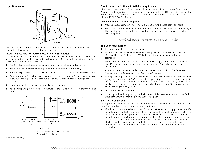
path is adequate. Electrical Connection [b properly install your dryer, you must determine the type of electrical connection you will lye using and follow the instructions provided for it here. • [his dryer is manufactured ready to install with a 3-wire electrical supply connection. The neutral - Maytag MED6600TQ | Use and Care Guide - Page 6
electrician or service representative or personnel if you are in doubt as to whether the dryer is properly grounded. Do not modify the plug on the power supply cord: if it will not fit the outlet, have a proper outlet installed by a qualified electrician. SAVE THESE INSTRUCTIONS 3-wire" re - Maytag MED6600TQ | Use and Care Guide - Page 7
information, please reference the service numbers located in the "Assistance or Service" section. GROUNDING iNSTRUCTiONS • For a grounded, cord-connected dryer: This dryer must be grounded. In the event of malfunction or breakdown, grounding will reduce the risk of electric shock by providing a path - Maytag MED6600TQ | Use and Care Guide - Page 8
Power Supply Cord Fire Hazard Use a new UL listed 30 amp power supply cord. Use a UL listed strain relief. Disconnect power before making electrical connections. Connect neutral wire (white or center wire) to center terminal (silver). Ground wire (green or bare wire) must be connected to green - Maytag MED6600TQ | Use and Care Guide - Page 9
relief should have a tight fit with the dryer cabinet and be in a horizontal position. Tighten strain relief screw against the direct wire cable. Now complete installation following 4-wire/recommended) 3-wire (if 4-wire is not available instructions for your type of electrical connection: .... 9 - Maytag MED6600TQ | Use and Care Guide - Page 10
Electrical Connection Options If your home has: 4-wire receptacle (NEMA type 14-30R) __._._ 4-wire direct (12.7 cm) 3-wire receptacle (NEMA type 10-30R) © 3-wire direct And you will be connecting to: A UL listed, 120/240-volt minimum, supply cord* 30-amp, dryer power A fused disconnect or circuit - Maytag MED6600TQ | Use and Care Guide - Page 11
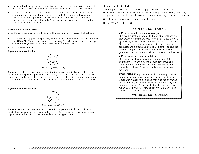
. !! !! 5. Tighten strain relief screws. 6. Insert tab of terminal block cover into slot of dryer rear panel. Secure cover with hold- down screw, 7. You have completed your electrical connection. Now go to "Venting Requirements." 4-wire connection: Direct Wire IMPORTANT: A 4-wire connection is - Maytag MED6600TQ | Use and Care Guide - Page 12
. Tighten screw. 5. Tighten strain relief screw. 6. Insert tab of terminal block cover into slot of dryer rear panel. Secure cover with hold- down screw. 7. You have completed your electrical connection. Now go to "Venting Requirements." 3-wire connection: Power supply cord Use where local codes - Maytag MED6600TQ | Use and Care Guide - Page 13
screws. !! !! block 4. Tighten strain relief screw. 5. Insert tab of terminal block cover into slot of dryer rear paneh Secure cover with hold- down screw. 6. You have completed your electrical connection. Now go to "Venting Requirements." Optional 3-wire connection Use for direct wire or power - Maytag MED6600TQ | Use and Care Guide - Page 14
. • Flexible metal vent must be fully extended and supported when the dryer is in its final location. • Remove excess flexible metal vent to avoid sagging and kinking that may result in reduced airflow and poor performance. • Do not install flexible metal vent in enclosed walls, ceilings or floors - Maytag MED6600TQ | Use and Care Guide - Page 15
shown here. B D - Choose your exhaust installation type Recommended exhaust installations [ypical installations vent the dryer from the rear of the dryer. B i (10.2 cm) A. Louw'r_ Moisture damage to woodwork, furniture, paint, wallpaper, carpets, etc. [] Housecleaning problems and health - Maytag MED6600TQ | Use and Care Guide - Page 16
for purchase. Please see the "Assistance or Service" section to order. • Over-the-Top Installation: Part Number 4"¢96028 • Periscope Installation (For use with dryer vent to wall vent mismatch): Part Number 43960"¢7 - 0" (0 cm) to 18" (45.72 cm) mismatch Part Number 4396011 - 1 8" (45.72 cm) to 29 - Maytag MED6600TQ | Use and Care Guide - Page 17
. Check that the vent is secured to exhaust hood with a 4" (10.2 cm) clamp. 2. Move dryer into its final location. Do not crush or kink vent. 3. (On gas models) Check that there are no kinks in the flexible gas line. 4. Once the exhaust vent connection is made, remove the corner posts and cardboard - Maytag MED6600TQ | Use and Care Guide - Page 18
. 3. [oosen the top screw from each of the 2 hinges in Step 2. A 'B ]hen, by placing a level in the crease on the side of the dryer between the top of the dryer and the dryer cabinet, check the levelness from front to back. A. _oose'll the'se' 5creq,vs. _. Remove" these" scre\,vg. 4, Remove the - Maytag MED6600TQ | Use and Care Guide - Page 19
strike and cosmetic screw on the opposite side of the dryer door opening from where they were removed. NOTE: Door strike and plugs must be on the same side of the dryer door opening. I ..a Install tile 2 hinges to the front panel of the dryer using 4 screws. Use tile non-slotted side to attach the - Maytag MED6600TQ | Use and Care Guide - Page 20
has not tripped. • Dryer door is closed. [his dryer automatically runs an installation diagnostic routine at the start of its first cycle. If you receive an "L2" code, there may be a problem with your home power supply keeping the dryer's heater from turning on. See "Troubleshooting." If you receive - Maytag MED6600TQ | Use and Care Guide - Page 21
of fire, electric shock, or injury to persons, read the IMPORTANT SAFETY INSTRUCTIONS before operating this appliance. This manual covers several different models. Your dryer may not have all of the cycles and features described. Follow these basic steps to start your dryer. Please refer to specific - Maytag MED6600TQ | Use and Care Guide - Page 22
L_SS • If you do not press Start within 5 minutes of selecting the cycle, the dryer automatically shuts off. • If you wish to end your drying cycle after pressing Start, press PAUSE/CANCEl. twice. To use a Steam Cycle • Press POWER. NOTE: [Dryness selections can be made only while using Sensor Dry - Maytag MED6600TQ | Use and Care Guide - Page 23
label directions when they are available. • If desired, add a fabric softener sheet. Follow package instructions. • lb reduce wrinkling, remove the load from the dryer the "Cycles" section) for a guide to drying various loads. Sensing • illuminates during the cool down part of the cycle, laundry - Maytag MED6600TQ | Use and Care Guide - Page 24
as work clothes and sheets. Wrinkle Control Use this cycle to get low heat for drying no-iron fabrics, such as sport shirts, casual business that have been worn or clothes that have been left in the dryer too long. When a Steam Cycle is selected, the estimated time remaining display shows the actual - Maytag MED6600TQ | Use and Care Guide - Page 25
Steam Refresh Preset Cycle Settings Timed Cycles Load Type RAPID REFRESH Small Load Helps to smooth out wrinkles and reduce odors from loads consisting of one to four dry items. CUSTOM REFRESH Helps to smooth out wrinkles in loads left in the dryer a specific amount on a low temperature setting. - Maytag MED6600TQ | Use and Care Guide - Page 26
DAMP DRY CHIME OPTIONS Drum Light On some models, select Drum Light to turn on the light inside the dryer drum. During a cycle, if Drum light is until the desired volume (High, i.ow or Off) is selected. • HIGH • LOW END OF CYCLE SIGNAL NOTE: When the Wrinkle Prevent setting is selected and the - Maytag MED6600TQ | Use and Care Guide - Page 27
rack, you may be able to purchase one for your model. lb find out whether your model allows drying rack usage and for information on ordering, please refer to the front page of the manual or contact the dealer from whom you purchased your dryer. NOTE: The drying rack must be removed for normal - Maytag MED6600TQ | Use and Care Guide - Page 28
drying, if needed. Temp. Low Time* 60 low 60 Air Fluff (no 90 heat) Air Fluff (no 90 heat) DRYER CARE Kee l) dryer area clear and free from items , such as gasoline, away from dryer. Place dryer at least 18 inches (46 era) above the floor for a garage installation. Failure to do so can result - Maytag MED6600TQ | Use and Care Guide - Page 29
5. Thoroughly dry lint screen with a clean towel. Insert lint screen back into dryer. 1. Apply a liquid, nonflammable household cleaner to the stained area of the inlet hoses, record the date of replacement. Install and store your dryer where it will not freeze. Because some water may stay in - Maytag MED6600TQ | Use and Care Guide - Page 30
For direct-wired dryers: Electrical Shock Hazard Disconnect power before servicing. Replace all parts and panels before operating. Failure to do so can result in death or electrical shock. 1. Disconnect power. 2. Disconnect wiring. 3. Shut off water faucet. 4. Disconnect separately. the water - Maytag MED6600TQ | Use and Care Guide - Page 31
TROUBLESHOOTING First try the solutions suggested here or visit our website and reference FAQs (Frequently Asked Questions) to possibly avoid the cost of a service call... In U.S.A. www.maytag.com/help - In Canada www.maytag.ca Dryer will not run • Has a household fuse blown, or has a circuit - Maytag MED6600TQ | Use and Care Guide - Page 32
ventilation openings at the top and bottom of the door. The rear of the dryer requires 5" (12.7 cm) of airspace, and the sides and front of the dryer require a minimum of 1" (2.5 cm). See the Installation Instructions. • Has the Air Fluff modifier been selected? Select the right temperature for the - Maytag MED6600TQ | Use and Care Guide - Page 33
label instructions. Dry clean only garments are not recommended. Odors • Have you recently been painting, staining or varnishing in the area where your dryer , rewash and dry the clothing. • Is the dryer being used for the first time? The new electric heating element may have an odor. The odor will - Maytag MED6600TQ | Use and Care Guide - Page 34
Services, I[C Customer Assistance toll free: 1-800-688-9900, at www.maytag.com Our consultants provide assistance with: • Features and specifications on our full line of appliances. • Installation information. or vist our website • Use and maintenance procedures. • Accessory and repair parts sales - Maytag MED6600TQ | Use and Care Guide - Page 35
correct the installation of your major appliance, to instruct you how to use your major appliance, to replace or repair house fuses or to correct house wiring or plumbing. 2. Service calls to repair or replace appliance light bulbs, air filters or water filters. Those consumable parts are excluded - Maytag MED6600TQ | Use and Care Guide - Page 36
& vous Risque possible de deces ou de blessure grave si vous ne suivez pas immediatement lee instructions. Risque possible de deces ou de blessure grave si vous ne euivez pas lee instructions. Tousles messages de securite vous diront quel est le danger potentiel et vous disent comment reduire le - Maytag MED6600TQ | Use and Care Guide - Page 37
a moins d'une recommandation specifique dans le guide d'utlilisation et d'entretien, ou publiee darts les instructions de reparation par I'utilisateur que vous comprenez et les instructions d'installation pour les exigences de liaison de I'appareil a la terre. CONSERVEZ CES INSTRUCTIONS !_!!!;iii - Maytag MED6600TQ | Use and Care Guide - Page 38
du plancher pour une installation darts un garage. Le non-respect de ces instructions peut causer un d_ces la section "Assistance ou service". Vous pouvez _galement contacter Voir "Spekifications _lectriques". • Un plancher robuste capable de supporter un poids total (s_cheuse et charge) de 200 Ib - Maytag MED6600TQ | Use and Care Guide - Page 39
les plinthes. • Un espace suppl_mentaire de tousles c6t6s de la s(!cheuse est recommand6 pour r_duire le transfert du bruit. • Si une porte de placard est install#e, on dolt pr#voir des orifices d'entr_e d'air en haut et en has de la porte. [es portes _ claire-vole offrant une surface _quivalente de - Maytag MED6600TQ | Use and Care Guide - Page 40
normalisafion, 178 Rexdale Blvd., lbronto, ON M9W 1R3 CANADA. • Alimenter I'appareil uniquement par un circuit monophasd de les numdros de service qui se trouvent _ la section "Assistance ou service". iNSTRUCTiONS DE LiAiSON installer une prise de courant appropriee. CONSERVEZ CES iNSTRUCTiONS 4.0 - Maytag MED6600TQ | Use and Care Guide - Page 41
. en feuille Le non-respect de ces instructions un deces ou un incendie. peut causer AVERTISSEMENT peut se procurer les produits d'_vacuation Maytag Services. [:)our plus de renseignements, aupr_s du marchand le rendement. • Ne [:)as installer le conduit ou planchers. Coudes m6tallique - Maytag MED6600TQ | Use and Care Guide - Page 42
la maison et problemes de sante. A I! ; .......I F... iiil!iiill-H A. 56cheuse B. ( oude C. Mur D. Clapet d_' d6charg_" E. Brides £ Conduit rn6tallique rigide ou fl_'xibl_' G. [ongueur d__ conduit n6cessaire pour raccorder /_'s coud_'s H. Bouche de d6charg_" Installations standard du conduit - Maytag MED6600TQ | Use and Care Guide - Page 43
r'nieux I'installation. Deux installations _ d6gagement r_duit sont illustr6es. Voir les instructions du fabricant. A B C A. Installation au-dessus Assistance ou service" de ce guide pour commander. • Installation au-dessus de la s(!cheuse : Piece num_ro 4_¢96028 • Installation de p_riscope - Maytag MED6600TQ | Use and Care Guide - Page 44
I'int@ieur du conduit pour fixer celui-ci. Risque du polds e×cesslf Utiliser deux ou plus de personnes pour d_placer et installer la secheuseo Le non-respect de cette instruction peut causer une blessure au dos ou d'autre blessure. 1. Pour prot6ger le plancher, utiliser une grande pi#ce de carton de - Maytag MED6600TQ | Use and Care Guide - Page 45
8. Terminer le serrage des raccords - deux tiers de tour supplementaires avec une pince. A Contr61er I'aplomb de la s_cheuse en placoant d'abord un niveau sur la partie sup&ieure de la s_cheuse pr6s de la console. A. Orifice d'entr6e d'eau froi&' REMARQUE : Ne pas serrer excessivement. I.e - Maytag MED6600TQ | Use and Care Guide - Page 46
int_rieur (partie interne de la porte) vers le haut. Retirer les deux vis desserre!es du panneau avant de la se!cheuse. m-l_c I --'t_ 0 k 6. Installer 4 chevilles de plastique dans les trous des vis sur la gauche de la s6cheuse apr_s avoir retir6 les charni_res (Etape 4). Inversion de la g_che - Maytag MED6600TQ | Use and Care Guide - Page 47
. Aligner les trous de vis inf(!rieurs dans la charni6re et la porte. Fixer deux vis inf6rieures. Serrer routes les vis de la charni#re. I 4, Installer les deux chami_res sur le panneau avant de la s_cheuse _ I'aide de quatre vis. Utiliser le c{_t_ sans fente pour fixer la chami_re sur [e panneau - Maytag MED6600TQ | Use and Care Guide - Page 48
• I.a porte de la sdcheuse est ferm6e. Cette s_cheuse met automatiquement au ddbut du premier programme. en marche une procddure de diagnostic d'installation Si vous recevez un code L2, il y a peut-_tre un probl_me au niveau de lUalimentation _lectrique du domicile emp_chant I'_l_ment chauffant - Maytag MED6600TQ | Use and Care Guide - Page 49
contenant mousse, caoutchouc ou plastique doivent @tre sech_s sur une cerde a linge ou par le programme de s6chage a Fair. Le non-respect de ces instructions un deces ou un incendie. peut causer Suivre ces _tapes de base pour mettre la sdcheuse en marche. Se rdf_rer aux sections sp_cifiques de ce - Maytag MED6600TQ | Use and Care Guide - Page 50
minutes et le programme de rafraichissement TIMED CYCLE ADJUST Appuyer sur TEMP jusqu'_ ce que la temp6rature d6sir6e s'illumine. • _,4_DIU M • tow • EXTRA LOW FLUFF TEMP f,D US__IWE_ C¥C S REMARQUE : la caract_ristique lemp ne peut 6tre utilise!e qu'avec les programmes minute's et le programme de - Maytag MED6600TQ | Use and Care Guide - Page 51
que la temp6rature d6sir6e s'illumine. @ HIGH • MEDIUM • LOW • EXTRA OW _LUF_ TEMP ADJUST 11&4ED CYCUS REMARQUE : une feuille d'assouplissant de tissu. Suivre les instructions figurant sur I'emballage. • Pour r6duire le (_ la section "Programmes') pour un guide de s6chage de charges diverses. • [a - Maytag MED6600TQ | Use and Care Guide - Page 52
tissus _ la temp6rature recommand_e. Un capteur d6tecte I'humidit6 de la charge et r6gle automatiquement la dur6e pour un s_chage optimal. Heavy Duty (service intense) Utiliser ce programme pour le s6chage _ teml%rature articles en coton et des jeans. #lev#e des charges mixtes Iourdes, des Normal - Maytag MED6600TQ | Use and Care Guide - Page 53
de s_chage par d_tection Type de charge Temperature HEAVY DUTY (service intense) Charges mixtes Iourdes, articles en coton, jeans High lavables en machine Medium (moyenne) low (basse) Extra-[ ow (extra-basse) Programmes Steam (vapeur) Utiliser les programmes Steam (vapeur) pour aider _ aplanir - Maytag MED6600TQ | Use and Care Guide - Page 54
temp(!ratures des programmes minutes. Appuyer sur TEMP jusqu'#_ ce que le re!glage de temp&ature d6sir(! s'allume. • HIGq • MEDIUM OIOW • EXTRA LOW FLUF_ TEMP CYCleS REMARQUE : [.es modificateurs de temp(!rature ne peuvent pas 6tre utilis(!s avec les programmes de s(!chage par d(!tection. Air Fluff - Maytag MED6600TQ | Use and Care Guide - Page 55
d(!sir_ (fort, faible ou _teint). la s(!lection du • HIGH • LOW END OF CYCLE SIGNAL REMARQUE : I.orsque le r_glage Wrinkle Prevent est s_lectionn_ de s(!chage peuvent &tre modifies pour s'adapter _ diff_rentes installations, conditions environnementales ou pr_f(%ences personnelles. II existe 3 - Maytag MED6600TQ | Use and Care Guide - Page 56
Utiliselragrilledesdchagpeoufrairesdchesrancsulbutagdeesarticletselsquechandaeilst 3. Placer les articles mouill6s sur la grille de s6chage. [ aisser de I'espace entre les articles oreillersL.etamboutorurnem, aislagrilledes6chagnebougepas. pour que I'air puisse atteindre routes les surfaces. - Maytag MED6600TQ | Use and Care Guide - Page 57
ressence, loin de la s_cheuse. telle Placer la secheuse au moins 46 cm (18 po) au-dessus du plancher pour une installation dans un garage. Le non-respect de ces instructions peut causer un d_ces, une explosion ou un incendie. Nettoyer le filtre _ charpie la dur_e de s_chage. IMPOR1-AN1- : avant - Maytag MED6600TQ | Use and Care Guide - Page 58
de la s_cheuse. 5. Utiliser du ruban adh(%if de masquage pour fixer la porte de la s(_cheuse. R_installer la s_cheuse Suivre les "Instructions d'installation" se!cheuse et la raccorder. pour choisir I'emplacernent, re!gler I'aplomb de la ka lumi6re de la s6cheuse s'allume automaticluement la - Maytag MED6600TQ | Use and Care Guide - Page 59
la FAQ (Foire aux questions) pour _viter le co_t d'un appel de service... www.maytag.ca s,¢:r '_g:).t'_(ikSi!' Le s_cheuse ne fonctionne pas • Un fusible sdcheuse peut vibrer si die n'est pas correctement install(!e. Voir les Instructions d'installation. kes v&tements sont-ils emm_l_s ou en boule - Maytag MED6600TQ | Use and Care Guide - Page 60
est pas trop long ou ne comports pas trop de changements de direction. Un long conduit augmentera les duress de s_chage. Voir les Instructions d'installation. Risque d'explosion Garder les matieres et les vapeurs inflammables, tele que I'essence, loin de la secheuse. Placer la secheuse au moins 46 - Maytag MED6600TQ | Use and Care Guide - Page 61
Utiliser deux ou plus de personnes pour deplacer et installer la secheuseo Le non-respect de cette instruction peut causer une blessure au dos eu d'autre , tricots, synth_tiques. • Charge toujours froiss_e apr_s un programme Steam (vapeur)? S'assurer que Palimentation en eau est connect_e _t la - Maytag MED6600TQ | Use and Care Guide - Page 62
Avant de faire un appel pour assistance ou service, consulter la section "D_pannage". Ce guide peut vous faire (_conomiser le coot d'une visite de service. Si vous avez encore besoin d'aide, suivre les instructions ci-dessous. [ors d'un appel, veuillez connattre la date d'achat, s_rie au complet - Maytag MED6600TQ | Use and Care Guide - Page 63
en appelant Maytag. Aux ¢.-U., composer le 1-800-688-9900. Au Canada, composer le 1-800-807-6777. 9/06 Conservez ce manuel et votre regu de vente ensemble pour r6f6rence ult6rieure. Pour le service sous garantie, vous devez pr6senter un document prouvant la date d'achat ou d'installation. Inscrivez - Maytag MED6600TQ | Use and Care Guide - Page 64
SP PN W10163136A © 2007 A[[ lights reselved. _:>us droits r_serv_s. MAYTAG and the "M" Symbol are registered trademarks of Maytag Limited in Canada. MAYTAG et le symbole "M" sont des marques d6pos6es de Maytag Limited au Canada. A[[ othel marks are trademarks of Mavtag Cot _oration or its related
-
 1
1 -
 2
2 -
 3
3 -
 4
4 -
 5
5 -
 6
6 -
 7
7 -
8
-
9
-
10
-
11
-
12
-
13
-
14
-
15
-
16
-
17
-
18
-
19
-
20
-
21
-
22
-
23
-
24
-
25
-
26
-
27
-
28
-
29
-
30
-
31
-
32
-
33
-
34
-
35
-
36
-
37
-
38
-
39
-
40
-
41
-
42
-
43
-
44
-
45
-
46
-
47
-
48
-
49
-
50
-
51
-
52
-
53
-
54
-
55
-
56
-
57
-
58
-
59
-
60
-
61
-
62
-
63
-
64
 |
 |

M_AYI'AI3®
BRAVOS TMSTEAM
FABRIC CARE SYSTEM ELECTRIC DRYER
USE & CARE GUIDE
P
SECHEUSE
DE
P
%
ELECTRIQUE BRAVOSTMAVEC SYSTEME
SOIN
DES TISSUS
A LA VAPEUR
GUIDE
D'UTILISATION
ET D'ENTRETIEN
FOR
QUESTIONS
ABOUT
FEAFURES,
OPERATION/PERFORMANCE,
PARTS,
ACCESSORIES
OR
SERVICE
CAI L: 1.800.688.9900
IN CANADA,
CALl:
1.800.807.6777
VISIT
OUR
WEBSITE
AF WWW.MAYTAG.COM
IN CANADA,
WWW.MAY
EAG.CA
AlJ
CANADA,
POUR
ASSISTANCE,
INS [ALl
AFION
OU
SERVICE,
COMPOSEZ
I E : 1.800.807.6777
OU
VISIIEZ
NOTRE
SIIE
INTERNE]
,_,
WWW.MAY
lAG .CA
PARA
OBTENER
ACCESO
AI
MANUAL
DE USO
Y CUIDADO
EN ESPANOL,
O
PARA
OBTENER
INFORMACI(_)N
ADICIONAL
ACERCA
DE SU
PRODUCTO,
VISITE:
WWW.MAYIAG.COM
TENGA
LISTO
SU
NUMERO
DE MODELO
COMPLETO.
PIJEDE
ENCONTRAR
El
NUMERO
DE MODEl
O
Y DE SERIE DENTRO
DE LA CAVIDAD
SUPERIOR
DE LA PUERTA.
W10160250A