Maytag MER8770WQ User Instructions
Maytag MER8770WQ - Convection Ceramic Range Manual
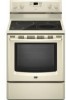 |
UPC - 883049185255
View all Maytag MER8770WQ manuals
Add to My Manuals
Save this manual to your list of manuals |
Maytag MER8770WQ manual content summary:
- Maytag MER8770WQ | User Instructions - Page 1
product. If you should experience a problem not covered in TROUBLESHOOTING, please visit our website at www.maytag.com for additional information. If you del caj6n de almacenamiento. Table of Contents RANGE SAFETY 2 The Anti-Tip Bracket 2 FEATURE GUIDE 4 COOKTOR USE 6 OVEN USE 7 - Maytag MER8770WQ | User Instructions - Page 2
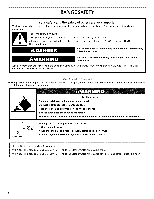
RANGE SAFETY Your safety and the safety of others are very important. We have provided many important safety messages in this manual and on your appliance. you what can happen if the instructions are not followed. The range will not tip during normal use. However, the range can tip if you apply too - Maytag MER8770WQ | User Instructions - Page 3
using the range. [] User Servicing - Do not repair or replace any part of the range unless specifically recommended in the manual. All other servicing should be until they have had sufficient time to cool. Other surfaces of the appliance may become hot enough to cause burns - among these surfaces are - Maytag MER8770WQ | User Instructions - Page 4
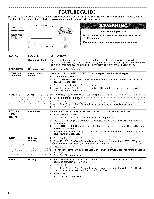
FEATURE GUIDE This manual covers several models. Your model may have some or all of the items listed. Refer to this manual or the Frequently Asked Questions (FAQs) section of our website at www.maytag.com for more detailed instructions. even air convection options start cancel hold 3 sec. to lock - Maytag MER8770WQ | User Instructions - Page 5
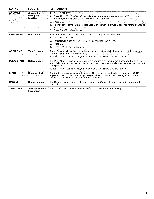
KEYPAD FEATURE INSTRUCTIONS 5. Press CANCEL when finished. KEEP WARM Hold warm Food must be at keypad, the function is canceled and the time of day is displayed. CANCEL Range function The Cancel keypad stops any function except the Clock, Kitchen Timer, and Oven Control Lockout. time - Maytag MER8770WQ | User Instructions - Page 6
result in death or fire. The control knobs can be set to anywhere between HIGH and LOW. Push in and turn to setting. REMEMBER: When range is in use or (on some models) during the Self-Cleaning cycle, the entire cooktop area may become hot. Ceramic Glass The surface cooking area - Maytag MER8770WQ | User Instructions - Page 7
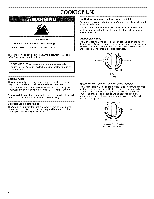
selection. IMPORTANT: To avoid permanent damage to the oven bottom finish, do not line the oven bottom with any type of foil or liner, For best cooking results, do not cover entire oven rack with foil because air must be able to move freely. - Maytag MER8770WQ | User Instructions - Page 8
out. Use the following illustration and charts as a guide. RackPositions Rack 7: Broiling very thin, non-fatty foods 5 or 3 and 6. Baking Layer Cakes on 2 Racks For best results when baking cakes on 2 racks, use racks 2 and 4 to maintain a precise temperature range for optimal cooking results. The - Maytag MER8770WQ | User Instructions - Page 9
Timed Cook: Before setting, make sure the clock is set to the correct time of day. See the "Clock" keypad feature in the "Feature Guide" section. 1. Press BAKE. 2. Press the TEMP/TIME "+" or "-" keypads to enter a temperature other than the one displayed. 3. Press COOK TIME. The cook time oven - Maytag MER8770WQ | User Instructions - Page 10
RANGE CARE Burn Hazard Do not touch the oven during the Self-Cleaning cycle. Keep children away from oven during Self-Cleaning cycle. Failure to follow these instructions can result in burns. IMPORTANT: The health of some birds is extremely sensitive to the fumes given off during the Self-Cleaning - Maytag MER8770WQ | User Instructions - Page 11
soon as the entire range is cool. These spills may affect the finish. Cleaning Method: • Glass cleaner, mild liquid cleaner or nonabrasive scrubbing pad: Gently clean around the model and serial number plate because scrubbing may remove numbers. • All-Purpose Appliance Cleaner Part Number 31682 (not - Maytag MER8770WQ | User Instructions - Page 12
bulb cover by turning clockwise. 5. Plug in range or reconnect power. TROUBLESHOOTING First try the solutions suggested here or visit our website and reference FAQs (Frequently Asked Questions) to possibly avoid the cost of a service call. www.maytag.com Nothing will operate • Is the power supply - Maytag MER8770WQ | User Instructions - Page 13
appliance is operated and maintained according to instructions attached to or furnished with the product, Maytag brand of Whirlpool Corporation or Whirlpool Canada LP (hereafter "Maytag") will pay for factory specified parts and repair labor to correct defects in materials or workmanship. Service - Maytag MER8770WQ | User Instructions - Page 14
any questions or concerns to the address below: Maytag Brand Home Appliances Customer eXperience Center 553 Benson Road Benton Harbor, MI 49022-2692 Please include a daytime phone number in your correspondence. Please keep these User Instructions and model number information for future reference. 14 - Maytag MER8770WQ | User Instructions - Page 15
15 - Maytag MER8770WQ | User Instructions - Page 16
W10239458A SP PN W10249693A © 2009 All rights reserved. ®Registered Trademark/TM Trademark of Maytag Corporation or its related companies. 4/09 Printed in U.S.A.
-
 1
1 -
 2
2 -
 3
3 -
 4
4 -
 5
5 -
 6
6 -
 7
7 -
8
-
9
-
10
-
11
-
12
-
13
-
14
-
15
-
16
 |
 |
THANK YOU for purchasing this high-quality product. If you should experience a problem not covered in TROUBLESHOOTING,
please visit our website at www.maytag.com
for additional information. If you still need assistance, call us at 1-800-688-9900.
You will need your model and serial number located on the oven frame behind the storage drawer panel.
Para obtener acceso a "lnstrucciones para el usuario de la estufa electrica" en espa_ol, o para obtener informaci6n adicional acerca
de su producto, visite: www.maytag.com
Tenga listo su nQmero de modelo completo. Puede encontrar su nQmero de modelo y de serie en la etiqueta, ubicada en el marco
del homo, detras del panel del caj6n de almacenamiento.
Table
of Contents
RANGE SAFETY
.......................................................................................
2
The Anti-Tip
Bracket
.............................................................................
2
FEATURE
GUIDE
.....................................................................................
4
COOKTOR
USE
........................................................................................
6
OVEN
USE
................................................................................................
7
Electronic
Oven Controls
......................................................................
7
Aluminum
Foil
........................................................................................
7
Positioning
Racks and Bakeware
.........................................................
8
Oven Vent
..............................................................................................
8
Baking and Roasting
.............................................................................
8
Broiling
..................................................................................................
9
Convection
Baking and Roasting
.........................................................
9
Timed Cooking
......................................................................................
9
RANGE
CARE
.........................................................................................
10
Self-Cleaning
Cycle
.............................................................................
10
General
Cleaning
.................................................................................
11
Oven Light
...........................................................................................
12
TROUBLESHOOTING
............................................................................
12
ACCESSORIES
......................................................................................
13
WARRANTY
............................................................................................
13
W10239458A