Maytag MGR6751BDB Installation Instructions
Maytag MGR6751BDB - 30" Gas Double Oven Range Manual
 |
UPC - 719881178714
View all Maytag MGR6751BDB manuals
Add to My Manuals
Save this manual to your list of manuals |
Maytag MGR6751BDB manual content summary:
- Maytag MGR6751BDB | Installation Instructions - Page 1
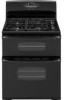
MaytagDoubleOven GasRange Cuisini_re gaz b deuxfoursMaytag/Estufaa Gasde HornoDobleMaytag j_J Printed in USA \\ \. \ \ j_1 j MODELSERIES:MGR6775, MGR6875/ SI_RIEDE MODF:LE: MGR6775, MGR6875/ SERIES DEL MODELO:MGR6775, MGR6875 ©2004 Maytag Corporation 8101P623-60 - Maytag MGR6751BDB | Installation Instructions - Page 2
Range PLEASEKEEPTHIS MANUAL FOR FUTUREREFERENCE This manualis intended to assist in the initial installation and adjustments of the range. • Onlyqualified personnel should install or service this range. • Read"Safety Instructions" in Use& Carebook before using range. • Improper installation - Maytag MGR6751BDB | Installation Instructions - Page 3
MUSTfollow installation instructions provided with the gas appliance connector and the warning label attached to the connector. Whenyour range requires service or replacement parts, contact your dealer or authorized service agency.Pleasegive the complete model and serial number of the range which - Maytag MGR6751BDB | Installation Instructions - Page 4
installer ou faire I'entretien de cette cuisiniere. • Lisezles ,, Instructions de s_curite ,_darts le guide d'utilisation et d'entretien avant d'utiliser la cuisiniere. • Une installation bois. Si cettecuisiniereest installeepresd'armoires ne supportant qu'une temperature inferieure _.90 °C - Maytag MGR6751BDB | Installation Instructions - Page 5
plusrecente.Au Canada,la installer un detecteur de gaz approuveUL.Installez-le et utilisez-le conformement aux instructions BTU/h. Suivez ces m6thodes pour d6placer I'appareil : 1. Faitesglisser la cuisini_reen avant pour la d_gagerdu support et le num_ro de modele de la cuisini_re qui - Maytag MGR6751BDB | Installation Instructions - Page 6
a Gas de Horno Doble P0R FAVORGUARDEESTEMANUAL PARA REFERENCIAFUTURA Este manual esta ManufacturedHome Installations)ANSI A225/NFPA501A o con los c6digos locales. En Canada,esta Canada,esta estufa debe instalarse de acuerdo con la norma CSAvigente C22.1del CodigoCanadiensede Electricidad,Parte - Maytag MGR6751BDB | Installation Instructions - Page 7
de Gas,ANSI gas gas gas LOsproveedoresde gas recomiendan la adquisici6n e instalacionde un detector de gas gas y la estufa. Incluya las conexionesy juntas de gas gas,cierre la valvula de cierre de la tuberia de gas GAS gas gas de gas debe estar gas BTU gas gas, verifique los escapes de gas gas gas la parte - Maytag MGR6751BDB | Installation Instructions - Page 8
the rear and on the sides below the cooktop. Forcompleteinformationin regard to the installationof wall cabinetsabovethe range and clearancesto combustiblewall abovethe cooking topsee the installationdrawings.ForSAFETYCONSIDERATIONdSo notinstalla rangein any combustiblecabinetrywhich is notin accord - Maytag MGR6751BDB | Installation Instructions - Page 9
un micro-ondes.Les instructions d'installation du four sur_lev_precisentla sin espacios de despeje contra superficies combustibles en la parte trasera y a los costados de la misma NormasNacionalesde EstadosUnidos(ANS)y el C6digoNacionalde Gas o en lascasas rodantes cuandolas mismasestan - Maytag MGR6751BDB | Installation Instructions - Page 10
Gas lines and electrical plugs MUST be installed within the shaded area to ensure proper alignment of this oven range Maytag reservesthe right to change specifications without notice, Dimensional specifications are provided for planning purposes only. For complete details see installation instructions - Maytag MGR6751BDB | Installation Instructions - Page 11
robinetprincipal au niveau du compteur./Cierrela valvula de gas en el medidor. Only qualified personnel shouldinstall range. Must be installed in accordancewith local codes.See instructionsin front of this manual./ Seul du personnelqualifi_ dolt installerla cuisini_re.Eriedolt_tre install_e - Maytag MGR6751BDB | Installation Instructions - Page 12
d_tecUondes fuitesnon corrosif, puisessuyez-le./Verifiquetodaslas conexionesy juntasdel suministmde gas a la estufa usando un liquido de detecci6n de au mur ou au sol avec deuxvis./Taladreagujeros de 1/8" (3 mm). Instale el soporteANTIVUELCOen la pared o en el pisousando 2 tornillos. Drill holes - Maytag MGR6751BDB | Installation Instructions - Page 13
120v 15amp/ Canadian 120 V 15 A/ Canada 120 V_15 Amp/ Canadiense Insert plug into groundedoutlet./lus_rez la fiche dans la y el cord6u el_ctricono est_n doblados. Checkleg positionin bracket./V_rifiezla positiondu pieddans le support./ Verifique la posici6udel tornillo nivelador en el soporte. - Maytag MGR6751BDB | Installation Instructions - Page 14
Check flame height and color./V_rifiezla hauteur et la couleurde la flamme./Verifique la altura y el color de la llama. Yellow Go to step 3aune Passeza 1'6tape Amariiia Vaya al paso 6iue iiftin_ 6o to step Flamme bieue ee see Jevant Passez5_1'6tape Azui que se Vayaal paso eepara del quemader
-
 1
1 -
 2
2 -
 3
3 -
 4
4 -
 5
5 -
 6
6 -
 7
7 -
8
-
9
-
10
-
11
-
12
-
13
-
14
 |
 |

MaytagDoubleOven
GasRange
Cuisini_re
gaz
b
deuxfoursMaytag/EstufaaGasdeHornoDobleMaytag
j_J
\
\
\.
\
\
j_1
j
MODELSERIES:MGR6775, MGR6875/
SI_RIEDEMODF:LE: MGR6775, MGR6875/
SERIESDELMODELO:MGR6775, MGR6875
Printed
in USA
©2004
MaytagCorporation
8101P623-60