Maytag MOED6030L Control Guide
Maytag MOED6030L Manual
 |
View all Maytag MOED6030L manuals
Add to My Manuals
Save this manual to your list of manuals |
Maytag MOED6030L manual content summary:
- Maytag MOED6030L | Control Guide - Page 1
Your model may have some or all of the items listed. Refer to this manual or Frequently Asked Questions (FAQs) section of our website at www.maytag.com for more detailed instructions. In Canada, reference the Customer Service section at www.maytag.ca. For more specific details on a feature and steps - Maytag MOED6030L | Control Guide - Page 2
Convect (Single or upper oven only) (on some models) Convection cooking Air Fry(Single or upper Air frying oven only) (on some models) INSTRUCTIONS 1. Press Bake for the desired oven. 2. Press the number keypads to set the desired temperature. If the temperature entered is not in the range - Maytag MOED6030L | Control Guide - Page 3
KEYPAD Self Clean Control Lock Hold 3 Sec Settings FEATURE Self-cleaning cycle Oven control lockout Oven use functions INSTRUCTIONS See the "Self-Cleaning Cycle" section in the Owner's Manual. 1. Check that the ovens and timers are off. 2. Press and hold Control Lock for 3 seconds. 3. If enabled, - Maytag MOED6030L | Control Guide - Page 4
Mode is running in only one oven): 1. Press the number keypad as instructed by the scrolling text to select the new temperature. NOTE: The temperature Racks and Bakeware Use the following illustration and charts as a guide for positioning racks. Rack Positions Broiling Food Broiled meats, poultry - Maytag MOED6030L | Control Guide - Page 5
the sliding shelf. Place the closed rack and the sliding shelf on the rack guide. 2. Using 2 hands, lift up on the front edge of the rack and affect its ability to slide. See the "General Cleaning" section in the Owner's Manual for more information. Air Fry Basket (on some models) When using the Air - Maytag MOED6030L | Control Guide - Page 6
It is not necessary to wait for the oven to preheat, unless recommended in the recipe. To order a broiler pan, see the Quick Start Guide for contact information. A. Broiler grid B. Broiler pan Convection Baking Use Convect Bake for single or multiple rack baking. When convection baking, reduce your - Maytag MOED6030L | Control Guide - Page 7
from the oven. Air Fry IMPORTANT: Cooking times, temperatures, and general instructions may differ depending on recipe. When air frying, food should be evenly as shown in the Positioning Racks and Bakeware section of your Control Guide. Close the oven door to ensure proper temperature. During air - Maytag MOED6030L | Control Guide - Page 8
Food Quantity Temperature Time Frozen Potstickers Fresh French Fries Potato Cubes 8-12 potstickers 1.5 Lbs 380°F (193°C) 450°F (232°C) 15-20 minutes 30-40 minutes 2 Lbs 425°F (218°C) 20-25 minutes Fresh Chicken Wings (no breading) 2 Lbs 400°F (204°C) 25 minutes Brussel Sprouts 2 Lbs 400 - Maytag MOED6030L | Control Guide - Page 9
8. Press START for the selected oven. When the start time is reached, the oven will automatically turn on. To change the temperature after the delay countdown, repeat Steps 5 and 6. For double ovens only: To change the temperature when both ovens are in use, touch any number keypad, then press "1" - Maytag MOED6030L | Control Guide - Page 10
charge électrique ou de blessures, lire les INSTRUCTIONS IMPORTANTES DE SÉCURITÉ du guide d'utilisation de votre appareil avant de faire de notre site Web sur www.maytag.com pour des instructions plus détaillées. Au Canada, consulter la section Service à la clientèle au www.maytag.ca. Pour - Maytag MOED6030L | Control Guide - Page 11
(Cuisson par convection) 1. Appuyer sur Convect (convection) jusqu'à afficher à l'écran le mode souhaité. Suivre les instructions sur le texte en défilement pour le mode désiré ou voir les instructions spécifiques pour le mode désiré à la section « Cuisson à convection ». 2. Appuyer sur le bouton - Maytag MOED6030L | Control Guide - Page 12
TOUCHE CARACTÉRIS- INSTRUCTIONS TIQUE Keep Warm (maintien au chaud) Hold warm (Maintien au chaud) Les aliments doivent être à la température de service avant d'être placés dans le four chaud. 1. Appuyer sur Keep Warm (maintien au chaud). 2. Utiliser les touches numériques pour régler la tempé - Maytag MOED6030L | Control Guide - Page 13
Utiliser la touche Settings (réglages) pour faire défiler les caractéristiques qui peuvent être modifiées. L'affichage passe au réglage suivant à chaque pression supplémentaire sur Settings (réglages). Après avoir sélectionné la fonction à modifier, le tableau de commande demande à l'utilisateur d' - Maytag MOED6030L | Control Guide - Page 14
souhaité pour éteindre le four. Positionnement des grilles et des ustensiles de cuisson au four Utiliser l'illustration et le tableau suivants comme guide de positionnement des grilles. Positions de grille Cuisson au gril Aliment Viandes grillées, volaille, poisson Cuire au gril/griller les viandes - Maytag MOED6030L | Control Guide - Page 15
du rail pour grille. Afin d'éviter d'endommager les supports coulissants, ne pas placer plus de 25 lb (11 ral » du Manuel d'utilisation pour obtenir plus d'instructions. Panier à friture à l'air (sur certains ustensiles de cuisson au four » du guide des commandes pour le positionnement du panier - Maytag MOED6030L | Control Guide - Page 16
conçue pour laisser s'écouler les jus et aider à éviter les éclaboussures et la fumée. Il est possible de commander une lèchefrite. Consulter le Guide de démarrage rapide pour obtenir les coordonnées. Cuisson par convection - four simple ou supérieur uniquement Lors de la cuisson par convection, le - Maytag MOED6030L | Control Guide - Page 17
. Il n'est pas nécessaire d'attendre le préchauffage du four, sauf si la recette le recommande. Pour commander une lèchefrite, consulter le Guide de démarrage rapide pour obtenir les coordonnées. A. Grille de la lèchefrite B. Lèchefrite Cuisson au four par convection Utiliser la fonction Convect - Maytag MOED6030L | Control Guide - Page 18
des grilles et ustensiles de cuisson au four du guide de commandes. Fermer la porte du four pour une circuler l'air chaud. � Consulter les instructions sur l'emballage des aliments pour conna Les aliments doivent être à la température de service avant d'être placés dans le four chaud. Les - Maytag MOED6030L | Control Guide - Page 19
Utilisation : 1. Appuyer sur la touche Keep Warm (maintien au chaud) du four souhaité. 2. Utiliser les touches numériques pour régler la température souhaitée. Si la température entrée ne se trouve pas dans la fourchette des températures autorisées, la température minimale ou maximale autorisée s' - Maytag MOED6030L | Control Guide - Page 20
de incendio, choque eléctrico o lesiones personales, lea las INSTRUCCIONES IMPORTANTES DE SEGURIDAD que se encuentran en el Manual del propietario, antes de usar el electrodoméstico. Este manual abarca varios modelos. Su modelo puede contar con algunos o todos los elementos enumerados. Consulte este - Maytag MOED6030L | Control Guide - Page 21
TECLA Bake (Hornear) FUNCIÓN Baking and roasting (Hornear y asar) Broil (Asar a la parrilla) Broiling (Asar a la parrilla) Convect (Convección) (Solo para el horno individual o superior) (en algunos modelos) Convection cooking (Cocción por convección) Air Fry (Freír sin aceite)(Horno simple o - Maytag MOED6030L | Control Guide - Page 22
), consulte la sección "Tiempo de cocción". Self Clean (Autolimpieza) Self-cleaning Consulte la sección "Ciclo de autolimpieza" en el Manual del propietario. cycle (Ciclo de autolimpieza) Control Lock (Bloqueo de controles) (mantenga presionado por 3 segundos) Oven control lockout (Bloqueo - Maytag MOED6030L | Control Guide - Page 23
4. Presione CANCEL (Cancelar) para salir y mostrar la hora del día. Volumen de sonido Fija el tono de la señal sonora como alto o bajo. 1. Presione Settings (Ajustes) hasta que aparezca en la pantalla "SOUND VOLUME" (Volumen de sonido). 2. Aparecerá el ajuste actual. 3. Presione la tecla "1" para - Maytag MOED6030L | Control Guide - Page 24
Para activar la función del modo Sabbath (Sabbat) (solo una vez): 1. Presione Settings (Ajustes) hasta que aparezca "SABBATH" (Sabbat). 2. Presione la tecla "1". Puede activarse el modo Sabbath (Sabbat) para hornear. 3. Presione CANCEL (Cancelar) para guardar el ajuste y salir para mostrar la hora - Maytag MOED6030L | Control Guide - Page 25
. Puede quitar el lubricante de la parrilla y afectar su capacidad de deslizamiento. Para obtener más información, consulte la sección "Limpieza general" del Manual del propietario. Cesta para freír sin aceite (en algunos modelos) Cuando utilice la función de freír sin aceite, coloque la cesta de - Maytag MOED6030L | Control Guide - Page 26
Antes de hornear o asar, coloque las parrillas de acuerdo con lo especificado en la sección "Colocación de las parrillas y los utensilios para hornear". Para asar, no es necesario esperar a que termine el ciclo de precalentamiento del horno antes de colocar los alimentos, a menos que la receta de - Maytag MOED6030L | Control Guide - Page 27
Convection Broil (Asar a la parrilla por convección) Cuando ase a la parrilla por convección, ingrese su temperatura normal para asar a la parrilla. La puerta del horno debe estar cerrada cuando esté asando a la parrilla por convección. No es necesario precalentar el horno para asar a la parrilla - Maytag MOED6030L | Control Guide - Page 28
Durante la fritura sin aceite, los elementos o quemadores de horneado y asado se encienden y apagan a intervalos para mantener la temperatura del horno mientras el ventilador hace circular el aire caliente. � Consulte las instrucciones de los alimentos envasados para hornear en horno convencional - Maytag MOED6030L | Control Guide - Page 29
5. Presione START (Inicio) para el horno seleccionado. En la pantalla aparecerá la cuenta regresiva del tiempo. Cuando finalice el tiempo, el horno se apagará automáticamente. La temperatura y/o el ajuste de tiempo pueden cambiarse en cualquier momento. Para cambiar la temperatura, repita los pasos
-
 1
1 -
 2
2 -
 3
3 -
 4
4 -
 5
5 -
 6
6 -
 7
7 -
8
-
9
-
10
-
11
-
12
-
13
-
14
-
15
-
16
-
17
-
18
-
19
-
20
-
21
-
22
-
23
-
24
-
25
-
26
-
27
-
28
-
29
 |
 |

1
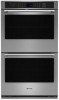
Built-In Electric Single And Double Oven Control Guide
WARNING:
To reduce the risk of fire, electric shock, or injury to persons, read the IMPORTANT SAFETY INSTRUCTIONS, located in
your appliance's Owner's Manual, before operating this appliance.
This manual covers several models. Your model may have some or all of the items listed. Refer to this manual or Frequently Asked
Questions (FAQs) section of our website at
www.maytag.com
for more detailed instructions. In Canada, reference the Customer Service
section at
www.maytag.ca.
For more specific details on a feature and steps to use the feature listed, refer to the titled section for that
feature.
WARNING
Food Poisoning Hazard
Do not let food sit for more than one hour before or
after cooking.
Doing so can result in food poisoning or sickness.
Single Oven
Double Oven
KEYPAD
FEATURE
INSTRUCTIONS
Clock
Clock
This clock uses a 12- or 24-hour cycle. See “Electronic Oven Controls” section.
1.
Press Clock until “Clock” is displayed.
2.
Press the number keypads to set the time of day.
3.
Press START.
Light
Oven cavity
light
While the oven door(s) are closed, press the Light keypad to turn the light(s) on and off.
The light(s) will come on when an oven door is opened.
Kitchen Timer On/Off
Oven timer
The Timer can be set in hours or minutes up to 9 hours and 59 minutes.
1.
Press Kitchen Timer On/Off.
2.
Press the number keypads to set the length of time in hour-minute. Leading zeros do
not have to be entered. For example, for 2 minutes, enter “2.”
3.
Press Kitchen Timer On/Off to begin the countdown. If enabled, timer tone(s) will
sound at the end of countdown.
4.
Press Kitchen Timer On/Off to cancel the Timer and return to the time of day. Do not
press the CANCEL keypad because the oven will turn off.
START
Cooking start
The START keypad begins any oven function in the selected oven. If START is not
pressed within 2 minutes after pressing a keypad, the function is canceled and the time of
day is displayed.
CANCEL
Oven function
The CANCEL keypad stops any oven function except the Clock, Timer, and Control Lock
in the selected oven.