Miele F 1471 Vi Operating and Installation manual
Miele F 1471 Vi Manual
 |
View all Miele F 1471 Vi manuals
Add to My Manuals
Save this manual to your list of manuals |
Miele F 1471 Vi manual content summary:
- Miele F 1471 Vi | Operating and Installation manual - Page 1
Operating and Installation Instructions Freezer with Ice/Water Dispenser F 1471 Vi To prevent accidents and appliance damage read these instructions before installation or use. en - US, CA M.-Nr. 09 157 430 - Miele F 1471 Vi | Operating and Installation manual - Page 2
Contents IMPORTANT SAFETY INSTRUCTIONS 4 Guide to the freezer 8 Control panel for freezer 9 Control panel for Ice/Water 14 Temperature alarm 14 Door alarm 14 Setting the temperature 15 Using the freezer efficiently 17 Freezing food 17 Defrosting 18 Cooling drinks quickly 18 SuperCool 20 - Miele F 1471 Vi | Operating and Installation manual - Page 3
37 Confirming the filter change 38 Using an external water filter 38 Lead free certificate 41 Frequently asked questions 42 After sales service 49 Caring for the environment 52 Installation 53 Installation site 53 Stainless steel panels 55 Custom door panels 55 Installation options 55 - Miele F 1471 Vi | Operating and Installation manual - Page 4
instructions before installation and use to prevent accidents and machine damage. This appliance is intended for residential use only. Use only as described in this Operating manual qualified electrician if in doubt. ~ Before installation or service, disconnect the power supply to the work area by - Miele F 1471 Vi | Operating and Installation manual - Page 5
the appliance is completely installed and secured per installation instructions. ~ Before installing the appliance, check for externally . Contact Miele's Technical Service Department. ~ This appliance must not be used in a non-stationary location (e.g. on a ship). ~ Do not install the freezer in a - Miele F 1471 Vi | Operating and Installation manual - Page 6
, or experience with the machine should not use it without supervision or instruction by a responsible person. ~ To reduce the risk of injury, do door hinge area. ~ After your freezer is in operation, do not touch the cold surfaces in the freezer compartment, particularly when hands are damp - Miele F 1471 Vi | Operating and Installation manual - Page 7
IMPORTANT SAFETY INSTRUCTIONS ~ Do not block the ventilation gaps in the plinth or the . - scratching the surface coating. Splashes of refrigerant can damage the eyes. ~ Your old freezer may have a cooling system that used CFCs (chlorofluorocarbons). CFCs are believed to harm stratospheric ozone - Miele F 1471 Vi | Operating and Installation manual - Page 8
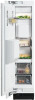
Guide to the freezer a Interior lighting b Door shelf c Ice cube maker d Ice cube container e Interior shelf f Control panel for the Freezer g Main switch to turn the appliance On/Off h Freezer baskets i Water filter j Ice / Water dispenser in the door k Control panel for Ice / Water Dispenser l - Miele F 1471 Vi | Operating and Installation manual - Page 9
Control panel for freezer Guide to the freezer a Access button "p" activates the control panel b Temperature display X colder; Y warmer Allows you to set the desired temperature in the freezer c On/Off sensor button for the SuperCool function d On/Off sensor button for the Ice/Water dispenser e - Miele F 1471 Vi | Operating and Installation manual - Page 10
Before use Before using for the first time ^ Clean the inside of the appliance and the accessories with a mild solution of warm water and liquid dish soap. Dry with a soft cloth. Turning the appliance On/Off ^ Open the appliance door. If the appliance was transported or laid horizontally for any - Miele F 1471 Vi | Operating and Installation manual - Page 11
will appear yellow. In settings mode, certain settings can be changed. The function possibilities are described in the respective chapters of this manual. Overview of the selectable function settings: ^ Touch the access button "p" so it turns yellow. On the control panel you will see additional - Miele F 1471 Vi | Operating and Installation manual - Page 12
Settings Turning the button sound On/Off If you prefer the buttons to be silent when touched the button sound can be turned off. ^ Touch the access button "p" so it turns yellow. ^ Note the position of the X button, but do not touch. ^ Touch the access button "p" again so it turns white. Only the - Miele F 1471 Vi | Operating and Installation manual - Page 13
Turning off for longer periods of time If the appliance is not going to be used for an extended time (for example, during a vacation) some precautions need to be taken: ^ Shut off the water supply line, (several hours before switching off the appliance) ^ Take all food out of the appliance ^ Turn - Miele F 1471 Vi | Operating and Installation manual - Page 14
"alarm" sensor button. The alarm signal turns off. The "alarm" indicator remains on until the alarm condition is corrected. If the temperature in the freezer zone reaches 0°F (-18°C) or higher, check that food has not defrosted. The alarm will sound and the display will flash if: - too much warm - Miele F 1471 Vi | Operating and Installation manual - Page 15
Setting the temperature Setting the temperature ^ Touch the access button "p" so it turns yellow. ^ Use the X and Y buttons next to the temperature display to set the temperature warmer or colder. Tap the X and Y sensor buttons to raise/lower the temperature 1°, or hold it down to move through the - Miele F 1471 Vi | Operating and Installation manual - Page 16
Setting the temperature Temperature unit (Fahrenheit/Celsius) The temperature can be displayed in degrees Fahrenheit (°F) or Celsius (°C). ^ While holding down the X button, press the access button "p" once. Keep holding the X button down until the following appears in the display (approx. 5 - Miele F 1471 Vi | Operating and Installation manual - Page 17
its nutritional value and spoil if left for too long. Do not refreeze defrosted food unless it has been cooked. Before placing food in the freezer ^ When you are planning to freeze large amounts of food (more than 4 ½ lbs [2 kg]), switch on the SuperCool function ahead of time (see "SuperCool - Miele F 1471 Vi | Operating and Installation manual - Page 18
food cold), To cool drinks quickly, switch on the SuperCool function. See "SuperCool" for more information. Do not leave bottles in the freezer for more than 1 hour, closed containers could burst. - in a steam oven. Poultry It is especially important to observe proper hygiene when defrosting - Miele F 1471 Vi | Operating and Installation manual - Page 19
fish, vegetables, herbs, fresh fruit, pastry/dough, leftovers, and a range of pre-cooked meals. - Do not place hot foods or drinks in the freezer. This causes already frozen food to thaw, and increases the energy consumption considerably. Allow hot foods and drinks to cool down before placing them - Miele F 1471 Vi | Operating and Installation manual - Page 20
is ideal for freezing large quantities of unfrozen food. Ideally the function should be switched on 4 - 6 hours before the food is placed in the freezer. If the max. freezing capacity is used, 24 hours are recommended. This helps food to freeze quickly and retain its nutrients, vitamins, flavor and - Miele F 1471 Vi | Operating and Installation manual - Page 21
for the first time, you must flush then fill appliance water lines with water. Flushing the lines of the Ice/Water Dispenser ^ Open the freezer door. ^ Touch the "Access" button so it turns yellow. ^ Touch the "ice" sensor button so it turns yellow. ^ Close the appliance door. After opening - Miele F 1471 Vi | Operating and Installation manual - Page 22
Dispenser Before using the Ice/Water Dispenser for the first time, you must flush the water lines. ^ Open the freezer door. ^ Be sure the ice cube container is under the ice maker. Ice cubes can only be produced first use, as well as when the appliance has been out of service for a long time. 22 - Miele F 1471 Vi | Operating and Installation manual - Page 23
dish towel. The ice dispenser produces a max. of 150 ice cubes per 24 hours. The production volume of ice depends on the temperature in the freezer. The lower the temperature the more ice that will be produced in a certain period of time. ^ Press and hold the "cubes" or "crushed" button. As - Miele F 1471 Vi | Operating and Installation manual - Page 24
the Ice/Water dispenser The water supply line must be shut off several hours before the appliance or ice maker is switched off. ^ Open the freezer door. ^ Touch the "lock" button so it turns yellow. The Ice/Water dispenser buttons are now locked. To unlock the buttons: ^ Touch the "lock" button - Miele F 1471 Vi | Operating and Installation manual - Page 25
Ice/Water Dispenser Settings The following settings on the Ice/Water dispenser can be adjusted: Entering the settings mode Anti-condensation heater A heater behind the control panel of the Ice/Water dispenser ensures that frost and ice do not build-up. To save energy, you can turn the heater off. - Miele F 1471 Vi | Operating and Installation manual - Page 26
Ice/Water Dispenser Anti-clumping The anti-clumping feature ensures that crushed ice or ice cubes do not freeze together. A noise will be heard periodically to indicate that the feature is working. If the sound disturbs you, the feature can be turned off. Button sound If you prefer the buttons to - Miele F 1471 Vi | Operating and Installation manual - Page 27
moisture generated in the appliance collects in the evaporator. It is automatically defrosted and dissipated by the condenser periodically. This automatic defrosting system enables the freezer to remain permanently ice-free, while ensuring that the food stored in the - Miele F 1471 Vi | Operating and Installation manual - Page 28
: ^ Slide the shelf upwards all the way to the top of the side-rails until it can be removed. Replacing the door shelf: ^ Insert the freezer basket at the top of the side-rails and slide it down into the desired position. 28 - Miele F 1471 Vi | Operating and Installation manual - Page 29
. On the hinged-side of the door is a safety lock, which must be turned to a horizontal position before the drawer can be removed. Replacing the freezer basket ^ Fully extend the telescopic tracks. ^ Lay the basket onto the tracks so that it connects in the front and back. ^ Turn the safety lock - Miele F 1471 Vi | Operating and Installation manual - Page 30
electronic unit or lights. The data plate located inside the appliance must not be removed. It contains information which is required in the event of a service call. 30 - Miele F 1471 Vi | Operating and Installation manual - Page 31
Cleaning and care Before cleaning ^ Use the main switch to turn the appliance off completely. The main switch is located on the right side underneath the control panel. ^ Unplug the power cord. ^ Remove any food from the appliance and store it in a cool place. ^ Take out any removable parts, e.g., - Miele F 1471 Vi | Operating and Installation manual - Page 32
the anti-clumping screw to prevent new ice cubes from sticking. ^ To re-insert push the ice cube container all the way back onto the supports until it locks into position. ^ If the container cannot be pushed all the way back, twist the anti-clumping screw in the container. Drip tray - Miele F 1471 Vi | Operating and Installation manual - Page 33
it on with the main switch. ^ Switch on the SuperCool function. The freezer section will cool down quickly. ^ Once the temperature is cold enough, place the freezer baskets containing the frozen food into the freezer. ^ Turn off the SuperCool function on a temperature of 0 °F (-18 °C) is reached - Miele F 1471 Vi | Operating and Installation manual - Page 34
Cleaning and care Changing the light bulb The lighting automatically switches off after the door has been open for approx. 10 minutes. This is not a fault. If the light does not come on when the door is opened briefly, the light bulb should be changed. ^ Use the main switch to turn the appliance - Miele F 1471 Vi | Operating and Installation manual - Page 35
on when the dispenser is used again, the light bulb should be changed. The dispenser lighting should only be repaired or replaced by Miele Technical Service. ^ Pull the defective light bulb from the socket. ^ Place the new bulb in the socket. Halogen bulb type: 5 W/12 V/socket G 4. ^ Put the light - Miele F 1471 Vi | Operating and Installation manual - Page 36
ice maker has not been used for a prolonged time discard any ice cubes in the freezer, empty the container and discard the ice production of the next 24 hours. Additional water filters are available from Miele. It is important to change the water filter regularly. - If the appliance or ice maker - Miele F 1471 Vi | Operating and Installation manual - Page 37
Exchanging the water filter Note: Air trapped in the system may cause water and the filter cartridge to eject forcefully. Use caution when removing. Water filter ^ Remove the cap from the used filter, 3. ^ Take a new filter cartridge out of the packaging and remove the protective cap. ^ Push the - Miele F 1471 Vi | Operating and Installation manual - Page 38
Water filter ^ After the filter change the filter indicator in the display still flashes. The change must be be confirmed in the electronic. Using an external water filter If your household water supply already has an external water filter installed, leave the standard water filter (bypass - Miele F 1471 Vi | Operating and Installation manual - Page 39
Health Water Treatment Device Certificate Number Trademark/Model Designation 9000 077095 Miele 07134220 Manufacturer: Cuno, Incorporated 06 - 1775 Date Issued: March None Inorganic/Radiological Contaminants None Rated Service Capacity: 740 gals Rated Service Flow: 0.75 gpm Conditions of - Miele F 1471 Vi | Operating and Installation manual - Page 40
207 - 827 kPa) Water temperature* 33°F - 100°F (0.6°C - 38°C) Service flow 0.75 gpm (2.83 lpm) IMPORTANT: Must be installed and operated in due to water leakage, you MUST read and follow these operating instructions before installation and use of this product. For estimated costs of replacement - Miele F 1471 Vi | Operating and Installation manual - Page 41
Lead free certificate This product F 1471 Vi (KIMIWD18US) is tested and certified by WQA against ORD0902 for California "lead free" compliance. Miele & Cie. KG Carl-Miele-Straße 29 D-33332 Gütersloh 41 - Miele F 1471 Vi | Operating and Installation manual - Page 42
the following guide minor problems can be corrected without a service call. appliance or the outlet may be defective. Contact Miele or a qualified electrician. The temperature is set causing the temperature to time. fall automatically. The freezer is too warm. The room temperature is Raise the - Miele F 1471 Vi | Operating and Installation manual - Page 43
problems Issue Possible fault Solution Water is flowing out of Close the shut-off valve immediately. the appliance. Check whether the water Contact Miele Technical pipe in the appliance is Service for too long. The door has been Once the freezer gets opened too frequently, or a down to the - Miele F 1471 Vi | Operating and Installation manual - Page 44
a warning that the Order replacement filters water filter needs to be from Miele. changed soon. The filter display is flashing red. The water filter turned off. See "Anti-condensation heater" for more information. Problems with the ice/water dispenser Issue Possible fault Solution The ice - Miele F 1471 Vi | Operating and Installation manual - Page 45
Problems purged of air) before the appliance was used for the first time. Contact Miele. Check if: - the Ice/Water dispenser is switched on. - the exit. - the ice cube container is in the right position. - the freezer compartment temperature is too high. - the water pressure is too low. The - Miele F 1471 Vi | Operating and Installation manual - Page 46
Frequently asked questions Problems with the ice/water dispenser Issue Possible fault Solution frequently. Check if the ice cube container is dirty. Clean the container. Unsealed packages in the freezer will transfer odor/flavor particles to the ice cubes. Check that food has been packed in - Miele F 1471 Vi | Operating and Installation manual - Page 47
Problems with the ice/water dispenser Issue Possible fault Solution The ice maker is not producing enough ice or the ice cubes are misshapen. Check the water pressure. The water pressure must be between 25 and 120 psi (1.72-8.25 bar). Contact a plumber. Check that the freezer temperature - Miele F 1471 Vi | Operating and Installation manual - Page 48
Frequently asked questions The appliance is making noises. Issue Possible fault Solution Brrrrr... Blubb, blubb... Humming noise made by the compressor. This noise can get louder for brief periods when the motor is switching on. A gurgling noise can be heard when coolant is circulating through - Miele F 1471 Vi | Operating and Installation manual - Page 49
by 5 years of worry-free ownership. MieleCare is the only Extended Service Contract in the industry that guarantees repairs by a Miele Authorized Service Provider using genuine Miele parts. Only genuine Miele parts installed by factory-trained professionals can guarantee the safety, reliability and - Miele F 1471 Vi | Operating and Installation manual - Page 50
- Miele F 1471 Vi | Operating and Installation manual - Page 51
Installation instructions Information is subject to change. Please refer to our website to obtain the most current product specification, technical & warranty information. To prevent accidents and machine damage read these instructions before installation or use. - Miele F 1471 Vi | Operating and Installation manual - Page 52
Caring for the environment Disposal of packing materials The cardboard box and packing materials are biodegradable and recyclable. Please recycle. Ensure that any plastic wrappings, bags, etc., are disposed of safely and kept out of the reach of babies and young children. Danger of suffocation! - Miele F 1471 Vi | Operating and Installation manual - Page 53
until the appliance is completely installed and secured as per the installation instructions. Do not install the appliance: - outdoors, - in an such as an oven, radiator, etc. Empty weight of your machine: F 1471 Vi 306 lbs (139 kg) The ambient temperature should not drop below 55°F ( - Miele F 1471 Vi | Operating and Installation manual - Page 54
a fully loaded machine is: F 1471 Vi 503 lbs (228 kg) To ensure that the appliance is installed securely and functions properly, the base must be flat, level and made of a hard, rigid material. If in doubt, contact Miele niche To ensure safe, trouble-free installation and the - Miele F 1471 Vi | Operating and Installation manual - Page 55
1471 Vi 143 lbs (65 kg) This appliance can be installed "side-by-side" with another fridge/freezer using a "Merging Kit". The "Merging Kit" is available from Miele. Contact Miele please refer to the instructions included with the "Merging Kit", available from Miele. Installation without a partition - Miele F 1471 Vi | Operating and Installation manual - Page 56
installed within its own niche using the mounting accessories included. The "Merging Kit" will also be needed. The "Merging Kit" is available from Miele. Installation with partition without using the "Merging Kit" If there is a partition with a thickness of more than 6 5/16" (160 mm) between the - Miele F 1471 Vi | Operating and Installation manual - Page 57
115°) Installation The dimensions of the door fronts and handles will vary according to each individual kitchen. F 1471 Vi A 20 11/16" (525 mm) B Door front max. 1 1/2" (38 mm) C Door handle D 9 3/16" (234 mm) Miele recommends using the full door opening angle of 115° for this freezer. 57 - Miele F 1471 Vi | Operating and Installation manual - Page 58
Installation Niche dimensions Niche width (A) F 1471 Vi 18" (457 mm) 58 - Miele F 1471 Vi | Operating and Installation manual - Page 59
Power supply and water connection Installation 1. Power supply 2. Water connection F 1471 Vi A 9" (229 mm) Door front dimensions 59 - Miele F 1471 Vi | Operating and Installation manual - Page 60
the risk of injury or damage to the product, two people should be used for installation. These installation instructions are intended for use by qualified installers. In addition to these instructions, the appliance must be installed in accordance with all local codes, or in the absence of a local - Miele F 1471 Vi | Operating and Installation manual - Page 61
Installing the appliance Aligning the housing unit Check the installation niche To ensure a safe, trouble-free installation and the best possible cosmetic result, check to be sure that the installation space complies with the installation requirements. The housing unit must - Miele F 1471 Vi | Operating and Installation manual - Page 62
on the ground it can be wheeled around. ^ Do not remove the installation supports from the appliance door. They will be used later in the installation niche. the power supply when performing installation, maintenance or service work. Install the RemoteVision module before placing the appliance - Miele F 1471 Vi | Operating and Installation manual - Page 63
not come on, installation of the module was unsuccessful. In that case, repeat the process. If that does not correct the problem, contact Miele. ^ Pull the antenna d straight out. ^ Guide the cover b over the antenna d and screw on the cover. ^ Angle the antenna d so that it faces to the right or - Miele F 1471 Vi | Operating and Installation manual - Page 64
Installing the appliance Mounting Accessories The mounting accessories needed for installing the appliance into the niche are included in the packaging. Several plastic bags are included which are marked alphabetically. The bag needed for each step will be marked with its respective letter. The - Miele F 1471 Vi | Operating and Installation manual - Page 65
Installing the appliance In a cabinet with a back wall ^ Drill pilot holes: - 1/8" (3 mm) for 5 x 60 mm wood screws - 1/16" (2 mm) for 4 x 15 mm wood screws ^ Tightly secure the anti-tip brackets in the niche. Be certain that the screws penetrate through the flooring and into the wall plate a - Miele F 1471 Vi | Operating and Installation manual - Page 66
Installing the appliance Securing an alternative anti-tip device If the anti-tip brackets cannot be attached securely using a wooden beam, an alternative anti-tip device can be used. Ensure that there is no "give" between the appliance and the anti-tip device. If possible, always screw the wooden - Miele F 1471 Vi | Operating and Installation manual - Page 67
Sliding the appliance into the installation niche If a side-by-side installation is desired, connect the two appliances together. See the Installation Manual included with the "Merging Kit". ^ Plug the appliance into the power outlet b. The plug of the appliance should be easily accessible after - Miele F 1471 Vi | Operating and Installation manual - Page 68
gradually, alternating between left and right. - Unscrew the height-adjustable feet until the mark on the base has reached the indicated guide dimension 1 1/4" (32 mm). The guide dimension of 1 1/4" (32 mm) is related to a niche height of 84" (2134 mm). The installation aids e on the appliance door - Miele F 1471 Vi | Operating and Installation manual - Page 69
Installing the appliance Attaching the appliance to the installation niche ^ Secure the attachment plate side lugs. ^ Screw the attachment plate lugs h to the overhead furniture/fixtures. If there is no way to attach the top of the appliance, it can be attached to the sides of the installation - Miele F 1471 Vi | Operating and Installation manual - Page 70
Installing the appliance For a side-by-side combination the filler ^ Open the appliance door. strips from both appliances are put together to form one long filler strip: ^ Take the peg from the "side-by-side merging kit" and insert it halfway into the filler strip rail on the left-side appliance. ^ - Miele F 1471 Vi | Operating and Installation manual - Page 71
Preparing the custom door Installing the appliance ^ Load the door basket. ^ Open the appliance door. ^ Unscrew the installation supports n from the appliance door. ^ Loosen the remaining screws from the strips o on each side of the door, then remove. ^ Set aside the screws and side - Miele F 1471 Vi | Operating and Installation manual - Page 72
Installing the appliance The bracket includes a variety of holes for the various design options of custom doors. When performing work on the custom door, always observe the following: - Always select the best load-bearing surface of the custom door as the location for screws. - Always select a screw - Miele F 1471 Vi | Operating and Installation manual - Page 73
Attaching and aligning the custom door front Installing the appliance ^ Align the custom door height with the threaded bolts p. ^ Now tighten the nuts q on top. This secures the appliance door. ^ Open the door and hang the custom door with the mounting frame over the threaded bolts p. ^ Put the - Miele F 1471 Vi | Operating and Installation manual - Page 74
Installing the appliance Attaching the covers ^ To mount the cover strips on both sides of the door, click them into place from bottom to top, into the gap between the appliance door and the custom door. ^ Insert the cover strip into the space between the appliance and the side panel. For side-by- - Miele F 1471 Vi | Operating and Installation manual - Page 75
required, cut the toe-kick cover to the required length and height. Mounting the air separator The air separator on the inside of the freezer door keeps the supply and exhaust air separate. This prevents warm exhaust air from flowing into the machine, optimizing the energy performance of the unit - Miele F 1471 Vi | Operating and Installation manual - Page 76
Installing the appliance Aligning the Ice/Water Dispenser If necessary the depth of the Ice/Water dispenser can be aligned from inside the custom door cut-out. This allows the dispenser to be aligned with the custom door to achieve the best possible appearance. ,Disconnect the appliance from the - Miele F 1471 Vi | Operating and Installation manual - Page 77
Installing the appliance Once the drip tray has been removed, the four metal strips can be used to align the Ice/Water Dispenser. ^ Pull the rear cover forward and out. ^ Loosen the water sensors and carefully bend them upwards. ^ Loosen the screws of the four metal strips. ^ Insert a screwdriver - Miele F 1471 Vi | Operating and Installation manual - Page 78
Installing the appliance Attaching the frame and the shelf The word "TOP" is marked on the rear of the frame at the top. For 3/4" (19 mm) thick custom doors: ^ Slide the cover frame onto the Ice/Water Dispenser and press until it is flush with the door front. For 1 1/2" / (38 mm) thick custom doors: - Miele F 1471 Vi | Operating and Installation manual - Page 79
All plumbing work should be carried out by a suitably qualified and competent person, in accordance with all applicable local and national regulations. The water quality must conform to country requirements for drinking water. - The appliance is only suitable for connection to the cold water supply. - Miele F 1471 Vi | Operating and Installation manual - Page 80
guide The connection to the household water supply must be installed before the appliance is installed. ^ Turn off the main water valve to prevent damage caused by leaking water. ^ Attach the connecting pipe to the shut-off valve, according to the instructions through the hose guide at the back - Miele F 1471 Vi | Operating and Installation manual - Page 81
Plumbing Connecting the water supply When connecting the water pipe to the solenoid valve of the appliance, follow the instructions supplied by the manufacturer of the ice cube maker installation kit. When bending the water pipe, be sure not to kink it, otherwise there is a - Miele F 1471 Vi | Operating and Installation manual - Page 82
- Do not use an adapter. - Do not use an extension cord. Failure to follow these instructions can result in death, fire, or electrical shock. Improper connection of the equipment grounding conductor may a licensed electrician or call the Miele Technical Service. U1-800-999-1360 V1-800-565-6435 82 - Miele F 1471 Vi | Operating and Installation manual - Page 83
Miele's client service center will be notified and contact you, or another trusted individual identified on your call roster, in order to gain access to your appliance to fix the problem , exact router setup instructions are not included in this manual. Wording and instructions may vary. 83 - Miele F 1471 Vi | Operating and Installation manual - Page 84
to the network when ; # appears in the display. If ; # does not appear, refer to the "Network options" section of the XKM 2000 Installation Instruction manual. ^ Press and hold the access button "p" for 2 seconds to confirm the change. ^ To return to the main menu, tap the X button until a solid - Miele F 1471 Vi | Operating and Installation manual - Page 85
RemoteVision (optional accessory) MasterCool control panel options for RemoteVision Status indicators Description of function Flashing ; ~ Module booting phase Flashing ; ‡ Not connected to network Flashing ; | Connection to network established, no - Miele F 1471 Vi | Operating and Installation manual - Page 86
86 - Miele F 1471 Vi | Operating and Installation manual - Page 87
87 - Miele F 1471 Vi | Operating and Installation manual - Page 88
Alteration rights reserved / 4811 M.-Nr. 09 157 430 / 02 INFORMATION IS SUBJECT TO CHANGE. PLEASE REFER TO OUR WEBSITE TO OBTAIN THE MOST CURRENT PRODUCT SPECIFICATIONS, TECHNICAL & WARRANTY INFORMATION.
-
 1
1 -
 2
2 -
 3
3 -
 4
4 -
 5
5 -
 6
6 -
 7
7 -
8
-
9
-
10
-
11
-
12
-
13
-
14
-
15
-
16
-
17
-
18
-
19
-
20
-
21
-
22
-
23
-
24
-
25
-
26
-
27
-
28
-
29
-
30
-
31
-
32
-
33
-
34
-
35
-
36
-
37
-
38
-
39
-
40
-
41
-
42
-
43
-
44
-
45
-
46
-
47
-
48
-
49
-
50
-
51
-
52
-
53
-
54
-
55
-
56
-
57
-
58
-
59
-
60
-
61
-
62
-
63
-
64
-
65
-
66
-
67
-
68
-
69
-
70
-
71
-
72
-
73
-
74
-
75
-
76
-
77
-
78
-
79
-
80
-
81
-
82
-
83
-
84
-
85
-
86
-
87
-
88
 |
 |

Operating and Installation
Instructions
Freezer
with Ice/Water Dispenser
F 1471 Vi
To prevent accidents
and appliance damage
read these instructions
before
installation or use.
M.-Nr. 09 157 430
en - US, CA