Motorola ADMIRAL User Guide - Page 88
Send a Gmail Message, Read and Reply to Gmail Messages, Email, Add an Email Account (POP or IMAP)
 |
View all Motorola ADMIRAL manuals
Add to My Manuals
Save this manual to your list of manuals |
Page 88 highlights
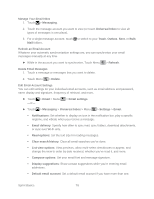
Select messages and conversations: Touch the box before the email or conversation. View the Inbox of your other Gmail account: Touch Menu Accounts and then touch the account that you want. > Settings > Refresh the inbox: Touch Menu > Refresh. Send a Gmail Message 1. Touch > Gmail. 2. Touch Menu > Compose. 3. Enter the message recipient's email address in the To field. If you are sending the email message to several recipients, separate the email addresses with a comma. As you enter email addresses, any matching addresses from your contacts list are displayed. Touch a match to enter that address directly. 4. Enter the email subject, and then compose your email. 5. After composing your message, touch the Send icon. Read and Reply to Gmail Messages 1. Touch > Gmail. 2. Touch a message. To Reply or Reply to all, enter an additional message. To Forward a message, enter or select recipients and then enter an additional message. 3. After composing your message, touch the Send icon. Email Use the Email app to send and receive email from your webmail or other accounts, using POP3 or IMAP. You can also access your Corporate Sync email and other features on your phone. Add an Email Account (POP or IMAP) 1. Touch > Accounts > Add an Account > Email. 2. Enter your existing email account address and password. 3. Select Automatically configure account. -or- De-select Automatically configure account to enter server settings manually. Sprint Basics 76
-
 1
1 -
2
-
3
-
4
-
5
-
6
-
7
-
8
-
9
-
10
-
11
-
12
-
13
-
14
-
15
-
16
-
17
-
18
-
19
-
20
-
21
-
22
-
23
-
24
-
25
-
26
-
27
-
28
-
29
-
30
-
31
-
32
-
33
-
34
-
35
-
36
-
37
-
38
-
39
-
40
-
41
-
42
-
43
-
44
-
45
-
46
-
47
-
48
-
49
-
50
-
51
-
52
-
53
-
54
-
55
-
56
-
57
-
58
-
59
-
60
-
61
-
62
-
63
-
64
-
65
-
66
-
67
-
68
-
69
-
70
-
71
-
72
-
73
-
74
-
75
-
76
-
77
-
78
-
79
-
80
-
81
-
82
-
 83
83 -
 84
84 -
 85
85 -
 86
86 -
 87
87 -
 88
88 -
 89
89 -
 90
90 -
 91
91 -
 92
92 -
 93
93 -
94
-
95
-
96
-
97
-
98
-
99
-
100
-
101
-
102
-
103
-
104
-
105
-
106
-
107
-
108
-
109
-
110
-
111
-
112
-
113
-
114
-
115
-
116
-
117
-
118
-
119
-
120
-
121
-
122
-
123
-
124
-
125
-
126
-
127
-
128
-
129
-
130
-
131
-
132
-
133
-
134
-
135
-
136
-
137
-
138
-
139
-
140
-
141
-
142
-
143
-
144
-
145
-
146
-
147
-
148
-
149
-
150
-
151
-
152
-
153
-
154
 |
 |