Motorola SBG6580 User Manual - Page 24
Create a Wi-Fi Network Using the WPS Feature, Option 1 - PIN, Option 2 - WPS Pairing Button - setup
 |
View all Motorola SBG6580 manuals
Add to My Manuals
Save this manual to your list of manuals |
Page 24 highlights
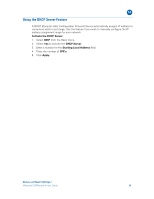
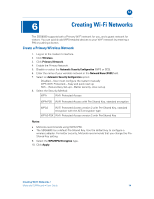
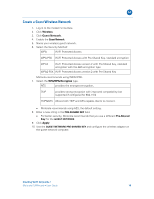
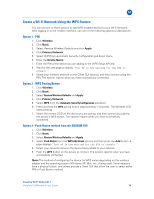
B Create a Wi-Fi Network Using the WPS Feature You can use one of three options to add WPS-enabled devices to your Wi-Fi Network. After logging in to the modem interface, use one of the following options to add advices. Option 1 - PIN 1. Click Wireless. 2. Click Basic. 3. Select Restore Wireless Defaults and click Apply. 4. Click Primary Network. 5. Select WPS from Automatic Security Configuration pull-down menu. 6. Enter the Device Name. 7. Enter the PIN of the device you are adding to the WPS Setup AP field. 8. Wait for the web page to display "Your AP is now waiting for the STA to connect." 9. Select your wireless network on the Client GUI (device), and then connect using the PIN. The system reports when you have successfully connected. Option 2 - WPS Pairing Button 1. Click Wireless. 2. Click Basic. 3. Select Restore Wireless Defaults and Apply. 4. Click Primary Network. 5. Select WPS from the Automatic Security Configuration pull-down. 6. Press and hold the WPS pairing button (approximately 7 seconds). The Wireless LED starts blinking. 7. Select the correct SSID on the device you are pairing, and then connect by pushing the device's WPS button. The system reports when you have successfully connected. Option 3 - Push-Button method from the SBG6580 GUI 1. Click Wireless. 2. Click Basic. 3. Select Restore Wireless Defaults and Apply. 4. Select Push-Button from the WPS Add Client options and then press the Add button. A page displays "Your AP is now waiting for the STA to connect." 5. Select your network name on the device being added to your network. 6. Push the WPS button on the device to connect. The system reports when you have successfully connected. Note: The method of configuring the device for WPS varies depending on the wireless adapter and the operating system (Windows XP, Mac, etc.,) being used. Some adapters have a physical button, and others provide a Client GUI that allow the user to select either PIN or Push Button method. Creating Wi-Fi Networks • Motorola SURFboard • User Guide 16
-
 1
1 -
2
-
3
-
4
-
5
-
6
-
7
-
8
-
9
-
10
-
11
-
12
-
13
-
14
-
15
-
16
-
17
-
18
-
 19
19 -
 20
20 -
 21
21 -
 22
22 -
 23
23 -
 24
24 -
 25
25 -
 26
26 -
 27
27 -
 28
28 -
 29
29 -
30
-
31
-
32
-
33
-
34
-
35
-
36
 |
 |