Motorola SD4591 User Guide
Motorola SD4591 - Digital Corded/Cordless Phone Cordless Base Station Manual
 |
UPC - 612572121696
View all Motorola SD4591 manuals
Add to My Manuals
Save this manual to your list of manuals |
Motorola SD4591 manual content summary:
- Motorola SD4591 | User Guide - Page 1
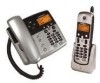
SD4590 2.4 GHz Digital Numérique 2,4 GHz Expandable Corded/ Cordless Telephone System with Base Speakerphone, Keypad, and Answering Machine Système téléphonique extensible avec ou sans fil Base avec micro, haut-parleur, clavier et répondeur User Guide Guide de l'utilisateur - Motorola SD4591 | User Guide - Page 2
For a large-print version of this guide, or for product-related questions, visit us online at: www.motorola.com/cordless Or phone us at: •1-800-353-2729 U.S.A. •1-800-461-4575 Canada •1-888-390-6456 TTY (Text Telephone) Copyright © 2005 Motorola, Inc. All rights reserved. No part of this publication - Motorola SD4591 | User Guide - Page 3
on your purchase of a Motorola SD4590 series telephone. Take a moment to ensure that your purchase includes each of the items pictured. Product registration is an important step toward enjoying your new Motorola product. Registering helps us facilitate warranty service and permits us to contact - Motorola SD4591 | User Guide - Page 4
Handset Overview 1 Volume Controls 2 LCD Display 3 Left and Right Soft Keys 4 Up and Down Scroll 1 5 Phone On/Flash 6 Redial list of the last 5 numbers dialed 2 7 Switch from upper to lower case letters 3 8 Turn on speakerphone 9 Microphone 4 5 10 Connect to other registered - Motorola SD4591 | User Guide - Page 5
Base Unit Overview 1 Answering Machine Controls Play/stop message Skip backwards Skip forwards Delete message 2 Phone On/Flash 3 Left Softkey 4 Up and Down Scroll 5 Right Softkey 6 End Call/Cancel Function 7 Redial list of the last five numbers dialed 8 Removes Last Number - Motorola SD4591 | User Guide - Page 6
11 Locate Handset(s) 12 Record a Memo/Message Forwarding 13 Volume Up and Down 14 Speakerphone 15 Speaker LED Handset Charger Overview Charge LED iv - Motorola SD4591 | User Guide - Page 7
Table of Contents Table of Contents Welcome i Handset Overview ii Base Unit Overview iii Important Safety Instructions xi Getting Started 1 Battery Safety Instructions 1 Battery Meter Icon 4 Installing the Corded Handset 4 Base Unit and Charger Installation 5 Using the SD4590 on a Flat - Motorola SD4591 | User Guide - Page 8
Telephone Overview 10 Standby Screen Information 10 Using the Soft Keys 11 Using the Navigation Keys 11 Setting Up 12 Ringer Options 12 Setting the Ring Tone and Ring Volume 13 Setting Key Beeps On or Off 14 Naming a Handset or Base Station 15 Setting Touch Tone or Pulse Dialing 19 Using - Motorola SD4591 | User Guide - Page 9
Hold 23 Redialing a Number 23 Finding a Lost or Misplaced Handset 24 Saving a Number in the Phonebook 25 Private Phonebooks a Phonebook Entry 28 Inserting Pauses in a Number 29 Using Caller ID 29 Reviewing Caller ID Call List 30 Using Automated Dialing 31 Using the Answering Machine 32 - Motorola SD4591 | User Guide - Page 10
ID Number 37 Using the Answer Machine 38 Checking Messages from the Base Station . . . 38 Checking Messages from the Handset 39 Recording a Memo 40 Checking Messages Remotely from a Touch-Tone Phone 40 Advanced Features 41 Conference Calling 42 Using the Intercom 43 Intercom Setup 43 - Motorola SD4591 | User Guide - Page 11
Another 45 Unannounced Transfer 45 Announced Transfer 45 Using the Handset as a Walkie Talkie 46 Monitoring a Room 47 Room Monitoring with the SD4504 Wireless Camera (Optional 48 openLCR™ Option 49 Registering a New Handset 50 FCC Information 52 Industry Canada (IC) Information 56 Warranty - Motorola SD4591 | User Guide - Page 12
x - Motorola SD4591 | User Guide - Page 13
outlet before cleaning. Do not use liquid cleaners or aerosol cleaners. Use a damp cloth for cleaning. 7. Do not disassemble this product. If service or repair work is required, contact the Motorola address found in the back of this user guide. 8. Do not overload wall outlets and extension cords. xi - Motorola SD4591 | User Guide - Page 14
exposed to rain or water. Do not retrieve the handset or base until after you have unplugged the power and phone from the wall. Then retrieve the unit by the 1. Read and understand all instructions and save them for future reference. 2. Follow all warnings and instructions marked on the product. 3. - Motorola SD4591 | User Guide - Page 15
6. Adjust only those controls that are covered by the operating instructions. Improper adjustment of other controls may result in damage and supplies may damage the unit. 9. Because cordless phones operate on electricity, you should have at least one phone in your home that isn't cordless, in case - Motorola SD4591 | User Guide - Page 16
Started Battery Safety Instructions • Do not burn, disassemble, mutilate, or puncture the battery. The battery contains toxic materials that could be released, resulting in injury. • Caution: There is a risk of explosion if you replace the battery with an incorrect battery type. Use only the battery - Motorola SD4591 | User Guide - Page 17
Installing the Handset and Base Unit Batteries Handset 1 Remove stickers from battery door if present. 2 Press the indentation on the battery door, and slide downwards to remove. 3 Plug the battery connector into receptacle, and insert the battery into the compartment. Note: The battery cable is - Motorola SD4591 | User Guide - Page 18
(not included) for optional backup power. 1 Press the cover latch with a screwdriver to lift and remove the battery cover. 2 Insert 4 AAA alkaline batteries into the battery compartment. 3 Insert the tabs of the cover into the slots on the base station and press down until the cover clicks into - Motorola SD4591 | User Guide - Page 19
discharge during a power outage. If you experience numerous power outages, or the power is out for more than one hour, you should replace the batteries to ensure they are fresh. Installing the Corded Handset Connect the coiled phone cord to the bottom of the base unit and the bottom of the corded - Motorola SD4591 | User Guide - Page 20
Base Unit and Charger Installation Your SD4590 base unit can be placed on a flat surface or mounted to a wall. Using the SD4590 on a Flat Surface 1 Place the base unit on a flat surface convenient to a phone jack and an electric outlet. (See "Connecting the Base Unit" on page 7 for location - Motorola SD4591 | User Guide - Page 21
the wall mount. Removing the Base Unit from the Wall Bracket Push the base unit up until it is clear of the screws on the telephone jack. Removing the Wall Mount from the Base Unit Push down on the wall mount to remove it from the - Motorola SD4591 | User Guide - Page 22
Connecting the Base Unit 1 Select a location convenient to both an electrical outlet and a phone jack. 7 - Motorola SD4591 | User Guide - Page 23
Getting Started 2 Insert the phone cord into back of base unit and into the wall phone jack. 3 Plug other end of phone cord into back of base unit. 4 Hang wall mount bracket on phone wall plate. 5 Plug power cord into power outlet. 8 - Motorola SD4591 | User Guide - Page 24
Connecting the Expansion Handset Charger Your expansion handset does not require a phone line. Just charge the battery and register it to the base. To set up your Motorola Expansion Handset: 1 Insert the power cord into the bottom of the charging base. 2 Plug the power cord into an electrical outlet - Motorola SD4591 | User Guide - Page 25
device information 5 6 5 Left soft key options 6 Right soft key options 7 Mute call symbol 8 Battery strength meter Note: Caller ID information is supplied only if you subscribe to the service with your telephone company. When the handset or base station speakerphone is on, V displays. 10 - Motorola SD4591 | User Guide - Page 26
Navigation Keys Use the up and down scroll keys to navigate through menu items, settings, phonebook entries, Caller ID and redial lists. The handset display uses an arrowhead to indicate the current selection. The up and down b arrowhead indicates additional options above and below the selected item - Motorola SD4591 | User Guide - Page 27
for day or night time, and assigning a name to the handset. Ringer Options Follow the steps listed to set one ring tone for incoming calls and another ring tone for numbers stored in your phonebook. (You must have Caller ID service to use this feature.) The Ringer option has five submenus: • Day - Motorola SD4591 | User Guide - Page 28
Setting the Ring Tone and Ring Volume 1 Press Menu. 2 Scroll to Ringer. 3 Press Select. 4 Scroll through list of options (Day Volume, Night Volume, Ringer Tone, etc.). 5 Select desired option. 6 Press Change. Each tone/volume plays as you press Change. 7 Stop at desired tone/volume to set. 8 Press - Motorola SD4591 | User Guide - Page 29
Setting Key Beeps On or Off 1 Press Menu. 2 Scroll to Ringer. 3 Press Select. 4 Scroll to Key beeps. 5 Press Change to view options (Off, On, Link to Ringer). Stop at the desired option. 6 Press Done to save changes. 7 Press Exit to return to Standby Screen. 14 Setting Up - Motorola SD4591 | User Guide - Page 30
(X). The X represents the list of devices registered to the base unit. (e.g., Handset(1), Camera(2), etc.) The number assigned at registration remains part of the name (e.g., Handset(1)). 1 Press Menu. 2 Scroll to Name handset. 3 Press SELECT. 4 Enter new name using keypad (up to12 characters). The - Motorola SD4591 | User Guide - Page 31
The chart below shows how many times to press each button on the handset to enter letters and special characters (e.g., Press 7 three times to enter R). Use the up and down scroll keys to backspace to make corrections. Note: To - Motorola SD4591 | User Guide - Page 32
Setting Date and Time If you subscribe to Caller ID service, the date and time set automatically with the first incoming call. Use the following steps to manually set the date and time. 1 Press Menu. 2 Scroll to Date/Time. 3 Press Select. 4 Enter the time. (2 digits are required; for both hour and - Motorola SD4591 | User Guide - Page 33
8 Scroll to next field. 9 Press Change to select date format (MM/DD, DD/MM). 10 Scroll to next field. 11 Enter the current date. 12 Press Done. 13 Press Exit to return to Standby Screen. Setting the Language Option 1 Press Menu. 2 Scroll to Language. 3 Press Select. 4 Press Change until desired - Motorola SD4591 | User Guide - Page 34
Setting Touch Tone or Pulse Dialing Your phone is set for touch tone dialing. Do not change the setting unless touch tone service is not available in your area. 1 Press Menu. 2 Scroll to Tone/Pulse. 3 Press Select. 4 Press Change to switch between Tone and Pulse. 5 Press Done. 6 Press - Motorola SD4591 | User Guide - Page 35
Using Your SD4590 Using Your SD4590 Making a Call from the Handset or Base Unit A Press . When you hear the dial tone, dial the number. OR A Enter the phone number, then press . The phone number appears on the display before it is dialed. Use the BACKSP to make corrections. Note: During a call, a - Motorola SD4591 | User Guide - Page 36
Answering/Ending a Call A Press to answer an incoming call. Press ON or A HANDSFREE to answer using the speakerphone.If you have call waiting service, press to answer the second call. B Press to end the call. Adjusting the Volume During a Call Press the top button to make caller's voice louder, - Motorola SD4591 | User Guide - Page 37
Dial the number. Note: For optimal speakerphone quality, when using the handset, make sure the belt clip is on. This raises the handset up so it is not lying flat (the speakerphone is on the back of the handset). Pressing Handsfree while in the Phonebook, Caller ID Redial lists, automatically turns - Motorola SD4591 | User Guide - Page 38
Muting a Call Press MUTE. To unmute the call, press UNMUTE. Placing a Call on Hold 1 Press HOLD. A 2 To return to the call, press UNHOLD or . When a call is on hold, the intercom features are available. Redialing a Number To redial the most recently dialed number: 1 Press A. 2 Press REDIAL. To - Motorola SD4591 | User Guide - Page 39
Using Your SD4590 Finding a Lost or Misplaced Handset Press PAGE on the base unit. All handsets registered to the base unit beep. B Press , EXIT or OK on a handset to stop paging that handset, or press PAGE on the base unit to stop paging all handsets. 24 - Motorola SD4591 | User Guide - Page 40
ID or redial list. Save the number in the private or shared phonebook. Private Phonebooks The private phonebook is unique to each handset and is not accessible by other handsets. Each private phonebook stores up to 50 names and numbers. Shared Phonebooks The shared phonebook is accessible by all - Motorola SD4591 | User Guide - Page 41
, or press EXIT twice to return to the standby menu. Adding Numbers to the Phonebook from Redial 1 Press REDIAL. The display list the last five phone numbers you dialed, with the most recent number at the top. 2 Scroll to the number you want to save. 3 Press STORE. 4 Select the PRIVATE or - Motorola SD4591 | User Guide - Page 42
Enter the name up to 11 characters. Press BACKSP to erase characters to the left of the blinking cursor. 5 Scroll down. The phone number displays in the Number field. 6 Press DONE. 7 Press EXIT once to return to the redial list, or press EXIT twice to return to the - Motorola SD4591 | User Guide - Page 43
to Edit. 5 Press Select. Use Delete to backspace and erase characters to the left of the blinking cursor. 6 Scroll down to move to phone number field. 7 Modify number. 8 Press Done. Deleting a Phonebook Entry 1 Press PHONEBK. 2 Scroll to the entry you want to delete. 3 Press Options. 4 Scroll to - Motorola SD4591 | User Guide - Page 44
for going into a voicemail system. Using Caller ID Note: You must subscribe to caller ID service from your local telephone company to use the caller ID features of your phone. If you subscribe to Caller ID service, the caller's name and/or number are displayed when you receive an incoming call. If - Motorola SD4591 | User Guide - Page 45
Using Your SD4590 Reviewing Caller ID Call List The handset can hold up to 40 caller ID records. 1 Scroll to enter recent calls list. Most recent call listed first. 2 Scroll to review more calls. A 3 Press to call selected number. 30 - Motorola SD4591 | User Guide - Page 46
: This function is useful when using automated response systems. For example, you could access your bank account number by dialing the bank's phone number, entering your account number (using automated dialing), and PIN (using automated dialing). Then, you can enter your most frequently used prompt - Motorola SD4591 | User Guide - Page 47
new answering machine stores up to 15 minutes of messages and/or memos. Listen to your messages from the base unit, the handset, or remotely. Use the base unit or handset to setup the answering machine. All of the features of the answer machine are located in the SETUP DEVICE menu. 1 Press - Motorola SD4591 | User Guide - Page 48
an Outgoing Message (OGM) You can record a personal outgoing message greeting that plays when you receive a call and you do not answer the phone. If you do not record a personal greeting, a prerecorded greeting plays when you receive a call. 1 Go to the SETUP DEVICE menu.. 2 Scroll to OUTGOING - Motorola SD4591 | User Guide - Page 49
Using the Answering Changing the Outgoing Message 1 Go to the SETUP DEVICE menu. 2 Scroll to OUTGOING MSG. 3 Press SELECT. 4 Scroll to CHANGE OGM. 5 Press SELECT. 6 Select DEFAULT OGM or RECORDED OGM. 7 Press SELECT. 8 Press EXIT to return to the OUTGOING MSG menu. Press EXIT again to return to the - Motorola SD4591 | User Guide - Page 50
Erasing the Outgoing Message Note: You cannot erase the default message. 1 Go to the SETUP DEVICE menu. 2 Scroll to OUTGOING MSG. 3 Press SELECT. 4 Scroll to ERASE OGM 5 Press SELECT. 6 Press YES to ERASE RECORDED OGM. 7 Press EXIT to return to the OUTGOING MSG menu. Press EXIT again to return to - Motorola SD4591 | User Guide - Page 51
Using the Answering 5 Press DONE. 6 Press EXIT to return to the SETUP DEVICE menu. Press EXIT again to return to the standby screen. Using Call Screening 1 Press SCREEN when display reads RECORDING INCOMING MESSAGE to listen to the caller without answering. 2 Press flash button to answer the call, - Motorola SD4591 | User Guide - Page 52
Setting the Security ID Number Use your security ID number to remotely access your messages from any touch-tone phone. 1 Go to the SETUP DEVICE menu. 2 Scroll to SECURITY ID. 3 Press SELECT. 4 Enter desired three digit security code 5 Press DONE. 6 Press EXIT to return to - Motorola SD4591 | User Guide - Page 53
Using the Answering Using the Answer Machine Checking Messages from the Base Station Press i to play and stop messages Press g to skip forward Press h to skip backward Press f to delete message 38 - Motorola SD4591 | User Guide - Page 54
Checking Messages from the Handset 1 Press MENU. 2 Scroll to MESSAGES. 3 Press SELECT. 4 Scroll desired function: 2:Play/Stop 3:Skip 4:Answer On/Off 5:Memo 7:Repeat menu 0:Erase 39 - Motorola SD4591 | User Guide - Page 55
a message that you can playback later. Checking Messages Remotely from a TouchTone Phone For your convenience, cut this page out and take it with you so from home. Use the other side of this page to write down notes and phone numbers. Call your base unit. When the machine answers, press * and enter - Motorola SD4591 | User Guide - Page 56
registered to the base unit. You can expand your phone system by adding Motorola SD Series expansion accessories (up to a total of 8 devices). Expansion handsets do not require connection to a phone line. Place the handset and its charging base anywhere a standard electrical outlet is available - Motorola SD4591 | User Guide - Page 57
to the same base unit shows Line in use. Once a second handset is added to the call, the display on all handsets shows On conference. To connect a second handset to a call: A 1 Press or DELETE on the second handset. A 2 To join a conference call, press from the base unit. B 3 To disconnect - Motorola SD4591 | User Guide - Page 58
SELECT. B 6 Press to return to the standby screen, or to scroll to a different menu option. OPTIONS No Auto Answer - the handset does not automatically answer an intercom page. After 1 Ring or After 3 Rings - the handset automatically answers and turns on the speakerphone after 1 or 3 rings. 43 - Motorola SD4591 | User Guide - Page 59
Intercom 1 Press Connect to. 2 Scroll to the desired handset. 3 Press PAGE. 4 Press OK answer the page. The first handset to respond is connected. B 5 Press EXIT or to stop the page. The handset reads No Answer. (If there is no answer, the page automatically ends after two minutes.) B 6 Press - Motorola SD4591 | User Guide - Page 60
to Another Unannounced Transfer 1 Press HOLD. 2 Press Handsfree. 3 Scroll to the handset you want to transfer the call to and press PAGE. B 4 Press to hang up. The call is transferred to the other handset Announced Transfer 1 Follow steps 1 through 3 above. 2 Press OK to answer the page. You can - Motorola SD4591 | User Guide - Page 61
handset you want to use the walkie talkie with. (For example, if the handset you want to talk to is named Kitchen(2), press 2 on the keypad.) 6 Press OK to answer the page. B 7 Press to end the walkie talkie session. Note: When a handset is in walkie talkie mode, you cannot make or receive phone - Motorola SD4591 | User Guide - Page 62
.) The display lists all the devices registered to the base unit. 4 Scroll to the listing for the sending handset. Notes: If you answer an incoming call, the monitoring feature is turned off. You can also use the base unit for monitoring by following the same instructions from the base unit. 47 - Motorola SD4591 | User Guide - Page 63
B intercom to listen to activity. 7 To turn off monitoring, press on either handset. Room Monitoring with the SD4504 Wireless Camera (Optional) Motorola's SD4504 Wireless Camera transmits sound and video to your color handset. 1 Place your camera in the room you wish to monitor. 2 Press CONNECT - Motorola SD4591 | User Guide - Page 64
openLCR™ Option You can download additional ring tones and purchase services with openLCR. 1 Go to the openLCR website at www.openLCR.com. 2 Click on Ringtone. 3 Click on Search& Listen. 4 Select any song. openLCR and the openLCR logo are the trademarks of openLCR.com Inc. 49 - Motorola SD4591 | User Guide - Page 65
Register. 7 Press SELECT. 8 Press and hold PAGE button on base unit until the base beeps. Note: If you exceed the registration limit of 8 devices, the handset display reads Unable to Register. 9 Press and release PAGE again. "Please register - Motorola SD4591 | User Guide - Page 66
base unit and render your cordless telephone system inoperable until at least one handset is reregistered to the base unit. 1 Delete or listen to all voice mail messages, if necessary, to clear the IN USE/Voice Mail indicator. 2 Press OFF on the base unit and all handsets. 3 Press and hold down PAGE - Motorola SD4591 | User Guide - Page 67
with this product. It is designed to be connected to a compatible modular jack that is also compliant. See installation instructions for details. Notification of Local Telephone Company On the bottom of this equipment is a label that contains, among other information, a product identifier in the - Motorola SD4591 | User Guide - Page 68
(USOC RJ11C/RJ11W or RJ14C/RJ14W). Rights of the Telephone Company Should your equipment cause trouble on your line which may harm the telephone network, the telephone company shall, where practicable, notify you that temporary discontinuance of service may be required. Where prior notice is not - Motorola SD4591 | User Guide - Page 69
happens, the telephone company will provide advance notice in order for you to make necessary modifications to maintain uninterrupted service. Interference and, if not installed and used in accordance with the instructions, may cause harmful interference to radio communications. However, there - Motorola SD4591 | User Guide - Page 70
to be serviced only by Motorola or its authorized service agents. CAUTION / WARNING: Changes or modifications not expressly approved by Motorola could void not only the user's authority to operate the equipment, but also the limited warranty. Hearing Aid Compatibility This telephone system meets - Motorola SD4591 | User Guide - Page 71
when your telephone number is called. The sum of the RENs of all devices connected to one line may not exceed 5. Before installing this cordless phone, you with a single line individual service may be extended by means of a certified connector assembly (telephone extension cord). You should be - Motorola SD4591 | User Guide - Page 72
cordless phone does not disable your alarm equipment. If you have questions about what will disable alarm equipment, consult your telephone company or a qualified installer. Repairs Repairs to this equipment should be made by an authorized Canadian maintenance facility designated by Motorola. Any - Motorola SD4591 | User Guide - Page 73
and, if not installed and used in accordance with the instructions, may cause harmful interference to radio communications. However, there is reception, which can be determined by turning the equipment on and off, the user is encouraged to try to correct the interference with one or more of the - Motorola SD4591 | User Guide - Page 74
interference, please consult your dealer or an experienced radio/television technician for additional suggestions. Industry Canada publishes several publications to assist consumers with solving interference problems, which are available from its offices or from its web site (strategis.gc.ca). 59 - Motorola SD4591 | User Guide - Page 75
Does this Warranty Cover? Subject to the exclusions contained below, Motorola, Inc. warrants its cordless telephones ("Products"), Motorola-branded or certified accessories sold for use with these Products ("Accessories"), and Motorola software contained on CD-ROMs or other tangible media and sold - Motorola SD4591 | User Guide - Page 76
equipment are excluded from coverage. Unauthorized Service or Modification. Defects or damages resulting from service, testing, adjustment, installation, maintenance, alteration, or modification in any way by someone other than Motorola, or its authorized service centers, are excluded from coverage - Motorola SD4591 | User Guide - Page 77
; or (d) nonconforming or non-Motorola housings, or parts, are excluded from coverage. Communication Services. Defects, damages, or the failure . Who is Covered This warranty extends to the first end-user purchaser, only. What will Motorola Do? Motorola, at its option, will at no charge repair, or - Motorola SD4591 | User Guide - Page 78
and software, please call the telephone number designated above for the product with which they are used. You will receive instructions on how to ship the Products, Accessories or Software, at your expense, to a Motorola Authorized Repair Center. To obtain service, you must include: (a) a copy of - Motorola SD4591 | User Guide - Page 79
another. Laws in the United States and other countries preserve for Motorola certain exclusive rights for copyrighted Motorola software such as the exclusive rights to reproduce and distribute copies of the Motorola software. Motorola software may only be copied into, used in, and redistributed with - Motorola SD4591 | User Guide - Page 80
aux numéros : •1-800-353-2729 aux États-Unis •1-800-461-4575 au Canada •1-888-390-6456 ATS (téléphone textuel) Copyright © 2005 Motorola, Inc. Tous droits réservés. Aucune partie de ce guide ne peut être reproduite sous quelque forme ou par quelque procédé que ce soit, ni utilisée pour tout travail - Motorola SD4591 | User Guide - Page 81
téléphone Motorola de la série SD4590. Prenez le temps de vérifier que votre emballage contient bien chacun des éléments illustrés. L'enregistrement du produit est une démarche importante pour apprécier pleinement votre nouveau produit Motorola. L'enregistrement nous aide à faciliter le service de - Motorola SD4591 | User Guide - Page 82
Vue d'ensemble du combiné 1 Réglages du volume 2 Écran LCD 3 Touches programme gauche et droite 4 Navigation Haut/Bas 1 5 Combiné allumé/Flash 6 Liste des 5 derniers numéros composés 2 7 Changement majuscules/minuscules 3 8 Allumer le haut-parleur 9 Microphone 4 5 10 Connexion à d' - Motorola SD4591 | User Guide - Page 83
Bienvenue Vue d'ensemble de la base 1 Commandes du répondeur lire ou arrêter les messages 1 revenir au message précédent passer au message suivant supprimer le message en cours 2 Combiné allumé/Flash 3 Touche programmable gauche 4 Navigation Haut/Bas 5 Touche programmable droite 6 Raccrocher - Motorola SD4591 | User Guide - Page 84
11 Localiser un (des) combiné(s) 12 Enregistrer un mémo/Transfert de messages 13 Augmenter ou diminuer le volume 14 Haut-parleur 15 DEL du haut-parleur Vue d'ensemble du chargeur de combiné DEL Ctéhmaorgine dLeEDcharge iv - Motorola SD4591 | User Guide - Page 85
ères Bienvenue i Vue d'ensemble du combin ii Vue d'ensemble de la base iii Instructions importantes sur la sécurit x Préliminaires 1 Consignes de sécurité relatives aux batteries . . . 1 Témoin de charge de la batterie 4 Installation du combiné filaire 4 Installation de la base et du chargeur - Motorola SD4591 | User Guide - Page 86
Vue d'ensemble du téléphone 10 Informations sur l'écran de veille 10 Utilisation des touches programmables 11 Utilisation des touches de navigation 11 Configuration 12 Options de sonnerie 12 Réglage - Motorola SD4591 | User Guide - Page 87
Table des matières Mise en sourdine d'un appel 23 Mise en attente d'un appel 23 Recomposition d'un numéro 23 Recherche d'un combiné égar 24 Enregistrement d'un numéro dans l'annuaire . . . 25 Annuaires privés 25 Annuaires partagés 25 Ajout d'une entrée 26 Ajout de numéros dans l'annuaire à - Motorola SD4591 | User Guide - Page 88
des messages à partir du poste de base 39 Vérification des messages depuis le combin 40 Enregistrement d'un mémo 41 Vérification des messages à distance depuis un téléphone à tonalit 41 viii - Motorola SD4591 | User Guide - Page 89
Table des matières Fonctions avancées 42 Conférence téléphonique 43 Utilisation de l'interphone 44 Configuration de l'interphone 44 Interphone entre combinés 45 Transfert d'un appel depuis un combiné vers un autre 46 Transfert sans annonce 46 Transfert avec annonce 46 Utilisation des combin - Motorola SD4591 | User Guide - Page 90
Instructions importantes sur la sécurité Lorsque vous utilisez votre téléphone sans fil, respectez les consignes de travaux de réparation ou d'entretien s'avéraient nécessaires, contactez Motorola à l'adresse indiquée au verso de ce guide de l'utilisateur. 8. Ne surchargez pas les prises de courant - Motorola SD4591 | User Guide - Page 91
Instructions importantes sur la sécurité 9. Évitez d'utiliser le produit pendant un orage. Utilisez un parasurtenseur pour protéger le matériel. 10. N'utilisez pas le téléphone sans fil pour signaler une fuite de gaz, notamment si vous êtes à proximité de la conduite de gaz. Débranchez immé - Motorola SD4591 | User Guide - Page 92
d'alimentation qui accompagne cet appareil. L'utilisation d'autres blocs d'alimentation pourrait l'endommager. 9. Puisque les téléphones sans fil fonctionnent à l'électricité, vous devriez avoir au moins un téléphone filaire dans votre résidence, au cas où il y aurait une panne de courant. 10. Pour - Motorola SD4591 | User Guide - Page 93
type que celui recommandé. Utilisez seulement la batterie vendue avec votre téléphone ou une batterie de remplacement autorisée recommandée par le fabricant du téléphone. • Maintenez les batteries hors de portée des enfants. • Retirez les batteries du téléphone si vous le rangez pendant plus de 30 - Motorola SD4591 | User Guide - Page 94
chéant. 2 Appuyez sur l'encoche du couvercle de la batterie et faites-le glisser vers le bas pour l'enlever. 3 Branchez le connecteur de batterie dans sa prise et insérez la batterie dans son logement. Remarque : pour que le câble de la batterie soit installé correctement, le fil rouge doit être sur - Motorola SD4591 | User Guide - Page 95
les fentes de la base et appuyez pour l'enclencher à sa place. Remarque : le combiné filaire fonctionnera pendant une panne de courant avec ou sans les batteries de secours. 3 - Motorola SD4591 | User Guide - Page 96
le courant est coupé pendant plus d'une heure, il est conseillé de remplacer les batteries par des batteries neuves. Installation du combiné filaire Connectez le cordon de téléphone spiralé au bas de la base et au bas du combiné filaire. 4 PNInaosstaBdalleettdbearitetes rie BBatteerriesfaLiobwle - Motorola SD4591 | User Guide - Page 97
le branchement à une prise électrique murale et une prise téléphonique. (Voir « Connexion de la base » en page 7 pour des suggestions d'emplacements). 2 Connectez le cordon du téléphone dans l'arrière de la base et branchez-le dans la prise téléphonique murale. 5 - Motorola SD4591 | User Guide - Page 98
des vis de la prise téléphonique. Dépose de la fixation murale de la base Poussez la fixation murale vers le bas pour la dégager du téléphone. 6 - Motorola SD4591 | User Guide - Page 99
Préliminaires Connexion de la base 1 Choisissez un emplacement pratique pour le branchement à une prise électrique murale et une prise téléphonique. 7 - Motorola SD4591 | User Guide - Page 100
2 Insérez le cordon du téléphone dans l'arrière de la base et branchez-le dans la prise téléphonique murale. 3 Branchez l'autre extrémité du cordon à l'arrière de la base. 4 Accrochez la fixation murale dans la plaque murale de support du téléphone. 5 Branchez le cordon d'alimentation dans la prise - Motorola SD4591 | User Guide - Page 101
chargeur du combiné additionnel Votre combiné additionnel ne nécessite pas de ligne téléphonique ; chargez simplement la batterie et enregistrez-le sur la base. Pour installer votre combiné supplémentaire Motorola : 1 Insérez le cordon d'alimentation en bas du socle de charge. 2 Branchez le cordon - Motorola SD4591 | User Guide - Page 102
programmable droite 7 Symbole d'appel en mode muet 8 Témoin de charge de la batterie Remarque : les informations d'identification de l'appelant ne s'affichent que si vous avez souscrit à ce service auprès de votre compagnie du téléphone. Lorsque le haut-parleur du combiné ou de la base est allum - Motorola SD4591 | User Guide - Page 103
Préliminaires Utilisation des touches programmables Utilisez les touches programmables gauche et droite pour sélectionner les fonctions qui s'affichent en liste à l'écran au-dessus de chaque touche. Les fonctions disponibles changent lorsque vous passez d'un écran à un autre. Utilisation des - Motorola SD4591 | User Guide - Page 104
entrants inconnus et un autre pour les numéros enregistrés dans votre répertoire. Remarque : cette option fonctionne uniquement si vous avez le service d'identification de l'appelant. L'option de sonnerie a cinq sous-menus : • Volume quot. : volume de la sonnerie réglé par défaut en usine de 6h00 - Motorola SD4591 | User Guide - Page 105
Réglage du timbre et du volume de sonnerie 1 Appuyez sur Menu. 2 Défilez jusqu'à Prog. sonnerie. 3 Appuyez sur Sélect. 4 Scroll through list of options (Volume quot., Volume nuit, Timbre sonn., etc.). 5 Sélectionnez l'option désirée. 6 Appuyez sur Modif. Chaque timbre/niveau sonore se fait entendre - Motorola SD4591 | User Guide - Page 106
Activation et désactivation des timbres des touches 1 Appuyez sur Menu. 2 Défilez jusqu'à Prog. sonnerie. 3 Appuyez sur Sélect. 4 Défilez jusqu'à Sons de touche. 5 Appuyez sur Modif. pour afficher les options (Éteint, Activé, Lier à la sonnerie). Arrêtez-vous sur l'option souhaitée. 6 Appuyez sur - Motorola SD4591 | User Guide - Page 107
Attribution d'un nom à un combiné ou à la base Lorsque vous enregistrez un combiné, il reçoit par défaut le nom de Combiné(X). La lettre X représente la liste d'appareils enregistrés sur la base (ex. : Combiné(1), Photo(2), etc.). Le numéro affecté à l'enregistrement fait toujours partie du nom (ex: - Motorola SD4591 | User Guide - Page 108
Le tableau ci-dessous indique combien de fois vous devez appuyer sur chaque touche du combiné pour entrer les lettres et les caractères spéciaux (ex : appuyer trois fois sur 7 pour la lettre R). Utilisez les touches de défilement haut et bas pour revenir en arrière et faire des corrections. - Motorola SD4591 | User Guide - Page 109
Date et heure Si vous êtes abonné au service d'identification de l'appelant, la date et l'heure se règlent automatiquement lors du prochain appel entrant. Effectuez les étapes cidessous pour régler la date et l'heure - Motorola SD4591 | User Guide - Page 110
8 Défilez vers le champ suivant. 9 Appuyez sur Modif. pour sélectionner le format de la date (MM/JJ ou JJ/MM). 10 Défilez vers le champ suivant. 11 Entrez la date. 12 Appuyez sur Terminé. 13 Appuyez sur Sortie pour retourner à l'écran de veille. Langue 1 Appuyez sur MENU. 2 Défilez jusqu'à Prog. - Motorola SD4591 | User Guide - Page 111
Numérotation par tonalité ou par impulsions Votre téléphone est réglé en numérotation par tonalité. Ne modifiez pas ce réglage à moins que le service de numérotation par tonalité ne soit pas disponible dans votre localité. 1 Appuyez sur Menu. 2 Faites défiler jusqu'à Ton./Imp. 3 Appuyez sur Sélect. - Motorola SD4591 | User Guide - Page 112
sur . Lorsque vous entendez la tonalité de composition, composez le numéro. ou A Saisissez le numéro de téléphone et appuyez sur la touche . Le numéro de téléphone s'affiche à l'écran avant d'être composé. Pour le corriger, utilisez BACKSP [Retour arrière]. Remarque : pendant l'appel, un compteur - Motorola SD4591 | User Guide - Page 113
à un appel entrant. Appuyez sur la touche DÉCROCHER ou sur la touche MAINS A LIBRES pour répondre en utilisant le haut-parleur. Si vous avez un service de mise en attente, appuyez sur pour répondre à un second appel. B Appuyez sur pour terminer l'appel. Réglage du volume pendant un appel Appuyez sur - Motorola SD4591 | User Guide - Page 114
de la liste de recomposition ou de l'annuaire, le haut-parleur s'active et le numéro sélectionné est composé automatiquement. Poser le combiné sur son support lorsque le haut-parleur est activé ne met pas fin à l'appel. Changement entre combiné et haut-parleur Appuyez sur la touche MAINS LIBRES pour - Motorola SD4591 | User Guide - Page 115
Utilisation de votre SD4590 Mise en sourdine d'un appel Appuyez sur SOURD. Pour rétablir le son de l'appel, appuyez sur FIN SOU. Mise en attente d'un appel A 1 Appuyez sur GARDE. 2 Pour revenir à l'appel, appuyez sur FIN GAR ou sur . Lorsqu'un appel est en attente, les fonctions d'interphone sont - Motorola SD4591 | User Guide - Page 116
Recherche d'un combiné égaré Appuyez sur la touche PAGE de la base. Tous les combinés enregistrés sur la base se mettent à sonner. B Appuyez sur , SORTIE ou sur la touche OK d'un combiné pour arrêter l'appel de ce combiné, ou appuyez de nouveau sur la touche PAGE de la base pour arrêter l'appel des - Motorola SD4591 | User Guide - Page 117
é est spécifique à chaque combiné et n'est pas accessible depuis les autres combinés. Chaque annuaire privé peut sauvegarder jusqu'à 50 noms et numéros de téléphone. Annuaires partagés L'annuaire partagé est accessible depuis tous les combinés ; il peut conserver jusqu'à 49 noms et numéros de - Motorola SD4591 | User Guide - Page 118
Ajout d'une entrée 1 Appuyez sur RÉPERT. 2 Appuyez sur Sélect. depuis l'option NOUV. ENTRÉE. 3 Entrez le nom de la personne (jusqu'à 11 caractères). Sélectionnez BACKSP [Retour arrière] pour effacer les caractères situés à gauche du curseur clignotant. 4 Défilez vers le bas. L'option NUMÉROS appara - Motorola SD4591 | User Guide - Page 119
Appuyez sur BACKSP [Retour arrière] pour effacer les caractères situés à gauche du curseur clignotant. 5 Défilez vers le bas. Le numéro de téléphone apparaît dans le champ Numéro. 6 Appuyez sur TERMINÉ. 7 Appuyez sur SORTIE une fois pour revenir à la liste de recomposition, ou deux fois sur SORTIE - Motorola SD4591 | User Guide - Page 120
Pour modifier le numéro, 8 Appuyez sur Supprim. pour revenir en arrière en effaçant les caractères à gauche du curseur clignotant. 9 Lorsque votre entrée est correcte, appuyez sur TERMINÉ pour l'enregistrer. Remarque : vous pouvez aussi enregistrer un numéro dans l'annuaire à partir de la liste d' - Motorola SD4591 | User Guide - Page 121
Utilisation de votre SD4590 Modification d'une entrée d'annuaire 1 Appuyez sur RÉPERT. 2 Défilez jusqu'à l'entrée que vous voulez modifier. 3 Appuyez sur Options. 4 Défilez jusqu'à Modifier. 5 Appuyez sur Sélect. Utilisez Supprim pour revenir en arrière en effaçant les caractères à gauche du - Motorola SD4591 | User Guide - Page 122
de l'appelant auprès de votre compagnie du téléphone pour pouvoir utiliser cette fonction sur votre téléphone. Si vous êtes abonné au service d'identification de l'appelant, le nom et/ou le numéro de téléphone de l'appelant s'affiche à l'écran du téléphone lorsque vous recevez un appel. Si votre - Motorola SD4591 | User Guide - Page 123
Utilisation de votre SD4590 Consultation de la liste d'identification de l'appelant Le combiné peut contenir jusqu'à 40 enregistrements d'identification de l'appelant. 1 Défilez pour ouvrir la liste des appels récents. L'appel le plus récent s'affiche en premier. 2 Défilez pour consulter d'autres - Motorola SD4591 | User Guide - Page 124
si vous tombez sur un système de réponse automatisée. Par exemple, vous pouvez accéder à votre compte bancaire en composant le numéro de téléphone de la banque, puis votre numéro de compte avec la composition automatique et enfin votre code PIN de la même manière. Vous pouvez - Motorola SD4591 | User Guide - Page 125
Utilisation du répondeur Utilisation du répondeur Votre nouveau répondeur peut enregistrer 15 minutes de messages et/ou de mémos. Vous pouvez écouter les messages depuis la base, depuis un combiné, ou à distance. Utilisez la base ou le combiné pour configurer le répondeur. Toutes les options du ré - Motorola SD4591 | User Guide - Page 126
5 Appuyez sur TERMINÉ. Un message vocal annonce la modification effectuée. 6 Appuyez sur SORTIE pour revenir au menu PROG. RÉPOND. Appuyez de nouveau sur SORTIE pour retourner à l'écran de veille. Enregistrement d'un message sortant (MS) Vous pouvez enregistrer un message d'accueil personnel qui - Motorola SD4591 | User Guide - Page 127
Utilisation du répondeur 7 Appuyez sur SORTIE pour revenir au menu PROG. RÉPOND. Appuyez de nouveau sur SORTIE pour retourner à l'écran de veille. Modification du message sortant 1 Allez au menu PROG. RÉPOND. 2 Défilez jusqu'à MESS. SORTANT. 3 Appuyez sur SÉLECT. 4 Défilez jusqu'à MODIFIER MS. 5 - Motorola SD4591 | User Guide - Page 128
Effacement du message sortant Remarque : vous ne pouvez pas effacer le message par défaut. 1 Allez au menu PROG. RÉPOND. 2 Défilez jusqu'à MESS. SORTANT. 3 Appuyez sur SÉLECT. 4 Défilez jusqu'à EFFACER MS. 5 Appuyez sur SÉLECT. 6 Appuyez sur OUI pour EFFACER LE MESSAGE SORTANT ENREGISTRÉ. 7 Appuyez - Motorola SD4591 | User Guide - Page 129
Utilisation du répondeur Réglage du nombre de sonneries avant que le répondeur se mette en route 1 Allez au menu PROG. RÉPOND. 2 Défilez jusqu'à NBRE SONNERIES. 3 Appuyez sur SÉLECT. 4 Défilez pour sélectionner 3, 4, 5, 6 sonneries ou ÉCONOM. D'INTER. 5 Appuyez sur TERMINÉ. 6 Appuyez sur SORTIE - Motorola SD4591 | User Guide - Page 130
du numéro d'identification sécurisée Utilisez votre numéro d'identification sécurisée pour accéder à distance à vos messages depuis n'importe quel téléphone à tonalités. 1 Allez au menu PROG. RÉPOND. 2 Défilez jusqu'à ID SÉCURITÉ. 3 Appuyez sur SÉLECT. 4 Entrez le code de sécurité à trois chiffres - Motorola SD4591 | User Guide - Page 131
Utilisation du répondeur Utilisation du répondeur Vérification des messages à partir du poste de base Appuyez sur i pour lire ou arrêter les messages. Appuyez sur g pour passer au message suivant. Appuyez sur h pour revenir au message précédent. Appuyez sur f pour supprimer le message en cours. 39 - Motorola SD4591 | User Guide - Page 132
Vérification des messages depuis le combiné 1 Appuyez sur MENU. 2 Défilez jusqu'à MESSAGES. 3 Appuyez sur SÉLECT. 4 Défilez jusqu'à la fonction voulue : 2 : Lecture/arrêt 3 : Message suivant 4 : Répondeur activé/désactivé 5 : Mémo 7 : Répéter le menu 0 : Effacer 40 - Motorola SD4591 | User Guide - Page 133
appeller votre répondeur lorsque vous êtes éloigné de votre domicile. Utilisez le verso pour des notes personnelles et pour y noter des numéros de téléphone utiles. Appelez votre numéro. Lorsque le répondeur se met en marche, appuyez sur * et entrez votre numéro d'ID de sécurité à trois chiffres - Motorola SD4591 | User Guide - Page 134
la base. Vous pouvez étendre votre réseau téléphonique en ajoutant des accessoires d'extension Motorola de la série SD (jusqu'à 8 appareils). Il n'est pas nécessaire de connecter le : 1-800-461-4575 au Canada ATS 1-888-390-6456 (téléphone textuel) Par internet : www.motorola.com/cordless 42 - Motorola SD4591 | User Guide - Page 135
Fonctions avancées Conférence téléphonique Si un combiné est déjà en ligne, l'écran des autres combinés enregistrés sur la même base affiche Ligne occupée. Lorsqu'un deuxième combiné est ajouté sur cet appel, l'écran de tous les combinés affiche Conférence. Pour connecter un deuxième combiné à un - Motorola SD4591 | User Guide - Page 136
Utilisation de l'interphone Configuration de l'interphone Réglez un combiné ou la base pour répondre automatiquement à un appel en interphone après 1 ou 3 sonneries. Tous les combinés sont réglés en usine sur Rép auto inact. Effectuez les étapes ci-dessous pour modifier les réglages usine. 1 Appuyez - Motorola SD4591 | User Guide - Page 137
Fonctions avancées Interphone entre combinés 1 Appuyez sur la touche Connect to [Connecter à]. 2 Faites défiler jusqu'au combiné souhaité. 3 Appuyez sur PAGE. 4 Appuyez sur OK pour répondre à un appel. Le premier combiné qui répond est connecté. B 5 Appuyez sur SORTIR ou sur pour arrêter l'appel. - Motorola SD4591 | User Guide - Page 138
Transfert d'un appel depuis un combiné vers un autre Transfert sans annonce 1 Appuyez sur GARDE. 2 Appuyez sur la touche Handsfree [mains libres]. 3 Défilez jusqu'au combiné auquel vous désirez transférer l'appel et appuyez sur PAGE. B 4 Appuyez sur pour raccrocher. L'appel est transféré sur l'autre - Motorola SD4591 | User Guide - Page 139
Utilisation des combinés en walkie talkie La fonction walkie talkie permet de parler de combiné à combiné. Vous pouvez l'utiliser même si les combinés sont hors de portée de la base. Vous devez effectuer les étapes 1 et 2 sur les deux combinés pour utiliser le mode walkie talkie. 1 Appuyez sur MENU. - Motorola SD4591 | User Guide - Page 140
. Remarques : si vous répondez à un appel entrant, la fonction de surveillance se désactive. Vous pouvez surveiller aussi à partir de la base : pour cela, suivez les instructions cidessus à partir de la base. 48 - Motorola SD4591 | User Guide - Page 141
combiné de réception émet un bip et l'affichage indique Monitoring HANDSET(X) Vol-X [Surveillance COMBINÉ(X) Vol-X]. 6 Appuyez sur HANDSFREE [Mains avec la caméra sans fil SD4504 (option) La caméra sans fil SD4504 de Motorola transmet le son et l'image à votre combiné couleur. 1 Placez la caméra - Motorola SD4591 | User Guide - Page 142
. Vous pouvez désormais voir et entendre ce qui se passe dans cette pièce. Option openLCR™ Vous pouvez télécharger des sonneries supplémentaires et acheter divers services chez openLCR. 1 Allez sur le site d'openLCR à l'adresse www.openLCR.com. 2 Cliquez sur Ringtone. 3 Cliquez sur Search & Listen - Motorola SD4591 | User Guide - Page 143
Fonctions avancées Enregistrement d'un nouveau combiné Vous pouvez enregistrer jusqu'à 8 appareils (combinés, appareils photo ou base de téléphone portable) sur une base. Pour enregistrer votre nouveau combiné : 5 Appuyez sur la touche programmable de droite pour sélectionner menu. 6 Défilez jusqu - Motorola SD4591 | User Guide - Page 144
combinés seront annulés sur la base et votre téléphone sans fil sera inutilisable jusqu'à ce qu'au moins un combiné soit de nouveau enregistré sur cette base. 1 Si besoin, écoutez tous les messages vocaux ou supprimez-les pour éteindre le témoin EN SERVICE de la messagerie. 2 Appuyez sur le bouton - Motorola SD4591 | User Guide - Page 145
une même ligne ne doit pas être supérieure à 5. Avant d'installer ce téléphone sans fil, assurez-vous que sa connexion au réseau de l'opérateur téléphonique local cas, le câblage interne de l'opérateur téléphonique associé à un service individuel à une seule ligne peut être étendu grâce à un - Motorola SD4591 | User Guide - Page 146
citées dans la référence CS-03 de Industry Canada. Un cordon de téléphone et une prise modulaire conformes accompagnent ce produit. La fiche est conçue pour par une structure de maintenance canadienne autorisée et désignée par Motorola. Toute réparation ou altération faite par l'utilisateur ou tout - Motorola SD4591 | User Guide - Page 147
de ce téléphone. D'autres appareils, y compris d'autres téléphones sans fil, peuvent interférer avec le fonctionnement de ce téléphone ou causer du causer, en cas d'installation et d'utilisation non conformes aux instructions, des interférences préjudiciables aux communications radio. Toutefois - Motorola SD4591 | User Guide - Page 148
Si cet équipement génère effectivement des interférences dommageables à la réception radio ou télévision, ce qui peut être vérifié en l'éteignant et en le rallumant, il est recommandé à l'utilisateur d'essayer de corriger les interférences par l'une ou plusieurs des mesures suivantes : • réorienter - Motorola SD4591 | User Guide - Page 149
, Inc. garantit que ses téléphones sans fil (ci-après nommés « Produits »), les accessoires certifiés ou de marque Motorola vendus pour l'usage avec les Produits (ci-après nommés « Accessoires »), ainsi que les logiciels Motorola contenus sur les CD-ROM ou tout autre support matériel vendus pour - Motorola SD4591 | User Guide - Page 150
. La garantie s'applique uniquement aux défauts physiques du support contenant la copie du logiciel (CD-ROM ou disquette). Batteries. Seules les batteries dont la pleine capacité est inférieure à 80 % de la capacité normale ainsi que les batteries Motorola, sont exclus de la présente garantie. 58 - Motorola SD4591 | User Guide - Page 151
l'Accessoire ou du Logiciel causés par tout service de communication ou signal auquel vous êtes abonné ou que vous utilisez avec le Produit, l'Accessoire ou le Logiciel, ne sont pas couverts par la garantie. Logiciel contenu sur un support matériel. Motorola ne garantit pas que le logiciel satisfera - Motorola SD4591 | User Guide - Page 152
téléphone indiqué précédemment et demander de l'aide pour le produit avec lequel l'accessoire ou le logiciel est utilisé. On vous indiquera comment procéder à l'expédition, à vos frais, des Produits, Accessoires ou Logiciels à un centre de réparation Motorola autorisé. Pour obtenir le service, vous - Motorola SD4591 | User Guide - Page 153
CADRE DE CETTE GARANTIE EXPRESSE LIMITÉE SONT SOUS LA RESPONSABILITÉ EXCLUSIVE DU CONSOMMATEUR, ET SE SUBSTITUENT À TOUTE AUTRE GARANTIE, EXPRESSE OU IMPLICITE. MOTOROLA NE POURRA EN AUCUN CAS ÊTRE TENUE RESPONSABLE, EN CONTRAT OU EN TORT (Y COMPRIS LA NÉGLIGENCE) POUR DES DOMMAGES EXCÉDANT LE PRIX - Motorola SD4591 | User Guide - Page 154
SD4590 Expandable Corded/ Cordless Telephone System with Base Speakerphone, Keypad, and Answering Machine Système téléphonique extensible avec ou sans fil Base avec micro, haut-parleur, clavier et répondeur 520127-002 06/05 MGBI
-
 1
1 -
 2
2 -
 3
3 -
 4
4 -
 5
5 -
 6
6 -
 7
7 -
8
-
9
-
10
-
11
-
12
-
13
-
14
-
15
-
16
-
17
-
18
-
19
-
20
-
21
-
22
-
23
-
24
-
25
-
26
-
27
-
28
-
29
-
30
-
31
-
32
-
33
-
34
-
35
-
36
-
37
-
38
-
39
-
40
-
41
-
42
-
43
-
44
-
45
-
46
-
47
-
48
-
49
-
50
-
51
-
52
-
53
-
54
-
55
-
56
-
57
-
58
-
59
-
60
-
61
-
62
-
63
-
64
-
65
-
66
-
67
-
68
-
69
-
70
-
71
-
72
-
73
-
74
-
75
-
76
-
77
-
78
-
79
-
80
-
81
-
82
-
83
-
84
-
85
-
86
-
87
-
88
-
89
-
90
-
91
-
92
-
93
-
94
-
95
-
96
-
97
-
98
-
99
-
100
-
101
-
102
-
103
-
104
-
105
-
106
-
107
-
108
-
109
-
110
-
111
-
112
-
113
-
114
-
115
-
116
-
117
-
118
-
119
-
120
-
121
-
122
-
123
-
124
-
125
-
126
-
127
-
128
-
129
-
130
-
131
-
132
-
133
-
134
-
135
-
136
-
137
-
138
-
139
-
140
-
141
-
142
-
143
-
144
-
145
-
146
-
147
-
148
-
149
-
150
-
151
-
152
-
153
-
154
 |
 |
