NEC MD210C2 User Manual
NEC MD210C2 Manual
 |
View all NEC MD210C2 manuals
Add to My Manuals
Save this manual to your list of manuals |
NEC MD210C2 manual content summary:
- NEC MD210C2 | User Manual - Page 1
MD210C2 MD211C2 MD211C3 INSTALLATION & MAINTENANCE GUIDE - NEC MD210C2 | User Manual - Page 2
cations - MD211C3 ...English-25 Features ...English-26 Troubleshooting ...English-27 be read carefully in order to avoid any problems. Protective earth terminal marked. Main switch ON. NEC is a registered trademark of NEC Corporation. ErgoDesign is a registered trademark of NEC Display Solutions - NEC MD210C2 | User Manual - Page 3
THE UNIT, PLEASE DISCONNECT THE POWER CORD FROM THE AC OUTLET. DO NOT REMOVE COVER (OR BACK). NO USER SERVICEABLE PARTS INSIDE. REFER SERVICING TO QUALIFIED SERVICE PERSONNEL. Power Cord Important Information CAUTION: Please use the power cord provided with this monitor in accordance with the table - NEC MD210C2 | User Manual - Page 4
display performance as specified, it must only be used in conjunction with NEC approved display controllers. MD210C2/MD211C2/MD211C3 cannot be used for a life-support front or back cover. No user serviceable parts inside. Refer servicing to qualified service personnel. The AC outlet shall be readily - NEC MD210C2 | User Manual - Page 5
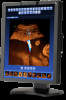
MD211C3 21.3" Diagnostic Imaging Color LCD Monitor Model Number: MD211C2/(MD210C2)/MD211C3 UMDNS Code: 16-603 NEC Display and used in accordance with the instructions, may cause harmful interference to to Identify and Resolve Radio-TV Interference Problems." This booklet is available from the - NEC MD210C2 | User Manual - Page 6
EMC details information, please contact NEC local authority. • DO NOT OPEN THE MONITOR. There are no user serviceable parts inside and opening or • If the monitor does not operate normally by following operating instructions. • Allow adequate ventilation around the monitor so that heat can - NEC MD210C2 | User Manual - Page 7
hour and a residual image remains, the monitor should be turned off for one hour to erase the image. NOTE: As with all personal display devices, NEC DISPLAY SOLUTIONS recommends using a moving screen saver at regular intervals whenever the screen is idle or turning off the monitor when not in use - NEC MD210C2 | User Manual - Page 8
Contents Your new NEC monitor box* should contain the following: • MD210C2/MD211C2/MD211C3 monitor with tilt/swivel/pivot/height adjust stand • Power Cord • DVI-D cable*1 • DisplayPort cable • USB Cable • Quick Reference Guide • CD-ROM x 2 • Screw (x 4) (to mount the monitor to a flexible arm (page - NEC MD210C2 | User Manual - Page 9
instructions: NOTE: Make sure to read "Recommended Use" (page 4) before installation. In order to display the maximum resolution, a display for MD211C3 is needed. 1. Turn off your computer. 2. For a PC with DVI digital output: Connect the DVI-D cable to the connector of the display controller in - NEC MD210C2 | User Manual - Page 10
cord from a USB device, plug into one of the downstream ports of the monitor. NOTE: Incorrect cable connections may result in irregular operation, damage display quality/components of the LCD module and/or shorten the module's life. NOTE: Up to 5 sub monitors can be daisy-chained. 30° Tilt A Type - NEC MD210C2 | User Manual - Page 11
the top (Portrait) or left side (Landscape) of the monitor (Figure E.1). Turn on the computer. NOTE: If you have any problems, please refer to the Troubleshooting section of this Manual. Power switch Figure E.1 Raise and Lower Monitor Screen The monitor may be raised or lowered in either Portrait or - NEC MD210C2 | User Manual - Page 12
Screen Rotation Before rotating, the screen must be raised to the highest level and tilt to avoid knocking the screen on the desk or pinching your fingers. Disconnect all cables. To raise the screen, place hands on each side of the monitor and lift up to the highest position (Figure RL.1). To rotate - NEC MD210C2 | User Manual - Page 13
the safety requirements, the monitor must be mounted to an arm that supports the weight of the monitor. See page 23-24-25 for details. arm This LCD monitor is designed for use with a flexible arm. 1. Follow the instructions on how to Remove the Monitor Stand for Mounting to remove the stand. 2. Use - NEC MD210C2 | User Manual - Page 14
is rotated. Choose the button that matches the Key Guide. NOTE: The KEY GUIDE appears as follows: • KEY GUIDE when OSD menu is displayed. • KEY GUIDE when PICTURE MODE 2 is disabled. • KEY GUIDE when PICTURE MODE 2 is enabled. Each KEY GUIDE works as follows: 2 LED 3 Control Buttons 4 AMBIENT - NEC MD210C2 | User Manual - Page 15
the display area of the LCD. EXPANSION Sets the zoom method. FULL: The image is expanded to full screen regardless of the resolution. ASPECT: The image is expanded without changing the aspect ratio. OFF: The image is not expanded. CUSTOM: Refer to the Advanced OSD menu for detailed instructions - NEC MD210C2 | User Manual - Page 16
and 1536x 2048 pixels for MD211C3. NOTE: If you have any problems, please refer to the Troubleshooting section of this Manual. If a change was long as the current video signal is present. LAST: When the monitor is displaying a signal from the current video source and a new secondary video source is - NEC MD210C2 | User Manual - Page 17
can be reset by highlighting the control to be reset and pressing the RESET button. Information Provides information about the current resolution display and technical data including the preset timing being used and the horizontal and vertical frequencies. Indicates the model name and serial number - NEC MD210C2 | User Manual - Page 18
medical images. Medical settings for endoscopic imaging view. Setting for Gamma 2.2 image. For Hardware Calibration settings by NEC Display Solutions QA software (some OSD settings are disabled). NOTE: A "PICTURE MODE IS LOCKED" warning message appears, when PICTURE MODE is locked out. To - NEC MD210C2 | User Manual - Page 19
DICOM is available with this built-in method. - If the monitor is connected with a video signal source (computer): Make sure that no OSD menu is displayed, then press the RESET button for more than 3 seconds or press the RESET button twice. This will start drawing the test pattern across the screen - NEC MD210C2 | User Manual - Page 20
> • When both OSD and Key Guide are off, push the "RESET" weak xy makes it a bluish white. GAMMA CUSTOM VALUE BLACK Manually select the desired Gamma* correction for the monitor. The LUT setting can be selected only by using the NEC Display Solutions software when PICTURE MODE is set to - NEC MD210C2 | User Manual - Page 21
CABLE (DisplayPort input only) This function electronically compensates the slight variations in the white uniformity level that may occur across the display area of the screen. These variations are a characteristic of LCD panel technology. This function evens out the luminance uniformity of the - NEC MD210C2 | User Manual - Page 22
to stop cooling fans. When a person comes near the monitor again, it resumes from the power saving mode, start cooling fan operation and displays the images. LIGHT: After it is detected that there is no person after a period of time, the monitor shifts to low brightness mode automatically - NEC MD210C2 | User Manual - Page 23
menu to appear on your screen. Selecting OSD Location allows you to manually adjust the position of the OSD control menu left or right. You select color" & "Adjust Window frame color" can be changed. The NEC logo is briefly displayed after the monitor is powered on. This feature can be turned on or - NEC MD210C2 | User Manual - Page 24
and 1536x 2048 pixels for MD211C3. Note: If you have any problems, please refer to the Troubleshooting section of this Manual. If a change was made is shown in degrees (C). The estimated remaining lifetime of the display backlight is indicated here. Backlight lifetime depends mainly on the desired - NEC MD210C2 | User Manual - Page 25
gray Typ) Resolutions Supported (Some systems may not support all modes listed). NEC DISPLAY SOLUTIONS recommended resolution 1600 x 1200 at 60 Hz for optimal display performance. 1200 x 1600 at 60 Hz NEC DISPLAY SOLUTIONS recommended resolution for optimal display performance. Active Display - NEC MD210C2 | User Manual - Page 26
gray Typ) Resolutions Supported (Some systems may not support all modes listed). NEC DISPLAY SOLUTIONS recommended resolution 1600 x 1200 at 60 Hz for optimal display performance. 1200 x 1600 at 60 Hz NEC DISPLAY SOLUTIONS recommended resolution for optimal display performance. Active Display - NEC MD210C2 | User Manual - Page 27
gray Typ) Resolutions Supported (Some systems may not support all modes listed). NEC DISPLAY SOLUTIONS recommended resolution 2048 x 1536 at 60 Hz for optimal display performance. 1536 x 2048 at 60 Hz NEC DISPLAY SOLUTIONS recommended resolution for optimal display performance. Active Display - NEC MD210C2 | User Manual - Page 28
standard cables. DVI-D: The digital-only subset of DVI ratified by the Digital Display Working Group (DDWG) for digital connections between computers and displays. As a digital-only connector, analog support is not provided off a DVI-D connector. As a DVI-based digital only connection, only a simple - NEC MD210C2 | User Manual - Page 29
English Troubleshooting No Picture • The signal cable should be completely connected to the display controller/computer. • The display controller should be completely seated in its slot. • The monitor does not support a DisplayPort converter signal. • Monitor power switch and computer power switch - NEC MD210C2 | User Manual - Page 30
to one or more additional displays. • Gamma Adjust: Recalibrates Gamma data by the integrated front sensor. • DICOM Measurement: Measures DICOM response. • AMBIENT SENSOR CALIBRATION: To manually adjust the integrated ambient light sensor with an external color analyzer reference, which is traceable - NEC MD210C2 | User Manual - Page 31
front sensor based on the USB color sensor. Or to manually adjust the integrated front sensor with an external near range color any influence of ambient light. DO NOT press the USB color sensor against the display panel. NOTE: Make sure that the USB color sensor cable is positioned to avoid blocking - NEC MD210C2 | User Manual - Page 32
MD211C3 A B USB color sensor Source display MD210C2/ MD211C2/ MD211C3 A Source display Sensor Port (located at the back of the monitor) Figure C.1 Figure C.2 Display A - SOURCE display is satisfactory. If the copy result is unsatisfactory, manually fine tune the white point using the "LEFT" - NEC MD210C2 | User Manual - Page 33
English Gamma Adjust By using the integrated front sensor, Gamma Adjust recalibrates the LCD gamma. Gamma Adjust is recommended if MAX GSDF ERROR exceeds the medical standards. All PICTURE MODES are updated when Gamma Adjust is performed. 1. To show the CALIBRATION menu, select the STAND ALONE - NEC MD210C2 | User Manual - Page 34
Figure D.1 Figure D.2 AMBIENT SENSOR CALIBRATION AMBIENT SENSOR CALIBRATION can manually calibrate the ambient light sensor. This function is effective when AMB illuminance meter which should be installed at the same angle as the display (Figure AS.5). Input the value by using the control keys, - NEC MD210C2 | User Manual - Page 35
English 5. Input the value measured at 1, and press SELECT (Figure AS.3). When not having measured, press SELECT without changing the value. 6. After the CALIBRATION SUCCEEDED message appears (Figure AS.4), press SELECT. You can set DATE and TIME by using control keys, and press SELECT. 7. To end - NEC MD210C2 | User Manual - Page 36
normal household waste. This includes monitors and electrical accessories, such as signal cables or power cords. When you need to dispose of your NEC display products, please follow the guidance of your local authority, or ask the shop where you purchased the product, or if applicable, follow any
-
 1
1 -
 2
2 -
 3
3 -
 4
4 -
 5
5 -
 6
6 -
 7
7 -
8
-
9
-
10
-
11
-
12
-
13
-
14
-
15
-
16
-
17
-
18
-
19
-
20
-
21
-
22
-
23
-
24
-
25
-
26
-
27
-
28
-
29
-
30
-
31
-
32
-
33
-
34
-
35
-
36
 |
 |

MD210C2
MD211C2
MD211C3
INSTALLATION & MAINTENANCE GUIDE