NEC NP1150 NP1150/2150/3150/3151W network setup guide
NEC NP1150 - XGA LCD Projector Manual
 |
UPC - 805736019568
View all NEC NP1150 manuals
Add to My Manuals
Save this manual to your list of manuals |
NEC NP1150 manual content summary:
- NEC NP1150 | NP1150/2150/3150/3151W network setup guide - Page 1
NEC Projector NP3150 / NP2150 / NP1150 NP3151W Wired and Wireless Network Setup Guide SELECT LEFT LENS SHIFT RIGHT DOWN UP 3D REFORM AUTO ADJUST SOURCE ON/STAND BY POWSETRATLUASMUPSB 1. What You Can Do with User Supportware 5 2. Operating Environment 3. Connecting LAN Cable 1 2 3 - NEC NP1150 | NP1150/2150/3150/3151W network setup guide - Page 2
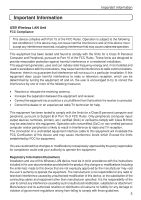
, refer to the User's Manual for the personal computer or the peripheral equipment for the network. Use a wireless LAN card conforming to the Wi-Fi standard for your personal computer. Information on USB Wireless LAN: The NP3150/NP2150/NP1150/NP3151W series projectors distributed in some areas - NEC NP1150 | NP1150/2150/3150/3151W network setup guide - Page 3
your authority to operate the equipment. Regulatory Information/Disclaimers Installation and use of this Wireless LAN device must be in strict accordance with the instructions included in the user documentation provided with the product. Any changes or modifications (including the antennas) made to - NEC NP1150 | NP1150/2150/3150/3151W network setup guide - Page 4
can be used both indoors and outdoors. This Class B digital apparatus complies with Canadian RSS-210. Cet appareil numerique de be disabled by factory firmware and is not user changeable. Regulatory Statement: Operation Hereby, NEC Display Solutions, Ltd. declares that this USB Wireless LAN Unit - NEC NP1150 | NP1150/2150/3150/3151W network setup guide - Page 5
has been intercepted, introduce computer viruses or otherwise damage data or the system, etc. Wireless LAN cards and wireless access points generally include security measures for dealing with these problems. Making the proper security settings before using the products can reduce the risk of such - NEC NP1150 | NP1150/2150/3150/3151W network setup guide - Page 6
Specifications Specifications For United States, Canada, and Mexico Product Name NP01LM3 Operating Voltage 5V (power supplied from the projector) Max Amps Tx: 472 mA (Max) Rx: 300 mA (Max) Wireless Standard IEEE802.11a, IEEE802.11b, IEEE802.11g Modulation Method CCK/DQPSK/DBPSK/OFDM LED - NEC NP1150 | NP1150/2150/3150/3151W network setup guide - Page 7
For other countries except United States, Canada and Mexico Product Name NP01LM2 Operating Voltage 5V (power supplied from the projector) Max Amps Tx: 472 mA (Max) Rx: 300 mA (Max) Wireless Standard IEEE802.11a, IEEE802.11b, IEEE802.11g Modulation Method CCK/DQPSK/DBPSK/OFDM LED Display - NEC NP1150 | NP1150/2150/3150/3151W network setup guide - Page 8
Do with User Supportware 5 9 1-1. Image Express Utility 2.0 9 1-2. Desktop Control Utility 1.0 11 1-3. Ulead Photo Explorer 8.0 SE Basic 12 1-4. Viewer PPT Converter 3.0 13 1-5. PC Control Utility 3.0 13 2. Operating Environment 14 2-1. Supported Projector 14 2-2. Supported the wireless LAN - NEC NP1150 | NP1150/2150/3150/3151W network setup guide - Page 9
Do with User Supportware 5 1-1. Image Express Utility 2.0 Image Express Utility 2.0 is a software tool used to send the screen of your personal computer to the projector via a network, without the signal cables. G High-speed, high-quality image transmissions based on NEC's original compression - NEC NP1150 | NP1150/2150/3150/3151W network setup guide - Page 10
1. What You Can Do with User Supportware 5 G Projected images can be transferred and saved to personal projector. Mr. D, please start your presentation. Attendant A Manager SELECT LEFT LENS SHIFT RIGHT DOWN UP 3D REFORM AUTO ADJUST SOURCE ON/STAND BY POWSETRATLUASMUPSB WIRELESS WIRELESS - NEC NP1150 | NP1150/2150/3150/3151W network setup guide - Page 11
Can Do with User Supportware 5 1-2. Desktop Control Utility 1.0 Desktop Control Utility 1.0 is software that operates the desktop screen of a personal computer at a remote location from the projector by using a network. G A commercially available USB mouse is connected to the projector to operate - NEC NP1150 | NP1150/2150/3150/3151W network setup guide - Page 12
be easily created. G Ulead Photo Explorer 8.0 in the User Supportware 5 CD-ROM has functions that allow you to use the projector more conveniently, in addition to the functions that come with the software, for when an NEC projector is connected. Additional functions are listed below. For details of - NEC NP1150 | NP1150/2150/3150/3151W network setup guide - Page 13
Control Utility 3.0 PC Control Utility 3.0 is software that allows you to operate the projector from the personal computer when the personal computer and the projector are connected with LAN (wired or wireless) or a serial cable. G You can operate the projector as follows from your personal computer - NEC NP1150 | NP1150/2150/3150/3151W network setup guide - Page 14
2-1. Supported Projector User Supportware 5 supports the following NEC projector (as of March 2008) NP Series VT Series NP3150/NP2150/NP1150/NP3151W/NP905/ NP901W VT800* * The "Easy Connection" function cannot be used with VT800. Reference Some of software can be used with projectors other - NEC NP1150 | NP1150/2150/3150/3151W network setup guide - Page 15
software, please refer to the help function of each software. Supported OS Supported Service Pack 2 or later) Windows 2000 Professional Service Pack 4 or later 2 • Windows power-saving function is not supported. • The "Easy Connection" supports wired LAN or wireless LAN environment required - NEC NP1150 | NP1150/2150/3150/3151W network setup guide - Page 16
3. Connecting LAN Cable Connect a LAN cable to the LAN port (RJ-45) of the projector when connecting the projector to wired LAN. After connecting LAN cable to the projector, set the required settings for the projector ( next page). Server HUB, etc. LAN cable (commercially available) LAN USB(LAN) 16 - NEC NP1150 | NP1150/2150/3150/3151W network setup guide - Page 17
4. Setting the LAN Setting of Projector 4. Setting the LAN Setting of Projector Reference For how to turn on/off the power to the projector and how to operate the buttons and remote control of the projector, refer to "User's Manual" included in the User's Manual CD-ROM. 4-1. Displaying On-Screen - NEC NP1150 | NP1150/2150/3150/3151W network setup guide - Page 18
the LAN Setting of Projector 4 Press the button to highlight the "INSTALLATION" tab. 5 Press the SELECT ̄ button to highlight "NETWORK SETTINGS", and press the button. The "NETWORK SETTINGS" screen will be displayed. • To make setting of wireless LAN Proceed to "4-2. Wireless LAN" ( next page - NEC NP1150 | NP1150/2150/3150/3151W network setup guide - Page 19
4. Setting the LAN Setting of Projector 4-2. Wireless LAN When connecting the wireless LAN, configure the LAN settings in the "WIRELESS" page of "NETWORK SETTINGS" selected from On-Screen Menu. I Flow of Setting Step 1 Display "WIRELESS" page of "NETWORK SETTINGS". Step 2 Select "PROFILES". Step - NEC NP1150 | NP1150/2150/3150/3151W network setup guide - Page 20
in the memory of the projector as the setting for LAN. • "EASY CONNECTION" is a mode in which the personal computer that runs Image Express Utility 2.0 in the User Supportware 5 CD-ROM is easily connected to wireless LAN. Note that "EASY CONNECTION" does not support software other than Image Express - NEC NP1150 | NP1150/2150/3150/3151W network setup guide - Page 21
is connected. Press the SELECT ̄ button once to highlight the "IP ADDRESS" field and press the button. The software keyboard will be displayed. 4 Setting the LAN Setting of Projector Use the SELECT ̄̆̇̈ button to select a number to input, and press the The characters will be input - NEC NP1150 | NP1150/2150/3150/3151W network setup guide - Page 22
" is not checked, input the default gateway of the network to which the projector is connected. The method of inputting is the same as that of the " SECURITY" (encryption) specific to wireless LAN. Use the SELECT ̄/̆ button to highlight "ADVANCED" on the "WIRELESS" page and press the button - NEC NP1150 | NP1150/2150/3150/3151W network setup guide - Page 23
list of SSID is displayed. button. Setting the LAN Setting of Projector Icon Wireless access point Personal computer (AD HOC) 4 ........... WEP or is pressed, a software keyboard is displayed and characters can be input or edited. The default setting of the projectors is "NECPJ". 23 - NEC NP1150 | NP1150/2150/3150/3151W network setup guide - Page 24
4. Setting the LAN Setting of Projector 11 Select "NETWORK TYPE" (if necessary). The communication mode "AD HOC" SELECT LEFT LENS SHIFT RIGHT DOWN UP 3D REFORM AUTO ADJUST SOURCE ON/STAND BY POWSETRATLUASMUPSB WIRELESS WIRELESS WIRELESS WIRELESS Wireless Access point Wired LAN Example - NEC NP1150 | NP1150/2150/3150/3151W network setup guide - Page 25
4. Setting the LAN Setting of Projector 13 Select "SECURITY" page (if necessary). Proceed to step 17 if SECURITY is not set. Use the SELECT ̄/̆ button to select TYPE", select which of the following encryption keys, "KEY 1" to "KEY 4", is to be used. Setting the LAN Setting of Projector 25 - NEC NP1150 | NP1150/2150/3150/3151W network setup guide - Page 26
Projector 16 Input "KEY 1" to "KEY 4" (only when WEP is selected). If "WEP (64BIT)" or "WEP (128BIT)" is selected from "SECURITY TYPE", input an encryption key. Set the same encryption key as the wireless to be input and press the button. The software keyboard will be displayed. Use the - NEC NP1150 | NP1150/2150/3150/3151W network setup guide - Page 27
4. Setting the LAN Setting of Projector 17 Finalize "ADVANCED". Use the SELECT ̄/̆ button to highlight [OK] and press the The "WIRELESS" page will be displayed again. button. 18 Reconnect the network. Use the SELECT ̄/̆ button to highlight "RECONNECT" and press the 19 Finalize the - NEC NP1150 | NP1150/2150/3150/3151W network setup guide - Page 28
4-3. Wired LAN When connecting a LAN cable to the LAN port of the projector, configure the LAN settings in the "WIRED" page of "NETWORK SETTINGS" selected from On-Screen Menu. I Flow of setting Step 1 Display "WIRED" page of "NETWORK - NEC NP1150 | NP1150/2150/3150/3151W network setup guide - Page 29
". "PROFILE 1" or "PROFILE 2" can be stored in the memory of the projector as the setting of LAN. Press the SELECT ̄ button once to highlight same procedure as in "4-2. Wireless LAN" ( page 19,20). 4 5 Input "DNS CONFIGURATION". Follow the same procedure as in "4-2. Wireless LAN" ( page 20). - NEC NP1150 | NP1150/2150/3150/3151W network setup guide - Page 30
, refer to the User's Manual of the wireless LAN card. • Check the display of the Windows Vista taskbar. If a network connection utility dedicated to a wireless LAN unit or a wireless LAN card is executed, terminate that utility. • Make the wireless LAN setting of the projector. For details, refer - NEC NP1150 | NP1150/2150/3150/3151W network setup guide - Page 31
]. A list of the networks you are able to connect to will be displayed. 4-1 Click ([Example] Wireless LAN of Windows Vista: Ad Hoc connection) 4-2 Click 5 4 From the list, click the SSID of the projector you want to connect to ("NECPJ" in this example), and click [Connect]. A screen for entering - NEC NP1150 | NP1150/2150/3150/3151W network setup guide - Page 32
Computer ([Example] Wireless LAN of Windows Vista: Ad Hoc connection) 7 When the screen shows "Successfully connected to NECPJ", check "M Save this network" and click [Close]. "Set Network Location" window will be displayed. Note • Unless "M Save this network" is checked, the Remote Desktop function - NEC NP1150 | NP1150/2150/3150/3151W network setup guide - Page 33
will be displayed. 17 Click the [X] in the top-right corner of the window. The window will close. This Completes the Ad Hoc connection of wireless LAN on the personal computer (Windows Vista). Use each software program in User Supportware 5 to transmit the PC screen to the projector. 33 - NEC NP1150 | NP1150/2150/3150/3151W network setup guide - Page 34
projector, by using the wireless network setting function with Windows XP Service Pack 2 (SP2). Preparation: • Install a commercially available wireless LAN card driver to your personal computer, and complete setup of the wireless LAN card. For how to install the driver, refer to the User's Manual - NEC NP1150 | NP1150/2150/3150/3151W network setup guide - Page 35
Network Connection] icon and click [Property]. 3-1 Right-click 3-2 Click A property window for wireless network connections will be displayed. Setting the LAN Setting of Personal Computer ([Example] Wireless LAN of Windows XP: Ad Hoc connection) 4 From the list of [This connection uses the - NEC NP1150 | NP1150/2150/3150/3151W network setup guide - Page 36
6. Setting the LAN Setting of Personal Computer ([Example] Wireless LAN of Windows XP: Ad Hoc connection) 5 Click [Use the following IP address:], and input [IP address]and[Subnet mask]. • If, for example, the [IP address] and [Subnet mask] of the projector are set as show in "Example of settings - NEC NP1150 | NP1150/2150/3150/3151W network setup guide - Page 37
XP: Ad Hoc connection) 9 Right-click the [Wireless Network Connection] icon and click [View Available Wireless Networks]. 9-1 Right-click 9-2 Click The "Wireless Network Connection" window is displayed. 10 From the list, select SSID of the projector to be connected and click [Connect]. 10-1 Click - NEC NP1150 | NP1150/2150/3150/3151W network setup guide - Page 38
the selected SSID is displayed. Configure the wireless network key under the [Association] tab according to those for the projector. This Completes the Ad Hoc connection of wireless LAN on the personal computer (Windows XP). Use each software program in User Supportware 5 to transmit the PC screen - NEC NP1150 | NP1150/2150/3150/3151W network setup guide - Page 39
help file that explains the functions and operation methods in detail. Also, "User's Guide" (PDF) explains the basic operation procedure of each software program carefully. 7-1. Displaying "User's Guide" (PDF) Important • User Supportware 5 CD-ROM does not contain Acrobat Reader or Adobe Reader. If - NEC NP1150 | NP1150/2150/3150/3151W network setup guide - Page 40
7. Refer to "User's Guide" and Help Reference If the above menu is not displayed, follow these steps. (*Example when Windows Vista is used) 1. Click [Start] of Windows. 2. Click [All - NEC NP1150 | NP1150/2150/3150/3151W network setup guide - Page 41
software onto your personal computer from the User Supportware 5 CD-ROM. You cannot run the programs nor view Help directly from the CD-ROM. I Displaying Helps other than Ulead Photo Explorer 8.0 Click in the following order. Start Refer to "User's Guide" and Help All Programs NEC Projector User - NEC NP1150 | NP1150/2150/3150/3151W network setup guide - Page 42
7. Refer to "User's Guide" and Help I Displaying Ulead Photo Explorer 8.0 Help To display the Help of Ulead Photo Explorer 8.0, start the software and make your bar, select [Help] → [Ulead Photo Explorer Help] or [NEC Projector User Supportware Help]. I Help Screen Layout [Hide] button Shows/hides - NEC NP1150 | NP1150/2150/3150/3151W network setup guide - Page 43
in the U.S. or other countries. • Copyright (c) 2007 InterVideo Digital Technology Corporation. All Rights Reserved. Corel,the Corel logo,Ulead,the document are registered trademarks or trademarks of the respective companies. ©NEC Display Solutions, Ltd. 2007-2008 Printed in China Third Edition - NEC NP1150 | NP1150/2150/3150/3151W network setup guide - Page 44
NP3150 / NP2150 / NP1150 / NP3151W Wired and Wireless Network Setup Guide NEC Projector User Supportware 5 I Image Express Utility 2.0 I Desktop Control Utility 1.0 I Ulead Photo Explorer 8.0 SE Basic I Viewer PPT Converter 3.0 I PC Control Utility 3.0 (T) 7N8P8221
-
 1
1 -
 2
2 -
 3
3 -
 4
4 -
 5
5 -
 6
6 -
 7
7 -
8
-
9
-
10
-
11
-
12
-
13
-
14
-
15
-
16
-
17
-
18
-
19
-
20
-
21
-
22
-
23
-
24
-
25
-
26
-
27
-
28
-
29
-
30
-
31
-
32
-
33
-
34
-
35
-
36
-
37
-
38
-
39
-
40
-
41
-
42
-
43
-
44
 |
 |

1
2
4
5
6
7
1.
What You Can Do with User
Supportware 5
2.
Operating Environment
4. Setting the LAN Setting of
Projector
5.
Setting the LAN Setting of Personal
Computer ([Example] Wireless LAN of
Windows Vista : Ad Hoc connection)
6.
Setting the LAN Setting of Personal
Computer ([Example] Wireless LAN
of Windows XP:Ad Hoc connection)
7. Refer to “User’s Guide” and
Help
Install in the PC the software stored in the User Supportware 5 CD-ROM.
This manual describes the LAN settings to use the software programs included in
the supplied User Supportware 5 CD-ROM. For how to operate each software
program, refer to “User’s Guide” (PDF) on User Supportware 5 CD-ROM.
NP3150 / NP2150 / NP1150
NP3151W
Wired and Wireless Network Setup Guide
3
3.
Connecting LAN Cable
NEC Projector