NEC NP1150 NP1150/2150/3150/3151W user's manual - Page 77
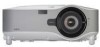
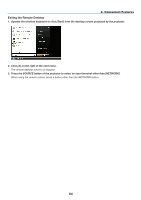
Operate the wireless keyboard to input the user's password and press [Enter]., From the [NETWORK] menu
 |
UPC - 805736019568
View all NEC NP1150 manuals
Add to My Manuals
Save this manual to your list of manuals |
Page 77 highlights
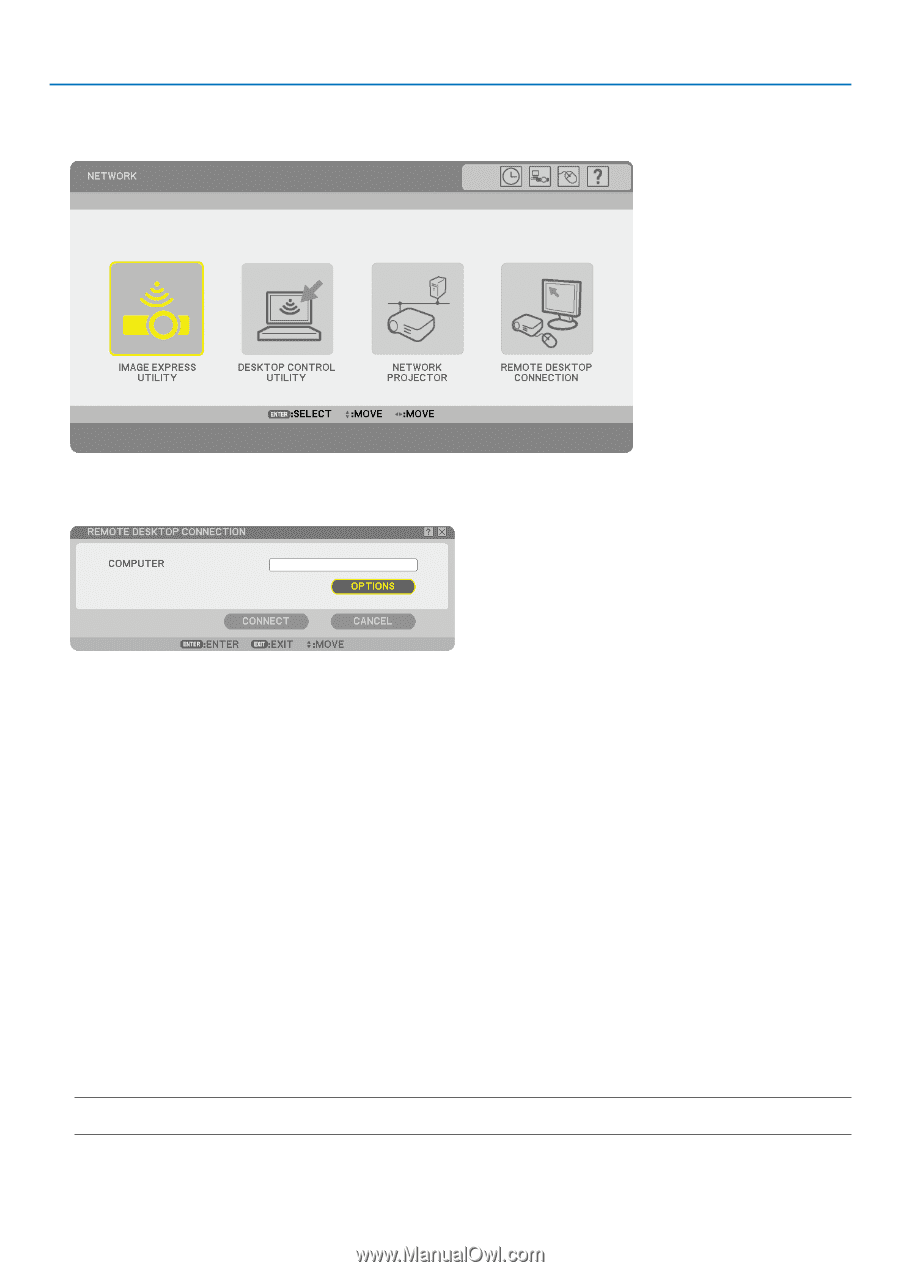
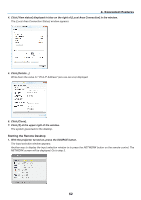
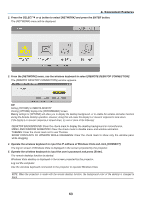
4. Convenient Features 2. Press the SELECT or button to select [NETWORK] and press the ENTER button. The [NETWORK] menu will be displayed. 3. From the [NETWORK] menu, use the wireless keyboard to select [REMOTE DESKTOP CONNECTION]. The [Remote Desktop Connection] window appears. TIP: Setting [OPTIONS] in REMOTE DESKTOP Clicking [OPTIONS] displays the [PERFORMANCE] screen. Making settings to [OPTIONS] will allow you to display the desktop background, or to enable the window animation function during the Remote Desktop operation. However, doing this will cause the display's or mouse's response to slow down. If the display's or mouse's response is slowed down, try one or more of the following: DESKTOP BACKGROUND: Clear the check mark to display the desktop background in monochrome. MENU AND WINDOW ANIMATION: Clear the check mark to disable menu and window animation. THEMES: Clear the check mark not to use Themes. SHOW CONTENTS OF WINDOW WHILE DRAGGING: Clear the check mark to show only the window pane while dragging. 4. Operate the wireless keyboard to input the IP address of Windows Vista and click [CONNECT]. The log-on screen of Windows Vista is displayed in the screen projected by the projector. 5. Operate the wireless keyboard to input the user's password and press [Enter]. The remote desktop function is started. Windows Vista desktop is displayed in the screen projected by the projector. Log out the computer. Use the wireless keyboard connected to the projector to operate Windows Vista. NOTE: When the projection is made with the remote desktop function, the background color of the desktop is changed to black. 63
-
 1
1 -
2
-
3
-
4
-
5
-
6
-
7
-
8
-
9
-
10
-
11
-
12
-
13
-
14
-
15
-
16
-
17
-
18
-
19
-
20
-
21
-
22
-
23
-
24
-
25
-
26
-
27
-
28
-
29
-
30
-
31
-
32
-
33
-
34
-
35
-
36
-
37
-
38
-
39
-
40
-
41
-
42
-
43
-
44
-
45
-
46
-
47
-
48
-
49
-
50
-
51
-
52
-
53
-
54
-
55
-
56
-
57
-
58
-
59
-
60
-
61
-
62
-
63
-
64
-
65
-
66
-
67
-
68
-
69
-
70
-
71
-
 72
72 -
 73
73 -
 74
74 -
 75
75 -
 76
76 -
 77
77 -
 78
78 -
 79
79 -
 80
80 -
 81
81 -
 82
82 -
83
-
84
-
85
-
86
-
87
-
88
-
89
-
90
-
91
-
92
-
93
-
94
-
95
-
96
-
97
-
98
-
99
-
100
-
101
-
102
-
103
-
104
-
105
-
106
-
107
-
108
-
109
-
110
-
111
-
112
-
113
-
114
-
115
-
116
-
117
-
118
-
119
-
120
-
121
-
122
-
123
-
124
-
125
-
126
-
127
-
128
-
129
-
130
-
131
-
132
-
133
-
134
-
135
-
136
-
137
-
138
-
139
-
140
-
141
-
142
-
143
-
144
-
145
-
146
-
147
-
148
-
149
-
150
-
151
-
152
-
153
-
154
-
155
-
156
-
157
-
158
-
159
-
160
-
161
-
162
-
163
-
164
-
165
-
166
-
167
-
168
-
169
-
170
-
171
-
172
 |
 |