NEC PX-50VP1A 42PD2/50PD1
NEC PX-50VP1A Manual
 |
View all NEC PX-50VP1A manuals
Add to My Manuals
Save this manual to your list of manuals |
NEC PX-50VP1A manual content summary:
- NEC PX-50VP1A | 42PD2/50PD1 - Page 1
PlasmaSync Plasma Monitor User's Manual NEC Technologies - NEC PX-50VP1A | 42PD2/50PD1 - Page 2
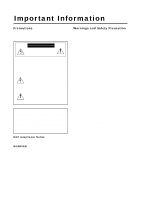
if not installed and used in accordance with the instruction manual, may cause harmful interference to radio communications. Operation . Warnings and Safety Precaution The NEC plasma monitor is designed and manufactured to provide long, trouble-free service. No maintenance other than cleaning is - NEC PX-50VP1A | 42PD2/50PD1 - Page 3
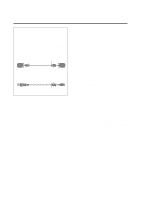
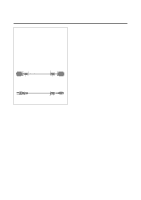
supplied) band band Connector core (small) core (small) Power cable (supplied) core (large) band Set side (Plasma Monitor side) To avoid damage and prolong operating life: 1. Use only with 120V 50/60Hz AC power supply unit and have it serviced by an authorized NEC Service Center. 5. Do not - NEC PX-50VP1A | 42PD2/50PD1 - Page 4
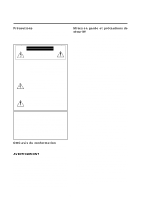
NEC produise des panneaux à affichage plasma avec plus de 99,99 % de cellules actives, il peut y avoir des cellules qui ne produisent pas de lumière ou qui restent allumées. Pour des raisons de sécurité et pour éviter d'endommager l'appareil, lire attentivement les instructions NEC pour le service - NEC PX-50VP1A | 42PD2/50PD1 - Page 5
appareil. En cas d'accident, débrancher l'appareil et le confier à un centre de service agréé NEC. 5. Ne pas frapper ou rayer la surface de la écran plasma, car des défauts risquent de se produire sur la surface de la écran plasma. 6. Comme c'est le cas pour tout affichage à base de phosphore (comme - NEC PX-50VP1A | 42PD2/50PD1 - Page 6
Plasma Monitors NEC acts of nature, unauthorized product modification, or failure to follow instructions supplied with the product. b. Repair or attempted repair by anyone and a description of the problem(s). 3. For the name of the nearest NECTECH authorized service center, call NECTECH at 800 - NEC PX-50VP1A | 42PD2/50PD1 - Page 7
Plasma Monitor 8 Introduction Introduction to the PlasmaSync 42PD2/50PD1 9 The features you'll enjoy include ...9 Contents of the Package ...9 OPTIONS ...9 Setup Procedure ...10 Part Names and Functions Front View ...12 Side View Terminal Board L/R ...13 Remote Set 46 Troubleshooting ...47 - NEC PX-50VP1A | 42PD2/50PD1 - Page 8
Attach Options to the Plasma Monitor You can attach your optional mounts or stand to the plasma monitor in one of the following two ways: * In the upright position. (See Drawing A) * Lay the screen face down (See Drawing B). Lay the protective sheet, which was wrapped around the monitor when it was - NEC PX-50VP1A | 42PD2/50PD1 - Page 9
Plug and Play which are supported by Windows 98 and Plasma Sync monitor package. Please save the original box and packing materials for future transportation or shipment of this monitor. 1. PlasmaSync 42PD2/50PD1 2. Power cord 3. Wireless/Wired remote control unit and two AAA batteries 4. Remote - NEC PX-50VP1A | 42PD2/50PD1 - Page 10
the use of a tabletop stand or wall mount unit for permanent installation and use. This monitor cannot be used without one of these accessories. Note: RETRACTABLE FEET ARE FOR TEMPORARY USE ONLY AND ARE NOT INTENDED FOR PERMANENT INSTALLATION. MODEL # PX-42VPU1-ST STAND IS REQUIRED FOR PERMANENT - NEC PX-50VP1A | 42PD2/50PD1 - Page 11
control holder into the installation hole of the main unit and then insert the bottom hook into its respective hole. To remove the remote control holder, first release the bottom hook, then release the top hook. Knob 1 2 Removing the Terminal Board Cover This unit's terminal board cover can - NEC PX-50VP1A | 42PD2/50PD1 - Page 12
or power management. 5 UP button Functions as the (v) button in the on-screen display (OSM) mode. 2 Remote control sensor Receives the signal from the remote control (when using the wireless remote control). 6 DOWN button Functions as the (w) button in the on-screen display (OSM) mode. 3 VIDEO - NEC PX-50VP1A | 42PD2/50PD1 - Page 13
support analog input. 12 REMOTE (Mini jack) IN jack: This jack connects the wired remote control. THROUGH OUT jack: Outputs as is the remote control signal that is connected to the REMOTE IN jack. * This is used when operating multiple monitors IN connector Connects with the supplied power cable. 13 - NEC PX-50VP1A | 42PD2/50PD1 - Page 14
Remote Controller 16 17 4 6 7 8 9 10 11 12 14 POWER OFF POWER ON RGB 2 RGB 1 RGB 3 VIDEO POSITION / CONTR OL EXIT PROCEED RGB/VIDEO CONTRAST BRIGHT VIDEO COLOR TINT SHARPNESS VISUAL NORMAL RASTER NORMAL ID SELECT CLEAR 1 POWER ON/OFF button: Switches the power on/off. (If the POWER/ - NEC PX-50VP1A | 42PD2/50PD1 - Page 15
in a video wall so that each monitor can be adjusted with the remote control one at a time. 15 CLEAR: Deletes the ID number that was set with ID SELECT. 16 Remote control transmitter: Transmits the remote control signal. (Used with the wireless remote control.) 17 Remote jack: Connects the supplied - NEC PX-50VP1A | 42PD2/50PD1 - Page 16
supplied ferrite core. If you do not do this, this monitor will not conform to mandatory FCC standards. (42PD2 only) Note: Do not connect the wired remote control to the REMOTE THROUGH OUT jack. If doing so, the remote control does not work. 16 Remote Control Cable To Remote Jack POWER OFF POWER - NEC PX-50VP1A | 42PD2/50PD1 - Page 17
power remote control * When using multiple units under wireless remote control operation, the remote control signal also enters other monitors and may control them at the same time. Monitors for which the reception of the wireless remote Manual 1 (Composite) Manual 2 (Sync-on-green) Switch position - NEC PX-50VP1A | 42PD2/50PD1 - Page 18
power management function of the display becomes operational when the monitor power management setting method, see the operating system (OS) manual of the personal computer you are using. To see the video when the power about 4 seconds Remote control in standby mode Power cord not connected * - NEC PX-50VP1A | 42PD2/50PD1 - Page 19
Installation Wiring Diagram Plasma monitor Document camera VCR, Video copy stand or Multimedia application IN OUT VIDEO Personal computer with a digital RGB (TMDS) output To RGB3 DVI 29pin (not supplied) G B H/CS V S-VIDEO HIGH 75Ω To VIDEO IN inputs To R,G,B,H/CS, V inputs (BNC) - NEC PX-50VP1A | 42PD2/50PD1 - Page 20
for installation instructions. 3. Use the signal cable that's supplied to connect your PC or Macintosh computer to the RGB1 input terminal. 4. Turn on the monitor and the computer. Note: Refer to your computer's owner's manual for more information about your computer's video output requirements - NEC PX-50VP1A | 42PD2/50PD1 - Page 21
you to control multiple monitors using one remote control. 1. Connect the REMOTE OUT of the monitor to the RE- MOTE IN of the next monitor using the optional remote cable. When using the VIDEO inputs: THROUGH OUT Connections 1. To pass the VIDEO IN (BNC-type) or S-VIDEO signals, connect THROUGH OUT - NEC PX-50VP1A | 42PD2/50PD1 - Page 22
the picture. General Controls Before you turn on your plasma monitor ensure that the computer or video source is turned on. 1)To adjust: 1. Turn On The Monitor The power button is on the front panel of the monitor. By turning this switch on, the POWER/STANDBY indicator will turn to green and the - NEC PX-50VP1A | 42PD2/50PD1 - Page 23
) Press the buttons of the remote control to make direct adjustments and settings. A press of the desired button will show the adjustment display. The adjustment condition is stored in memory even after the power is switched off. Preparation: Select the input screen (VIDEO, RGB1, RGB2, RGB3) that is - NEC PX-50VP1A | 42PD2/50PD1 - Page 24
display. The display will go off about 3 seconds after your finger is released from the button. Items adjusted with the VIDEO and RGB signals Contrast adjustment (CONTRAST) CONTRAST Image becomes fainter CONTRAST Image becomes denser Brightness adjustment (BRIGHTNESS) BRIGHTNESS Returning the - NEC PX-50VP1A | 42PD2/50PD1 - Page 25
adjustments to be made. The adjustment details will be stored even when the power is switched off. The on-screen display (OSM) function puts an adjustment screen menu Visual Control Sub menu At time of video input selection Brightness Contrast Color Tint Sharpness Gamma Adjustment details Image - NEC PX-50VP1A | 42PD2/50PD1 - Page 26
page Sub menu Display Mode Source Info: H-Freq.: V-Freq.: H-Pol.: V-Pol.: Present Time VIDEO WALL Menu SETTINGS 1 SETTINGS 2 Timer Screen Divider Setting Position of Divider Color System Power On Mode Power Manage External Control All Reset Long Life Mode 1 Long Life Mode 2 Long Life Mode - NEC PX-50VP1A | 42PD2/50PD1 - Page 27
Before Making Adjustments... POWER OFF POWER ON RGB 2 RGB 1 RGB 3 VIDEO POSITION / CONTR OL EXIT PROCEED RGB/VIDEO CONTRAST BRIGHT VIDEO COLOR TINT SHARPNESS VISUAL NORMAL RASTER NORMAL ID SELECT CLEAR Adjust using the remote control buttons. PROCEED button Press to display the main - NEC PX-50VP1A | 42PD2/50PD1 - Page 28
To Reset the Adjustment Value to the Factory Default Setting 1. Press the VISUAL NORMAL button or RASTER NORMAL button. The verification sub menu is displayed. VISUAL NORMAL RASTER NORMAL 2. A press of the PROCEED button will reset the adjustment. To cancel the reset, press the EXIT button. - NEC PX-50VP1A | 42PD2/50PD1 - Page 29
green Sharpness (Sharpness adjustment) Softer quality Sharper quality Gamma (Adjusts the brightness of dark portions) Normal Darker *Tint cannot be adjusted when the video system selection switch is set to PAL or SECAM. *Switching to GAMMA is not possible when LONG LIFE MODE3 is set to INV - NEC PX-50VP1A | 42PD2/50PD1 - Page 30
adjustment (Displayed only with Multiple Screens) Adjustment is possible only in multi mode. H-POSITION 2 cannot be adjusted at the time of VIDEO input. H-POSITION 1 H-POSITION 2 H-WIDTH * To reset the adjustment value, press the RASTER NORMAL button before pressing the EXIT button. * To delete - NEC PX-50VP1A | 42PD2/50PD1 - Page 31
adjustment (Displayed only with Multiple Screens) Adjustment is possible only in multi mode. V-POSITION 2 cannot be adjusted at the time of VIDEO input. V-POSITION 1 V-POSITION 2 V-HEIGHT * To reset the adjustment value, press the RASTER NORMAL button before pressing the EXIT button. * To delete - NEC PX-50VP1A | 42PD2/50PD1 - Page 32
Color Temperature (COLOR TEMP) This adjusts the color temperature. 1. Align the cursor with icon (4) The cursor is moved left and right with the POSITION CONTROLᮤ / ᮣ buttons. Icon (4) Color temperature adjustment screen COLOR TEMP 3. Return to the main menu EXIT * To reset the adjustment value, - NEC PX-50VP1A | 42PD2/50PD1 - Page 33
Adjustment of the White Balance This adjusts the white balance of bright images (Gain) and dark images (Bias). 3. Align the cursor with Gain or Bias of the sub menu, then make the adjustment with the ᮤ / ᮣ buttons while watching the screen. 1. Align the cursor with icon (4) The cursor is moved - NEC PX-50VP1A | 42PD2/50PD1 - Page 34
Adjustment of the On-screen Display Position 3. Exiting the adjustment 1. Align the cursor with icon (5) The cursor is moved left and right with the POSITION CONTROLᮤ / ᮣ buttons. Icon (5) OSM adjustment screen OSM H-POS OSM V-POS OSM ANGLE OSM DISPLAY TIME EXIT The display will change to the - NEC PX-50VP1A | 42PD2/50PD1 - Page 35
Setting the On-screen Display OFF Time While using the on-screen display (OSM), the OFF time setting functions to automatically turn off the on-screen display when there is no input. 3. Return to the main menu EXIT 1. Align the cursor with icon (5) The cursor is moved left and right with the - NEC PX-50VP1A | 42PD2/50PD1 - Page 36
the image. •The Fine Picture adjusts the clock phase or reduces video noise, dot interference or cross talk. (This is evident when parts 480 input signals There are two controls in the plasma monitor OSM menus that allow you to set the monitor to display resolutions with 848, 852 and 640 horizontal - NEC PX-50VP1A | 42PD2/50PD1 - Page 37
480 input signals There are two controls in the Plasma monitor OSM menus that allow you to set the monitor to display resolutions with 848, 852 and 640 horizontal the clock phase adjustment function are available at the time of VIDEO and S-VIDEO input. * To reset the adjustment value, press the - NEC PX-50VP1A | 42PD2/50PD1 - Page 38
Normal Screen Returns the user side image data of the mode currently being input to the standard condition. 1. Align the cursor with icon (7) The cursor is moved left and right with the POSITION CONTROLᮤ / ᮣ buttons. Icon (7) ALL VISUAL NORMAL ALL RASTER NORMAL ALL NORMAL Next Page Screen 1. Moving - NEC PX-50VP1A | 42PD2/50PD1 - Page 39
of the horizontal sync signal Neg./Pos. (Negative polarity/Positive polarity) V-Pol.:Polarity of vertical sync Neg./Pos. (Negative polarity/Positive polarity) SOURCE INFO. VIDEO MODE : NTSC * When video input is selected SOURCE: VIDEO MODE: NTSC, PAL, SECAM Note: NTSCis processed as 4.43 NTSC. 39 - NEC PX-50VP1A | 42PD2/50PD1 - Page 40
TIMER : OFF 3. Align the cursor with SET and press PROCEED PROCEED * When the timer has been set, the LED will flash orange every 3 seconds during remote control standby. Note: Data can be maintained for about one month by the built-in lithium battery even when the AC cable is disconnected. 2. Use - NEC PX-50VP1A | 42PD2/50PD1 - Page 41
Auto Timer Screen Used to turn the power ON/OFF, change inputs or enter the invert mode. 1. Align the cursor with icon ( displayed. Auto Timer Screen PROGRAM MENU DATE ON OFF MODE OCT30 10:10 13:00 VIDEO JAN01 22:15 24:00 INV MON* 15:45 19:00 VIDEO WED* 09:00 11:00 RGB1 THU* 08:15 10:00 RGB2 * 13:30 - NEC PX-50VP1A | 42PD2/50PD1 - Page 42
9. Use the v / w bottons to select MODE and set to VIDEO, RGB1, RGB2, RGB3, INV or WT with the ᮤ / ᮣ cursor is in the DATE position, a press of the remote control CLEAR button will clear only that program. (The CLEAR function is set, the POWER/ STANDBY indicator is blinking orange at intervals of 3 seconds. - NEC PX-50VP1A | 42PD2/50PD1 - Page 43
icon (12) on the second page The cursor is moved left and right with the POSITION CONTROLᮤ / ᮣ buttons. Multiple Screens Icon (12) VIDEO WALL MENU 1. SCREEN DIVIDER SETTING : 1 2. POSITION OF DRIVER : 3. Align the cursor with POSITION OF SETTING and set with the ᮤ / ᮣ buttons. Nothing will - NEC PX-50VP1A | 42PD2/50PD1 - Page 44
below. * COLOR SYSTEM: AUTO/3.58 NTSC/PAL/SECAM/4.43 NTSC (Initial value: AUTO) * POWER ON MODE: LAST MEM/VIDEO/RGB1/RGB2/RGB3 (Initial value: LAST MEM (Last Memory)) * POWER MANAGER: This means Power management of RGB input ON/OFF (Initial value is OFF) * EXTERNAL CONTROL: OFF/1/2 (Initial - NEC PX-50VP1A | 42PD2/50PD1 - Page 45
long life mode is designed to extend the service life of the plasma panel and reduce ghost images. It is MODE3 is set LONG LIFE MODE 3: When the plasma monitor is turned on or off, the INV. WT Initial value is ALL) → Displays ALL with the remote control or CLEAR button. Note: Selecting ALL RESET and - NEC PX-50VP1A | 42PD2/50PD1 - Page 46
regardless of the ID set for each monitor. * This function is also valid when this monitor is controlled via the RS232 connector. VIDEO WALL No. * The POSITION CONTROLᮤ / ᮣ buttons are used to switch the numbers from 1 through 4. * A press of the remote control CLEAR button causes a reset. (Initial - NEC PX-50VP1A | 42PD2/50PD1 - Page 47
the following case, power off the monitor immediately and contact your dealer or authorized NEC Service Center. The monitor turns off in 5 seconds after powering on and then the POWER/STANDBY indicater blinks. It indicaters that the power supply circuit or, one more fans have been damaged. Overheat - NEC PX-50VP1A | 42PD2/50PD1 - Page 48
(Model PX-42VP2A) Plasma Screen RGB Input Terminals RGB Output Terminals THROUGH OUT Video Input Terminals VIDEO S-VIDEO Video Output Terminals THROUGH OUT THROUGH OUT (S-VIDEO) External Control (IN/THROUGH OUT) Synchronization Range Maximum Resolution Power Supply Current Rating Power consumption - NEC PX-50VP1A | 42PD2/50PD1 - Page 49
(Model PX-50VP1A) Plasma Screen RGB Input Terminals RGB Output Terminals THROUGH OUT Video Input Terminals VIDEO S-VIDEO Video Output Terminals THROUGH OUT THROUGH OUT (S-VIDEO) External Control (IN/THROUGH OUT) Synchronization Range Maximum Resolution Power Supply Current Rating Power consumption - NEC PX-50VP1A | 42PD2/50PD1 - Page 50
original image because the image of 640 dots x 480 lines is converted to 853 dots x 480 lines and displayed. *At the time of video input, video signals derived from poor recording conditions may give rise to a disturbed screen image. *The sync may be disturbed when non standard signals other than - NEC PX-50VP1A | 42PD2/50PD1 - Page 51
Pin (Analog) Input Connector RGB 1 543 2 1 10 9 8 7 6 15 14 13 12 11 Signal level VIDEO signal : 0.7Vp-p (Analog) Sync signal : TTL level Pin No. 1 2 3 4 5 6 7 8 Data 1 + T.M.D.S Data 1 Shield No connection No connection +5V Power Ground Hot Plug Detect T.M.D.S Data 0 T.M.D.S Data 0 + T.M.D.S Data - NEC PX-50VP1A | 42PD2/50PD1 - Page 52
Application These specifications are applicable to NEC plasma monitors (including 42- and 50-inch types to 3 4 5 and 14 Not used Power ON/OFF Function Input switching The input mode is switched by the combination of pin numbers 5 and 14. Input VIDEO RGB1 RGB2 RGB3 Pin No. 5 Open Ground - NEC PX-50VP1A | 42PD2/50PD1 - Page 53
commands. For ACK, when bit 2 and bit 3 are both "1", reception of a supported command or data is indicated. When bit 2 is "0", reception of an unsupported command as a result, ACK is not returned. Communications Flow Plasma display Personal computer PC or other external equipment Various commands - NEC PX-50VP1A | 42PD2/50PD1 - Page 54
54 - NEC PX-50VP1A | 42PD2/50PD1 - Page 55
55 - NEC PX-50VP1A | 42PD2/50PD1 - Page 56
56 - NEC PX-50VP1A | 42PD2/50PD1 - Page 57
57 - NEC PX-50VP1A | 42PD2/50PD1 - Page 58
58 - NEC PX-50VP1A | 42PD2/50PD1 - Page 59
59 - NEC PX-50VP1A | 42PD2/50PD1 - Page 60
60 - NEC PX-50VP1A | 42PD2/50PD1 - Page 61
61 - NEC PX-50VP1A | 42PD2/50PD1 - Page 62
62 - NEC PX-50VP1A | 42PD2/50PD1 - Page 63
35.8) 17''(432) 19.85''(504.08) Cabinet dimensions Unit : inch(mm) PlasmaSync 42PD2 (Model PX-42VP2A) 39.3''(998) 4.5'' (114) 4.4'' (112) 23.4''(595) PlasmaSync 50PD1 (Model PX-50VP1A) 47.8''(1214) 5.1'' (129) 5.0'' (127) 1.4''(35.8) 1.4''(35.8) 20.8''(528) 25.06''(636.45) 28.6''(727 - NEC PX-50VP1A | 42PD2/50PD1 - Page 64
NEC Technologies, Inc. 1250 N. Arlington Heights Road, Suite 500 Itasca, Illinois 60143-1248 Printed in Japan 7S800091
-
 1
1 -
 2
2 -
 3
3 -
 4
4 -
 5
5 -
 6
6 -
 7
7 -
8
-
9
-
10
-
11
-
12
-
13
-
14
-
15
-
16
-
17
-
18
-
19
-
20
-
21
-
22
-
23
-
24
-
25
-
26
-
27
-
28
-
29
-
30
-
31
-
32
-
33
-
34
-
35
-
36
-
37
-
38
-
39
-
40
-
41
-
42
-
43
-
44
-
45
-
46
-
47
-
48
-
49
-
50
-
51
-
52
-
53
-
54
-
55
-
56
-
57
-
58
-
59
-
60
-
61
-
62
-
63
-
64
 |
 |

NEC Technologies
PlasmaSync Plasma Monitor
User’s Manual