NEC PX-61XM1A 61MP1 - Page 38
Setting RGB3 ADJ., Reducing burn-in of the screen
 |
View all NEC PX-61XM1A manuals
Add to My Manuals
Save this manual to your list of manuals |
Page 38 highlights
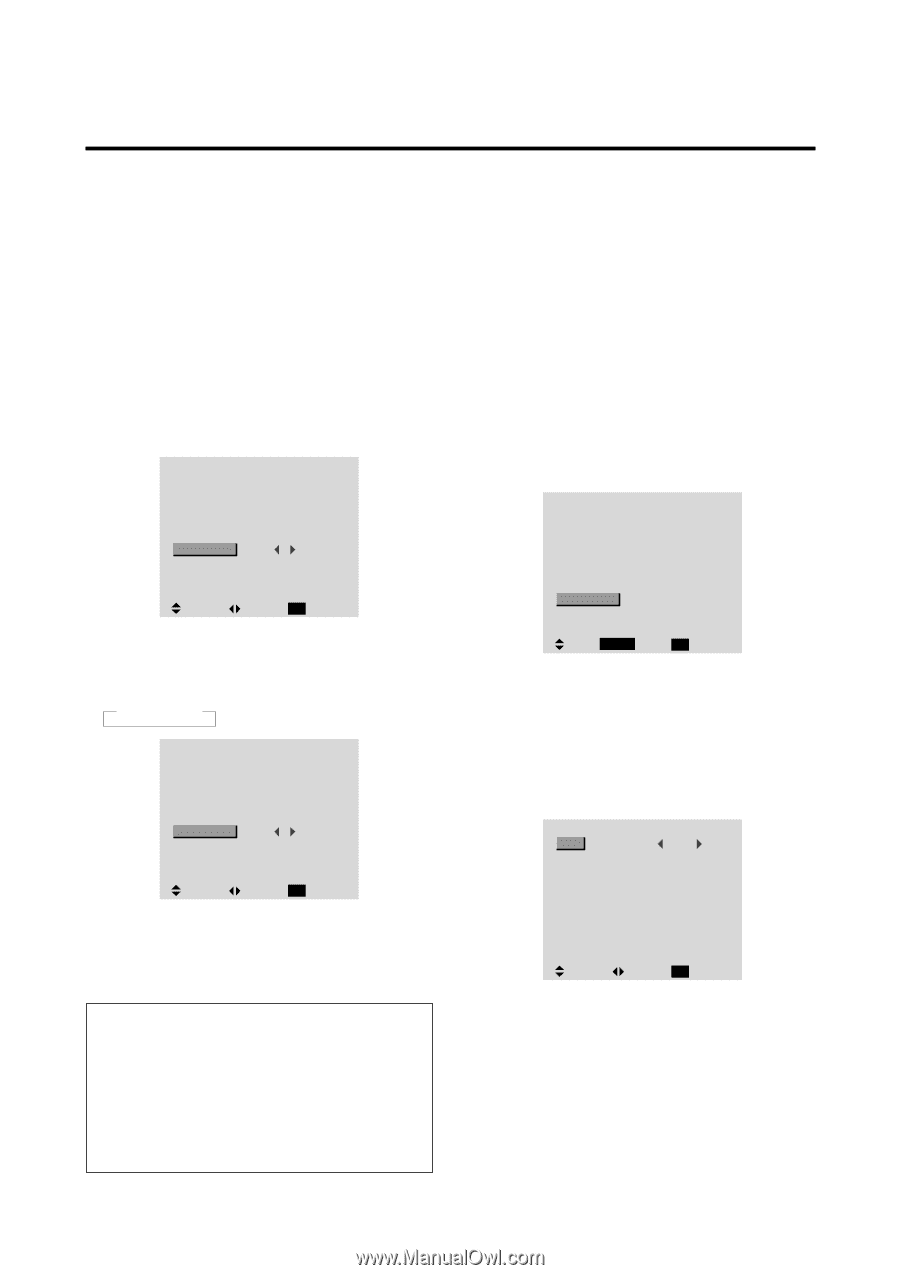
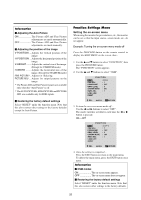
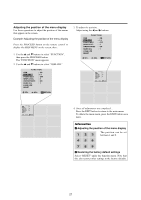
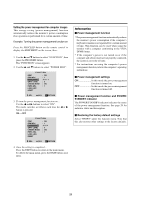
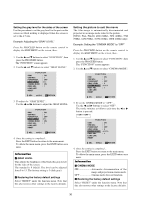
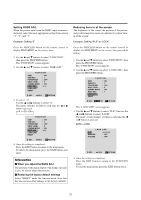
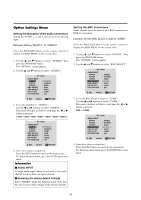
Setting RGB3 ADJ. When the picture input from the RGB3 input terminal is distorted, select the most appropriate setting from among "1", "2", and "3". Example: Setting "2" Press the PROCEED button on the remote control to display MAIN MENU on the screen, then... 1. Use the L and M buttons to select "FUNCTION", then press the PROCEED button. The "FUNCTION" screen appears. 2. Use the L and M buttons to select "RGB3 ADJ.". FUNCTION OSM OSM ADJ. POWER MGT GRAY LEVEL CINEMA MODE RGB3 ADJ. LONG LIFE RESET : ON :1 : OFF :3 : ON :1 SEL. ADJ. EXIT RETURN 3. To select "2"... Use the ᮤ and ᮣ buttons to select "2". The mode switches as follows each time the ᮤ or ᮣ buton is pressed: → 1 ↔ 2 ↔ 3 ← FUNCTION OSM OSM ADJ. POWER MGT GRAY LEVEL CINEMA MODE RGB3 ADJ. LONG LIFE RESET : ON :1 : OFF :3 : ON :2 SEL. ADJ. EXIT RETURN 4. Once the setting is completed... Press the EXIT button to return to the main menu. To delete the main menu, press the EXIT button once more. Information Ⅵ When you adjust the RGB3 ADJ. The position of the menu display will change. In such a case, be sure to adjust the position. Ⅵ Restoring the factory default settings Select "RESET" under the function menu. Note that this also restores other settings to the factory defaults. Reducing burn-in of the screen The brightness of the screen, the position of the picture, and positive/negative mode are adjusted to reduce burnin of the screen. Example: Setting "PLE" to "LOCK" Press the PROCEED button on the remote control to display the MAIN MENU on the screen, then proceed as follows. 1. Use the L and M buttons to select "FUNCTION", then press the PROCEED button. The "FUNCTION" screen appears. 2. Use the L and M buttons to select "LONG LIFE", then press the PROCEED button. FUNCTION OSM OSM ADJ. POWER MGT GRAY LEVEL CINEMA MODE RGB3 ADJ. LONG LIFE RESET : ON :1 : OFF :3 : ON :1 SEL. PROCEED OK EXIT RETURN The "LONG LIFE" screen appears. 3. Use the L and M buttons to select "PLE", then use the ᮤ and ᮣ buttons to select "LOCK". The mode switch changes as follows each time the ᮤ or ᮣ button is pressed: AUTO ↔ LOCK LONG LIFE PLE ORBITER INVERSE : LOCK : OFF : OFF SEL. ADJ. EXIT RETURN 4. Once the setting is completed... Press the EXIT button to return to the FUNCTION menu. To exit the main menu, press the EXIT button twice. 31
-
 1
1 -
2
-
3
-
4
-
5
-
6
-
7
-
8
-
9
-
10
-
11
-
12
-
13
-
14
-
15
-
16
-
17
-
18
-
19
-
20
-
21
-
22
-
23
-
24
-
25
-
26
-
27
-
28
-
29
-
30
-
31
-
32
-
 33
33 -
 34
34 -
 35
35 -
 36
36 -
 37
37 -
 38
38 -
 39
39 -
 40
40 -
 41
41 -
 42
42 -
 43
43 -
44
-
45
-
46
-
47
-
48
-
49
-
50
-
51
-
52
-
53
-
54
-
55
-
56
-
57
-
58
-
59
-
60
-
61
-
62
-
63
-
64
 |
 |