Netgear CM212NA Installation Guide
Netgear CM212NA Manual
 |
View all Netgear CM212NA manuals
Add to My Manuals
Save this manual to your list of manuals |
Netgear CM212NA manual content summary:
- Netgear CM212NA | Installation Guide - Page 1
- Netgear CM212NA | Installation Guide - Page 2
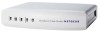
USB Introduction Broadband Cable Modem CM212 Broadband Cable Modem Thank you for purchasing a NETGEAR CM212 Cable Modem. With this modem you can have secure high-speed Internet access and, if you have an Cable/DSL Gateway Router, share the modem with several computers. This installation guide shows - Netgear CM212NA | Installation Guide - Page 3
What's in the Box Broadband Cable Modem CM212 Broadband Cable Modem POWER CABLE STATUS ETHERNET USB Model CM212 GearBox CD, installation guide, support information card & warranty/registration card Category 5 Ethernet cable Vertical Stand Power adapter When you open the box, verify that you - Netgear CM212NA | Installation Guide - Page 4
1 Prepare for Installation Before installing the CM212 cable modem, you should have active (two-way) cable service and an Internet account with your cable provider. Note: If you're connecting a single computer to the modem, you may use either the modem's USB or Ethernet port. If you're connecting - Netgear CM212NA | Installation Guide - Page 5
power strip). CM212 Broadband Cable Modem Once the Modem establishes a link with your service provider, the PC will automatically detect the modem on the USB port. The Power, Cable, Status, and USB lights on the modem should be lit. If any of the lights are not lit, go to Troubleshooting on page 13 - Netgear CM212NA | Installation Guide - Page 6
). CM212 Broadband Cable Modem 4. If the computer was turned off, turn it on now. The Power, Cable, Status, and Ethernet lights on the modem should be lit. If any of the lights are not light, go to Troubleshooting on page 13. Note: If you plan on sharing your cable Internet Service among multiple - Netgear CM212NA | Installation Guide - Page 7
Next, you configure the computer to interact with the modem. USB Connection Note: The modem must be connected to the Coaxial Cable and established link (Cable and Status Lights are solid Green) before your PC will recognize the modem. For the USB connection, you need to install USB drivers on your - Netgear CM212NA | Installation Guide - Page 8
4. Select "Search for suitable drivers for my device" and click Next 5. Select CD-ROM Drives and click Next. 7 - Netgear CM212NA | Installation Guide - Page 9
6. Click Next when the following dialog box appears. 7. Click Finish. 8 - Netgear CM212NA | Installation Guide - Page 10
8. When the following dialog box appears, click Yes. 9. Restart the computer. 10. Proceed to Chapter 4 - Test the Connection on page 11. Ethernet Connection For the Ethernet connection, configure the TCP/IP settings on the computer and then restart the computer. How you do this depends on your - Netgear CM212NA | Installation Guide - Page 11
Windows 98 or Me 1. Choose Settings>Control Panel from the Start menu. 2. Double-click the Network icon. 3. Click the Configuration tab. 4. In the list of installed network components, select the TCP/IP entry for the computer's Ethernet adapter or NIC. 5. Click Properties. 6. Click the IP Address - Netgear CM212NA | Installation Guide - Page 12
Macintosh Operating System Mac OS® 8.6 or 9.x 1. Choose Control Panels > TCP/IP from the Apple () menu. 2. Choose User Mode from the Edit menu. 3. Click Advanced and click OK. 4. If not already selected, select Ethernet in the Connect via list. 5. Select Using DHCP Server in the Configure list. 6. - Netgear CM212NA | Installation Guide - Page 13
4 Test the Connection To test your setup, you view a Web page online. 1. Start your Internet browser on the computer 2. Go to NETGEAR's Web site (www.NETGEAR.com). Note: If NETGEAR'S Web site doesn't appear, go to Troubleshooting on page 13. 3. Quit your Internet browser. 12 - Netgear CM212NA | Installation Guide - Page 14
Your Cable Internet with Multiple Computers Combining a Cable/DSL router with your Cable Modem enables you to connect multiple computers so they can share access. CM212 Broadband Cable Modem Cable/DSL Web Safe Router RP614 Refer to your Router documentation for complete installation instructions. 13 - Netgear CM212NA | Installation Guide - Page 15
light doesn't light up There's a hardware connection problem. • Make sure the CATV cable connector is securely plugged in at the modem. • Turn the power off and on to the modem. You don't have cable service. • You may not have active cable service yet. Contact your provider to verify activation. The - Netgear CM212NA | Installation Guide - Page 16
(see page 10). Resetting TCP/IP Properties (Windows) If you're on a Windows computer and are still having problems, you may try the following procedure before contacting technical support. Windows 98/Me 1. Click the Start button and then click Run. 2. Type winipcfg and then click OK. 3. Select - Netgear CM212NA | Installation Guide - Page 17
for high-speed networking. Community Antenna Television (CATV): Broadband cable TV and Internet access service. DOCSIS: Data Over Cable Service Interface Specification. A specification that defines interface requirements for cable modems. IP Address: A 4-part number uniquely defining each host - Netgear CM212NA | Installation Guide - Page 18
the Manufacturer/Importer It is hereby certified that the NETGEAR Model CM212 Cable Modem has been suppressed in accordance with the conditions set certain restrictions. Please refer to the notes in the operating instructions. Federal Office for Telecommunications Approvals has been notified of the - Netgear CM212NA | Installation Guide - Page 19
of product and software upgrades. NETGEAR, INC. Support Information Phone: 1-888-NETGEAR (For US & Canada only) See Support Information card for other countries. E-mail: [email protected] www.NETGEAR.com ©2002 by NETGEAR, Inc. All rights reserved. NETGEAR is a trademark or registered trademark
-
 1
1 -
 2
2 -
 3
3 -
 4
4 -
 5
5 -
 6
6 -
 7
7 -
8
-
9
-
10
-
11
-
12
-
13
-
14
-
15
-
16
-
17
-
18
-
19
 |
 |
