Netgear DGFV338 DGFV338 Installation Guide
Netgear DGFV338 - ProSafe Wireless ADSL Modem VPN Firewall Router Manual
 |
View all Netgear DGFV338 manuals
Add to My Manuals
Save this manual to your list of manuals |
Netgear DGFV338 manual content summary:
- Netgear DGFV338 | DGFV338 Installation Guide - Page 1
)NSTALLATION - Netgear DGFV338 | DGFV338 Installation Guide - Page 2
from a computer with a wireless adapter that is configured to match the settings you just applied to your DGFV338. For wireless connectivity problems, see the Troubleshooting Tips below or in the DGFV338 ProSafe Wireless ADSL Modem VPN Firewall Router Reference Manual. A documentation link to the
-
 1
1 -
 2
2
 |
 |
DGFV338 ProSafe™ Wireless ADSL Modem VPN Firewall Router
Start Here
Follow these instructions to set up your wireless ADSL gateway.
You can also
consult the documentation links on the
Resource CD
or the NETGEAR knowledgebase at
.
Prepare to Install Your Gateway
The DGFV338 ProSafe Wireless ADSL Modem VPN Firewall Router can be connected
either via an ADSL connection using the internal modem or connected using an Ethernet
connection through an external modem. Either connection is compatible with the wireless
networking bands.
First, Connect the DGFV338
1. C
ONNECT
THE
ANTENNAS
TO
THE
DGFV338.
Attach the antennas supplied with the wireless ADSL gateway as shown in (1) and
(2).
2. C
ONNECT
THE
CABLES
BETWEEN
THE
DGFV338,
THE
ISP
LINE
,
AND
A
COMPUTER
a.
Connect the DGFV338 using one of the following methods:
•
If you are using a direct ADSL connection, insert the telephone cable
directly into the DSL WAN port (3) of the DGFV338,
or
4
5
6
3
2
1
•
If you are using the Ethernet connection to an external modem, turn off
and
unplug the broadband modem. Insert the Ethernet cable from the modem
into the 10/100 WAN port (4) of the DGFV338.
Note:
You can connect to both WAN ports if you are planning on using the WAN
rollover feature, but not necessary otherwise.
b.
Insert the Ethernet cable that came with your wireless ADSL gateway into a
LAN port on the router (5) and the other end into the Ethernet port of your
computer.
Your network cables are connected and you are ready to restart your network.
3. R
ESTART
YOUR
NETWORK
IN
THE
CORRECT
SEQUENCE
Warning:
Failure to restart your network in the correct sequence could prevent you
from connecting to the Internet.
a.
First, power on the broadband modem (if required). Wait two minutes.
b.
Now, power on the DGFV338 by connecting the power supply to your gateway
(6). Wait one minute.
c.
Last, turn on your computer.
d.
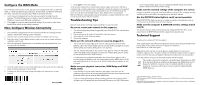
Check the DGFV338 status lights to verify the following:
•
Power
:
The power light should turn solid green. If it does not turn solid
green, see the Troubleshooting section of the full manual.
•
Test
: When the router is first turned on, the test light is yellow then goes off.
After two minutes if it is still on, see the Troubleshooting Tips below.
•
WAN
: Either the Link/Act light on the 10/100 WAN port or the DSL light
should be lit, depending on the method of connection. If not, make sure the
Ethernet cable is securely attached to the modem and the 10/100 WAN port,
and that the modem is powered on, or that the ADSL line is securely
attached to the gateway and the ADSL outlet.
•
LOCAL
: A LAN light (such as 8) should be lit. Green on top indicates your
computer is communicating at 100 Mbps. If a LAN light is not lit, check that
Power
Test
Internet Ports
Local Port 8
Wireless
the Ethernet cable from the computer to the router is securely attached at
both ends, and that the computer is turned on.
Configure the DGFV338 for Internet Access
Before you begin, be sure you have the configuration parameters from your ISP handy.
1. L
OG
IN
TO
THE
WIRELESS
ADSL
GATEWAY
Note:
To connect to the firewall, your computer needs to be configured to obtain IP
addresses automatically, which is usually the case.
a.
Use a browser to connect to
For security reasons, the firewall
has its own user name and password.
When prompted, enter
admin
for the firewall User Name and
password
for the
firewall password.
b.
You are now connected to the firewall.
Select Web Support on the main menu for links to the NETGEAR DGFV338
product documentation and support knowledge base. Be aware that the default
configuration login time-out is 5 minutes of inactivity, after which automatic
logout will occur.
2. C
ONNECT
TO
THE
I
NTERNET
Configure your ISP connection for Internet access based on your WAN port
connection configuration:
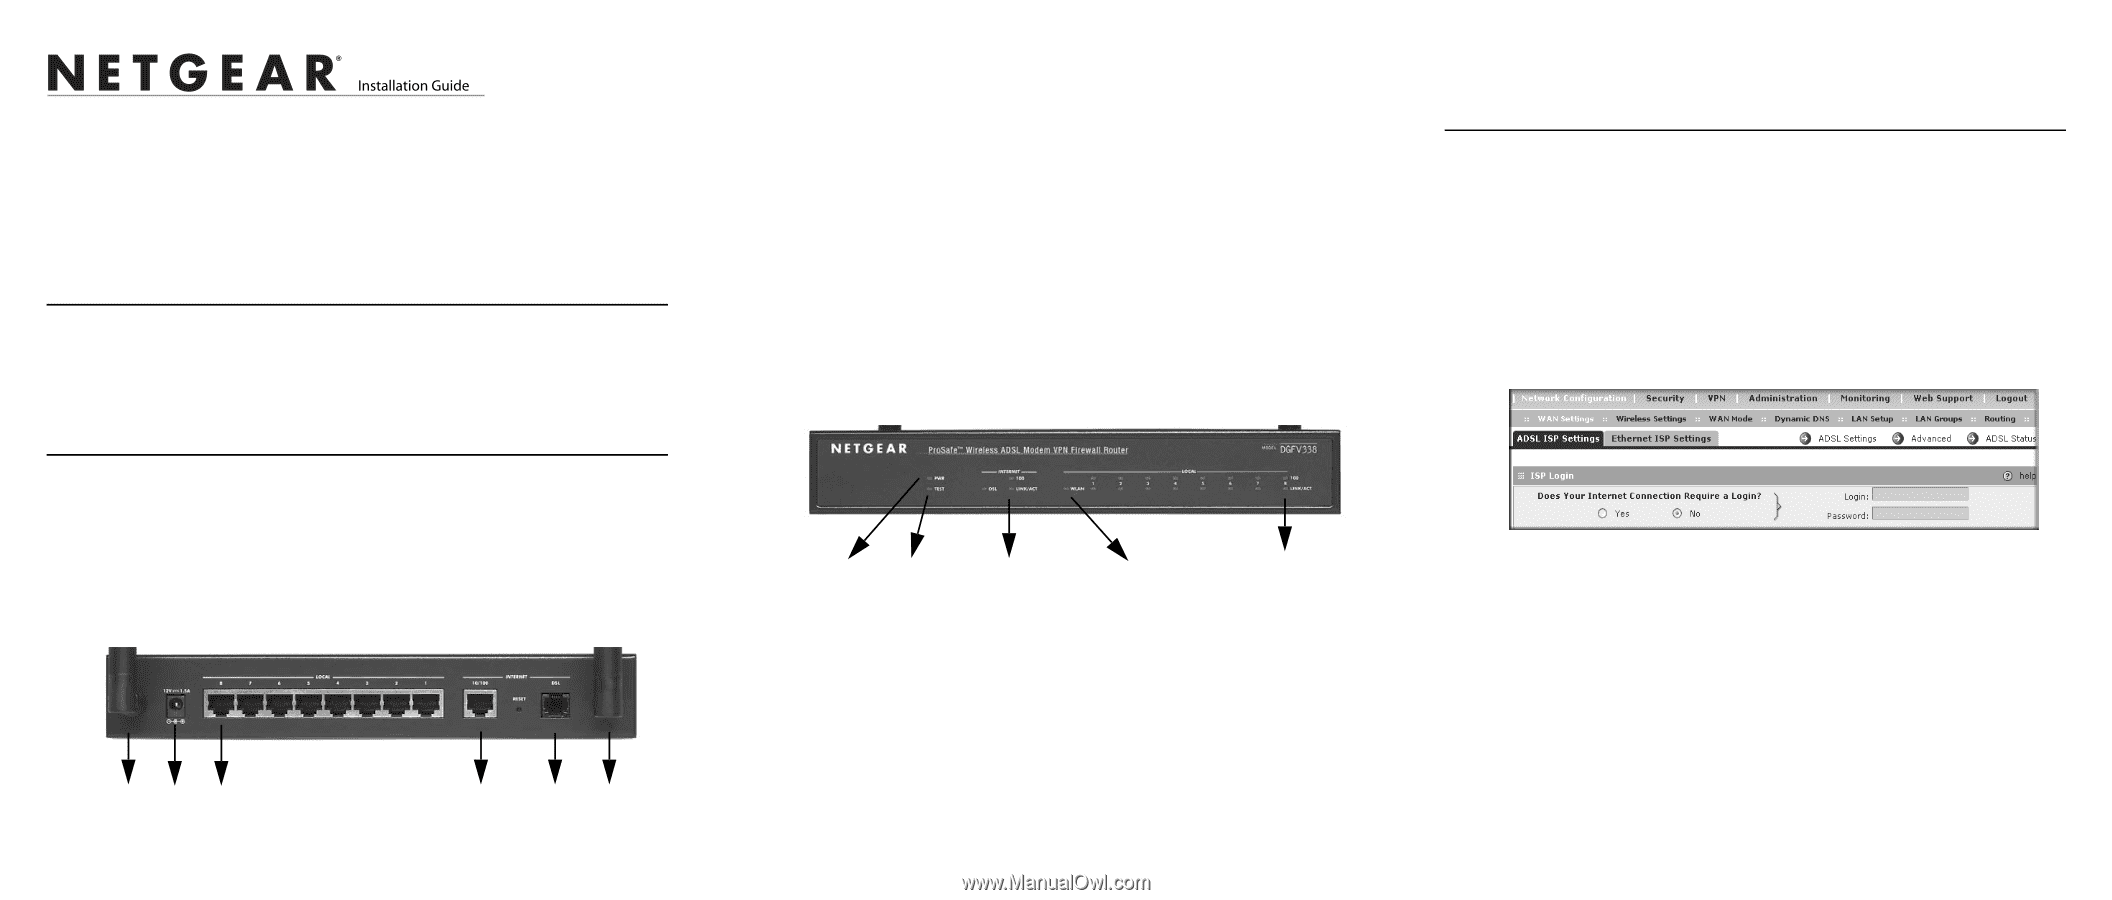
a.
From the Network Configuration main menu, select WAN Settings and then
select either the
ADSL ISP Settings
tab (for DSL) or the
Ethernet ISP Settings
(for 10/100)—or configure both if you connected both WAN ports. Click
Auto
Detect
for the router to detect your ISP connection, or enter the parameters to
complete the Internet configuration.
b.
When finished, click
Test
to verify that the Internet connection you selected is
active.