Netgear DGN2200v3 DGN2200v3 User Manual - Page 48
Edit or Delete a Port Forwarding Entry, Application Example: Make a Local Web Server Public
 |
View all Netgear DGN2200v3 manuals
Add to My Manuals
Save this manual to your list of manuals |
Page 48 highlights
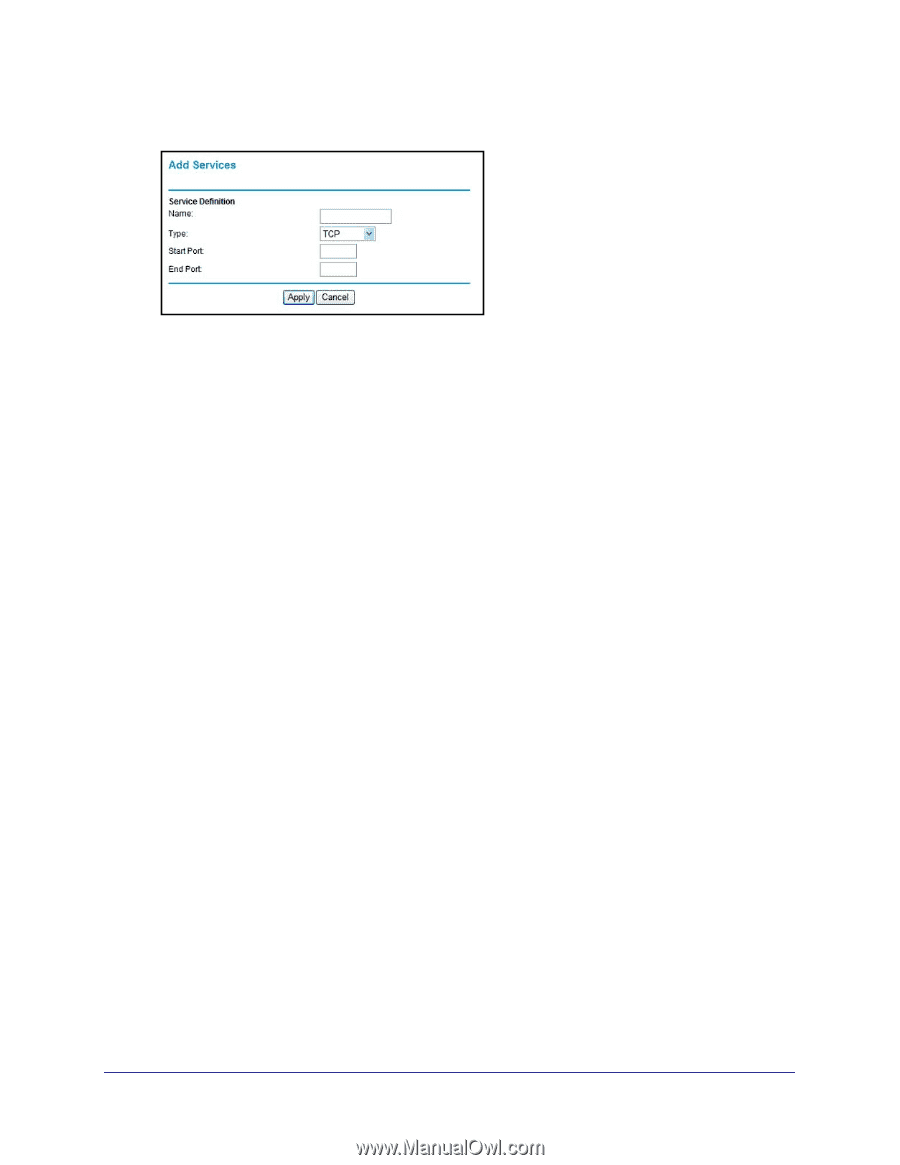
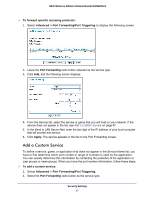
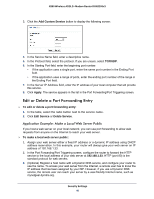
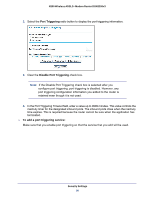
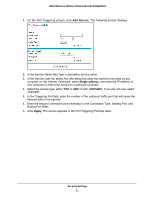
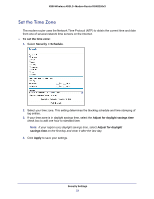
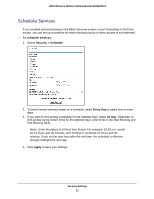
N300 Wireless ADSL2+ Modem Router DGN2200v3 3. Click the Add Custom Service button to display the following screen: 4. In the Service Name field, enter a descriptive name. 5. In the Protocol field, select the protocol. If you are unsure, select TCP/UDP. 6. In the Starting Port field, enter the beginning port number. • If the application uses a single port, enter the same port number in the Ending Port field. • If the application uses a range of ports, enter the ending port number of the range in the Ending Port field. 7. In the Server IP Address field, enter the IP address of your local computer that will provide this service. 8. Click Apply. The service appears in the list in the Port Forwarding/Port Triggering screen. Edit or Delete a Port Forwarding Entry To edit or delete a port forwarding entry: 1. In the table, select the radio button next to the service name. 2. Click Edit Service or Delete Service. Application Example: Make a Local Web Server Public If you host a web server on your local network, you can use port forwarding to allow web requests from anyone on the Internet to reach your web server. To make a local web server public: 1. Assign your web server either a fixed IP address or a dynamic IP address using DHCP address reservation. In this example, your router will always give your web server an IP address of 192.168.1.33. 2. In the Port Forwarding/Port Triggering screen, configure the router to forward the HTTP service to the local address of your web server at 192.168.1.33. HTTP (port 80) is the standard protocol for web servers. 3. (Optional) Register a host name with a Dynamic DNS service, and configure your router to use the name. To access your web server from the Internet, a remote user has to know the IP address that has been assigned by your ISP. However, if you use a Dynamic DNS service, the remote user can reach your server by a user-friendly Internet name, such as mynetgear.dyndns.org. Security Settings 48
-
 1
1 -
2
-
3
-
4
-
5
-
6
-
7
-
8
-
9
-
10
-
11
-
12
-
13
-
14
-
15
-
16
-
17
-
18
-
19
-
20
-
21
-
22
-
23
-
24
-
25
-
26
-
27
-
28
-
29
-
30
-
31
-
32
-
33
-
34
-
35
-
36
-
37
-
38
-
39
-
40
-
41
-
42
-
 43
43 -
 44
44 -
 45
45 -
 46
46 -
 47
47 -
 48
48 -
 49
49 -
 50
50 -
 51
51 -
 52
52 -
 53
53 -
54
-
55
-
56
-
57
-
58
-
59
-
60
-
61
-
62
-
63
-
64
-
65
-
66
-
67
-
68
-
69
-
70
-
71
-
72
-
73
-
74
-
75
-
76
-
77
-
78
-
79
-
80
-
81
-
82
-
83
-
84
-
85
-
86
-
87
-
88
-
89
-
90
-
91
-
92
-
93
-
94
-
95
-
96
-
97
-
98
-
99
-
100
-
101
-
102
-
103
-
104
-
105
-
106
-
107
-
108
-
109
-
110
-
111
-
112
-
113
-
114
-
115
-
116
-
117
-
118
-
119
-
120
 |
 |