Netgear DGND3300v2 DGND3300 Setup Manual
Netgear DGND3300v2 - RangeMax Dual Band Wireless-N Modem Router Manual
 |
View all Netgear DGND3300v2 manuals
Add to My Manuals
Save this manual to your list of manuals |
Netgear DGND3300v2 manual content summary:
- Netgear DGND3300v2 | DGND3300 Setup Manual - Page 1
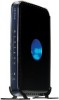
RangeMax Dual Band Wireless-N Modem Router Setup Manual NETGEAR, Inc. 350 E. Plumeria Drive San Jose, CA 95134 USA May 2009 208-10449-01 v1.0 - Netgear DGND3300v2 | DGND3300 Setup Manual - Page 2
Statement of Conditions In the interest of improving internal design, operational function, and/or reliability, NETGEAR reserves the right to make changes to the products described in this document without notice. NETGEAR does not assume any liability that may occur due to the use or application of - Netgear DGND3300v2 | DGND3300 Setup Manual - Page 3
RangeMax Dual Band Wireless-N Modem Router Setup Manual Getting to Know Your Wireless Router 1 Unpacking Your New Router 1 Hardware Features ...3 Front Panel ...3 Back Panel ...5 Modem Router Dome 6 Router Label ...7 Positioning Your Modem Router for Optimal Wireless Connections 8 Installing - Netgear DGND3300v2 | DGND3300 Setup Manual - Page 4
Off ...30 Troubleshooting the ISP Connection 31 ADSL Link LED ...31 Window Appears Asking You to Reload Firmware 32 Cannot Access the Router Menu 32 Obtaining an Internet IP Address 33 Troubleshooting PPPoE or PPPoA 34 Troubleshooting Internet Browsing 34 Troubleshooting a TCP/IP Network Using - Netgear DGND3300v2 | DGND3300 Setup Manual - Page 5
the online Setup Manual • Warranty and Support Information cards If any of the parts are incorrect, missing, or damaged, contact your NETGEAR dealer. Keep the carton, including the original packing materials, in case you need to return the product for repair. Getting to Know Your Wireless Router 1 - Netgear DGND3300v2 | DGND3300 Setup Manual - Page 6
To prepare your router for installation: The modem router has internal wireless antennas. For optimal wireless network performance, use the stand (included in the package) to position your modem router upright with the NETGEAR logo at the top. This position also ensures proper heat dissipation and - Netgear DGND3300v2 | DGND3300 Setup Manual - Page 7
Solid amber Blinking amber Off Power is supplied to the router. POST (Power-On Self-Test) failure or device malfunction. Power is not supplied to the router. Lights red momentarily after the reset button is depressed 10 Mbps. No link is detected on this port. Getting to Know Your Wireless Router 3 - Netgear DGND3300v2 | DGND3300 Setup Manual - Page 8
a 2.4 GHz Wireless-N network. NETGEAR recommends this if you have only 2.4 GHz Wireless-N clients (most adapters are 2.4 GHz, if not specified as Dual Band) AND/OR 802.11 b/g laptops to connect. ‡. On blue signifies a 5 GHz interference-free network. Getting to Know Your Wireless Router 4 - Netgear DGND3300v2 | DGND3300 Setup Manual - Page 9
: 1. RJ-11 ADSL port for connecting the router to an ADSL line 2. Four Local Ethernet RJ-45 LAN ports for connecting the router to the local computers 3. USB port 4. Restore Factory Settings push button 5. Power (On/Off) button 6. AC power adapter input Getting to Know Your Wireless Router 5 - Netgear DGND3300v2 | DGND3300 Setup Manual - Page 10
Dome Dome Figure 4 The top of the modem router includes a dome that performs two functions: 1. Antenna display . 2. Push 'N' Connect (WPS). The dome acts as a push-button for the router to enable WPS security with other WPS-enabled devices. Pushing on the dome for over 5 seconds opens a 2- - Netgear DGND3300v2 | DGND3300 Setup Manual - Page 11
Before using these Wi-Fi Protected Setup (WPS) push-button procedures, verify that your device (a notebook, adapter, or other device) supports WPS. To use the WPS method to implement security, see "Using Push 'N' Connect (WPS) to Configure Your Wireless Network" on page 24. To turn the antenna - Netgear DGND3300v2 | DGND3300 Setup Manual - Page 12
Positioning Your Modem Router for Optimal Wireless Connections The modem router has internal wireless antennas. For optimal wireless network performance, use the stand (included in the package) to position your modem router upright with the NETGEAR logo at the top. This position also ensures proper - Netgear DGND3300v2 | DGND3300 Setup Manual - Page 13
check with your company's network support staff. Corporate network settings or Virtual Private Network (VPN) client software may conflict with the default settings of a home router. If you are unsure about whether there might be a conflict, use a different computer. • Manual Setup: If you cannot or - Netgear DGND3300v2 | DGND3300 Setup Manual - Page 14
the instructions and prompts to complete the installation. The Smart Wizard guides you through installing your router and connecting your router to the Internet. You can choose to upgrade your modem router to the latest firmware. Then the Smart Wizard guides you through configuring your wireless - Netgear DGND3300v2 | DGND3300 Setup Manual - Page 15
wireless router, the wireless adapter card for each computer in your network should support the same technology as your router (see the online User Manual latest available firmware. Once you have configured your modem router, when you log in to the modem router the Firmware Upgrade Assistant screen - Netgear DGND3300v2 | DGND3300 Setup Manual - Page 16
The modem router automatically checks the NETGEAR database for a new firmware image file. If no new firmware version is available, the message "No New Firmware Version Available" displays. (If you select "No," you can check for new firmware later; see the online User Manual). 2. If new firmware is - Netgear DGND3300v2 | DGND3300 Setup Manual - Page 17
(Advanced, Mac, and Linux Users) Before installing and connecting your router manually, review the list below and make sure that you have all of the necessary information. • Internet ADSL service connection through an Internet Service Provider (ISP). • The configuration information your ISP gave you - Netgear DGND3300v2 | DGND3300 Setup Manual - Page 18
, fax machine, answering machine, or caller ID display requires an ADSL microfilter. Do not connect the modem router to the ADSL line through a microfilter unless the microfilter is a combination microfilter/splitter specifically designed for this purpose. Doing so will prevent block your connection - Netgear DGND3300v2 | DGND3300 Setup Manual - Page 19
or see the link to TCP/IP Addressing in "Related Documents" on page 41. If you are replacing an existing router, disconnect it completely from your network and set it aside before starting to install your new router. To connect the modem router, the ADSL filter and the computer: 1. Connect an - Netgear DGND3300v2 | DGND3300 Setup Manual - Page 20
then connect the phone to the filter. 2. Connect the modem router to the ADSL filter. Using the included phone cable with RJ-11 jacks, connect the ADSL port (B) of the modem router to the ADSL port (C) of the two-line filter. . Installing Your Router Manually (Advanced, Mac, and Linux Users) 16 - Netgear DGND3300v2 | DGND3300 Setup Manual - Page 21
a filter to your modem router will block your ADSL connection. 3. Connect the Ethernet cable (D) from a modem router LAN port to the Ethernet adapter in your computer. 4. Connect the power adapter to the router and plug it in to a power outlet. Installing Your Router Manually (Advanced, Mac, and - Netgear DGND3300v2 | DGND3300 Setup Manual - Page 22
router status lights. • The power light should turn solid green. If it does not, see "Basic Functioning" on page 29. • The ADSL link light is lit, indicating an ADSL the router is securely attached at both ends, and that the computer is turned on. Installing Your Router Manually (Advanced, Mac - Netgear DGND3300v2 | DGND3300 Setup Manual - Page 23
. You can also enter either of these addresses to connect to your wireless router: http://www.routerlogin.net or http://www.routerlogin.com. . Figure 12 A login window similar to the one shown in Figure 13 will display. Figure 13 Installing Your Router Manually (Advanced, Mac, and Linux Users) 19 - Netgear DGND3300v2 | DGND3300 Setup Manual - Page 24
allow the Setup Wizard to detect your Internet connection. When prompted, click Next. The wizard will assist you with configuring your wireless router to Review your settings and make sure that you have selected the correct options and typed everything correctly. Installing Your Router Manually - Netgear DGND3300v2 | DGND3300 Setup Manual - Page 25
• Contact your ISP to verify that you have the correct configuration information. • Read "Troubleshooting" on page 29. If problems persist, register your NETGEAR product and contact NETGEAR Technical Support. Installing Your Router Manually (Advanced, Mac, and Linux Users) 21 - Netgear DGND3300v2 | DGND3300 Setup Manual - Page 26
into the router to complete your wireless setup. The wireless network settings of the router must match the wireless network settings of any wireless devices that connect wirelessly to the router (such as wireless adapter cards and wireless computers). For a wireless connection, the router and each - Netgear DGND3300v2 | DGND3300 Setup Manual - Page 27
option. NETGEAR strongly recommends that you use wireless security. To successfully implement wireless security, check each wireless adapter to determine which wireless security option it supports. To set up basic wireless connectivity: 1. Log in to the modem router at its default LAN address of - Netgear DGND3300v2 | DGND3300 Setup Manual - Page 28
of each computer or wireless adapter to have the same SSID (wireless network name) as the router. 2. Check that the wireless adapter on each computer can support the mode and security option that you selected. (If you have a question, see the online User Manual or review the settings you selected - Netgear DGND3300v2 | DGND3300 Setup Manual - Page 29
WPA2-PSK. WEP security is not supported by WPS. These instructions assume that you are configuring WPS on the router for the first time and connecting a WPS-capable device. To set up basic wireless connectivity: 1. Log in to the modem router at its default LAN address of http://192.168.0.1 with its - Netgear DGND3300v2 | DGND3300 Setup Manual - Page 30
client and, from the client's WPS utility, obtain the wireless client's security PIN, or follow the client's WPS utility instructions to generate a security PIN. - Then, enter this PIN in the Enter Client's PIN field provided on the router and click Next. You have 4 minutes to enable WPS on the - Netgear DGND3300v2 | DGND3300 Setup Manual - Page 31
LAN address and password you have set up. 2. Click the Wireless Settings link in the main menu of the modem router. 3. Note that the default SSIDs are: • Name (11N SSID). The default is NETGEAR-DualBand-N. • Name (11G SSID). The default is NETGEAR-2.4G. The SSID of any wireless adapters must - Netgear DGND3300v2 | DGND3300 Setup Manual - Page 32
test your computers for wireless connectivity. Program the wireless adapter of your computers to have the same wireless network name (SSID) as the modem router. Check that they have a wireless link and are able to obtain an IP address by DHCP from the router. Your modem router is now configured to - Netgear DGND3300v2 | DGND3300 Setup Manual - Page 33
This chapter gives information about troubleshooting your modem router. After each problem description, instructions are provided to help you diagnose and solve the problem. For the common problems listed, go to the section indicated. • Is the router on? Go to "Basic Functioning" on page - Netgear DGND3300v2 | DGND3300 Setup Manual - Page 34
configuration to factory defaults. This will set the router's IP address to 192.168.0.1. This procedure is explained in "Using the Restore Factory Settings Button" on page 37. If the error persists, you might have a hardware problem and should contact technical support. LAN LEDs Are Off If the LAN - Netgear DGND3300v2 | DGND3300 Setup Manual - Page 35
Troubleshooting the ISP Connection If your router is unable to access the Internet, you should check the ADSL connection, then the Internet TCP/IP connection. ADSL Link LED If your router is unable to access the Internet, you should first determine whether you have an ADSL link with the service - Netgear DGND3300v2 | DGND3300 Setup Manual - Page 36
of Windows and MacOS generate and assign an IP address if the computer cannot reach a DHCP server. These auto-generated addresses are in the range of 169.254.x.x. If your IP address is in this range, check the connection from the computer to the router and reboot your computer. Troubleshooting 32 - Netgear DGND3300v2 | DGND3300 Setup Manual - Page 37
has not obtained an IP address from your ISP. If your router is unable to obtain an IP address from the ISP, the problem may be one of the following: • If you have selected a login program, you may have incorrectly set the Service Name, User Name and Password. See "Troubleshooting PPPoE or PPPoA" on - Netgear DGND3300v2 | DGND3300 Setup Manual - Page 38
. There also may be a provisioning problem with your ISP. Unless you connect manually, the modem router will not authenticate using PPPoE or PPPoA until data is transmitted to the network. Troubleshooting Internet Browsing If your modem router can obtain an IP address but your computer is unable to - Netgear DGND3300v2 | DGND3300 Setup Manual - Page 39
the wireless ADSL modem router configured as its TCP/IP default gateway. If your computer obtains its information from the modem router by DHCP, reboot the computer and verify the modem router address as described in "Preparing a Computer for Network Access" on page 41. Troubleshooting a TCP/IP - Netgear DGND3300v2 | DGND3300 Setup Manual - Page 40
restore the factory default configuration settings, changing the router's administration password to password and the IP address to 192.168.0.1. You can erase the current configuration and restore factory defaults in two ways: • Use the Erase function from the modem router menu. Troubleshooting 36 - Netgear DGND3300v2 | DGND3300 Setup Manual - Page 41
administration password or IP address, you must use the Restore Factory Settings button on the rear panel of the modem router. 1. Press and router to reboot.The Power LED will blink red three times and then will turn green when the default configuration settings have been restored. Troubleshooting - Netgear DGND3300v2 | DGND3300 Setup Manual - Page 42
specifications for the modem router. General Specifications Network Protocol and Standards Compatibility Data and Routing Protocols Power Adapter 992.3 ADSL2 (G.dmt.bis), ITU 992.5 ADSL2+. Annex A ADSL is supported by DGND3300, Annex B ADSL is supported by DGND3300. Technical Specifications 38 - Netgear DGND3300v2 | DGND3300 Setup Manual - Page 43
Router Login User login URL User name (case sensitive) Login password (case sensitive) Internet Connection WAN MAC address WAN MTU size ADSL line rate Local Network (LAN) Lan IP Subnet mask RIP direction RIP version RIP authentication DHCP server DHCP starting IP address DHCP ending IP address - Netgear DGND3300v2 | DGND3300 Setup Manual - Page 44
filtering Disabled Wireless Wireless communication Enabled Name (11N SSID) NETGEAR-Dual Band-N Name (11G SSID) NETGEAR-2.4G Security 2.4GHz Output Power Full a. Maximum Wireless signal rate derived from IEEE Standard 802.11 specifications. Actual throughput will vary. Network conditions - Netgear DGND3300v2 | DGND3300 Setup Manual - Page 45
of the technologies used in your NETGEAR product. Document Link Internet Networking and TCP/IP Addressing http://documentation.netgear.com/reference/enu/tcpip/index.htm Wireless Communications http://documentation.netgear.com/reference/enu/wireless/index.htm Preparing a Computer for Network - Netgear DGND3300v2 | DGND3300 Setup Manual - Page 46
to the Internet, click the KnowledgeBase link to view support information or click the Documentation link to view the online User Manual for this modem router. Maximum Wireless Signal Rate Derived from IEEE Standard 802.11 Specifications Actual data throughput will vary. Network conditions and
-
 1
1 -
 2
2 -
 3
3 -
 4
4 -
 5
5 -
 6
6 -
 7
7 -
8
-
9
-
10
-
11
-
12
-
13
-
14
-
15
-
16
-
17
-
18
-
19
-
20
-
21
-
22
-
23
-
24
-
25
-
26
-
27
-
28
-
29
-
30
-
31
-
32
-
33
-
34
-
35
-
36
-
37
-
38
-
39
-
40
-
41
-
42
-
43
-
44
-
45
-
46
 |
 |

May 2009
208-10449-01
v1.0
NETGEAR
, Inc.
350 E. Plumeria Drive
San Jose, CA 95134 USA
RangeMax Dual Band
Wireless-N Modem Router
Setup Manual