Netgear FSM726v2 FSM726v2 Installation Guide
Netgear FSM726v2 - 10/100 Mbps Managed Switch Manual
 |
View all Netgear FSM726v2 manuals
Add to My Manuals
Save this manual to your list of manuals |
Netgear FSM726v2 manual content summary:
- Netgear FSM726v2 | FSM726v2 Installation Guide - Page 1
- Netgear FSM726v2 | FSM726v2 Installation Guide - Page 2
installation. This equipment generates, uses, and can radiate radio frequency energy and, if not installed and used in accordance with the instructions and EN 55 024 Statements This is to certify that the NETGEAR Model FSM726 Managed Switch is shielded against the generation of radio interference in - Netgear FSM726v2 | FSM726v2 Installation Guide - Page 3
digital apparatus (NETGEAR Model FSM726 Managed Switch) Support For assistance with installing and configuring your NETGEAR system or with questions or problems following installation: • Check the NETGEAR Web page at http://www.NETGEAR.com. • Call Technical Support in North America at 1-888-NETGEAR - Netgear FSM726v2 | FSM726v2 Installation Guide - Page 4
6: Installing a GBIC Module ...15 Step 7: Connecting to the Console Port to Manage the Switch (initial configuration 16 APPENDIX A: TECHNICAL SPECIFICATIONS ...19 APPENDIX B: TROUBLESHOOTING ...21 Troubleshooting Chart...21 Additional Troubleshooting Suggestions ...21 APPENDIX C: DEFAULT SETTINGS - Netgear FSM726v2 | FSM726v2 Installation Guide - Page 5
MOUNTING BRACKETS 14 FIGURE 3-2. CONNECTING DEVICES TO THE SWITCH 15 FIGURE 3-3. INSTALLING A GIGABIT ETHERNET MODULE INTO AN FSM726 16 FIGURE 3-4. SYSTEM INFORMATION ...17 Tables TABLE 2-1. FRONT PANEL LEDS: ...11 TABLE 3-1. SITE REQUIREMENTS...13 TABLE B-1. TROUBLESHOOTING CHART 21 Page 4 of 4 - Netgear FSM726v2 | FSM726v2 Installation Guide - Page 6
of the management features in this switch, refer to the User Manual, located on your GearBox™ for Managed Switches CD-ROM that came with your switch. This chapter serves as the introduction for using your NETGEAR FSM726 Switch and provides the following information: Overview Switch Features Package - Netgear FSM726v2 | FSM726v2 Installation Guide - Page 7
NETGEAR Model FSM726 firmware upgrade • Security to better safeguard your network o Password Access Control o IP Access Control List o RADIUS Client Support • Traffic management to better manage traffic flows through your switch o IEEE 802.1p (Class of Service based Network Management Software (NMS) • - Netgear FSM726v2 | FSM726v2 Installation Guide - Page 8
learning function to build the packet-forwarding information table. The table contains up to 8,000 media access control (MAC) addresses (that is, the switch can support networks with as many as 8,000 devices). • Store-and-Forward transmission to remove bad packets from the network • LED indicators - Netgear FSM726v2 | FSM726v2 Installation Guide - Page 9
package contains the following: • FSM726 Managed Switch • Rubber footpads for tabletop installation • Power cord • Null-modem cable • Rack-mount kit for installing the switch in a 19-inch rack • This Installation Guide • Managed Switches Resource CD • Warranty/Support information card If you ordered - Netgear FSM726v2 | FSM726v2 Installation Guide - Page 10
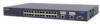
Reset Button Front and Back Panels Figures 2-1 and 2-2 show the key components on the front and back panels of the NETGEAR Model FSM726 simplify the procedure for attaching devices, all RJ-45 ports support Auto Uplink. This technology lets you attach devices to the router, switch, or hub). Page 9 of 9 - Netgear FSM726v2 | FSM726v2 Installation Guide - Page 11
for example, connecting two RJ-45 ports on a NETGEAR Model FSM726 Managed Switch to a router containing a 4-port switch creates a loop. The Your NETGEAR Model FSM726 Managed Switch has two Gigabit Ethernet ports that can be used as either a 1000BASE-T port or as a GBIC module bay. The default setting - Netgear FSM726v2 | FSM726v2 Installation Guide - Page 12
on the port. OFF -No 100/1000Mbps link is established on the port. Note: GBIC port using TP port LED display. Console Port Your NETGEAR Model FSM726 Managed Switch has a console port on the front panel. This port is labeled Console and is required for initial management configuration of the switch - Netgear FSM726v2 | FSM726v2 Installation Guide - Page 13
. For more information about console-port connections, see "Connecting to the Console Port" in Chapter 3 Installation. For more information about managing the switch, see the User Manual located on the CDROM. Reset Button This recessed button on the front panel once pushed will perform a hardware - Netgear FSM726v2 | FSM726v2 Installation Guide - Page 14
This chapter describes the installation procedures for your NETGEAR Model FSM726 Managed Switch. Switch installation involves the following steps: Step 1: Preparing the site Step 2: Installing the switch Step 3: Checking the installation Step 4: Applying AC power Step 5: Connecting devices - Netgear FSM726v2 | FSM726v2 Installation Guide - Page 15
equipment thoroughly. o Verify that all cables are installed correctly. o Check cable routing to make sure cables are not damaged or create a safety hazard. o Be sure all equipment is mounted properly and securely. Step 4: Applying AC Power NETGEAR Model FSM726 Managed Switch does not have an ON/OFF - Netgear FSM726v2 | FSM726v2 Installation Guide - Page 16
end of the supplied AC power adapter cable to the power receptacle on the back of the switch. 2. problem, refer to Appendix B, Troubleshooting. Step 5: Connecting Devices to the Switch The following procedure describes how to connect devices to the switch's RJ-45 ports. Your NETGEAR Model FSM726 - Netgear FSM726v2 | FSM726v2 Installation Guide - Page 17
Installing a Gigabit Ethernet Module into an FSM726 Step 7: Connecting to the Console Port to Manage the Switch (initial configuration) Your NETGEAR Model FSM726 Managed Switch contains software to access the switch remotely. To learn the IP address, you must first access the management via the - Netgear FSM726v2 | FSM726v2 Installation Guide - Page 18
port to discover the new IP address. NETGEAR recommends changing the IP mode to Manual for a more reliable connection. If you need help changing the IP mode, please refer the User Manual on the GearBox™ for Managed Switches CD-ROM. Note: Step 5 of the installation process assumes that you have - Netgear FSM726v2 | FSM726v2 Installation Guide - Page 19
Set-up 3. Select 'B' for IP configuration 4. Enter in the IP address, Subnet mask, and Default Gateway 5. Hit 'Q' twice to exit to the main menu 6. Select 'D' for the Tools page 7. Select 'A' for Save Configurations to NVRAM, and confirm with a 'Y' 8. Select 'C' for Reset Switch, and confirm with - Netgear FSM726v2 | FSM726v2 Installation Guide - Page 20
IEEE 802.1Q Static VLAN (Up to 64) IEEE 802.1p Class of Service (CoS) IEEE 802.1D Spanning Tree Protocol Port Trunking - Manual as per IEEE802.3ad Link Aggregation IGMP v1, v2 Snooping Support Port Mirroring support SNMP v1 RFC1757 RMON 1 groups 1,2,3, and 9 RFC1213 MIB II RFC1643 Ethernet Interface - Netgear FSM726v2 | FSM726v2 Installation Guide - Page 21
Power Supply DC power consumption: 15 W maximum 100-240VAC/50-60 Hz universal input Physical Dimensions 440 x 205 x 43 mm (W x D x H) 17.3 x 8.1 x 1.7 inch Environmental Specifications Operating temperature: 0 to 40°C (32 to104°F) Storage temperature: -20 to 70°C (-4 to 158°F) Operating humidity: 90 - Netgear FSM726v2 | FSM726v2 Installation Guide - Page 22
Suggestions If the suggestions in Table B-1 do not resolve your problem, refer to the troubleshooting suggestions in this section. Network Adapter Cards Make sure the network adapter cards installed in the PCs are in working condition and the software driver has been installed. Page 21 of 21 - Netgear FSM726v2 | FSM726v2 Installation Guide - Page 23
, verify the integrity of the switch by resetting the switch. To reset the switch, use the Tools> Reset command or remove AC power from the switch and then reapply AC power. If the problem continues, contact NETGEAR technical support. In North America, call 1-888-NETGEAR. If you are outside of North - Netgear FSM726v2 | FSM726v2 Installation Guide - Page 24
) Broadcast Storm Control Gigabit ports IP Configuration Password protection User Name Password VLAN IP Multicast Filtering Spanning Tree Protocol Fast Link Traffic Prioritization 802.1p DiffServe MAC address aging SNMP Community FSM726 Default Setting Auto-negotiation Auto-negotiation Enabled - Netgear FSM726v2 | FSM726v2 Installation Guide - Page 25
-
 1
1 -
 2
2 -
 3
3 -
 4
4 -
 5
5 -
 6
6 -
 7
7 -
8
-
9
-
10
-
11
-
12
-
13
-
14
-
15
-
16
-
17
-
18
-
19
-
20
-
21
-
22
-
23
-
24
-
25
 |
 |
