Netgear GS752TS GS7xxTS-TPS Installation Guide
Netgear GS752TS Manual
 |
View all Netgear GS752TS manuals
Add to My Manuals
Save this manual to your list of manuals |
Netgear GS752TS manual content summary:
- Netgear GS752TS | GS7xxTS-TPS Installation Guide - Page 1
GS7xxTS-TPS IG 21Nov11.book Page 1 Thursday, December 1, 2011 12:03 PM Installation Guide NETGEAR GS728TS, GS728TPS, GS752TS, GS752TPS Smart Switch™ Start Here Verify Package Contents • NETGEAR Smart Switch • Rubber footpads for tabletop installation • Power cord • Rack-mount kit for installing the - Netgear GS752TS | GS7xxTS-TPS Installation Guide - Page 2
Manual. For complete DoC please visit the NETGEAR EU Declarations of Conformity website at: http://support.netgear.com/app/answers/detail/a_id/11621/ For GNU General Public License (GPL) related information, please visit http://support.netgear.com/app/answers/detail/a_id/2649 WARNING!! DO NOT stack
-
 1
1 -
 2
2
 |
 |
Installation Guide
NETGEAR GS728TS, GS728TPS, GS752TS, GS752TPS Smart
Switch™
Start Here
Verify Package Contents
•
NETGEAR Smart Switch
•
Rubber footpads for tabletop installation
•
Power cord
•
Rack-mount kit for installing the switch in a 19-inch rack
•
Installation Guide
•
Smart Switch Resource CD that includes the Smart Control Center Utility and
Hardware Installation Guide. (A link to the online Software Administration
Manual is on the Resource CD.)
Prepare a PC with an Ethernet adapter and a CD ROM
drive
Prepare a PC with an Ethernet adapter and a CD ROM drive.
Install the Smart Control Center Utility on a PC
1.
Insert the Resource CD into your CD drive.
2.
Run the Setup program to install the Smart Control Center Utility. The
Installation Wizard will guide you through the installation.
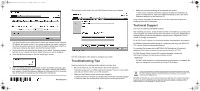
Connect Your Smart Switch in the Correct Order
These instructions assume you are using DHCP in your network. If you are using
static IP addressing in your network, configure the switch IP address before
connecting it to your network. In the absence of a DHCP server, the switch will
default to 192.168.0.239 for its IP address. To configure the switch before
connecting it to your network:
1.
Set up the PC with a Static IP address in the 192.168.0.x subnet, and connect
the PC to the switch. Then, use the Smart Control Center Utility to configure
the switch.
2.
Connect each PC to an RJ-45 network port on the switch front panel.
Use category 5 (Cat5) unshielded twisted-pair (UTP) cable terminated with an
RJ-45 connector to make these connections.
3.
Connect the switch to your network.
4.
Power on the switch.
5.
Verify that the PC with the Smart Control Center Utility is on the same subnet
as the switch.
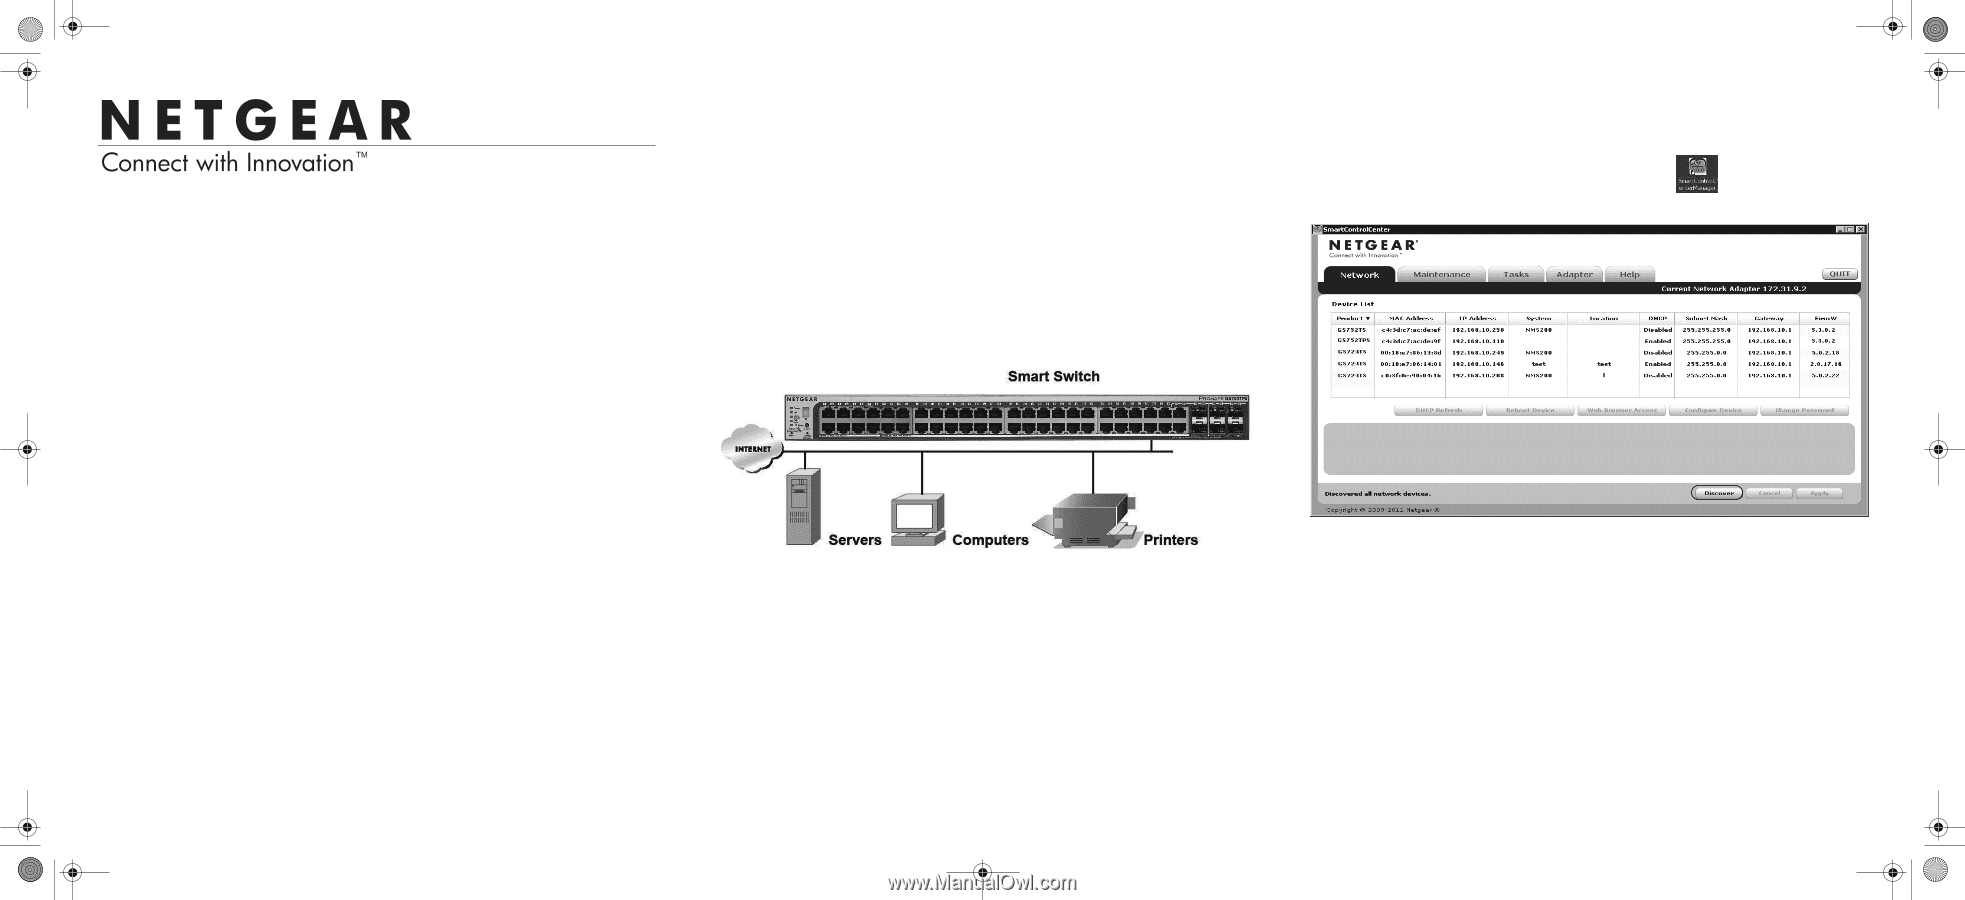
Configure the Switch with the Smart Control Center
Utility
1.
Double-click the Smart Control Center Utility icon
on your desktop or in
Windows Start menu Programs to run the utility and view this screen.
2.
Click Discover to find your switch in the network.
GS7xxTS-TPS IG 21Nov11.book
Page 1
Thursday, December 1, 2011
12:03 PM