Netgear HDX111 HDX111 User Manual - Page 28
Specifying the Network ID for a New Powerline HD Ethernet Adapter
 |
View all Netgear HDX111 manuals
Add to My Manuals
Save this manual to your list of manuals |
Page 28 highlights
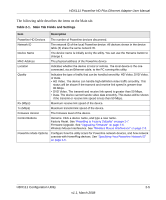
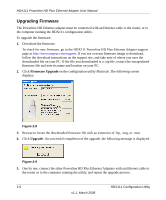
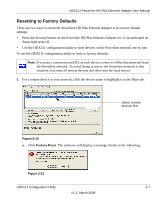
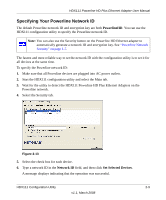
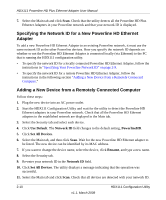
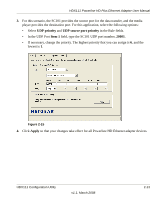
HDX111 Powerline HD Plus Ethernet Adapter User Manual 7. Select the Main tab and click Scan. Check that the utility detects all the Powerline HD Plus Ethernet Adapters in your Powerline network and that your network ID is displayed. Specifying the Network ID for a New Powerline HD Ethernet Adapter To add a new Powerline HD Ethernet Adapter to an existing Powerline network, it must use the same network ID as the other Powerline devices. How you specify the network ID depends on whether or not the Powerline HD Ethernet Adapter is connected locally (via Ethernet) to the PC that is running the HDX111 configuration utility. • To specify the network ID for a locally connected Powerline HD Ethernet Adapter, follow the instructions in "Specifying Your Powerline Network ID" on page 2-9. • To specify the network ID for a remote Powerline HD Ethernet Adapter, follow the instructions in the following section "Adding a New Device from a Remotely Connected Computer." Adding a New Device from a Remotely Connected Computer Follow these steps: 1. Plug the new device into an AC power outlet. 2. Start the HDX111 Configuration Utility and wait for the utility to detect the Powerline HD Ethernet adapters in your Powerline network. Check that all the Powerline HD Ethernet adapters in the established network are displayed in the Main tab. 3. Select the Security tab and select each device. 4. Click Use Default. The Network ID field changes to the default setting, PowerlineHD. 5. Click Set All Devices. 6. Select the Main tab, and then click Scan. Wait for the new Powerline HD Ethernet adapter to be listed. The new device can be identified by its MAC address. 7. If you want to change the device name, select the device, click Rename, and type a new name. 8. Select the Security tab. 9. Re-enter your network ID in the Network ID field. 10. Click Set All Devices. The utility displays a message indicating that the operation was successful. 11. Select the Main tab and click Scan. Check that all devices are detected with your network ID. 2-10 v1.1, March 2008 HDX111 Configuration Utility
-
 1
1 -
2
-
3
-
4
-
5
-
6
-
7
-
8
-
9
-
10
-
11
-
12
-
13
-
14
-
15
-
16
-
17
-
18
-
19
-
20
-
21
-
22
-
 23
23 -
 24
24 -
 25
25 -
 26
26 -
 27
27 -
 28
28 -
 29
29 -
 30
30 -
 31
31 -
 32
32 -
 33
33 -
34
-
35
-
36
-
37
-
38
 |
 |
