Netgear WNR1000 WNR1000 Setup Manual - Page 18
Connecting Your Wireless Router - support
 |
UPC - 606449062588
View all Netgear WNR1000 manuals
Add to My Manuals
Save this manual to your list of manuals |
Page 18 highlights
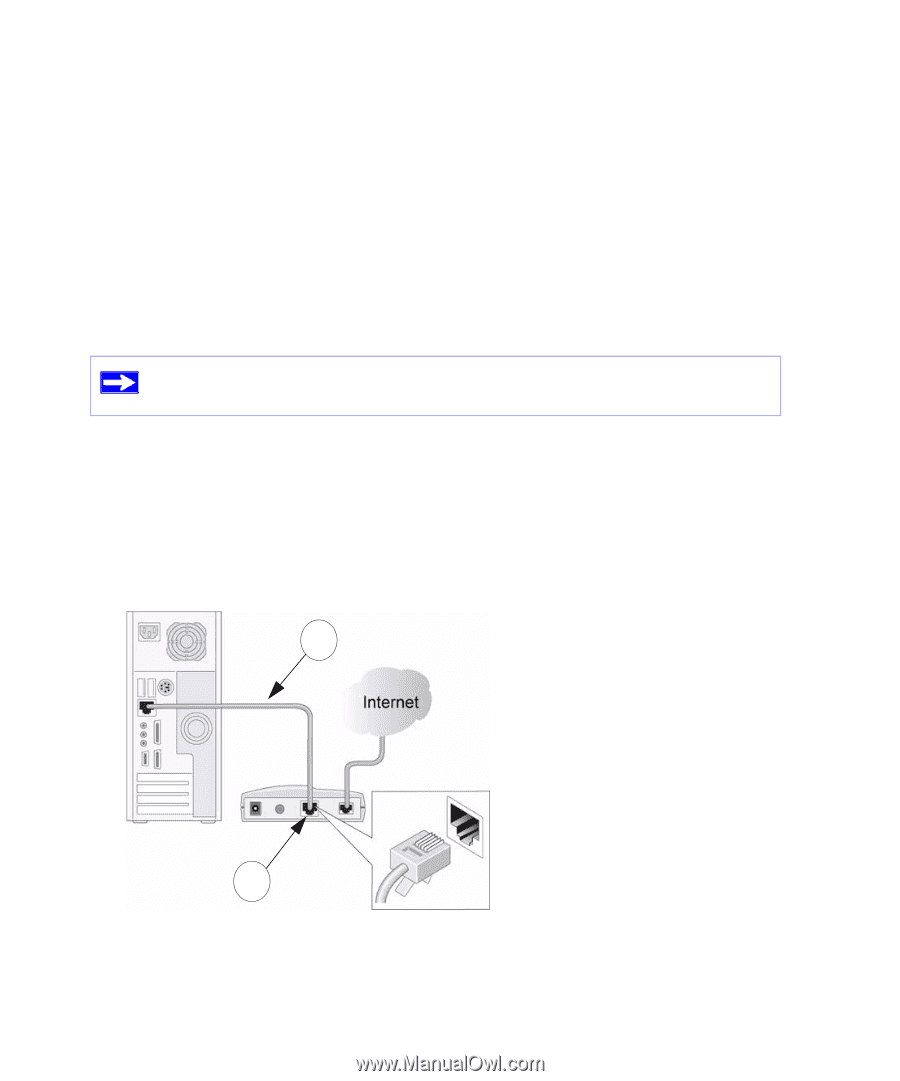
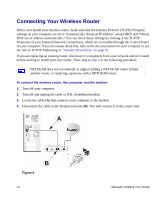
Connecting Your Wireless Router Before you install your wireless router, make sure that the Internet Protocol (TCP/IP) Property settings on your computer are set to "automatically obtain an IP address" using DHCP and "Obtain DNS server address automatically." You can check these settings by looking at the TCP/IP Properties of your Internal Network Connections, which are accessible through the Control Panel of your computer. If you are unsure about this, refer to the documentation for your computer or see the link to TCP/IP Addressing in "Related Documents" on page 41. If you are replacing an existing router, disconnect it completely from your network and set it aside before starting to install your new router. Then, skip to step 5 in the following procedure NETGEAR does not recommend or support adding a NETGEAR router behind another router, or replacing a gateway with a NETGEAR router. To connect the wireless router, the computer, and the modem: 1. Turn off your computer. 2. Turn off and unplug the cable or DSL broadband modem. 3. Locate the cable (A) that connects your computer to the modem. 4. Disconnect the cable at the modem end only (B). You will connect it to the router later. A B Figure 6 14 Manually Installing Your Router
-
 1
1 -
2
-
3
-
4
-
5
-
6
-
7
-
8
-
9
-
10
-
11
-
12
-
 13
13 -
 14
14 -
 15
15 -
 16
16 -
 17
17 -
 18
18 -
 19
19 -
 20
20 -
 21
21 -
 22
22 -
 23
23 -
24
-
25
-
26
-
27
-
28
-
29
-
30
-
31
-
32
-
33
-
34
-
35
-
36
-
37
-
38
-
39
-
40
-
41
-
42
-
43
-
44
-
45
-
46
-
47
-
48
 |
 |