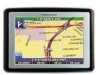
Nextar X3-02 X3-02 - Software Manual
Nextar X3-02 - Automotive GPS Receiver Manual
 |
UPC - 714129936675
View all Nextar X3-02 manuals
Add to My Manuals
Save this manual to your list of manuals |
Nextar X3-02 manual content summary:
- Nextar X3-02 | X3-02 - Software Manual - Page 1
contents Getting started 2 Charging the battery 2 Starting the system 2 Getting a GPS signal 3 Entering data on the system 4 Moving through the screens 5 Working with the map 6 Map view ...6 Maneuver detail 6 Panning the map 6 Route list ...7 Location and POI information 7 Planning your - Nextar X3-02 | X3-02 - Software Manual - Page 2
four signals, a GPS device can also calculate your altitude (height above sea level). To use the system for the first time you need to charge the battery, install the map loader onto your computer, and install map data onto the system. You can install the map loader while the battery is charging - Nextar X3-02 | X3-02 - Software Manual - Page 3
. The screen appears. 2 Tap Navigate. A warning screen appears. 3 Tap "I Agree" after you have read and agreed to the warning. The map view appears and you are ready to set your first destination! Getting a GPS signal To use the system to guide you to a destination, the system's GPS antenna must - Nextar X3-02 | X3-02 - Software Manual - Page 4
To check the status of your GPS signal: 1 Tap the Menu button and then Settings. 2 Tap GPS Information. The GPS Info screen appears. 3 To close the GPS Info screen, tap . Entering data on the system The system doesn't have a keyboard. Instead, you tap the screen to enter data. When you are entering - Nextar X3-02 | X3-02 - Software Manual - Page 5
Moving through the screens The system shows you one screen at a time. Each time you tap a button, a new screen appears. If you want to return to the previous screen, tap . If there isn't , you can Tap MENU to display the main menu. - 5 - - Nextar X3-02 | X3-02 - Software Manual - Page 6
and if the arrow is yellow the GPS signal is weak. At the bottom of the map is a scale indicating your current zoom level. Maneuver detail If you have set a destination, the map displays additional information. As you navigate to a destination, the top of the map displays the name of the next street - Nextar X3-02 | X3-02 - Software Manual - Page 7
can find location information about any point on the map by pressing firmly on the map. A screen appears giving you the opportunity to set the location about Favorites later in this manual). If you press firmly on a POI (Point of Interest) icon, you see the POI(S) screen, which lists the POIs at that - Nextar X3-02 | X3-02 - Software Manual - Page 8
latitude and longitude. To view POI information: 1. To view information about a POI on the map, press firmly on the icon on the map. The POI(S) screen appears. 2. Tap Information. The Information screen appears, giving you block information about the location, including latitude and longitude. - 8 - - Nextar X3-02 | X3-02 - Software Manual - Page 9
a stopover. The system also offers an Itinerary feature, where you can enter up to 50 destinations and use the Itinerary screen to move the addresses have found your destination, you have several options: Nav Fav Map Nav calculates the route from your current location (or the location you set - Nextar X3-02 | X3-02 - Software Manual - Page 10
asked to use City First. To enter an address as a destination using Street First: 1. Tap MENU. The main menu appears. 2. Tap Destination. The Set Destination screen appears. 3. Tap Address. The Input Method screen appears. 4. If you need to change the region: Tap Change State. The Enter State Name - Nextar X3-02 | X3-02 - Software Manual - Page 11
the name of the street. Tap OK when you have selected the street. The Enter House Number screen appears. 7. Select the address that matches the location you want to go to and tap Nav. The map appears, and the guidance directions begin. To enter an address as a destination using City First: 1. Tap - Nextar X3-02 | X3-02 - Software Manual - Page 12
region, or tap the name of the region. Tap OK when you have selected the region. You return to the Input Method screen. 5. Tap City First. The Enter City Name screen appears. 6. Tap the letters to enter the name of the city. Tap OK when you have selected the city. The Enter - Nextar X3-02 | X3-02 - Software Manual - Page 13
8. Tap the numbers to enter the house number. Tap OK when you have finished. The Select Address screen appears. 9. Select the address that matches the location you want to go to and tap Nav. The map appears, and the guidance directions begin. Using an intersection as a destination When you use an - Nextar X3-02 | X3-02 - Software Manual - Page 14
selected the region. You return to the Input Method screen. 5. Tap Street First. The Enter Street Name screen appears. 6. Tap the letters to enter the name screen appears. 7. Tap the letters to enter the name of the second street. Tap OK when you have selected the street. The Select Address screen - Nextar X3-02 | X3-02 - Software Manual - Page 15
First: 1. Tap MENU. The main menu appears. 2. Tap Destination. The Set Destination screen appears. 3. Tap Intersection. The Input Method screen appears. 4. If you need to change the region: Tap Change State. The Enter State Name screen appears. Tap the letters to enter the name of the region, or - Nextar X3-02 | X3-02 - Software Manual - Page 16
screen appears. 7. Tap the letters to enter the name of the street. Tap OK when you have selected the street. The Enter 2nd Street Name screen appears. 8. Tap the letters to enter the name of the second street. Tap OK when you have selected the street. The Select Address screen appears - Nextar X3-02 | X3-02 - Software Manual - Page 17
POI as a destination: 1. Tap MENU. The main menu appears. 2. Tap Destination. The Set Destination screen appears. 3. Tap POI. The Points of Interest screen appears. 4. Tap a category. Usually a subcategory screen appears. Note: If you chose Restaurant, tap the letters to enter a type of restaurant - Nextar X3-02 | X3-02 - Software Manual - Page 18
appears. Tap the letters to enter the name of the POI. Tap OK when you have selected the POI. The POI Select screen appears, displaying the address of the POI. Tap Nav. The map appears, and the guidance directions begin. 7. To select a nearby POI by distance: Tap By Distance. The POI List - Nextar X3-02 | X3-02 - Software Manual - Page 19
POIs in a region: 1. Tap MENU. The main menu appears. 2. Tap Destination. The Set Destination screen appears. 3. Tap POI. The Points of Interest screen appears. 4. Tap a category. Usually a subcategory screen appears. Note: If you chose Restaurant, tap the letters to enter a type of restaurant. If - Nextar X3-02 | X3-02 - Software Manual - Page 20
of the POI. Tap OK when you have selected the POI. The POI Select screen appears. Tap Nav. The map appears, and the guidance directions begin. 7. To select a POI by city: Tap By City. The Enter City Name screen appears. Tap the letters to enter the name of the city and tap OK - Nextar X3-02 | X3-02 - Software Manual - Page 21
system. You can add locations to your Favorites list as you set a destination, from the POI(S) screen, and from the Location Information screen main menu appears. 2. Tap Destination. The Set Destination screen appears. 3. Tap Favorites. The Favorites screen appears. 4. Tap on the favorite you want to - Nextar X3-02 | X3-02 - Software Manual - Page 22
as a destination Recent destinations are locations you have navigated to recently. You can easily select one of these . The main menu appears. 2. Tap Destination. The Set Destination screen appears. 3. Tap Recent. The Recent screen appears. 4. Tap on the recent destination you want to go to and - Nextar X3-02 | X3-02 - Software Manual - Page 23
City Center as a destination Sometimes you may want to use the system to get to a city, but not to a specific location City Name screen appears. Tap the letters to enter the name of the city. Tap OK when you have selected the city. The City Center screen appears. Tap Nav. The map appears, and - Nextar X3-02 | X3-02 - Software Manual - Page 24
To select a city center from all available in a region: Tap List All. The Enter City Name screen appears. Tap the letters to enter the name of the city. Tap OK when you have selected the city. The City Center screen appears. Tap Nav. The map appears, and the guidance directions begin. - 24 - - Nextar X3-02 | X3-02 - Software Manual - Page 25
section as unavailable the system will calculate a new screen appears. 4. Mark any segments that you do not want included: Tap on a route instruction to highlight it. Tap Avoid. A do not enter symbol appears. 5. When you have finished marking segments, tap Nav. Your route is recalculated, the map - Nextar X3-02 | X3-02 - Software Manual - Page 26
to your final destination. To create a stopover: 1. Tap MENU. The main menu appears. 2. Tap Destination. The Destination Options screen appears. 3. Tap Stopover. The Set Stopover screen appears. 4. Set your stopover destination using any of the methods explained earlier in this section. To cancel - Nextar X3-02 | X3-02 - Software Manual - Page 27
2. Tap Destination. The Destination Options screen appears. 3. Tap Stopover. 4. Tap X. A confirmation message appears asking if you want to continue to your final destination. 5. Tap Yes. The map appears and navigation continues. - 27 - - Nextar X3-02 | X3-02 - Software Manual - Page 28
Tap MENU button and then Destination. 2. Tap Favorites. The Favorites screen appears. 3. To edit a favorite: Tap on the favorite you want to edit. Tap Edit. The Edit Favorites screen appears. Enter a descriptive name for this favorite. Tap OK when you - Nextar X3-02 | X3-02 - Software Manual - Page 29
Using Shortcuts The shortcut feature provides you quick access to some of the most important destinations while you're on the road, including: Home ATM Gas Hospital Parking Restaurant Tourist Information By tapping on any of the POI categories, you will see a list of the nearest POIs - Nextar X3-02 | X3-02 - Software Manual - Page 30
paper map. There are two guidance settings, which control whether or not the maneuver detail screen appears when you near your next maneuver. If you use the auto setting, the maneuver detail screen appears. The day/night setting controls the background of the screen. If you choose auto, the system - Nextar X3-02 | X3-02 - Software Manual - Page 31
There are three options for displaying POI icons. If you choose default, the most commonly displayed categories of POI icons will appear on the map at zoom levels of 1000 ft and closer. If you choose off, no POI icons are displayed. If you choose custom, you can choose which - Nextar X3-02 | X3-02 - Software Manual - Page 32
Display Options. The Display Options screen appears. 3. Tap your Orientation preference: Heading or North. 4. Tap your Guidance preference: Auto or Manual. 5. Tap your Day/ give you control over the appearance of the map. You can change the following: method ferries toll roads carpool turns - - Nextar X3-02 | X3-02 - Software Manual - Page 33
you want to make reduced or normal turns. To set your display settings: 1. Tap MENU button and then Settings. 2. Tap Route Options. The Display Options screen appears. - 33 - - Nextar X3-02 | X3-02 - Software Manual - Page 34
1. Tap MENU button and then Settings. 2. Tap Speed Alert. The Speed Alert screen appears. 3. To set auto speed alert: Tap the Auto Speed Alert check appears. Tap OK to close the warning. Tap OK. You return to the map. 4. To set a fixed speed alert: Tap the Fixed Speed Alert checkbox. A - Nextar X3-02 | X3-02 - Software Manual - Page 35
Volume You can set the volume used by your system to the level most comfortable for you. You can also mute the sound. There is also a Mute button on the Volume screen. To change the volume: 1. Tap MENU. The Menu screen appears. 2. Tap Settings. The Settings screen appears. 3. Tap Volume. The Volume - Nextar X3-02 | X3-02 - Software Manual - Page 36
settings. When you change the language, all of the screen names and controls will be in the selected language. There Mi and KM. There are three settings for TTS, which provides clear driving instructions with street names on your GPS device. You can choose between Off, Mixed, or Exclusive. To set - Nextar X3-02 | X3-02 - Software Manual - Page 37
4. Tap your Time Zone preference: Eastern, Central, Mountain, Pacific, Alaska or Hawaii. 5. Tap your Daylight Saving preference: DST or Standard. 6. Tap your Units preference: Mi or KM. 7. Tap your TTS preference: Off, Mixed, or Exclusive. Off - Only recorded voice without pronouncing the street - Nextar X3-02 | X3-02 - Software Manual - Page 38
Screen Display GUIDANCE SCREENS GPS Info Screen - 38 - - Nextar X3-02 | X3-02 - Software Manual - Page 39
Current Location Screen Route List Screen - 39 - - Nextar X3-02 | X3-02 - Software Manual - Page 40
(Hong Kong) Limited. Nextar is a trademark and service mark of Nextar (Hong Kong) Limited. All other brand names, trademarks and service marks are property of their owners. Nextar may find it necessary to modify, amend or otherwise change or update this manual. We may reserve the right to do this
-
 1
1 -
 2
2 -
 3
3 -
 4
4 -
 5
5 -
 6
6 -
 7
7 -
8
-
9
-
10
-
11
-
12
-
13
-
14
-
15
-
16
-
17
-
18
-
19
-
20
-
21
-
22
-
23
-
24
-
25
-
26
-
27
-
28
-
29
-
30
-
31
-
32
-
33
-
34
-
35
-
36
-
37
-
38
-
39
-
40
 |
 |

- 1 -
contents
Getting started
................................
………………………………………
.
....
…
...........
2
Charging
the
battery
.............................................
…………………………………….
..2
Starting
the
system
...............
……………………………………………………
..............
2
Getting
a
GPS
signal
........................
…
.
………………………………
.....................
3
Entering
data
on
the
system
.……………………………………………
.....................
4
Moving
through
the
screens
.........
……………………………………
...........................
5
Working
with
the
map
..........
.....
……………………………………
.............................
6
Map
view
.......................
……………………………………
..........................................
6
Maneuver
detail
.......
……………………………………
..............................................
6
Panning
the
map
...........
...………………………………………
..................................
6
Route
list
.......................
………………………………………
.....................................
7
Location
and
POI
information
................
…………………………………
...................
7
Planning
your
route
..........
.................
…………………………………………
...........
9
Setting
a
single
destination
..................
……………………………………
................
9
Using
an
address
as
a
destination
.........
…………………………………
.................
10
Using
an
intersection
as
a
destination
...........
…………………………………
.........
13
Using
a
Point
of
Interest
(POI)
as
a
destination
…………………………………
.......
17
Using
a
Favorite
destination
as
a
destination
.....
…………………………………
....
21
Using
a
Recent
destination
as
a
destination
...…………………………………
........
22
Using
a
City
Center
as
a
destination
.......
…………………………………………
....
23
Adding
detours
and
stopovers
......
……………………………………
.........................
25
Detours
..............................
…………………………………..…………………
...........
25
Stopovers
............................
……………………………………
...............
……
............
26
Creating
an
itinerary
............
……………………………………
................................
26
Managing
your
favorites
list
......
……………………………………
..................
…
.......
28
Using Shortcuts
............................................
………………………………………
....
29
Setting
your
options
.......................
…………………………………
............
…
..........
30
Display options
.......................................................
………
....................................
30
Route options
...........
............................................
……
..........................................
32
Speed alert
.........................................................
………
.........................................
34
Volume
…………………………………………………………………
...
…………………
..35
Localization
..................
………
................................................................................
3
5
Screen Display
.……………
........................................
…………
..............................
38