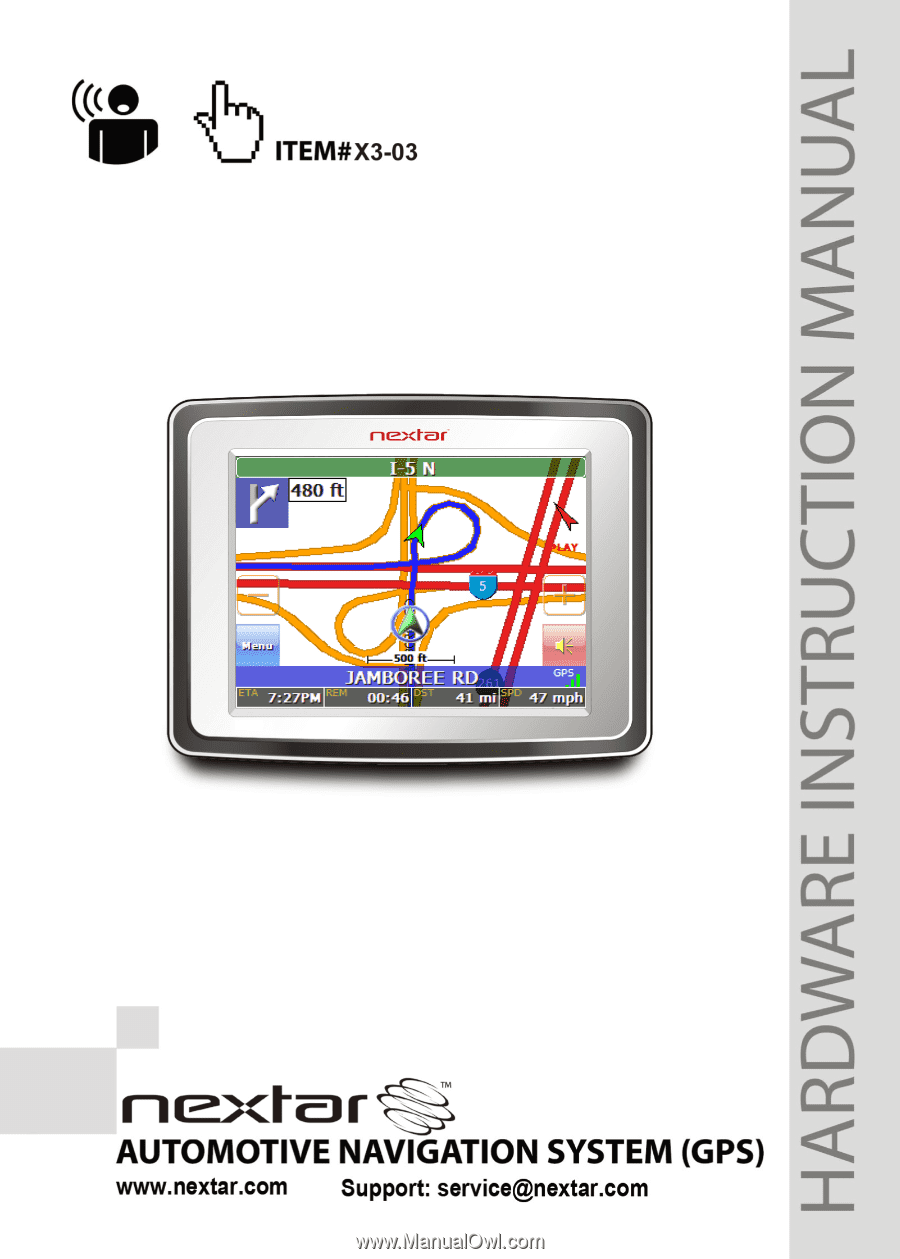
Nextar X3-03 X3-03Hardware Manual
Nextar X3-03 - Automotive GPS Receiver Manual
 |
UPC - 714129920919
View all Nextar X3-03 manuals
Add to My Manuals
Save this manual to your list of manuals |
Nextar X3-03 manual content summary:
- Nextar X3-03 | X3-03Hardware Manual - Page 1
- Nextar X3-03 | X3-03Hardware Manual - Page 2
Nextar GPS Navigator. Your mobile navigation system map guide you to your destination. Important Safety Information Read and keep these instructions GPS in temperatures less than -5°F or greater than 120°F. • This unit contains a non-user-replaceable lithium-ion battery. Do not dispose of your GPS - Nextar X3-03 | X3-03Hardware Manual - Page 3
NEXTAR. Use of products provided by other suppliers may void the warranty. • Caution: To reduce the risk of electric shock, do not remove cover or back. No user serviceable parts inside. Refer servicing to qualified service damage your GPS. • Spilled beverages are a common problem in moving - Nextar X3-03 | X3-03Hardware Manual - Page 4
energy and, if not installed and used in accordance with the instructions, may cause harmful interference to radio or television reception, which tested the performance or reliability of the Global Positioning System ("GPS") hardware, operating software or other aspects of this product. UL has only - Nextar X3-03 | X3-03Hardware Manual - Page 5
& UL Compliance 3 Getting Familiar With Your Hardware Main Unit 5 Accessories 6 Power Adaptor 7 System Connections 9 Using the Mounting Bracket 10 Using Your Navigator General Setup 11 Playing Music 16 Photo Viewer 18 Service & Support Troubleshooting 21 Specifications 23 Copyright 24 4 - Nextar X3-03 | X3-03Hardware Manual - Page 6
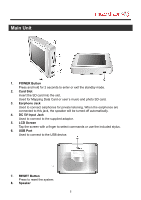
enter or exit the standby mode. 2. Card Slot Insert the SD card into the slot. Used for Mapping Data Card or user's music and photo SD card. 3. Earphone Jack Used to connect earphones for private . 6. USB Port Used to connect to the USB device. 7. RESET Button Press to reset the system. 8. Speaker 5 - Nextar X3-03 | X3-03Hardware Manual - Page 7
Accessories The Following Items Are Included With Your GPS Unit Instruction Manual Quick-Start Guide Warranty Card AC Adaptor Vehicle Power Adaptor Suction-Cup Mounting Bracket Mounting Cradle USB Cable Stylus Dashboard Mount Disk Mapping Data SD Card Pouch NOTE: The SD card may be shipped installed - Nextar X3-03 | X3-03Hardware Manual - Page 8
connected with adaptor, the LCD screen will be brighter than when it's not charging. Using the Power Adaptor The GPS unit is supplied with a DC Power Adaptor for charging the internal battery and for powering the unit while in a vehicle. Connect the Car Adaptor Power Plug to the unit's power jack - Nextar X3-03 | X3-03Hardware Manual - Page 9
Power Adaptor About Rechargeable Battery Your portable GPS device comes with a built-in rechargeable Lithium-Ion battery. Charge the battery fully before initial use. Charging time is normally about 3.5 hours. A fully charged battery delivers about 2.5 hours of use. It is recommended to use the - Nextar X3-03 | X3-03Hardware Manual - Page 10
System Connections installed correctly. Important: If you remove the SD Mapping Data Card to use the Music or Photo functions, treat the Mapping Card very carefully to avoid damage or loss of state and local laws prohibit the driver from wearing earphones while operating a vehicle on public roads. 9 - Nextar X3-03 | X3-03Hardware Manual - Page 11
to the windshield or the dashboard. Assemble the bracket and cradle as shown below and then attach the GPS to the cradle. 1. Following the arrow,silde the mount cradle onto the mount bracket. 2. See Fig. 2. Fix the unit on the mount cradle. 3. See Fig. 3. - Nextar X3-03 | X3-03Hardware Manual - Page 12
exit the program now, as shown below. In the confirmation screen, tap and the system main menu appears. In the main menu, there are four items for selecting. Touch the corresponding item to enter. Tap to enter the Navigator. Tap to enter the Music Player. Tap to enter the Photo Viewer. Tap - Nextar X3-03 | X3-03Hardware Manual - Page 13
General Setup Setup Menu In the main menu, tap to enter the Setup menu, the screen will display as below: In the Setup menu, tap to return to the main menu. Language Tap in the Setup menu to enter Language setting menu for language selection, as shown below: Tap the , Then tap buttons to - Nextar X3-03 | X3-03Hardware Manual - Page 14
General Setup Date & Time Tap in the Setup menu to enter Date & Time setting menu for changing to the current time zone, date and time, as shown below: Tap the Tap the Tap the Then tap buttons to select the proper Time Zone. buttons of Date group to change the corresponding date. buttons of - Nextar X3-03 | X3-03Hardware Manual - Page 15
General Setup Volume Tap in the Setup menu to enter Volume settings menu for volume adjustment, as shown below: Tap the Tap the Then tap to decrease the volume. to increase the volume. to confirm or tap to cancel. Align Screen Tap in the Setup menu to align the screen, as shown below. Tap - Nextar X3-03 | X3-03Hardware Manual - Page 16
Power menu, as shown below: The Power menu displays the unit's battery status. The values are between 0% and 100%, where 0% means the battery power has run out completely, and 100% represents a full battery power. When the battery is being charged, the Battery Status will indicate "Charging". 15 - Nextar X3-03 | X3-03Hardware Manual - Page 17
Please take special care of the Mapping Data Card if you remove it to use the Music Player as the navigation function will not work without it. . This process must be performed independent of the navigation unit. • Insert your SD card into the side of the GPS unit. Do not attempt to use the unit - Nextar X3-03 | X3-03Hardware Manual - Page 18
Playing Music Tap button to enter the music play list menu, as shown below: When you open the play list, the system will look for audio files on its SD memory card and create a play list automatically. If the play list consists of more than one screen, - Nextar X3-03 | X3-03Hardware Manual - Page 19
supports JPEG format files playback. To use the Photo Viewer, you will need to have an SD card with your JPEG picture files preloaded. Please note that you cannot use the navigation special care of the Mapping Data Card if you remove it to use the Photo Viewer as the navigation function will not work - Nextar X3-03 | X3-03Hardware Manual - Page 20
Photo Viewer Viewing Photos In the folder menu, double tap the memory card icon, and the photos stored in the memory card will be listed on the screen. In the photo list, double tap a photo to display it on the LCD screen. You can also tap a photo to select it and then tap to display it. Tap to - Nextar X3-03 | X3-03Hardware Manual - Page 21
Photo Viewer Using the slide show Tap in the photo list screen to enter the Setting menu for setting the Slide Show. You can set the slide show on or off to determine whether or not to play photos in slide show mode. When the slide show is on, you can set the interval between two photos during - Nextar X3-03 | X3-03Hardware Manual - Page 22
Troubleshooting Before contacting customer service, review the steps below to solve simple problems. If you still suspect something wrong with this unit, immediately turn the power off, disconnect the power connector from the unit, and contact Nextar Customer Service Charge battery Press Reset - Nextar X3-03 | X3-03Hardware Manual - Page 23
Troubleshooting Problem Navigator cannot receive satellite signals or does not orient Possible Cause Unit may be inside a tunnel, inside a building, or tall buildings may obstruct the satellite signal Mapping SD card may be removed for music or photo functions Possible Solution Check for - Nextar X3-03 | X3-03Hardware Manual - Page 24
Specifications TFT screen size Frequency Response Audio Signal-to-noise Rate Audio distortion or noise Channel Separation Dynamic Range Power Power Consumption Dimensions Weight 3.5 inches 20Hz~20kHz ≥65dB ≤-20dB (1kHz) ≥70dB (1kHz) ≥80dB (1kHz) AC 100- - Nextar X3-03 | X3-03Hardware Manual - Page 25
any way without prior written consent of Nextar, Inc. Any unauthorized distribution of this manual is expressly forbidden. NextarTM, is a trademark of Nextar (Hong Kong) Limited. Nextar may find it necessary to modify, amend or otherwise change or update this manual. We reserve the right to do this
-
 1
1 -
 2
2 -
 3
3 -
 4
4 -
 5
5 -
 6
6 -
 7
7 -
8
-
9
-
10
-
11
-
12
-
13
-
14
-
15
-
16
-
17
-
18
-
19
-
20
-
21
-
22
-
23
-
24
-
25
 |
 |