Nikon 1691 Instruction Manual
Nikon 1691 - F 3HP SLR Camera Manual
 |
View all Nikon 1691 manuals
Add to My Manuals
Save this manual to your list of manuals |
Nikon 1691 manual content summary:
- Nikon 1691 | Instruction Manual - Page 1
Nikon INSTRUCTION MANUAL - Nikon 1691 | Instruction Manual - Page 2
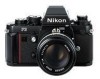
NOMENCLATURE CD ITT••r-,m",.,n dial button 2 ® Reflex mirror @ Memo holder Viewfinder illuminator @ - Nikon 1691 | Instruction Manual - Page 3
Distance scale @ -direct-readout scale @ Viewfinder illuminator button @ Self-timer lever @ Self-timer ON index @ Power switch ON index @ 3 Power switch ® Film advance lever @ Shutter- scale @ Shutter speed dial @) Film indicator ® - Nikon 1691 | Instruction Manual - Page 4
(LCD) . . .. .. 32 EV RANGE OF THE CAMERA 33- 35 ACCESSORIES 36-41 Interchangeable viewfinders 36 Interchangeable focusing screens 37 Focusing screen selector guide 38 Motor Drive MD-4 39 Speedlights 40 Other accessories 41 TIPS ON CAMERA CARE 42-43 SPECIFICATIONS 44 - 45 IMPORTANT 46 - Nikon 1691 | Instruction Manual - Page 5
--------- Congratulations! You now own one of the most advanced and easy-to-use cameras on the market today_ With a wealth of exciting new features, the Nikon F3 is designed to be as up-to-date as you are in your approach to photography_ However, before actually taking pictures with the F3 - Nikon 1691 | Instruction Manual - Page 6
BASIC OPERATION 1 Remove the battery 6 • chamber lid @ • Use a coin to twist the lid counterclockwise to unscrew it. 2 Install the batteries. • Insert the two 1.5V silver-oxide batteries supplied with the camera , making sure that the "+" signs are up. 3 Replace the battery • chamber lid. Slip - Nikon 1691 | Instruction Manual - Page 7
4. Move the power switch ® to uncover the red dot ®. This turns the camera on and makes it ready for exposure reading and shooting. 5 Touch the shutter release • button @ lightly. This activates the exposure meter. The meter stays on for 16 seconds after you take your finger off the button and - Nikon 1691 | Instruction Manual - Page 8
-BASIC OPERATION-continued------------ 1. Mount the lens onto 8 the camera. Grasp the lens by its mounting ring @ . Then line up the focusing index @ on the lens with the white dot @ on the camera body and twist the lens counterclockwise until it clicks into place. 8. Open the camera back. Push - Nikon 1691 | Instruction Manual - Page 9
insert it into one of the slots in the film takeup spool. Note: The Iwo dolo back conlacls localed inside Ihe camera below Ihe film guide rails are for use wilh a dolo back available in Ihe fulure . 11 Wind the film advance lever @ to • advance film onto the takeup sprocket. 9 Wind - Nikon 1691 | Instruction Manual - Page 10
-BASIC OPERATION-continued------------ 12. Close the camera back. 10 Close the camera back until it snaps shut. 13. Take up the film slack. Fold out the film rewind crank ® and rotate it in the direction of the arrow until it stops. Then fold the crank back in. 14 Make blank exposures • until - Nikon 1691 | Instruction Manual - Page 11
15. Set the ASA film speed. Lift up the ASA film speed dial @ and rotate it in either direction until the white dot is opposite the ASA film speed in use. Also make sure the exposure compensation dial is set to the red "0." This programs the camera's exposure meter so that it may provide a proper - Nikon 1691 | Instruction Manual - Page 12
-BASIC OPERATION-continued------------ 17. Hold the camera 12 steady. Wrap the fingers of your right hand around the camera body so that the index finger rests comfortably on the shutter release button and the thumb fits between the body and film advance lever . Then, cradle the camera in - Nikon 1691 | Instruction Manual - Page 13
2 345 6 ---------- Infocus ---------- ---- Inside the viewfinder - - I. LCD exposure information 2. ADR flnumber 3. Fine matte/Fresnel outer field 4. Microprism collar 5. Split-image rangefinder spot 6. 12mm reference circle 19. Set the lens aperture. Turn the lens aperture ring @ 13 until - Nikon 1691 | Instruction Manual - Page 14
-BASIC OPERATION-continued------------ 20. Take the picture. 14 Look through the viewfinder and press the shutter release button lightly to turn on the exposure meter. The shutter speed display indicates the shutter speed selected by the camera. As long as neither + 2000 nor - 8 - appears in - Nikon 1691 | Instruction Manual - Page 15
22. Push in the rewind button @. After the last exposure has been made, the film advance lever will stop working. You must then rewind the exposed film back into its cartridge . To do this, first turn the camera upside down and depress the rewind button to disengage the film sprocket drive. 23. - Nikon 1691 | Instruction Manual - Page 16
-BASIC OPERATION-continued----------- 25. Turn the camera off. 16 To conserve battery power between takes, return the power switch to the "off" position. - Nikon 1691 | Instruction Manual - Page 17
CONTROLS IN D E T A I L + M f,e-, 5 Shutter speed dial ® In addition to automatic stepless shutter speed control, the Nikon F3 offers manual control of all shutter speeds from 112000 sec. to 8 sec . including X, B, and T. To move the shutter speed dial off "A," depress the locking button CD as - Nikon 1691 | Instruction Manual - Page 18
remains open. "X" provides a shutter speed setting of 1/80 sec. It is used 18 to provide proper synchronization with electronic flash units other than the Nikon SB-12. The amount of light reaching the film plane is determined by a combination of the shutter speed and the lens aperture. Since the two - Nikon 1691 | Instruction Manual - Page 19
(Stop action) 19 (Subject motion blur) - Nikon 1691 | Instruction Manual - Page 20
-CONTROLS IN DETAIL-continued---------- Exposure memory lock button 0) When there is a substantial difference between the main subject and the background, unimportant bright spots or 20 dark spots are likely to fool the camera's metering , result- ing in under-or overexposure (see Fig. I). One way - Nikon 1691 | Instruction Manual - Page 21
Exposure compensation dial @ Another way to correct exposure is to use this dial. Push the locking button @ while rotating the dial. The dial is graduated in one-third stop increments. -1 and -2 indicate one and two stops underexposure , whereas + 1 and + 2 indicate one and two stops overexposure. - Nikon 1691 | Instruction Manual - Page 22
-CONTROLS IN DETAIL-continued---------- Memo holder @ As a reminder of the film type and the number of ex- 22 posures on the roll in use, clip off the end of the film carton and insert it into the memo holder. Note: At the "B" selling, unless you hold the shutler release butlon down all the way - Nikon 1691 | Instruction Manual - Page 23
In addition, the LCD shows SO in the finder. Or if you set the dial manually between 1/125 and 1/2000 sec . , the shutter will still fire at 1/S0 sec. In the finder, an "MSO" is displayed . However, if the speed is manually set to 1/S0 sec. (X) or below, the shutter will fire at the speed set - Nikon 1691 | Instruction Manual - Page 24
off with a soft cloth. At below-freezing temperatures, battery performance deteriorates. The use of a fresh set of batteries is recommended to ensure reliable service at low temperatures. In extremely cold climates, it is recommended to use the F3 in conjunction with the MD-4 Motor Drive . With the - Nikon 1691 | Instruction Manual - Page 25
Backup mechanical release lever ® This lever is provided as an alternative method of tripping the shutter in case the camera's batteries become weak or completely exhausted . To operate the lever, first use your fingernail to pull it down to the ready position. Then push it down to trip the shutter. - Nikon 1691 | Instruction Manual - Page 26
-CONTROLS IN DETAIL-continued---------- 26 Lens set at £/2.8 Lens set at fll6 At wide apertures, the depth-ol-field is very shallow with the main subject in focus. But when the lens is stopped down to £116, most objects from near to far are in sharp focus. - Nikon 1691 | Instruction Manual - Page 27
trip the shutter . Caution: If the depth -a/·/ield preview bullan is not depressed all the way, the mirror may remain in the "up" position. On MANUAL: Select a shutter speed. Then hold in the preview button and turn the aperture ring until the "- +" symbol appears in the finder. Release the preview - Nikon 1691 | Instruction Manual - Page 28
-CONTROLS IN DETAIL-continued---------- Self-timer The F3's blinking self-timer provides a lO-sec . delay in shutter release. To operate the self-timer: Mirror lockup lever 0 When using super-telephoto lenses or doing photomicro- 28 graphy, it becomes necessary to reduce camera vibration to the - Nikon 1691 | Instruction Manual - Page 29
use, the blind is painted red. Accessory shoe @ Located at the base of the rewind knob, the accessory shoe allows direct mounting of the Nikon SB-12 Speedlight. Three electrical contacts @ provide for synchro- 29 nization of the flash unit, automatic through -the-lens flash output control, and - Nikon 1691 | Instruction Manual - Page 30
terminal @ A separate sync terminal with a protective screw-in cover 30 is provided on the Nikon F3. It accepts all standard plugin PC cords, plus it is threaded for use with a Nikon screw-in PC cord. When using flash bulbs or an elec- tronic flash without a hot shoe, it is necessary to use the - Nikon 1691 | Instruction Manual - Page 31
Film plane indicator @ The film plane indicator (-e-) is engraved in white on the top deck just behind the shutter speed dial. It indicates the exact position of the film plane inside the camera . Whenever it becomes necessary to measure the exact distance between the subject and film plane, such as - Nikon 1691 | Instruction Manual - Page 32
LCD's life by doing so . 3. When the temperature goes below freezing, the response time decreases as the liquid crystal becomes more viscose. 4. Although the Nikon F3 employs the highest quality LCD, it deteriorates in contrast and becomes difficult to see after six or seven years. When this happens - Nikon 1691 | Instruction Manual - Page 33
. In practice, you will find that it is generally the high end and the low end which require a careful check. The EV range of the Nikon F3 encompasses most lighting situations, and it is only under dim-light or extra-bright picture-taking situations that you need pay any special attention. - Nikon 1691 | Instruction Manual - Page 34
purposes) with any film speed/aperture combination . Careful attention to the following instructions will assure precise exposure, automatically, over the complete exposure control and meter range capability of your Nikon F3. • Auto exposure control at full aperture For example, with an fll - Nikon 1691 | Instruction Manual - Page 35
EV Chart Section A Working Aperture I. I I 3222 16 11 8 5.64 2.8 2 1.4 Section D ASA Section C 7 6 5 4 3 2 1 0 - 1-2 8 7 6 5 4 3 2 1 0 -1 987654 3 210 10 9 8 7 6 5 4 3 2 1 11 10 9 8 7 6 5 4 3 2 1211109876543 131211 10 9 8 7 6 5 4 35 141312111098765 151413121110 9 8 7 6 16151413121110 9 - Nikon 1691 | Instruction Manual - Page 36
ACCESSORIES Interchangeable viewfinders In addition to the DE-2 Eye-Level Finder, the F3 accepts various other interchangeable viewfinders. To remove the finder, slide the finder release levers ® with your thumb and finger towards the back of the camera (Fig. I), and lift the finder out (Fig. - Nikon 1691 | Instruction Manual - Page 37
Interchangeable focusing screens Nikon offers you a choice of 20 interchangeable fo cusing screens: A-T . The type K screen comes with the camera as place (Fig. 2) . Note : For more information on which screens are compatible with which lenses, consult the instruction sheet supplied with the lens. 37 - Nikon 1691 | Instruction Manual - Page 38
-ACCESSORIES-continued Focusing Screen Selector Guide Type A: M~Ue/Fresnel field with 3mm; circular split-Iml.lge rangefinder spot and 12mm~ c ircle. Rapid and o!Iccurote focusing. Excellent for general photogrophy. Type J: MlIUe/ - Nikon 1691 | Instruction Manual - Page 39
Motor Drive One of the most exciting new accessories for the F3 is the MD-4 Motor Drive. This amazingly compact and streamlined unit attaches to the bottom of the camera in seconds and advances the film either singly or in sequence form up to a rapid 6· frames per second-making it the fastest - Nikon 1691 | Instruction Manual - Page 40
let you know when the light is insufficient for proper exposure. And for those photographers needing even more power and versatility, Nikon has created the SB-ll Speedlight. It has a gUide number of 36 (ASA 100 and meters) or 60 (ASA 25 and feet) and gives you a choice of three automatic shooting - Nikon 1691 | Instruction Manual - Page 41
OTHER ACCESSORIES Eyepiece Correction Lenses Screwing into the finder eyepiece, nine separate lenses are provided, so that near- and farsighted photographers can use the F3 without their glasses. They are available in -5, -4, -3, -2, 0, + 0.5, + I, + 2, and + 3 diopters representing the combined - Nikon 1691 | Instruction Manual - Page 42
TIPS ON CAMERA C A R E Camera care is common sense care. Treat your F3 as you would treat other valuable precision instruments . Even though the F3 is built to take many years of hard use, it may be damaged by shock, heat, water, or misuse . Following are some tips to help you keep your camera in - Nikon 1691 | Instruction Manual - Page 43
2. Clean the inside of the camera. Brush out the inside of the camera periodically using a soft brush . Do not exert pressure on the shutter curtains as this may damage them. Also keep the mirror free from fingerprints and dust. 3. Keep the camera away from water. Avoid excessive moisture. When - Nikon 1691 | Instruction Manual - Page 44
i m e r 35mm single-lens reflex Exposure control Aperture-priority automatic 24mm x 36mm exposure with manual override (standard 35mm film format) and backup mechanical control; Nikon bayonet mount through-the-Iens, full aperture Nikkor 5011.2, 5011.4, 5011.8, metering via silicon photo - Nikon 1691 | Instruction Manual - Page 45
display (LCD) shows shutter speed; on Auto, + 2000 indicates overexposure, -S- underexposure; on Manual, M appears with + indicating overexposure, - underexposure, and - + correct exposure; LED ready-light glows when Nikon SB-ll or SB-12 Speedlight is completely recycled; aperture in use also shown - Nikon 1691 | Instruction Manual - Page 46
it to the 46 camera, follow the directions provided in the BASIC OPERATION section of this instruction manual. If the lens is non-AI, stop-down exposure measurement is required with the camera body information concerning lens modification, please contact your local authorized Nikon dealer. - Nikon 1691 | Instruction Manual - Page 47
-
 1
1 -
 2
2 -
 3
3 -
 4
4 -
 5
5 -
 6
6 -
 7
7 -
8
-
9
-
10
-
11
-
12
-
13
-
14
-
15
-
16
-
17
-
18
-
19
-
20
-
21
-
22
-
23
-
24
-
25
-
26
-
27
-
28
-
29
-
30
-
31
-
32
-
33
-
34
-
35
-
36
-
37
-
38
-
39
-
40
-
41
-
42
-
43
-
44
-
45
-
46
-
47
 |
 |

Nikon
INSTRUCTION
MANUAL