Nikon COOLPIX L120 User Manual - Page 110
Connecting the Camera and Printer, Turn off the camera.
 |
View all Nikon COOLPIX L120 manuals
Add to My Manuals
Save this manual to your list of manuals |
Page 110 highlights
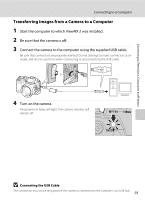
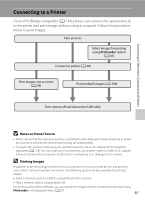
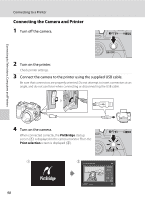
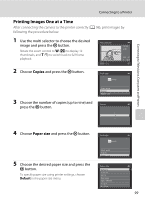
Connecting to Televisions, Computers and Printers Connecting to a Printer Connecting the Camera and Printer 1 Turn off the camera. 2 Turn on the printer. Check printer settings. 3 Connect the camera to the printer using the supplied USB cable. Be sure that connectors are properly oriented. Do not attempt to insert connectors at an angle, and do not use force when connecting or disconnecting the USB cable. 4 Turn on the camera. When connected correctly, the PictBridge startup screen (1) is displayed in the camera monitor. Then the Print selection screen is displayed (2). 1 98 2 Print selection 15/05 2011 NO. 32 32
-
 1
1 -
2
-
3
-
4
-
5
-
6
-
7
-
8
-
9
-
10
-
11
-
12
-
13
-
14
-
15
-
16
-
17
-
18
-
19
-
20
-
21
-
22
-
23
-
24
-
25
-
26
-
27
-
28
-
29
-
30
-
31
-
32
-
33
-
34
-
35
-
36
-
37
-
38
-
39
-
40
-
41
-
42
-
43
-
44
-
45
-
46
-
47
-
48
-
49
-
50
-
51
-
52
-
53
-
54
-
55
-
56
-
57
-
58
-
59
-
60
-
61
-
62
-
63
-
64
-
65
-
66
-
67
-
68
-
69
-
70
-
71
-
72
-
73
-
74
-
75
-
76
-
77
-
78
-
79
-
80
-
81
-
82
-
83
-
84
-
85
-
86
-
87
-
88
-
89
-
90
-
91
-
92
-
93
-
94
-
95
-
96
-
97
-
98
-
99
-
100
-
101
-
102
-
103
-
104
-
 105
105 -
 106
106 -
 107
107 -
 108
108 -
 109
109 -
 110
110 -
 111
111 -
 112
112 -
 113
113 -
 114
114 -
 115
115 -
116
-
117
-
118
-
119
-
120
-
121
-
122
-
123
-
124
-
125
-
126
-
127
-
128
-
129
-
130
-
131
-
132
-
133
-
134
-
135
-
136
-
137
-
138
-
139
-
140
-
141
-
142
-
143
-
144
-
145
-
146
-
147
-
148
-
149
-
150
-
151
-
152
-
153
-
154
-
155
-
156
-
157
-
158
-
159
-
160
-
161
-
162
-
163
-
164
 |
 |
98
Connecting to a Printer
Connecting to Televisions, Computers and Printers
Connecting the Camera and Printer
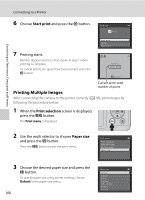
1
Turn off the camera.
2
Turn on the printer.
Check printer settings.
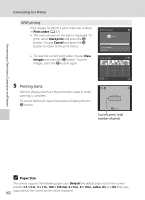
3
Connect the camera to the printer using the supplied USB cable.
Be sure that connectors are properly oriented. Do not attempt to insert connectors at an
angle, and do not use force when connecting or disconnecting the USB cable.
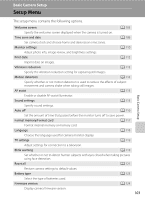
4
Turn on the camera.
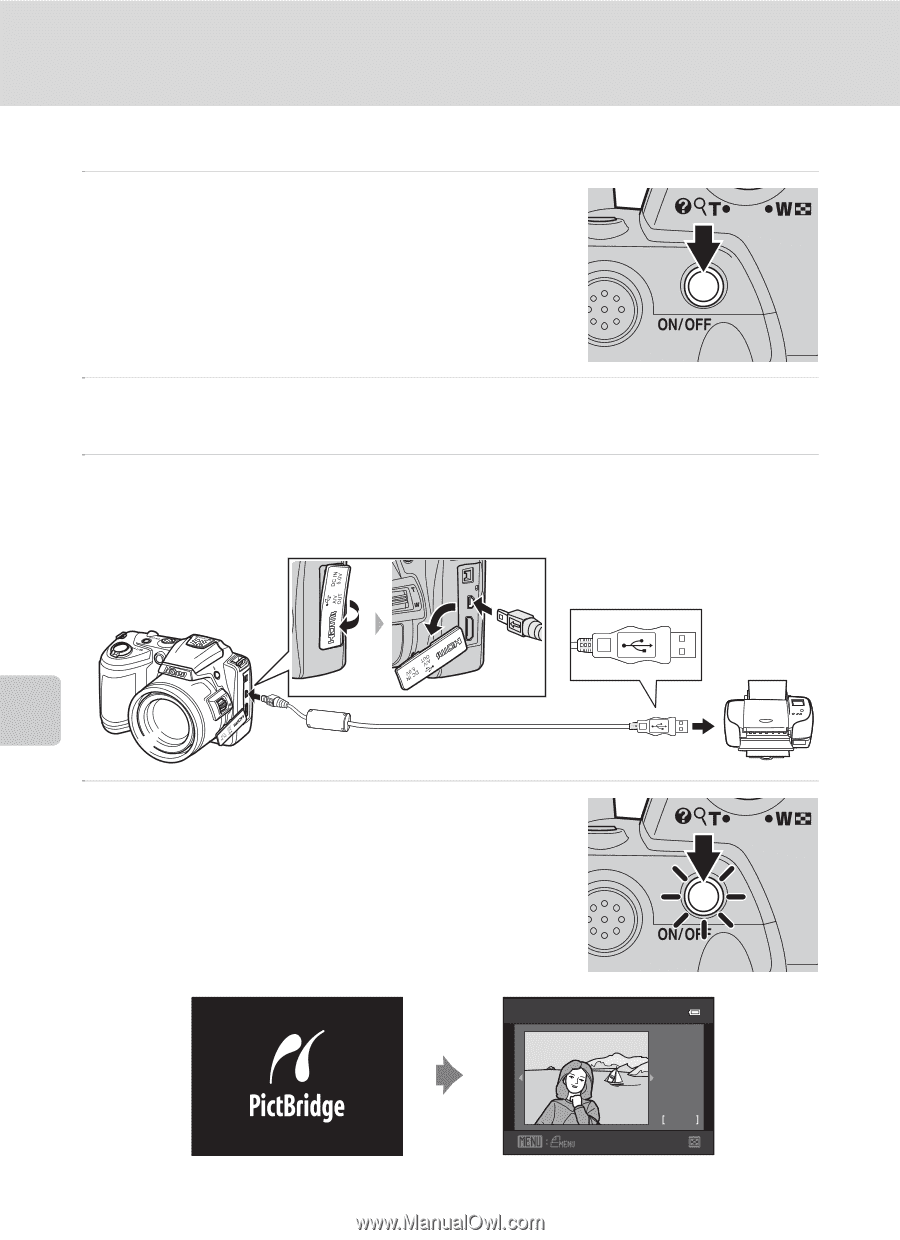
When connected correctly, the
PictBridge
startup
screen (
1
) is displayed in the camera monitor. Then the
Print selection
screen is displayed (
2
).
Print selection
32
NO.
32
15/05
2011
1
2