Nikon COOLPIX L610 Reference Manual - Page 58
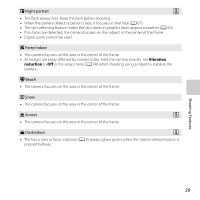
Night landscape, Hand-held, Tripod, Vibration reduction, Shooting Features, Close-up - digital camera settings
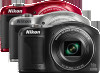 |
View all Nikon COOLPIX L610 manuals
Add to My Manuals
Save this manual to your list of manuals |
Page 58 highlights
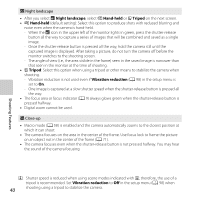
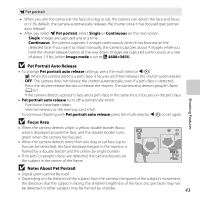
j Night landscape • After you select j Night landscape, select Y Hand-held or Z Tripod on the next screen. • Y Hand-held (default setting): Select this option to produce shots with reduced blurring and noise even when the camera is hand-held. - When the j icon in the upper left of the monitor lights in green, press the shutter-release button all the way to capture a series of images that will be combined and saved as a single image. - Once the shutter-release button is pressed all the way, hold the camera still until the captured image is displayed. After taking a picture, do not turn the camera off before the monitor switches to the shooting screen. - The angle of view (i.e., the area visible in the frame) seen in the saved image is narrower than that seen in the monitor at the time of shooting. • Z Tripod: Select this option when using a tripod or other means to stabilize the camera when shooting. - Vibration reduction is not used even if Vibration reduction (A 98) in the setup menu is set to On. - One image is captured at a slow shutter speed when the shutter-release button is pressed all the way. • The focus area or focus indicator (A 9) always glows green when the shutter-release button is pressed halfway. • Digital zoom cannot be used. k Close-up • Macro mode (A 58) is enabled and the camera automatically zooms to the closest position at which it can shoot. • The camera focuses on the area in the center of the frame. Use focus lock to frame the picture on an object not in the center of the frame (A 71). • The camera focuses even when the shutter-release button is not pressed halfway. You may hear the sound of the camera focusing. Shooting Features O: Shutter speed is reduced when using scene modes indicated with O; therefore, the use of a tripod is recommended. Set Vibration reduction to Off in the setup menu (A 98) when 40 shooting using a tripod to stabilize the camera.
-
 1
1 -
2
-
3
-
4
-
5
-
6
-
7
-
8
-
9
-
10
-
11
-
12
-
13
-
14
-
15
-
16
-
17
-
18
-
19
-
20
-
21
-
22
-
23
-
24
-
25
-
26
-
27
-
28
-
29
-
30
-
31
-
32
-
33
-
34
-
35
-
36
-
37
-
38
-
39
-
40
-
41
-
42
-
43
-
44
-
45
-
46
-
47
-
48
-
49
-
50
-
51
-
52
-
 53
53 -
 54
54 -
 55
55 -
 56
56 -
 57
57 -
 58
58 -
 59
59 -
 60
60 -
 61
61 -
 62
62 -
 63
63 -
64
-
65
-
66
-
67
-
68
-
69
-
70
-
71
-
72
-
73
-
74
-
75
-
76
-
77
-
78
-
79
-
80
-
81
-
82
-
83
-
84
-
85
-
86
-
87
-
88
-
89
-
90
-
91
-
92
-
93
-
94
-
95
-
96
-
97
-
98
-
99
-
100
-
101
-
102
-
103
-
104
-
105
-
106
-
107
-
108
-
109
-
110
-
111
-
112
-
113
-
114
-
115
-
116
-
117
-
118
-
119
-
120
-
121
-
122
-
123
-
124
-
125
-
126
-
127
-
128
-
129
-
130
-
131
-
132
-
133
-
134
-
135
-
136
-
137
-
138
-
139
-
140
-
141
-
142
-
143
-
144
-
145
-
146
-
147
-
148
-
149
-
150
-
151
-
152
-
153
-
154
-
155
-
156
-
157
-
158
-
159
-
160
-
161
-
162
-
163
-
164
-
165
-
166
-
167
-
168
-
169
-
170
-
171
-
172
-
173
-
174
-
175
-
176
-
177
-
178
-
179
-
180
-
181
-
182
-
183
-
184
-
185
-
186
-
187
-
188
-
189
-
190
-
191
-
192
-
193
-
194
-
195
-
196
-
197
-
198
-
199
-
200
-
201
-
202
-
203
-
204
-
205
-
206
-
207
-
208
-
209
-
210
-
211
-
212
-
213
-
214
-
215
-
216
-
217
-
218
-
219
-
220
-
221
-
222
-
223
-
224
-
225
-
226
-
227
-
228
-
229
-
230
-
231
-
232
-
233
-
234
-
235
-
236
-
237
-
238
-
239
-
240
-
241
-
242
-
243
-
244
-
245
-
246
-
247
-
248
-
249
-
250
-
251
-
252
 |
 |