Nikon D100 Product Manual - Page 147
Choosing a Settings Bank
 |
UPC - 018208252718
View all Nikon D100 manuals
Add to My Manuals
Save this manual to your list of manuals |
Page 147 highlights
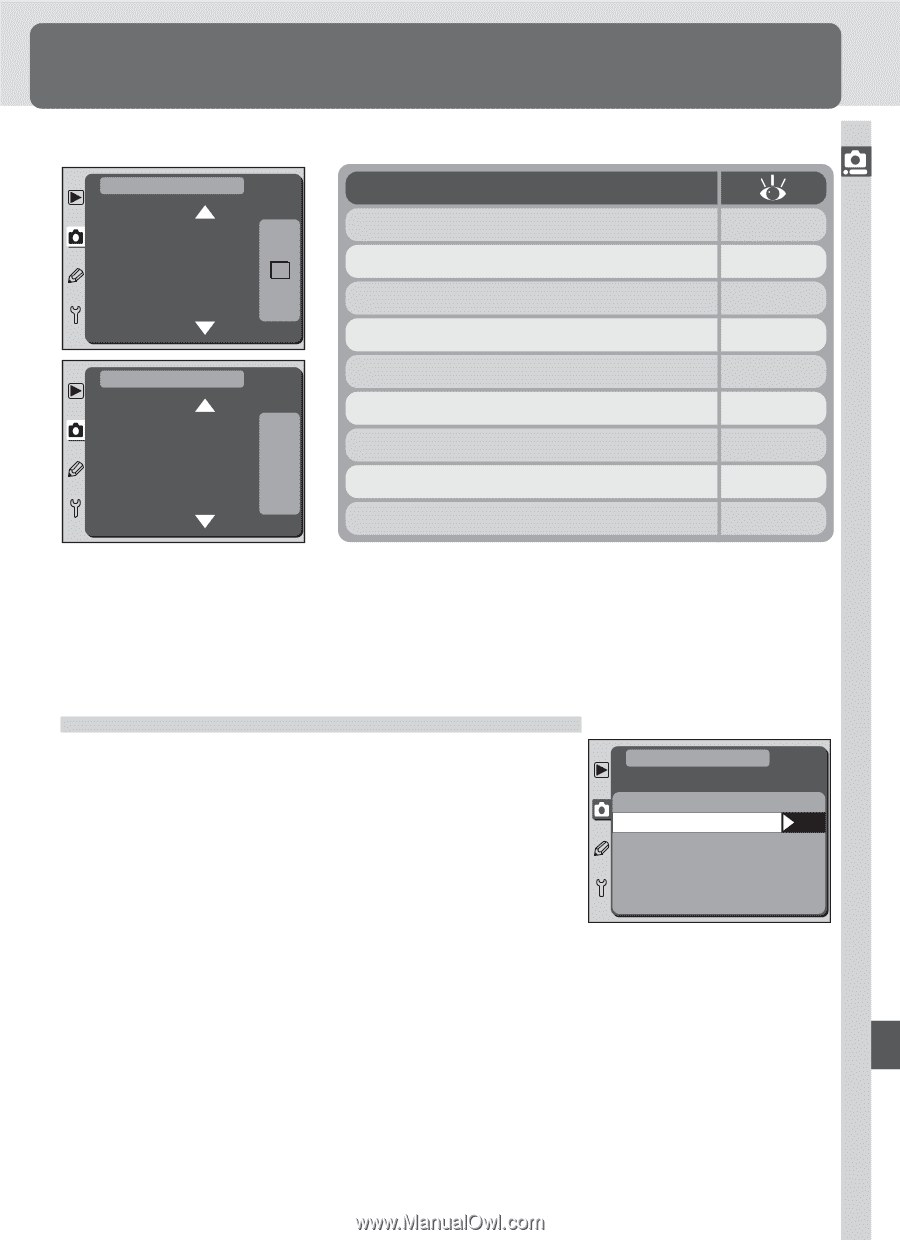
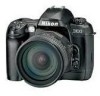
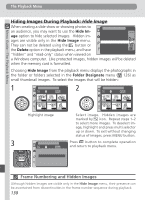
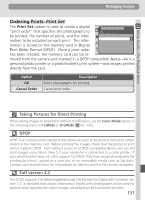
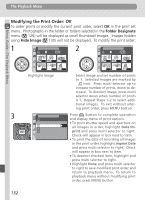
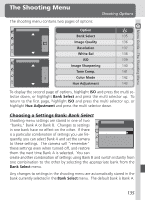
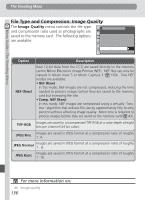
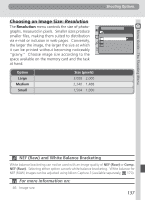
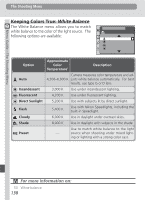
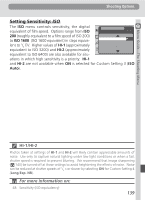
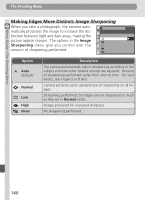
Menu Guide-The Shooting Menu The Shooting Menu The shooting menu contains two pages of options: Shooting Options SHOOTING MENU Bank Select A Image Quality NORM Resolution L White Bal A ISO 200 SHOOTING MENU ISO 200 Image Sharpening A Tone Comp. A Color Mode I Hue Adjustment 0° Option Bank Select 135 Image Quality 136 Resolution 137 White Bal 138 ISO 139 Image Sharpening 140 Tone Comp. 141 Color Mode 142 Hue Adjustment 143 To display the second page of options, highlight ISO and press the multi selector down, or highlight Bank Select and press the multi selector up. To return to the first page, highlight ISO and press the multi selector up, or highlight Hue Adjustment and press the multi selector down. Choosing a Settings Bank: Bank Select Shooting menu settings are stored in one of two "banks," Bank A or Bank B. Changes to settings in one bank have no effect on the other. If there is a particular combination of settings you use frequently, you can select Bank A and set the camera SHOOTING MENU Bank Select Bank A OK Bank B to these settings. The camera will "remember" these settings even when turned off, and restore them the next time Bank A is selected. You can create another combination of settings using Bank B and switch instantly from one combination to the other by selecting the appropriate bank from the Bank Select menu. Any changes to settings in the shooting menu are automatically stored in the bank currently selected in the Bank Select menu. The default bank is Bank A. 135
-
 1
1 -
2
-
3
-
4
-
5
-
6
-
7
-
8
-
9
-
10
-
11
-
12
-
13
-
14
-
15
-
16
-
17
-
18
-
19
-
20
-
21
-
22
-
23
-
24
-
25
-
26
-
27
-
28
-
29
-
30
-
31
-
32
-
33
-
34
-
35
-
36
-
37
-
38
-
39
-
40
-
41
-
42
-
43
-
44
-
45
-
46
-
47
-
48
-
49
-
50
-
51
-
52
-
53
-
54
-
55
-
56
-
57
-
58
-
59
-
60
-
61
-
62
-
63
-
64
-
65
-
66
-
67
-
68
-
69
-
70
-
71
-
72
-
73
-
74
-
75
-
76
-
77
-
78
-
79
-
80
-
81
-
82
-
83
-
84
-
85
-
86
-
87
-
88
-
89
-
90
-
91
-
92
-
93
-
94
-
95
-
96
-
97
-
98
-
99
-
100
-
101
-
102
-
103
-
104
-
105
-
106
-
107
-
108
-
109
-
110
-
111
-
112
-
113
-
114
-
115
-
116
-
117
-
118
-
119
-
120
-
121
-
122
-
123
-
124
-
125
-
126
-
127
-
128
-
129
-
130
-
131
-
132
-
133
-
134
-
135
-
136
-
137
-
138
-
139
-
140
-
141
-
 142
142 -
 143
143 -
 144
144 -
 145
145 -
 146
146 -
 147
147 -
 148
148 -
 149
149 -
 150
150 -
 151
151 -
 152
152 -
153
-
154
-
155
-
156
-
157
-
158
-
159
-
160
-
161
-
162
-
163
-
164
-
165
-
166
-
167
-
168
-
169
-
170
-
171
-
172
-
173
-
174
-
175
-
176
-
177
-
178
-
179
-
180
-
181
-
182
-
183
-
184
-
185
-
186
-
187
-
188
-
189
-
190
-
191
-
192
-
193
-
194
-
195
-
196
-
197
-
198
-
199
-
200
-
201
-
202
-
203
-
204
-
205
-
206
-
207
-
208
-
209
-
210
-
211
-
212
 |
 |