Nikon D100 Product Manual - Page 31
Step 4-Set the Time and Date
 |
UPC - 018208252718
View all Nikon D100 manuals
Add to My Manuals
Save this manual to your list of manuals |
Page 31 highlights
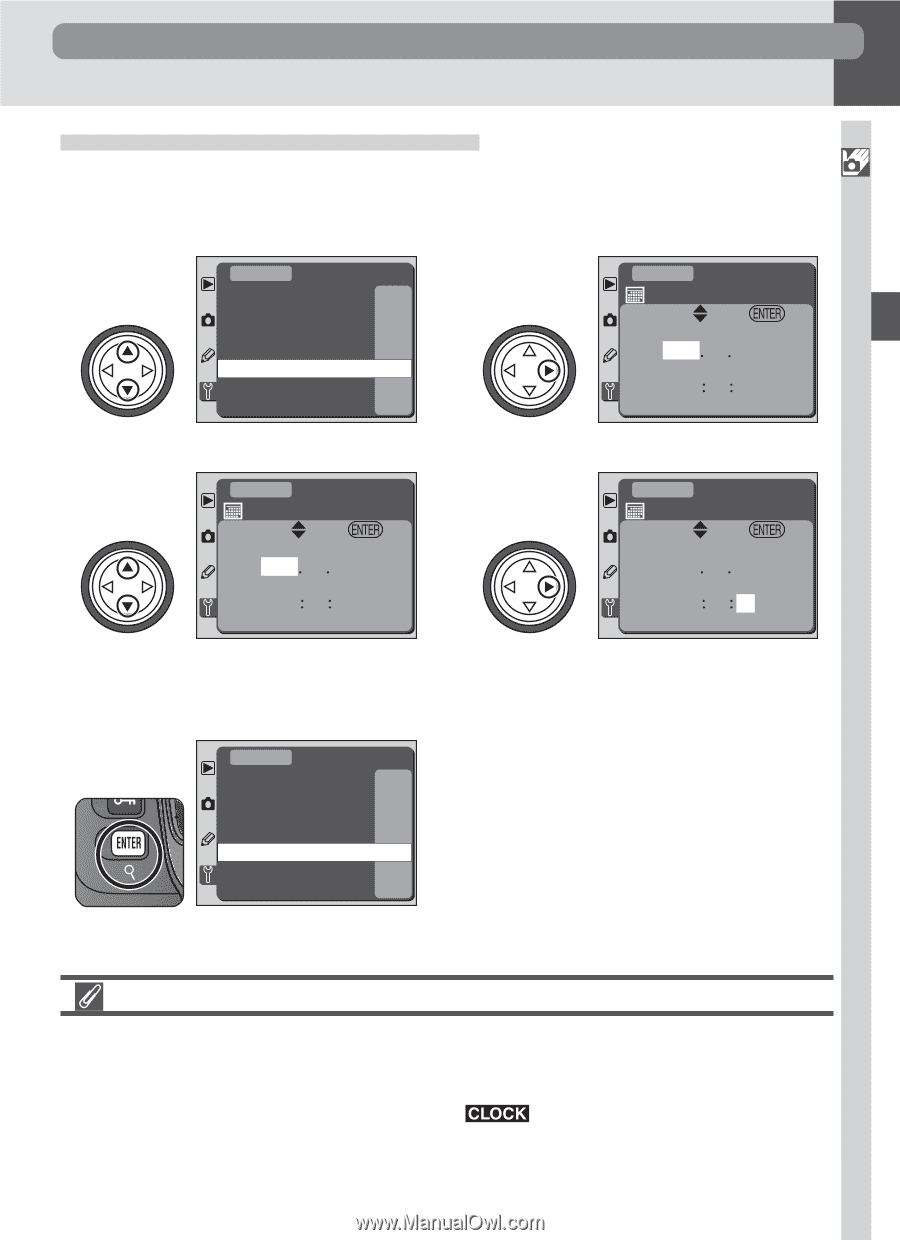
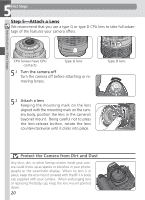
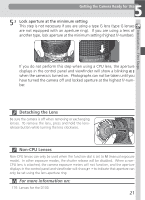
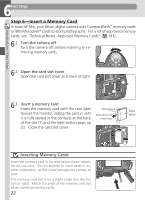
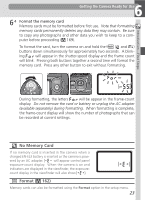
4 Getting the Camera Ready for Use Introduction-First Steps Step 4-Set the Time and Date The time and date of recording is included with all pictures. To ensure that your pictures are stamped with the correct time and date, display the setup menu as described opposite, then set the time and date as described below. 4.1 SET UP Format LCD Brightness Mirror Lock-up Video Output Date Language Image Comment - - O OFF NTSC - - En OFF Highlight Date 4.2 SET UP Date SET OK YM D 2002 01 01 HM S 00 15 20 Display Date menu 4.3 SET UP Date SET OK YM D 2002 01 01 HM S 00 15 20 4.4 SET UP Date SET OK YM D 2002 05 10 HM S 11 00 00 Edit Year Select next item. Repeat Steps 4.3- 4.4 to set Month, Day, Hour, Minute, and Second 4.5 SET UP Format LCD Brightness Mirror Lock-up Video Output Date Language Image Comment - - O OFF NTSC - - En OFF Save changes to settings and return to SET UP menu • The camera clock is less accurate than most battery-powered timepieces, and should be regularly checked and reset as necessary. The Clock Battery The clock-calendar is powered by an independent, rechargeable power source, which is charged as necessary when a charged EN-EL3 battery is installed or the camera is pow- ered by an optional EH-5 AC adapter. Three days of charging is sufficient to provide about five months of back-up power. If the icon in the control panel flashes, the clock battery is exhausted and the clock has been reset to 2002.01.01 00:00:00. Set the clock to the correct date and time as described above. 19
-
 1
1 -
2
-
3
-
4
-
5
-
6
-
7
-
8
-
9
-
10
-
11
-
12
-
13
-
14
-
15
-
16
-
17
-
18
-
19
-
20
-
21
-
22
-
23
-
24
-
25
-
 26
26 -
 27
27 -
 28
28 -
 29
29 -
 30
30 -
 31
31 -
 32
32 -
 33
33 -
 34
34 -
 35
35 -
 36
36 -
37
-
38
-
39
-
40
-
41
-
42
-
43
-
44
-
45
-
46
-
47
-
48
-
49
-
50
-
51
-
52
-
53
-
54
-
55
-
56
-
57
-
58
-
59
-
60
-
61
-
62
-
63
-
64
-
65
-
66
-
67
-
68
-
69
-
70
-
71
-
72
-
73
-
74
-
75
-
76
-
77
-
78
-
79
-
80
-
81
-
82
-
83
-
84
-
85
-
86
-
87
-
88
-
89
-
90
-
91
-
92
-
93
-
94
-
95
-
96
-
97
-
98
-
99
-
100
-
101
-
102
-
103
-
104
-
105
-
106
-
107
-
108
-
109
-
110
-
111
-
112
-
113
-
114
-
115
-
116
-
117
-
118
-
119
-
120
-
121
-
122
-
123
-
124
-
125
-
126
-
127
-
128
-
129
-
130
-
131
-
132
-
133
-
134
-
135
-
136
-
137
-
138
-
139
-
140
-
141
-
142
-
143
-
144
-
145
-
146
-
147
-
148
-
149
-
150
-
151
-
152
-
153
-
154
-
155
-
156
-
157
-
158
-
159
-
160
-
161
-
162
-
163
-
164
-
165
-
166
-
167
-
168
-
169
-
170
-
171
-
172
-
173
-
174
-
175
-
176
-
177
-
178
-
179
-
180
-
181
-
182
-
183
-
184
-
185
-
186
-
187
-
188
-
189
-
190
-
191
-
192
-
193
-
194
-
195
-
196
-
197
-
198
-
199
-
200
-
201
-
202
-
203
-
204
-
205
-
206
-
207
-
208
-
209
-
210
-
211
-
212
 |
 |