Nikon D100 Product Manual - Page 51
The Shooting Menu
 |
UPC - 018208252718
View all Nikon D100 manuals
Add to My Manuals
Save this manual to your list of manuals |
Page 51 highlights
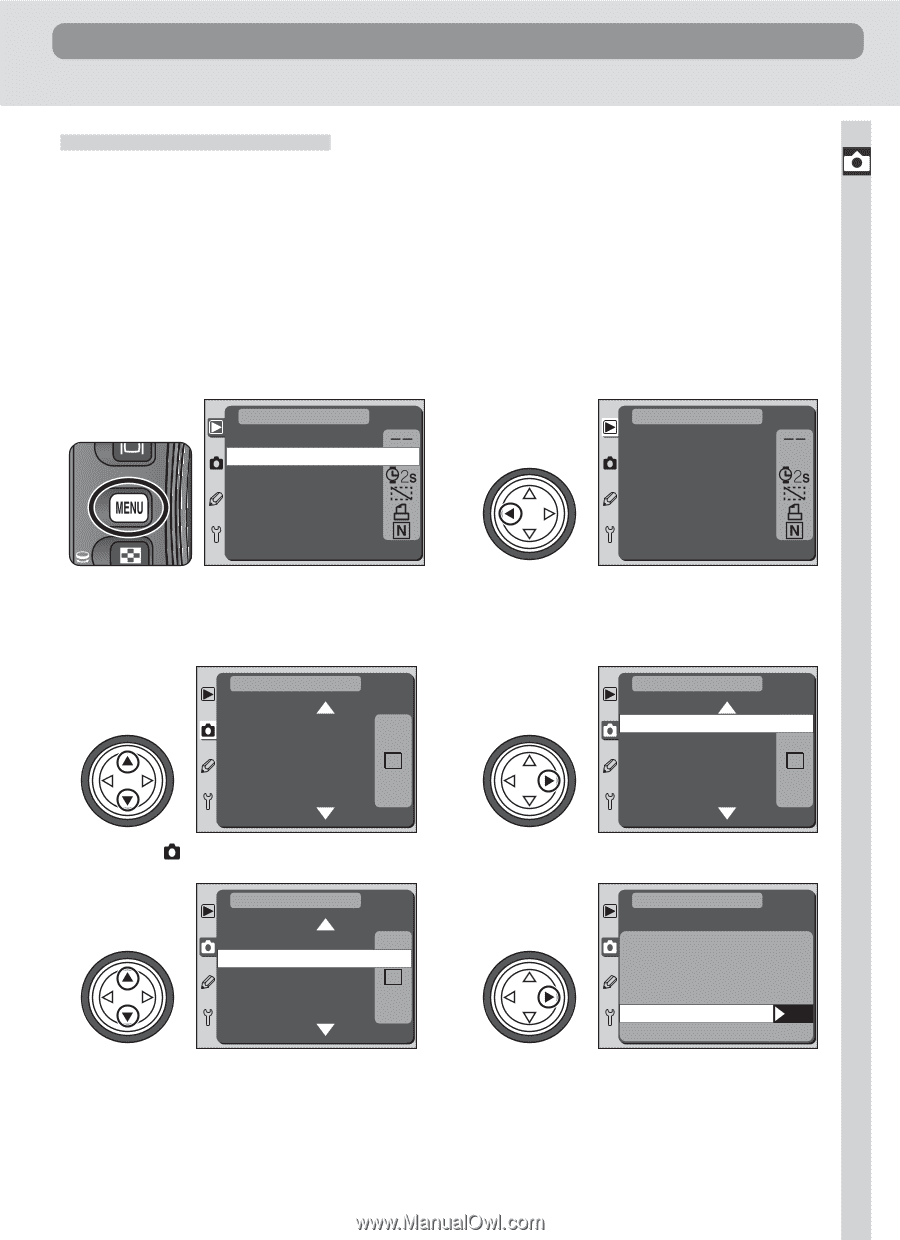
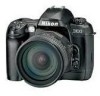
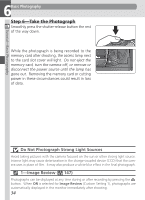
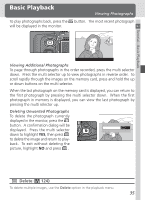
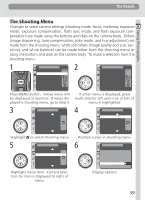
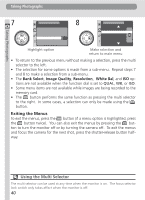
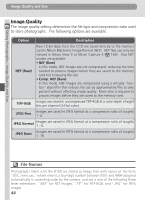
The Details Taking Photographs The Shooting Menu Changes to some camera settings (shooting mode, focus, metering, exposure mode, exposure compensation, flash sync mode, and flash exposure compensation) are made using the buttons and dials on the camera body. Others (image sharpening, tone compensation, color mode, and hue adjustment) are made from the shooting menu, while still others (image quality and size, sensitivity, and white balance) can be made either from the shooting menu or using the buttons and dials on the camera body. To make a selection from the shooting menu: 1 PLAYBACK MENU 2 PLAYBACK MENU Delete Delete Folder Designate ND100 Folder Designate ND100 Slide Show Slide Show Hide Image Hide Image Print Set Print Set Display Mode Display Mode Press MENU button. Active menu will be displayed in monitor. If menu displayed is shooting menu, go to Step 5. 3 SHOOTING MENU Bank Select Image Quality Resolution White Bal ISO A NORM L A 200 If other menu is displayed, press multi selector left until icon at left of menu is highlighted 4 SHOOTING MENU Bank Select Image Quality Resolution White Bal ISO A NORM L A 200 Highlight 5 to select shooting menu SHOOTING MENU Bank Select Image Quality Resolution White Bal ISO A NORM L A 200 Highlight menu item. Current selection for item is displayed to right of menu. Position cursor in shooting menu 6 SHOOTING MENU Image Quality NEF (Raw) TIFF-RGB JPEG Fine JPEG Normal OK JPEG Basic Display options 39
-
 1
1 -
2
-
3
-
4
-
5
-
6
-
7
-
8
-
9
-
10
-
11
-
12
-
13
-
14
-
15
-
16
-
17
-
18
-
19
-
20
-
21
-
22
-
23
-
24
-
25
-
26
-
27
-
28
-
29
-
30
-
31
-
32
-
33
-
34
-
35
-
36
-
37
-
38
-
39
-
40
-
41
-
42
-
43
-
44
-
45
-
 46
46 -
 47
47 -
 48
48 -
 49
49 -
 50
50 -
 51
51 -
 52
52 -
 53
53 -
 54
54 -
 55
55 -
 56
56 -
57
-
58
-
59
-
60
-
61
-
62
-
63
-
64
-
65
-
66
-
67
-
68
-
69
-
70
-
71
-
72
-
73
-
74
-
75
-
76
-
77
-
78
-
79
-
80
-
81
-
82
-
83
-
84
-
85
-
86
-
87
-
88
-
89
-
90
-
91
-
92
-
93
-
94
-
95
-
96
-
97
-
98
-
99
-
100
-
101
-
102
-
103
-
104
-
105
-
106
-
107
-
108
-
109
-
110
-
111
-
112
-
113
-
114
-
115
-
116
-
117
-
118
-
119
-
120
-
121
-
122
-
123
-
124
-
125
-
126
-
127
-
128
-
129
-
130
-
131
-
132
-
133
-
134
-
135
-
136
-
137
-
138
-
139
-
140
-
141
-
142
-
143
-
144
-
145
-
146
-
147
-
148
-
149
-
150
-
151
-
152
-
153
-
154
-
155
-
156
-
157
-
158
-
159
-
160
-
161
-
162
-
163
-
164
-
165
-
166
-
167
-
168
-
169
-
170
-
171
-
172
-
173
-
174
-
175
-
176
-
177
-
178
-
179
-
180
-
181
-
182
-
183
-
184
-
185
-
186
-
187
-
188
-
189
-
190
-
191
-
192
-
193
-
194
-
195
-
196
-
197
-
198
-
199
-
200
-
201
-
202
-
203
-
204
-
205
-
206
-
207
-
208
-
209
-
210
-
211
-
212
 |
 |