Nikon D500 Menu Guide - English
Nikon D500 Manual
 |
View all Nikon D500 manuals
Add to My Manuals
Save this manual to your list of manuals |
Nikon D500 manual content summary:
- Nikon D500 | Menu Guide - English - Page 1
DIGITAL CAMERA Menu Guide This manual details menu options and provides information on accessories and connecting the camera to other devices. • Read this manual thoroughly before using the camera. • After reading this manual, keep it in a readily accessible place for future reference. En - Nikon D500 | Menu Guide - English - Page 2
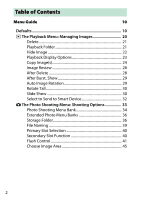
Table of Contents Menu Guide 10 Defaults 10 D The Playback Menu: Managing Images 20 Delete 21 Playback Folder 21 Hide Image 22 Playback Display Options 23 Copy Image(s 24 Image Review 28 After Delete 28 After Burst, Show 29 Auto Image Rotation 29 Rotate Tall 30 Slide Show 30 Select - Nikon D500 | Menu Guide - English - Page 3
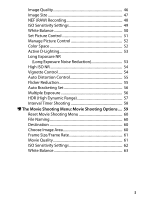
Timer Shooting 58 1 The Movie Shooting Menu: Movie Shooting Options .... 59 Reset Movie Shooting Menu 60 File Naming 60 Destination 60 Choose Image Area 60 Frame Size/Frame Rate 61 Movie Quality 61 ISO Sensitivity Settings 62 White Balance 63 3 - Nikon D500 | Menu Guide - English - Page 4
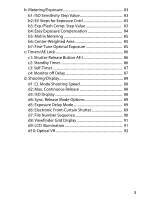
78 a9: Limit AF-Area Mode Selection 79 a10: Autofocus Mode Restrictions 79 a11: Focus Point Wrap-Around 80 a12: Focus Point Options 81 a13: Manual Focus Ring in AF Mode 82 4 - Nikon D500 | Menu Guide - English - Page 5
b2: EV Steps for Exposure Cntrl 83 b3: Exp./Flash Comp. Step Value 83 b4: Easy Exposure Compensation 84 b5: Matrix Metering 85 b6: Center-Weighted Area 85 b7: Fine-Tune Optimal Exposure 85 c: Timers/AE Lock 86 c1: Shutter-Release Button AE-L 86 c2: Standby Timer 86 c3: Self-Timer - Nikon D500 | Menu Guide - English - Page 6
f2: Multi Selector Center Button 109 f3: Shutter Spd & Aperture Lock 111 f4: Customize Command Dials 111 f5: Multi Selector 114 f6: Release Button to Use Dial 114 f7: Reverse Indicators 115 f8: Live View Button Options 115 f9: D Switch 115 f10: Assign MB-D17 Buttons 116 g: Movie 119 g1 - Nikon D500 | Menu Guide - English - Page 7
B The Setup Menu: Camera Setup 124 Format Memory Card 125 Language 125 Time Zone and Date 126 Monitor Brightness 127 Monitor Color Balance 128 Virtual Horizon 129 Information Display 130 AF Fine-Tune 131 Non-CPU Lens Data 132 Clean Image Sensor 133 Lock Mirror up for Cleaning 133 Image - Nikon D500 | Menu Guide - English - Page 8
Bluetooth 148 Network 148 Eye-Fi Upload 149 Conformity Marking 150 MB-D17 Battery Type 151 Battery Order 152 Battery Info 153 Slot Empty Release Lock 154 Save/Load Settings 155 Reset All Settings 158 Firmware Version 158 N The Retouch Menu: Creating Retouched Copies.......... 159 NEF (RAW - Nikon D500 | Menu Guide - English - Page 9
Technical Notes 184 Exposure Program 184 Connections 185 Installing ViewNX-i 185 Copying Pictures to the Computer 186 Ethernet and Wireless Networks 189 Printing Photographs 191 Viewing Photographs on TV 194 Other Accessories 197 Attaching a Power Connector and AC Adapter 205 9 - Nikon D500 | Menu Guide - English - Page 10
Menu Guide Defaults The default settings for the options in the camera menus are listed below. ❚❚ Playback Menu Defaults Option Playback folder (0 21) Image review (0 28) After delete (0 28) After burst, show (0 29) Auto image rotation (0 29) Rotate tall (0 30) Slide show (0 30) Image type Frame - Nikon D500 | Menu Guide - English - Page 11
NEF (RAW) bit depth ISO sensitivity settings (0 49) ISO sensitivity Auto ISO sensitivity control White balance (0 50) Fine-tuning Choose color temp. Preset manual Default Off ND500 100 DSC XQD card slot Overflow TTL Off Group flash DX (24×16) JPEG normal Large Large Lossless compressed 14-bit 100 - Nikon D500 | Menu Guide - English - Page 12
Interval 1 minute No. of intervals×shots/interval 0001×1 Exposure smoothing Off * Photo shooting menu reset is not available while shooting is in progress. 12 Menu Guide - Nikon D500 | Menu Guide - English - Page 13
/frame rate (0 61) Movie quality (0 61) ISO sensitivity settings (0 62) ISO sensitivity (mode M) Auto ISO control (mode M) Maximum sensitivity White balance (0 63) Fine-tuning Choose color temp. Preset manual Set Off Normal Auto Auto sensitivity Wide range Off Off 5 s 25 minutes On Off Menu Guide 13 - Nikon D500 | Menu Guide - English - Page 14
AF display Focus point illumination a13 Manual focus ring in AF mode (0 82) b1 ISO sensitivity step value (0 83) b2 EV steps for exposure cntrl (0 83) b3 Exp./flash comp. step value (0 83) b4 Easy exposure compensation (0 84) b5 Matrix metering (0 85) b6 Center-weighted area (0 85) Default Release - Nikon D500 | Menu Guide - English - Page 15
metering Center-weighted metering Spot metering Highlight-weighted metering c1 Shutter-release button AE-L (0 86) c2 Standby timer (0 86) c3 Self-timer (0 87) Self-timer delay Number of shots Interval between shots c4 Monitor off delay (0 87) Playback Menus Information display Image review Live view - Nikon D500 | Menu Guide - English - Page 16
) Shooting mode Playback mode Zoom on/off Live view f3 Shutter spd & aperture lock (0 111) Shutter speed lock Aperture lock Default 1/250 s 1/60 s Entire frame Subject and background On Flash/speed MTR > under > over Preview None None Choose image area Rating AF-ON Focus point selection AE/AF lock - Nikon D500 | Menu Guide - English - Page 17
main/sub Aperture setting Menus and playback Sub-dial frame advance f5 Multi selector (0 114) f6 Release button to use dial (0 114) f7 Reverse indicators (0 115 Exposure setting: Off Autofocus setting: Off Sub-command dial Off 10 frames Do nothing No Enable LCD backlight (D) AE lock (Reset on release - Nikon D500 | Menu Guide - English - Page 18
(0 130) Clean image sensor (0 133) Clean at startup/shutdown Beep (0 141) Volume Pitch Touch controls (0 142) Enable/disable touch controls Full-frame playback flicks HDMI (0 142) Output resolution Advanced Output range Output display size Live view on-screen display Dual monitor Default Off Off - Nikon D500 | Menu Guide - English - Page 19
) LED lamp Link mode Assign remote (WR) Fn button (0 145) Airplane mode (0 145) Send to smart device (auto) (0 147) Eye-Fi upload (0 149) MB-D17 battery type (0 151) Battery order (0 152) Slot empty release lock (0 154) Default No Enable Yes On Pairing None Disable Off Enable LR6 (AA alkaline - Nikon D500 | Menu Guide - English - Page 20
the playback menu, press G and select the K (playback menu) tab. G button Option Delete Playback folder Hide image Playback display options Copy image(s) Image review 0 Option 0 21 After delete 28 21 After burst, show 29 22 Auto image rotation 29 23 Rotate tall 30 24 Slide show 30 28 - Nikon D500 | Menu Guide - English - Page 21
button ➜ D playback menu Choose a folder for playback. Option Description Pictures in all folders created with the D500 will be visible (Folder name) during playback. Folders can be renamed using the Storage folder > Rename option in the photo shooting menu. All Pictures in all folders will - Nikon D500 | Menu Guide - English - Page 22
highlight Deselect all and press J). 2 Select pictures. Use the multi selector to scroll through the pictures on the memory card (to view the highlighted picture full screen, press and hold the X button) and press again. Continue until all the desired pictures have been selected. 22 Menu Guide - Nikon D500 | Menu Guide - English - Page 23
for the photo information display. A L appears next to selected items; to deselect, highlight an item and press 2. To return to the playback menu, press J. Menu Guide 23 - Nikon D500 | Menu Guide - English - Page 24
. Highlight Select source and press 2. 2 Select the source card. Highlight the slot for the card containing the images to be copied and press J. 24 Menu Guide - Nikon D500 | Menu Guide - English - Page 25
. 6 Select additional images. Highlight pictures and press the center of the multi selector to select or deselect (to view the highlighted picture full screen, press and hold the X button). Selected images are marked with a L. Press J to proceed to Step 7 when your selection is complete. Menu - Nikon D500 | Menu Guide - English - Page 26
images. Highlight Copy image(s)? and press J. A confirmation dialog will be displayed; highlight Yes and press J. Press J again to exit when copying is complete. 26 Menu Guide - Nikon D500 | Menu Guide - English - Page 27
Images will not be copied if there is insufficient space on the destination card. Be sure the battery is fully charged before copying movies. If the destination folder contains an image with the same name as Protect status is copied with the images. Hidden images can not be copied. Menu Guide 27 - Nikon D500 | Menu Guide - English - Page 28
Image Review G button ➜ D playback menu Choose whether pictures Option Description S Show next Display following picture. If deleted picture was last frame, previous picture will be displayed. T Show previous Display previous picture. If deleted described for Show previous. 28 Menu Guide - Nikon D500 | Menu Guide - English - Page 29
taken in continuous mode is the first or last shot in the burst. This option takes effect only when Image review (0 28) is off. Most recent shot (burst) DSC_0001.jpg DSC_0002.jpg DSC_0003.jpg DSC_0004.jpg DSC_0014.jpg panning or taking photographs with the lens pointing up or down. Menu Guide 29 - Nikon D500 | Menu Guide - English - Page 30
already in the appropriate orientation during shooting, images are not rotated automatically during image review. Slide Show G button ➜ D playback menu Create a slide show of the pictures Still images only, and Movies only. Frame interval Choose how long each picture will be displayed. 30 Menu - Nikon D500 | Menu Guide - English - Page 31
skip ahead Press Description Press 4 to return to previous frame, 2 to skip to next frame. View additional photo info Change or hide photo info . Exit to playback mode K End slide show and exit to full-frame or thumbnail playback. Exit to shooting mode Press shutter-release button halfway - Nikon D500 | Menu Guide - English - Page 32
for upload. Option Description Select image(s) Mark pictures for upload to the smart device. Deselect all Remove the upload markings from all pictures. 32 Menu Guide - Nikon D500 | Menu Guide - English - Page 33
sensitivity settings 49 HDR (high dynamic range) 57 White balance 50 Interval timer shooting 58 A See Also Menu defaults are listed on page 11. Menu Guide 33 - Nikon D500 | Menu Guide - English - Page 34
Picture Controls (quick adjust and other manual adjustments), changes to settings in one bank have no effect on the others. To store a particular combination of frequently-used settings, select one of the four added as described on page 39 by highlighting the menu bank and pressing 2. 34 Menu Guide - Nikon D500 | Menu Guide - English - Page 35
and aperture can be included in photo shooting menu banks using the Extended photo menu banks option in the photo shooting menu (0 36). For information on using the controls on the camera body to select the photo selected bank. See page 11 for a list of default settings. O (Q) button Menu Guide 35 - Nikon D500 | Menu Guide - English - Page 36
, the default name can be restored by pressing and holding the O (Q) button while the keyboard is displayed). Existing folders can not be renamed. 36 Menu Guide - Nikon D500 | Menu Guide - English - Page 37
by the card slot icon in the top right corner of the "select folder by number" dialog. The card used for new folders depends on the option currently selected for Secondary slot function (0 40). 3 Save changes and will be stored in the selected folder unless it is already full. Menu Guide 37 - Nikon D500 | Menu Guide - English - Page 38
less than 999, select an existing folder with a number less than 999 and less than 999 images, or try changing the options selected for Frame size/frame rate and Movie quality (0 61). A Startup Time Additional time may be required for camera startup if the memory card contains a very large number of - Nikon D500 | Menu Guide - English - Page 39
letters on the Name area touch-screen keyboard. You can also use the multi selector to highlight the desired character in the keyboard area cursor position (note that if a character is entered when the field is full, the last character in the field will be deleted). To delete the Guide 39 - Nikon D500 | Menu Guide - English - Page 40
when two memory cards are inserted in the camera. Choose from Overflow (the secondary card is used only when the primary card is full), Backup (each picture is recorded to both the primary and secondary card), and RAW primary card and the JPEG copies only to the secondary card). 40 Menu Guide - Nikon D500 | Menu Guide - English - Page 41
reflected by the subject; flash compensation is also available. Auto external flash supports "auto aperture" (qA) and "non-TTL auto" (A) modes; non focal length and maximum aperture using the Non-CPU lens data option in the setup menu (0 132). See the flash unit manual for details. Menu Guide 41 - Nikon D500 | Menu Guide - English - Page 42
the subject; flash output will be adjusted automatically. Flash compensation is also available. • Manual: Choose the flash level manually. • Repeating flash: The flash fires repeatedly while the shutter is open, producing see the documentation provided with the flash unit for details. 42 Menu Guide - Nikon D500 | Menu Guide - English - Page 43
remote flash units that support radio AWL. Off Remote flash photography disabled. A Radio AWL A WR-A10 adapter is required when using the WR-R10. Be sure to update the WR-R10 firmware to the latest version; for information on firmware updates, see the Nikon website for your area. Menu Guide 43 - Nikon D500 | Menu Guide - English - Page 44
you can choose the channel used by the master flash to communicate with the Use Quick wireless control options to adjust the balance between groups A and B and set the output for group C manually for Wireless flash options (0 43), the channel used by the master flash to communicate with the remote - Nikon D500 | Menu Guide - English - Page 45
image area from DX (24×16) and 1.3× (18×12). Option a DX (24×16) Z 1.3× (18×12) Description Pictures are recorded using a 23.5 × 15.7 mm image area (DX format). Pictures are recorded using a 18.0 × 12.0 mm image area, producing a telephoto effect without the need to change lenses. Menu Guide 45 - Nikon D500 | Menu Guide - English - Page 46
roughly 1 : 16 (basic quality). Record uncompressed TIFF-RGB images at a bit TIFF (RGB) TIFF depth of 8 bits per channel (24-bit color). TIFF (RGB) is supported by a wide variety of imaging applications. 46 Menu - Nikon D500 | Menu Guide - English - Page 47
to ensure maximum quality; the size of the files varies with the scene. Options without a star use a type of compression designed to produce smaller files; files tend to be roughly the same size Size (pixels) 5568 × 3712 4176 × 2784 2784 × 1856 4272 × 2848 3200 × 2136 2128 × 1424 Menu Guide 47 - Nikon D500 | Menu Guide - English - Page 48
photographs. ❚❚ NEF (RAW) Compression Option N Lossless compressed O Compressed Description NEF images are compressed using a reversible algorithm, reducing file size by about 20-40% with no effect on image quality. a bit depth of 12 bits but increasing the color data recorded. 48 Menu Guide - Nikon D500 | Menu Guide - English - Page 49
to prevent under exposure in modes P and A (the minimum shutter speed; choose from values between 1/4000 s and 30 s). The maximum ISO sensitivity for photos taken using an optional flash unit can be selected using Maximum sensitivity with M. Menu Guide 49 - Nikon D500 | Menu Guide - English - Page 50
flash units. G Cloudy Use in daylight under overcast skies. M Shade Use in daylight with subjects in the shade. K Choose color temp. L Preset manual Choose color temperature from list of values. Use subject, light source, or existing photograph as reference for white balance. 50 Menu Guide - Nikon D500 | Menu Guide - English - Page 51
and cityscapes. Details are preserved over a wide tone range, from highlights to shadows. Choose for photographs that will later be extensively processed or retouched. Menu Guide 51 - Nikon D500 | Menu Guide - English - Page 52
publication and commercial printing. A Adobe RGB For accurate color reproduction, Adobe RGB images require applications, displays, and printers that support color management. A Color Space ViewNX-i and Capture NX-D automatically select the correct color space when opening photographs created with - Nikon D500 | Menu Guide - English - Page 53
the camera is turned off before processing is complete, the picture will be saved but noise reduction will not be performed). In continuous release mode, frame rates will slow and while photographs are being processed, the capacity of the memory buffer will drop. Menu - Nikon D500 | Menu Guide - English - Page 54
edges of a photograph. Vignette control reduces vignetting for type G, E, and D lenses (PC lenses excluded). Its effects vary from lens to lens and are most noticeable at from default settings may not produce the desired effect. Take test shots and view the results in the monitor. Vignette control - Nikon D500 | Menu Guide - English - Page 55
shooting with wideangle lenses and to reduce pin-cushion distortion when shooting with long lenses (note that the D lenses (PC, fisheye, and certain other lenses excluded); results are not guaranteed with other lenses. of flicker. Note that setting the frame rate may drop while flicker reduction is - Nikon D500 | Menu Guide - English - Page 56
to perform white-balance bracketing, or ADL bracketing (y) to perform bracketing using Active D-Lighting. Note that white balance bracketing is not available at image compares the pixels in each exposure and uses only the brightest. • Darken: The camera compares the pixels in each exposure and - Nikon D500 | Menu Guide - English - Page 57
HDR (High Dynamic Range) G button ➜ C photo shooting menu Used with high contrast subjects, High Dynamic Range (HDR) preserves details in highlights and shadows by combining two shots scene. Choose how much to smooth the boundaries between the shots that make up each HDR photograph. Menu Guide 57 - Nikon D500 | Menu Guide - English - Page 58
the specified number of shots has been recorded. Select a release mode other than self-timer (E) when using the interval timer. Option Description Start interval timer shooting, either after 3 s (Now selected for Start takes effect in mode M if auto ISO sensitivity control is on). 58 Menu Guide - Nikon D500 | Menu Guide - English - Page 59
Control 63 File naming 60 Active D-Lighting 63 Destination 60 High ISO NR 64 Choose image area 60 Flicker reduction 64 Frame size/frame rate 61 Microphone sensitivity 65 Movie quality 61 Frequency response 65 ISO sensitivity settings 62 Wind noise reduction 66 White balance 63 - Nikon D500 | Menu Guide - English - Page 60
their default values (0 13). File Naming G button ➜ 1 movie shooting menu Choose the three-letter prefix used in naming the image files in which movies are stored. The default prefix is "DSC" (0 39). Destination movie shooting menu Choose the image area for movies from DX and 1.3×. 60 Menu Guide - Nikon D500 | Menu Guide - English - Page 61
movie shooting menu Choose the movie frame size (in pixels) and frame rate. Option 1 Maximum bit 24/12 4/4 1280 × 720; 60p 5/5 1280 × 720; 50p 1 Actual frame rate is 29.97 fps for values listed as 30p, 23.976 fps for Frame size/frame rate and Movie quality. Movie Quality G button ➜ - Nikon D500 | Menu Guide - English - Page 62
upper limit for auto ISO sensitivity control from values between ISO 200 and Hi 5. Auto ISO sensitivity control is used in exposure modes P, S, and A and when On is selected for Auto ISO control (mode M) in by choosing a lower value for ISO sensitivity settings > Maximum sensitivity. 62 Menu Guide - Nikon D500 | Menu Guide - English - Page 63
for movies (0 50). Select Same as photo settings to use the option currently selected for photos. Set Picture Control G movies (0 51). Select Same as photo settings to use the option currently selected for photos. Manage Picture Control use the option currently selected for photos (0 53). Menu - Nikon D500 | Menu Guide - English - Page 64
Auto to allow the camera to automatically choose the correct frequency, or manually match the frequency to that of the local AC power supply. you are unsure as to the frequency of the local power supply, test both the 50 and 60 Hz options and choose the one that or 1/25 s for 50 Hz. 64 Menu Guide - Nikon D500 | Menu Guide - English - Page 65
turn sound recording off; to select microphone sensitivity manually, select Manual sensitivity and choose a sensitivity. A The 2 Icon 2 is displayed in full-frame and movie playback if the movie was recorded bustling hum of a city street. Choose T Vocal range to bring out human voices. Menu Guide 65 - Nikon D500 | Menu Guide - English - Page 66
microphones that support this feature can be enabled or disabled using microphone controls. Time-Lapse Movie G button ➜ 1 movie shooting menu The camera automatically takes photos at selected intervals to create a silent time-lapse movie with the frame size, frame Guide - Nikon D500 | Menu Guide - English - Page 67
A Custom Settings: Fine-Tuning Camera Settings To display the Custom Settings menu, press G and select the A (Custom Settings menu) tab. G button Custom Settings are used to customize camera settings to suit individual preferences. Custom Setting groups Main menu Custom settings bank (0 71) Menu - Nikon D500 | Menu Guide - English - Page 68
78 a9 Limit AF-area mode selection 79 a10 Autofocus mode restrictions 79 a11 Focus point wrap-around 80 a12 Focus point options 81 a13 Manual focus ring in AF mode * 82 b Metering/exposure b1 ISO sensitivity step value 83 b2 EV steps for exposure cntrl 83 b3 Exp./flash comp - Nikon D500 | Menu Guide - English - Page 69
Exposure comp. for flash 94 e4 Auto M ISO sensitivity control 95 e5 Modeling flash 95 e6 Auto bracketing (mode M) 96 e7 Bracketing order 96 Menu Guide 69 - Nikon D500 | Menu Guide - English - Page 70
f2 Multi selector center button 109 f3 Shutter spd & aperture lock 111 f4 Customize command dials 111 f5 Multi selector 114 f6 Release button to use dial 114 f7 Reverse indicators 115 f8 Live view button options 115 f9 D switch 115 f10 Assign MB-D17 buttons 116 g Movie g1 Custom - Nikon D500 | Menu Guide - English - Page 71
to settings in one bank have no effect on the others. To store a particular combination of frequently-used settings, select one of the four banks and set the camera to these settings. The new settings will be added as described on page 39 by highlighting the menu bank and pressing 2. Menu Guide 71 - Nikon D500 | Menu Guide - English - Page 72
modified from default values, an asterisk will be displayed adjacent to the altered settings in the second level of the Custom Settings menu. 72 Menu Guide - Nikon D500 | Menu Guide - English - Page 73
. Photos can be taken even when the camera is not E Release + focus in focus. In continuous mode, frame rate slows for improved focus if the subject is dark or low contrast. F Focus Photos can only be taken camera will continue to adjust focus until the shutter is released. Menu Guide 73 - Nikon D500 | Menu Guide - English - Page 74
selected for autofocus mode, focus will lock while the shutter-release button is pressed halfway. Focus lock continues until the shutter is released. 74 Menu Guide - Nikon D500 | Menu Guide - English - Page 75
when photographing subjects that approach the camera at a steady pace, or Erratic for improved response when photographing subjects prone to sudden starts and stops. Menu Guide 75 - Nikon D500 | Menu Guide - English - Page 76
shutter-release button is pressed halfway. Choose whether 3D-tracking uses data from the surrounding focus points to track subjects that move A Custom Settings menu Choose the number of focus points available for manual focuspoint selection. Option Description 1 55 points Choose from the 55 - Nikon D500 | Menu Guide - English - Page 77
(portrait) orientation with the camera rotated 90° clockwise, and for "tall" orientation with the camera rotated 90° counterclockwise. Select Off to use the same focus point and AF-area mode regardless of camera orientation. Camera rotated 90°counter-clockwise Landscape (wide) orientation Camera - Nikon D500 | Menu Guide - English - Page 78
G button ➜ A Custom Settings menu Choose whether the shutter-release button can be used to focus (Shutter/AF-ON) or if focus can only be adjusted using the AF-ON button or other controls to which AF-ON has been assigned ( an option other than auto-area AF is selected for AF-area mode. 78 Menu Guide - Nikon D500 | Menu Guide - English - Page 79
G button ➜ A Custom Settings menu Choose the AF-area modes that can be selected using the AF-mode button and sub-command dial in viewfinder photography (live view is unaffected). one mode is selected, the autofocus mode can not be chosen using the AF-mode button and main command dial. Menu - Nikon D500 | Menu Guide - English - Page 80
outermost focus points so that, for example, pressing 2 when a focus point at the right edge of the display is selected has no effect. 80 Menu Guide - Nikon D500 | Menu Guide - English - Page 81
menu Choose from the following focus point display options. Option Description Manual focus mode Choose On to display the active focus point in manual focus mode, Off to display the focus point only during focus difficult to see. • Off: The selected focus point is not highlighted. Menu Guide 81 - Nikon D500 | Menu Guide - English - Page 82
only with lenses that support it. Selecting Enable allows the lens focus ring to be used for manual focus when using the focus ring. To refocus using autofocus, lift your finger from the shutter-release button and then press it halfway again. To prevent the lens focus ring being used for manual - Nikon D500 | Menu Guide - English - Page 83
Value G button ➜ A Custom Settings menu Select the increments used when making adjustments to ISO sensitivity. If possible, the Steps for Exposure Cntrl G button ➜ A Custom Settings menu Select the increments used when making adjustments to shutter speed, aperture, and bracketing. b3: Exp./Flash - Nikon D500 | Menu Guide - English - Page 84
is set by pressing the E button and rotating the main command dial. A Change Main/Sub The dial used to set exposure compensation when On (Auto reset) or On is selected for Custom Setting b4 (Easy exposure -command dial Main command dial A Main command dial Sub-command dial M N/A 84 Menu Guide - Nikon D500 | Menu Guide - English - Page 85
the area given the most weight in centerweighted metering. If a non-CPU lens is attached, the size of the area is fixed at 8 mm. b7: Fine-Tune Optimal Exposure G button ➜ A Custom Settings menu Use this option to fine-tune has been altered is to view the amount in the finetuning menu. Menu Guide 85 - Nikon D500 | Menu Guide - English - Page 86
-speed and aperture displays in the control panel and viewfinder turn off automatically when the standby timer expires. Choose a shorter standby timer delay for longer battery life. 86 Menu Guide - Nikon D500 | Menu Guide - English - Page 87
(Image review; defaults to 4 s), when menus (Menus; defaults to 1 minute) or information (Information display; defaults to 10 s) are displayed, or during live view and movie recording (Live view; defaults to 10 minutes). Choose a shorter monitor-off delay for longer battery life. Menu Guide 87 - Nikon D500 | Menu Guide - English - Page 88
/Display d1: CL Mode Shooting Speed G button ➜ A Custom Settings menu Choose the maximum frame advance rate in CL (continuous low speed) mode. d2: Max. Continuous Release G button show ISO sensitivity (Show ISO sensitivity) or the number of exposures remaining (Show frame count). 88 Menu Guide - Nikon D500 | Menu Guide - English - Page 89
the shutter on the master camera when using an optional wireless transmitter or wireless caused by shutter motion. A mechanical shutter is used in other release modes. A The Electronic Front- notice lines or fog when shooting with other lenses. The fastest shutter speed and maximum ISO sensitivity - Nikon D500 | Menu Guide - English - Page 90
memory card formatted, or a new memory card inserted in the camera, file numbering continues from the last number used or from the largest file number in the current folder, whichever is higher. If a photograph is taken when the If the folder is empty, file numbering is reset to 0001. 90 Menu Guide - Nikon D500 | Menu Guide - English - Page 91
is pressed; if On is selected, they will come back on when you lift your finger from the shutter-release button. Select Off for increased battery life. Menu Guide 91 - Nikon D500 | Menu Guide - English - Page 92
button X button W (M) button J button K button O (Q) button d10: Optical VR G button ➜ A Custom Settings menu This item is displayed only with lenses that support it. Selecting On enables vibration reduction, which takes effect whenever the shutter-release button is pressed halfway. Select Off - Nikon D500 | Menu Guide - English - Page 93
speed sync is used when a compatible flash unit is attached. If other flash units are used, shutter 1/250 sync speed limit in shutter-priority auto or manual exposure modes, select the next shutter speed after allows the flash to be used at the highest shutter speed supported by the camera, making - Nikon D500 | Menu Guide - English - Page 94
determines the slowest shutter speed available when using front- or rear-curtain sync or as slow as 30 s in shutter-priority auto and manual exposure modes or at flash settings of slow sync, slow when exposure compensation is used. Option Description YE Entire frame Both flash level and exposure - Nikon D500 | Menu Guide - English - Page 95
A Custom Settings menu Choose the reference used to set exposure when a flash is used with auto ISO sensitivity control. Option Description menu If On is selected when the camera is used with an optional flash unit that supports the Nikon Creative Lighting system, a modeling flash will be emitted - Nikon D500 | Menu Guide - English - Page 96
for the Auto bracketing set option in the photo shooting menu in manual exposure mode. Option Description F Flash/speed Camera varies shutter speed ( a setting other than Flash only is selected and the flash is not used, ISO sensitivity will be fixed at the value for the first shot when Guide - Nikon D500 | Menu Guide - English - Page 97
Settings menu Choose the functions assigned to camera controls, whether used individually or in combination with the command dials. ❚❚ Press focus function buttons * * The lens focus function buttons can be used for the assigned function only when AF-L is selected with the focus function selector. - Nikon D500 | Menu Guide - English - Page 98
C AE lock only D AE lock (Reset on release) E AE lock (Hold) F AF lock only A AF-ON h IDisable/enable 1 Bracketing burst 4 + NEF (RAW) 0vxV 8 S 98 Menu Guide - Nikon D500 | Menu Guide - English - Page 99
Center-weighted metering N Spot metering t Highlight-weighted metering b Viewfinder grid display ! Viewfinder virtual horizon c Sync. release selection % MY MENU 3 Access top item in MY MENU K Playback c Rating J Select center focus point K Highlight active focus point None 0vxV 8 S Menu Guide - Nikon D500 | Menu Guide - English - Page 100
to its original value. r FV lock Press the control to lock flash value for optional flash units. Press again to cancel FV lock. 100 Menu Guide - Nikon D500 | Menu Guide - English - Page 101
pressed. If the control is pressed while exposure, flash, or ADL bracketing is active in single frame or quiet shutter-release mode, all shots in the current 1 Bracketing burst bracketing program will be the bracketing burst while the shutter- release button is held down. Menu Guide 101 - Nikon D500 | Menu Guide - English - Page 102
-weighted metering is activated while the control is pressed. b Viewfinder grid display Press the control to turn the framing grid display in the viewfinder on or off. Viewfinder ! virtual horizon Press the control to view a virtual horizon display in the viewfinder (0 104). 102 Menu Guide - Nikon D500 | Menu Guide - English - Page 103
in "MY MENU." Select this option for quick access to a frequently-used menu item. The control performs same function as the K button. Select when using a telephoto lens or in other circumstances in which it is difficult to the active focus point. Pressing the control has no effect. Menu Guide 103 - Nikon D500 | Menu Guide - English - Page 104
tilted at a sharp angle forward or back. If the camera is unable to measure tilt, the amount of tilt will not be displayed. 104 Menu Guide - Nikon D500 | Menu Guide - English - Page 105
button + y * * Choose the role played by the movie-record button in combination with the command dials when the live view selector is rotated to C. Menu Guide 105 - Nikon D500 | Menu Guide - English - Page 106
modes A and M) are made in increments of 1 EV, regardless of the option selected for Custom Setting b2 (EV steps for exposure cntrl, 0 83). 106 Menu Guide - Nikon D500 | Menu Guide - English - Page 107
the control and rotate a command dial to w CPU lens choose a lens number specified using the Non- number CPU lens data option (0 132). y Active D-Lighting Press the the BKT button can not be used in combination with a command dial until high dynamic range or multiple exposure photography ends. - Nikon D500 | Menu Guide - English - Page 108
, highlight 7 Sub-selector and press the center of the multi selector. The sub-selector can be used for focus-point selection (x Focus point selection) or to duplicate the role performed by the multi selector photos at the same zoom ratio (Display next/previous frame). 7 Sub-selector 108 Menu Guide - Nikon D500 | Menu Guide - English - Page 109
of the option selected, pressing the center of the multi selector when a movie is displayed full frame starts movie playback). ❚❚ Shooting Mode Option Role assigned to center of multi selector J Select center center of the multi selector has no effect in viewfinder photography. Menu Guide 109 - Nikon D500 | Menu Guide - English - Page 110
View histograms a histogram is displayed while the center of the multi selector is pressed. Toggle between full-frame or thumbnail playback and playback zoom. Choose the initial p Zoom on/off zoom setting from Low magnification of the multi selector has no effect in live view. 110 Menu Guide - Nikon D500 | Menu Guide - English - Page 111
of the main and subcommand dials. Option Reverse rotation Description Reverse the direction of rotation of the command dials when they are used to make adjustments to Exposure compensation and/ or Shutter speed/aperture. Highlight options and press 2 to select or deselect, then press J. This - Nikon D500 | Menu Guide - English - Page 112
shutter speed. If On (Mode A) is selected, the main command dial will be used to set aperture in exposure mode A only. • Autofocus setting: If On is selected, of 1 EV (aperture for type G and E lenses is still set using the sub-command dial). Note that regardless of the setting chosen, the - Nikon D500 | Menu Guide - English - Page 113
playback, highlight thumbnails, and navigate menus. If On or On (image review excluded) is selected, the main command dial can be used to choose the picture displayed during full-frame playback, move the cursor left or right during thumbnail playback, and move the menu highlight bar up or down. The - Nikon D500 | Menu Guide - English - Page 114
If Do nothing is selected, the timer will not start when the multi selector is pressed. f6: Release Button to Use Dial G button ➜ A Custom Settings menu Selecting Yes allows adjustments that are normally made by holding the E, S (Q), is pressed halfway, or the standby timer expires. 114 Menu Guide - Nikon D500 | Menu Guide - English - Page 115
to disable the a button, preventing live view from starting accidentally. If Enable (standby timer active) is selected, the a button can only be used to start live view while the standby timer is active. f9: D Switch G button ➜ A Custom Settings menu Choose whether rotating the power switch - Nikon D500 | Menu Guide - English - Page 116
MB-D17 multi-power battery pack is attached. Choose the functions assigned to MB-D17 controls, whether used individually or in combination 4 + NEF (RAW) L Matrix metering M Center-weighted metering N Spot metering t Highlight-weighted metering b Viewfinder grid display ! Viewfinder virtual horizon % - Nikon D500 | Menu Guide - English - Page 117
the camera Y button. ❚❚ AF-ON button Choose the function performed by pressing the AF-ON button on the battery pack. See the "Press" section for Custom Setting f1 (Custom control assignment) on page 97 for more information role as that currently selected for the camera AF-ON button. Menu Guide 117 - Nikon D500 | Menu Guide - English - Page 118
❚❚ Multi Selector The multi selector on the battery pack can be used for focuspoint selection (x Focus point selection) or to duplicate the role performed by the camera multi selector (Y additional images and pressing the selector left or right changes the photo information displayed). 118 Menu Guide - Nikon D500 | Menu Guide - English - Page 119
Control Assignment G button ➜ A Custom Settings menu Choose the functions assigned to camera controls, whether used individually or in combination with the command dials, when the live view selector is rotated to " when it is already assigned to "press" sets the "press" option None. Menu Guide 119 - Nikon D500 | Menu Guide - English - Page 120
widens while the Pv button is pressed. t Power aperture (open) Use in combination with Custom Setting g1 (Custom control assignment) > Fn1 button narrows while the Fn1 button is pressed. q Power aperture (close) Use in combination with Custom Setting g1 (Custom control assignment) > Preview - Nikon D500 | Menu Guide - English - Page 121
during movie recording to add r Index marking an index at the current position. Indices can be used when viewing and editing movies. s View photo shooting info Press the control to display photo shooting to end movie recording and take a photograph with an aspect ratio of 16 : 9. Menu Guide 121 - Nikon D500 | Menu Guide - English - Page 122
way down to start or end recording. The shutter-release button can not be used for other purposes while the live view selector is rotated to 1. To end M and can not be used while photo shooting info is displayed (a 6 icon indicates that power aperture can not be used). The display may flicker while - Nikon D500 | Menu Guide - English - Page 123
center + y The following functions can be performed by pressing these controls and rotating a command dial: Option J Choose image area None Description At a movie frame size of 1920 × 1080, you can press the control and rotate a command dial to select the image area. The image area can not be - Nikon D500 | Menu Guide - English - Page 124
device (auto) 147 132 Wi-Fi 147 133 Bluetooth 148 133 Network 148 134 Eye-Fi upload 149 136 Conformity marking 150 137 MB-D17 battery type 151 138 Battery order 152 141 Battery info 153 124 Menu Guide - Nikon D500 | Menu Guide - English - Page 125
0 Slot empty release lock 154 Reset all settings 158 Save/load settings 155 Firmware version 158 * Not available when battery is low. A See Also Menu defaults are listed on page 18. Format Language G button ➜ B setup menu Choose a language for camera menus and messages. Menu Guide 125 - Nikon D500 | Menu Guide - English - Page 126
in the new time zone. Date and time Set the camera clock. Choose whether the camera clock is updated to the time (Coordinated Universal Time, or UTC), time zone, and standard or daylight saving time supplied panel and a flashing & indicator will appear in the information display. 126 Menu Guide - Nikon D500 | Menu Guide - English - Page 127
separately for: • Menus/playback: Adjust the brightness of the menu, information, and playback displays. • Live view: Adjust the brightness of the live view display. Menu Guide 127 - Nikon D500 | Menu Guide - English - Page 128
Color Balance G button ➜ B setup menu Use the multi selector as shown below to from a thumbnail list (to view the highlighted image full frame, press and hold X). If the memory card contains no photographs, an empty frame with a gray border will be displayed in place of of magenta 128 Menu Guide - Nikon D500 | Menu Guide - English - Page 129
not be displayed. A See Also For information on viewing a virtual horizon display in the viewfinder, see Custom Setting f1 (Custom control assignment; 0 97, 104). Menu Guide 129 - Nikon D500 | Menu Guide - English - Page 130
will automatically change from black to white or white to black to maintain contrast with the background. To always use the same color lettering, select Manual and choose Dark on light (B; black lettering) or Light on dark (W; white lettering). Monitor brightness will automatically be adjusted - Nikon D500 | Menu Guide - English - Page 131
live view, or fine-tuning can be performed manually using the Saved value and Default options. Option Description AF value used when no previously Default saved value exists for the current lens (CPU lenses only). lenses of the same type in light of the fact that Saved value can be used - Nikon D500 | Menu Guide - English - Page 132
the AF mode and movie-record buttons until instructions are displayed (you will need to press the for each type of lens. If a teleconverter is used, separate values can be stored for each combination of -CPU lenses, allowing them to be used with functions normally reserved for CPU lenses. Option - Nikon D500 | Menu Guide - English - Page 133
lenses using Clean image sensor can be removed manually as described in the section on manual cleaning in the User's Manual. Note, however, that because the image sensor is easily damaged, we recommend that manual cleaning be performed only by a Nikon-authorized service representative. Menu Guide - Nikon D500 | Menu Guide - English - Page 134
CPU lens is mounted on the camera. A lens with a focal length of at least 50 mm is recommended. When using a zoom lens, zoom all the way in. 1 Choose a start option. Highlight one of the following options and press the viewfinder and control panel displays when cleaning is complete. 134 Menu Guide - Nikon D500 | Menu Guide - English - Page 135
ten centimeters (four inches) from a welllit, featureless white object, frame the object so that it fills the viewfinder and then press the , focus will automatically be set to infinity; in manual focus mode, set focus to infinity manually. 3 Acquire dust off reference data. Press the Menu Guide 135 - Nikon D500 | Menu Guide - English - Page 136
Reference Data The same reference data can be used for photographs taken with different lenses or at different apertures. Reference images can not be viewed using computer imaging software. A grid pattern is displayed pressing 2. After choosing the desired setting, press J to exit. 136 Menu Guide - Nikon D500 | Menu Guide - English - Page 137
setting, press J to exit. D Copyright Information To prevent unauthorized use of the artist or copyright holder names, make sure that Attach copyright person. Nikon does not accept liability for any damages or disputes arising from the use of the Copyright information option. Menu Guide 137 - Nikon D500 | Menu Guide - English - Page 138
software, available for free download from: http://downloadcenter.nikonimglib.com See online help for instructions on using the software. ❚❚ Renaming, Editing, and Copying Presets Highlight Edit/save and press 2 Deleting Presets To delete presets, highlight Delete and press 2. 138 Menu Guide - Nikon D500 | Menu Guide - English - Page 139
copy the preset to the card. If two memory cards are inserted, the preset will be copied to the card in the primary slot. Menu Guide 139 - Nikon D500 | Menu Guide - English - Page 140
variety of publications. The camera supports standard roman alphanumeric characters only; characters long (if a longer name is created using a computer, all characters after the eighteenth will Presets in a Web Browser When using a WT-7 in HTTP server mode, you can use a web browser to connect to - Nikon D500 | Menu Guide - English - Page 141
that sounds when the camera focuses using single-servo AF (AF-S), time-lapse shooting ends, or the touchscreen is used for keyboard entry (0 39). Note that regardless Q and QC). A beep will not sound when the camera focuses using single-servo AF if Release is selected for Custom Setting a2 (AF-S - Nikon D500 | Menu Guide - English - Page 142
B setup menu Adjust monitor touch control settings. ❚❚ Enable/Disable Touch Controls Enable or disable touch controls. ❚❚ Full-Frame Playback Flicks Choose the gesture used to display the next image in full-frame playback: a flick from right to left or a flick from left to right. HDMI G button - Nikon D500 | Menu Guide - English - Page 143
location data settings for use when the camera is Coordinated Universal Time (UTC), and heading (if supported) as reported by the device. Adjust settings for timer, External GPS device options 0 86), reducing the drain on the battery. If a GP-1 or GP-1A unit is connected, the unit Guide 143 - Nikon D500 | Menu Guide - English - Page 144
menu Adjust settings for optional WR-R10 wireless remote controllers and for optional radio-controlled flash units that support Advanced Wireless Lighting. ❚❚ LED Lamp Enable or disable the status LEDs on a WR-R10 wireless remote will need to select pairing as the WR-1 link mode. 144 Menu Guide - Nikon D500 | Menu Guide - English - Page 145
to the camera using a WR-A10 adapter. Be sure the firmware for the WR-R10 has been updated to the latest version. For information on firmware updates, see the Nikon website for your to other devices using a wireless transmitter can only be disabled by removing the transmitter from the - Nikon D500 | Menu Guide - English - Page 146
setup menu Adjust settings for connection to smart devices. Option Start Description Follow on-screen instructions to connect to the smart device. Password protection Choose a password for smart device connections and may allow unauthorized access even when security is enabled. 146 Menu Guide - Nikon D500 | Menu Guide - English - Page 147
Adjust settings for Wi-Fi connections. Current settings View current Wi-Fi settings. Reset connection settings Restore Wi-Fi settings to their default values. Menu Guide 147 - Nikon D500 | Menu Guide - English - Page 148
turned off or the standby timer expires. Network G button ➜ B setup menu Adjust settings for connection to computers or ftp servers via wireless or Ethernet networks using an optional WT-7 wireless transmitter (0 189). 148 Menu - Nikon D500 | Menu Guide - English - Page 149
(Standby timer, 0 86) to 30 s or more when using an Eye-Fi card. See the manual provided with the Eye-Fi card, and direct any inquiries to the manufacturer. The camera can be used to turn Eye-Fi cards on and off, but may not support other Eye-Fi functions. D Airplane Mode (0 145) Enabling - Nikon D500 | Menu Guide - English - Page 150
change Eye-Fi settings. A Supported Eye-Fi Cards Some cards may not be available in some countries or regions; consult the manufacturer for more information. Eye-Fi cards are for use only in the country of purchase. Be sure the Eye-Fi card firmware has been updated to the latest version. Conformity - Nikon D500 | Menu Guide - English - Page 151
HR6 (AA Ni-MH) u FR6 (AA lithium) Description Select when using LR6 alkaline AA batteries. Select when using HR6 Ni-MH AA batteries. Select when using FR6 lithium AA batteries. A Using AA Batteries The capacity of AA batteries drops sharply at temperatures below 20 °C (68 °F) and varies with make - Nikon D500 | Menu Guide - English - Page 152
MB-D17 multipower battery pack is attached. Note that if the MB-D17 is powered by an optional AC adapter and power connector, the AC adapter will be used regardless of the option selected. A w icon is displayed in the camera control panel when the batteries in the MB-D17 are in use. 152 Menu Guide - Nikon D500 | Menu Guide - English - Page 153
pack equipped with an EN-EL18a/EN-EL18 (available separately). Calibration • j: Due to repeated use and recharging, calibration is required to ensure that battery level can be measured accurately; recalibrate battery before charging. • -: Calibration not required. A five-level display showing - Nikon D500 | Menu Guide - English - Page 154
at right. In the case of EN-EL18a/EN-EL18 batteries, the display shows whether calibration is required. If AA batteries are used, the battery level will be shown by a battery level icon; other items will not be displayed. Slot enabled when a memory card is inserted in the camera. 154 Menu Guide - Nikon D500 | Menu Guide - English - Page 155
inserted (if the card is full, an error will be displayed). Use this option to share settings among D500 cameras. Menu Option Playback display options Image review Playback After delete After burst, area Image quality Image size NEF (RAW) recording ISO sensitivity settings Menu Guide 155 - Nikon D500 | Menu Guide - English - Page 156
control Flicker reduction Auto bracketing set File naming Destination Choose image area Frame size/frame rate Movie quality ISO sensitivity settings White balance (with fine-tuning and reduction Microphone sensitivity Frequency response Wind noise reduction Electronic VR 156 Menu Guide - Nikon D500 | Menu Guide - English - Page 157
Location data (excepting the option chosen for Download from smart device) Wireless remote (WR) options Assign remote (WR) Fn button Eye-Fi upload MB-D17 battery type Battery order Slot empty release lock All My Menu items My Menu/ Recent Settings All recent settings Choose tab Menu - Nikon D500 | Menu Guide - English - Page 158
Settings saved using the D500 can be restored by selecting Load settings. Note that Save/load save settings using the Save/load settings option in the setup menu before performing a reset (0 155). Firmware Version G button ➜ B setup menu View the current camera firmware version. 158 Menu Guide - Nikon D500 | Menu Guide - English - Page 159
N (retouch menu) tab. G button The options in the retouch menu are used to create trimmed or retouched copies of existing pictures. The retouch menu is only i and selecting Retouch or holding J and pressing 2 in full-frame playback when a retouched image or original is displayed. Menu Guide 159 - Nikon D500 | Menu Guide - English - Page 160
highlight an item, 2 to select. 2 Select a picture. Highlight a picture and press J. To view the highlighted picture full screen, press and hold the X button. To view images in other locations, press W (M) and select the desired display or retouch images created with other devices. 160 Menu Guide - Nikon D500 | Menu Guide - English - Page 161
select Retouch, or hold J and press 2. D Retouching Copies Most options can be applied to copies created using other retouch options, although (with the exceptions of Image overlay and Edit movie > Choose start/end point) each RAW) and TIFF (RGB) images are saved in JPEG fine★ format. Menu Guide 161 - Nikon D500 | Menu Guide - English - Page 162
a picture selection dialog listing only NEF (RAW) images created with this camera. 2 Select a photograph. Use the multi selector to highlight a photograph (to view the highlighted photograph full frame, press and hold the X button). Press J to select the highlighted photograph and proceed to the - Nikon D500 | Menu Guide - English - Page 163
) 4 Copy the photograph. Highlight EXE and press J to create a JPEG copy of the selected photograph. To exit without copying the photograph, press the G button. Menu Guide 163 - Nikon D500 | Menu Guide - English - Page 164
the crop. Change crop aspect ratio Rotate the main command dial to choose the aspect ratio. Position crop Use multi selector to position the crop. Press and hold to move the crop rapidly to the desired position. zoom may not be available when cropped copies are displayed. 164 Menu Guide - Nikon D500 | Menu Guide - English - Page 165
pressing 2 (if only one memory card is inserted, proceed to Step 3). The menu shown at right will be displayed; highlight a card slot and press J. Menu Guide 165 - Nikon D500 | Menu Guide - English - Page 166
Select image and press 2. Highlight pictures and press the center of the multi selector to select or deselect (to view the highlighted picture full screen, press and hold the X button; to view pictures in other locations, press W/M). Selected pictures are marked by a 8 icon. Press J when the - Nikon D500 | Menu Guide - English - Page 167
TIFF (RGB) photos have an image quality (0 46) of JPEG fine★; copies created from JPEG photos have the same image quality as the original. Menu Guide 167 - Nikon D500 | Menu Guide - English - Page 168
D-Lighting G button ➜ N retouch menu D-Lighting brightens shadows, making it ideal for dark or backlit photographs. Before After Press 4 or 2 to choose the amount of correction performed. The effect can be previewed in the edit display. Press J to save the retouched copy. 168 Menu Guide - Nikon D500 | Menu Guide - English - Page 169
correct "red-eye" caused by the flash, and is available only with photographs taken using the flash. Note that red-eye correction may not always produce the expected results and may in edges of the image will be trimmed to create a square copy). Press J to save the retouched copy. Menu Guide 169 - Nikon D500 | Menu Guide - English - Page 170
using the multi selector, or select Manual to reduce distortion manually (note that Auto is not available with photos taken using use only with pictures taken with type G, E, and D lenses (PC, fisheye, and certain other lenses excluded). Results are not guaranteed with other lenses. 170 Menu Guide - Nikon D500 | Menu Guide - English - Page 171
Perspective Control G button ➜ N retouch menu Create copies that reduce the effects of perspective taken from the base of a tall object. Use the multi selector to adjust perspective (note that greater amounts of perspective control result in more of the edges being cropped out). The results can - Nikon D500 | Menu Guide - English - Page 172
. Creates a copy with warm tone filter effects, giving the Warm filter copy a "warm" red cast. The effect can be previewed in the monitor. 172 Menu Guide - Nikon D500 | Menu Guide - English - Page 173
or Cyanotype displays a preview of the selected image; press 1 to increase color saturation, 3 to decrease. Press J to create a monochrome copy. Increase saturation Decrease saturation Menu Guide 173 - Nikon D500 | Menu Guide - English - Page 174
photographs to create a single picture that is saved separately from the originals; the results, which make use of RAW data from the camera image sensor, are noticeably better than photographs combined in an imaging camera (small and medium NEF/ RAW images can not be selected). 174 Menu Guide - Nikon D500 | Menu Guide - English - Page 175
2 Select the first image. Use the multi selector to highlight the first photograph in the overlay. To view the highlighted photograph full frame, press and hold the X button. To view images in other locations, press W to double it. The effects of gain are visible in the Preview column. Menu Guide 175 - Nikon D500 | Menu Guide - English - Page 176
overlay. After an overlay is created, the resulting image will be displayed full-frame in the monitor. D Image Overlay Only large NEF (RAW) photographs with information, however, are not copied. Overlays saved in NEF (RAW) format use the compression selected for NEF (RAW) compression in the NEF (RAW) - Nikon D500 | Menu Guide - English - Page 177
This option is only available if the retouch menu is displayed by displaying a copy or original full frame and then either (a) holding and pressing J and pressing 2 or (b) pressing i and selecting Retouch Press 2 while pressing and holding the J button, or press i and select Retouch. Menu Guide 177 - Nikon D500 | Menu Guide - English - Page 178
image and the retouched copy. To view the highlighted picture full frame, press and hold the X button. If Source image the copy was created from two source images using Image overlay, or if the Retouched copy source has been protected or has since been deleted or hidden (0 22). 178 Menu Guide - Nikon D500 | Menu Guide - English - Page 179
My Menu, press G and select the O (My Menu) tab. G button The MY MENU option can be used to create and edit a customized list of options from the playback, photo shooting, movie shooting, Custom Settings, setup, the name of the menu containing the option you wish to add and press 2. Menu Guide 179 - Nikon D500 | Menu Guide - English - Page 180
displayed in My Menu are indicated by a check mark. Items indicated by a V icon can not be selected. Repeat steps 1-4 to select additional items. 180 Menu Guide - Nikon D500 | Menu Guide - English - Page 181
item currently highlighted in My Menu, press the O (Q) button. A confirmation dialog will be displayed; press O (Q) again to remove the selected item from My Menu. Menu Guide 181 - Nikon D500 | Menu Guide - English - Page 182
My Menu and press J. Repeat Steps 2-3 to reposition additional items. 4 Exit to My Menu. Press the G button to return to My Menu. G button 182 Menu Guide - Nikon D500 | Menu Guide - English - Page 183
" to "RECENT SETTINGS." Menu items will be added to the top of the recent settings menu as they are used. To view My Menu again, select O MY MENU for m RECENT SETTINGS > Choose tab. A Removing Items confirmation dialog will be displayed; press O (Q) again to delete the selected item. Menu Guide 183 - Nikon D500 | Menu Guide - English - Page 184
maximum and minimum values for EV vary with ISO sensitivity; the above graph assumes an ISO sensitivity of ISO 100 equivalent. When matrix metering is used, values over 16 1/3 EV are reduced to 16 1/3 EV. 184 Technical Notes - Nikon D500 | Menu Guide - English - Page 185
website and follow the on-screen instructions to complete installation. An Internet connection is required. For system requirements and other information, see the Nikon website for your region. http://downloadcenter.nikonimglib.com/ A Capture NX-D Use Nikon's Capture NX-D software to fine-tune - Nikon D500 | Menu Guide - English - Page 186
camera directly to the computer; do not connect the cable via a USB hub or keyboard. A Use a Reliable Power Source To ensure that data transfer is not interrupted, be sure the camera battery is fully charged. A Connecting Cables Be sure the camera is off when connecting or disconnecting interface - Nikon D500 | Menu Guide - English - Page 187
an AutoPlay prompt when the camera is connected. Tap or click the dialog and then tap or click Import File/ Nikon Transfer 2 to select Nikon Transfer 2. A OS X If Nikon Transfer 2 does not start automatically, confirm that the camera is connected and then launch Image Capture (an application that - Nikon D500 | Menu Guide - English - Page 188
the connection. When transfer is complete, turn the camera off and disconnect the USB cable. A For More Information Consult online help for more information on using ViewNX-i. 188 Technical Notes - Nikon D500 | Menu Guide - English - Page 189
server, or upload new photos as they are taken. Control the camera using optional Camera control Camera Control Pro 2 software and save new photos and For information on using optional wireless transmitters, refer to the manuals provided with the device. Be sure to update all related software - Nikon D500 | Menu Guide - English - Page 190
an Ethernet or a wireless network and Auto send or Send folder is not selected for Network > Options. D HTTP Server Mode The camera can not be used to record or view movies in http server mode. A Wireless Transmitters The principal differences between the WT-7 and WT-7A/B/C are in the number of - Nikon D500 | Menu Guide - English - Page 191
camera. ❚❚ Connecting the Printer Connect the camera using the supplied USB cable. Do not use force or attempt to insert the connectors at an 162). A Printing Via Direct USB Connection Be sure the battery is fully charged or use an optional AC adapter and power connector. When taking photographs to - Nikon D500 | Menu Guide - English - Page 192
the W (M) button. Use the multi selector to highlight pictures, or press the X button to display the highlighted picture full frame. To view images and press 2 to view options (only options supported by the current printer are listed; to use the default option, select Printer default). After - Nikon D500 | Menu Guide - English - Page 193
options and press 2. • Print select: Select pictures for printing. Use the multi selector to highlight pictures (to view images in other locations W (M) and select the desired card and folder; to display the current picture full screen, press and hold the X button) and, keeping the L (Z/Q) button - Nikon D500 | Menu Guide - English - Page 194
. During playback, images will be displayed on the television screen. Volume can be adjusted using television controls; the camera controls can not be used. A The HDMI Cable Clip When using the optional Nikon HDMI cable, attach the supplied clip as shown to prevent accidental disconnection. Do not - Nikon D500 | Menu Guide - English - Page 195
to 235. Choose this option if you notice loss of detail in shadows. • Full range: For devices with an RGB video signal input range of 0 to 255. option if shadows are "washed out" or too bright. Choose horizontal and vertical frame coverage for HDMI output from 95% or 100%. If Off is selected when - Nikon D500 | Menu Guide - English - Page 196
in the television display, select 95% for HDMI > Advanced > Output display size (0 195). A Slide Shows The Slide show option in the playback menu can be used for automated playback (0 30). A HDMI and Live View When the camera is connected via an HDMI cable, HDMI displays can be - Nikon D500 | Menu Guide - English - Page 197
were available for the D500. Power sources • Rechargeable Li-ion Battery EN-EL15 (0 153): Additional EN-EL15 batteries are available from local retailers and Nikon service representatives. • Battery Charger MH-25a: The MH-25a can be used to recharge EN-EL15 batteries. MH-25 battery chargers can also - Nikon D500 | Menu Guide - English - Page 198
is in the frame. • Center-weighted metering is recommended with filters with exposure factors (filter factors) over 1× (Y44, Y48, Y52, O56, R60, X0, X1, C-PL, ND2S, ND4, ND4S, ND8, ND8S, ND400, A2, A12, B2, B8, B12). See the filter manual for details. • Wireless Transmitter WT-7: Use the WT-7 to - Nikon D500 | Menu Guide - English - Page 199
Wireless transmitters (0 189) • USB Cable Gaskets and Connector Covers: Use a UF-7 connector cover for USB cables and UF3-RU14 USB cable gasket to help prevent accidental disconnections. Before connecting the cable, attach the UF-7 at - Nikon D500 | Menu Guide - English - Page 200
ten-pin remote terminal and used as a receiver, allowing the shutter to be released remotely by another WR-1 acting as a transmitter. Note: Be sure the firmware for the WR-R10 and WR-1 has been updated to the latest version. For information on firmware updates, see the Nikon website for your area - Nikon D500 | Menu Guide - English - Page 201
the control panel. Note: Use the latest versions of Nikon software; see the Nikon website for your region for the latest information on supported operating systems. At default settings, Nikon Message Center 2 will periodically check for updates to Nikon software and firmware while you are logged in - Nikon D500 | Menu Guide - English - Page 202
and image sensor free of dust when a lens is not in place. The D500 is equipped with a ten-pin remote terminal for remote control and automatic photography. The 25A, 30, 30A, 36, or 36A. Only one MC-21 or MC-21A can be used at a time (length 3 m/9 ft 10 in.). • Connecting Cord MC-23/MC-23A: - Nikon D500 | Menu Guide - English - Page 203
WR Adapter WR-A10: An adapter used to connect WR-R10 wireless remote supported; the MC-35 can not be used to connect GPS units via USB. The units connect to the MC-35 using a cable with a D-sub 9-pin connector provided by the manufacturer of the GPS device; see the MC-35 instruction manual - Nikon D500 | Menu Guide - English - Page 204
reduce the chance of picking up equipment noise (such as the sounds produced by the lens during autofocusing). • Wireless Microphone ME-W1: Use this wireless Bluetooth microphone for off-camera recording. • UF-8 Connector Cover for Stereo Mini-Plug Cables: Prevents accidental disconnection of mini - Nikon D500 | Menu Guide - English - Page 205
chamber (q) and power connector (w) covers. 2 Insert the EP-5B power connector. Be sure to insert the connector in the orientation shown, using the connector to keep the orange battery latch pressed to one side. The latch locks the connector in place when the connector is fully inserted. 3 Close the - Nikon D500 | Menu Guide - English - Page 206
4 Connect the EH-5b AC adapter. Connect the AC adapter power cable to the AC socket on AC adapter (e) and the power cable to the DC socket (r). A P icon is displayed in the monitor when the camera is powered by the AC adapter and power connector. 206 Technical Notes - Nikon D500 | Menu Guide - English - Page 207
No reproduction in any form of this manual, in whole or in part (except for brief quotation in critical articles or reviews), may be made without written authorization from NIKON CORPORATION. SB6B01(11) 6MB34611-01
-
 1
1 -
 2
2 -
 3
3 -
 4
4 -
 5
5 -
 6
6 -
 7
7 -
8
-
9
-
10
-
11
-
12
-
13
-
14
-
15
-
16
-
17
-
18
-
19
-
20
-
21
-
22
-
23
-
24
-
25
-
26
-
27
-
28
-
29
-
30
-
31
-
32
-
33
-
34
-
35
-
36
-
37
-
38
-
39
-
40
-
41
-
42
-
43
-
44
-
45
-
46
-
47
-
48
-
49
-
50
-
51
-
52
-
53
-
54
-
55
-
56
-
57
-
58
-
59
-
60
-
61
-
62
-
63
-
64
-
65
-
66
-
67
-
68
-
69
-
70
-
71
-
72
-
73
-
74
-
75
-
76
-
77
-
78
-
79
-
80
-
81
-
82
-
83
-
84
-
85
-
86
-
87
-
88
-
89
-
90
-
91
-
92
-
93
-
94
-
95
-
96
-
97
-
98
-
99
-
100
-
101
-
102
-
103
-
104
-
105
-
106
-
107
-
108
-
109
-
110
-
111
-
112
-
113
-
114
-
115
-
116
-
117
-
118
-
119
-
120
-
121
-
122
-
123
-
124
-
125
-
126
-
127
-
128
-
129
-
130
-
131
-
132
-
133
-
134
-
135
-
136
-
137
-
138
-
139
-
140
-
141
-
142
-
143
-
144
-
145
-
146
-
147
-
148
-
149
-
150
-
151
-
152
-
153
-
154
-
155
-
156
-
157
-
158
-
159
-
160
-
161
-
162
-
163
-
164
-
165
-
166
-
167
-
168
-
169
-
170
-
171
-
172
-
173
-
174
-
175
-
176
-
177
-
178
-
179
-
180
-
181
-
182
-
183
-
184
-
185
-
186
-
187
-
188
-
189
-
190
-
191
-
192
-
193
-
194
-
195
-
196
-
197
-
198
-
199
-
200
-
201
-
202
-
203
-
204
-
205
-
206
-
207
 |
 |
This manual details menu options and provides
information on accessories and connecting the camera to
other devices.
•
Read this manual thoroughly before using the camera.
•
After reading this manual, keep it in a readily accessible
place for future reference.
DIGITAL CAMERA
Menu Guide
En