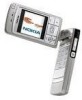
Nokia 6260 User Guide
Nokia 6260 - Smartphone 6 MB Manual
 |
View all Nokia 6260 manuals
Add to My Manuals
Save this manual to your list of manuals |
Nokia 6260 manual content summary:
- Nokia 6260 | User Guide - Page 1
User's Guide for Nokia 6260 9231815 Issue 2 - Nokia 6260 | User Guide - Page 2
. Nokia, Nokia Connecting People, Pop-Port and Xpress-on are registered trademarks of Nokia Corporation. Other product and company names mentioned herein may be trademarks or tradenames of their respective owners. Nokia tune is a sound mark of Nokia Corporation. This product includes software - Nokia 6260 | User Guide - Page 3
software Copyright (C) 1997-2004. Tegic Communications, Inc. All rights reserved. Bluetooth is a registered trademark of Bluetooth SIG, Inc. Nokia operates a policy of continuous development. Nokia are provided 'as is'. Except as required by applicable law, no warranties of any kind, either express - Nokia 6260 | User Guide - Page 4
phone on and off ...21 2. Your phone...23 Mechanical modes ...23 Closed mode ...23 Work mode...24 Imaging mode ...24 Browse mode...25 Keyguard...25 Keys and connectors...26 Indicators in standby mode ...28 Menu ...29 Actions common to all applications 30 Volume control...32 Copyright © 2004 Nokia - Nokia 6260 | User Guide - Page 5
...38 Diverting calls ...38 Push to talk ...39 Settings for push to talk ...40 Connecting to the push to talk service 40 Making a push to talk call...41 Receiving a push to talk call ...42 Call duration...47 Viewing the general log ...48 GPRS data counter...49 Copyright © 2004 Nokia. All rights 5 - Nokia 6260 | User Guide - Page 6
contacts...54 Adding a ringing tone...55 Voice dialling...56 Adding a voice tag to a phone number 56 Making a call by saying a voice tag 57 Assigning speed-dialling keys ...57 65 Calendar views...66 To-do...67 Importing data from compatible Nokia phones 68 Copyright © 2004 Nokia. All rights 6 - Nokia 6260 | User Guide - Page 7
...82 Picture messages folder...82 Wallpapers folder ...83 Presence logos folder...83 Downloading files ...83 Uploading images to an image server 84 7. Messaging ...85 Writing and sending messages...87 Settings for multimedia ...89 Settings for e-mail...89 Copyright © 2004 Nokia. All rights 7 - Nokia 6260 | User Guide - Page 8
E-mail messages...101 Settings for Mailboxes ...101 Service messages...103 Cell broadcast ...104 Settings for the Other folder ...104 Chat ...105 Connecting to a chat server...105 Modifying your chat ...109 Starting and viewing individual conversations 109 Copyright © 2004 Nokia. All rights 8 - Nokia 6260 | User Guide - Page 9
122 Starting an application using a voice command 123 Replaying, erasing, or changing a voice command 123 Device manager...124 9. Personalising your phone 126 Profiles...126 Themes...127 Settings ...129 Changing general settings...129 Phone settings ...130 Copyright © 2004 Nokia. All rights 9 - Nokia 6260 | User Guide - Page 10
Call settings...132 Connection settings ...133 Access points ...133 GPRS...137 Data call ...138 Date and time ...138 Security ...139 Phone and SIM ...139 your browser 149 Viewing ticket details ...150 Wallet settings...150 Resetting the wallet and wallet code 151 Calculator ...151 Converter ...152 - Nokia 6260 | User Guide - Page 11
...159 Quickpoint ...159 11.Services and Applications 160 Web (Mobile browser)...160 Basic steps for accessing ...160 Setting up the phone for the browser service 161 Receiving settings in a smart message 161 Keying in the settings manually 161 Making a connection ...161 Viewing bookmarks...162 - Nokia 6260 | User Guide - Page 12
details...177 Ending connections ...177 Connecting your phone to a compatible computer 178 Using your phone as a modem ...178 Remote synchronisation ...178 Creating a new synchronisation profile 179 Synchronising data ...180 13.Troubleshooting 181 Q&A ...182 14.Battery information 187 Care - Nokia 6260 | User Guide - Page 13
guide for further information. SWITCH ON SAFELY Do not switch the phone on when wireless phone free to operate the vehicle while driving. Your first consideration while driving should be road safety. INTERFERENCE All wireless phones Switch the phone off Do not use the phone at a refuelling point. - Nokia 6260 | User Guide - Page 14
in your phone. CONNECTING TO OTHER DEVICES When connecting to any other device, read its user guide for detailed safety instructions. Do not connect incompatible products. EMERGENCY CALLS Ensure the phone is switched on and in service. Press as many times as needed to clear the display and - Nokia 6260 | User Guide - Page 15
depend on features in the wireless network to function. These Network Services may not be available on all networks or you may have to make specific arrangements with your service provider before you can utilize Network Services. Your service provider may need to give you additional instructions for - Nokia 6260 | User Guide - Page 16
, calendar and to-do notes, and downloaded applications. Use of one or more of these features may reduce the memory available for the remaining features sharing memory. For example, saving many images may use all of the available memory. Your device may display a message that the memory is full - Nokia 6260 | User Guide - Page 17
package The stickers included on the warranty card,in the sales package, contain important information for service and customer support purposes. The sales package also includes instructions on how to use the stickers. ■ Access codes PIN code The PIN (Personal Identification Number, 4 to 8 digits - Nokia 6260 | User Guide - Page 18
code is 12345. To avoid unauthorised use of your phone, change the lock code. Keep the new code secret and in a safe place separate from your phone. PUK and PUK2 codes The PUK (Personal Unblocking Key the operator whose SIM card is in your phone for the codes. Copyright © 2004 Nokia. All rights 18 - Nokia 6260 | User Guide - Page 19
, always switch off the power and disconnect the charger and any other device. Avoid touching electronic components phone and that the golden contact area on the card is facing downwards. To slide the SIM card out of the slot, move the card holder towards the battery slot. Copyright © 2004 Nokia - Nokia 6260 | User Guide - Page 20
phone, and push the opposite end of the battery until it snaps into place. 6. Close the phone cover. Keep all SIM cards out of the reach of small children. For availability and information on using SIM card services on the incompatible card may be corrupted. Copyright © 2004 Nokia. All rights 20 - Nokia 6260 | User Guide - Page 21
the other end of the power cord from the charger to the base of the phone. 3. Connect the charger to an AC wall outlet. The battery indicator bar on the display starts scrolling if the fold is open, and the LED light indicator on the fold is lit if the fold is closed. Note that you can use the - Nokia 6260 | User Guide - Page 22
a PIN code: The PIN code is usually supplied with the SIM card. • Key in the code (displayed as ****) and press . If the phone requests a lock code: • Key in the lock code (displayed as *****) and press . The factory setting for the lock code is 12345. Copyright © 2004 Nokia. All rights 22 - Nokia 6260 | User Guide - Page 23
fold and the swivel. Note that there is a short time-out before a mode is activated. Closed mode When the phone is in the Closed mode, all applications the phone is in the Closed mode, the keyguard will automatically be activated for Camera/PTT key, but not for Volume keys. Copyright © 2004 Nokia. - Nokia 6260 | User Guide - Page 24
Work mode When you open the phone, Work mode is activated automatically, the display is lit up and the keyboard is available. Work mode is activated even if the fold is not fully opened. The fold opens up to approximately 150 degrees, see the picture. Do not try to force the fold to open more. To - Nokia 6260 | User Guide - Page 25
is activated when you open the fold up to 90 degrees, turn the fold counterclockwise (right) 180 degrees, and close the fold. After this Browse mode is active even if you open the fold. When you are not using the device. Key in the emergency number and press . Copyright © 2004 Nokia. All rights 25 - Nokia 6260 | User Guide - Page 26
above the keys. Press to display the main Menu. 4. Scroll key Enables scrolling through names, phone numbers, menus or settings. The scroll key is also used to move the cursor up and down, right and left when writing text, using the calendar, and in some game applications. Pressing the scroll key - Nokia 6260 | User Guide - Page 27
- enter numbers and characters. and are used for various purposes in different functions. Fold closed view 1. Volume/Zoom keys Adjust the volume of the earpiece or the loudspeaker, or the headset when it is connected to the phone. These keys also zoom in and out when you are using the built-in - Nokia 6260 | User Guide - Page 28
alert tone to None, and Chat alert tone to None in the currently active profile. The phone's keypad is locked. See "Keyguard" on page 25. You have an active alarm. You can make calls using phone line 2 only (Network Service). See "Call settings" on page 132. Copyright © 2004 Nokia. All rights 28 - Nokia 6260 | User Guide - Page 29
An infrared connection is active. ■ Menu Press to display the main Menu. In the Menu you can access all the applications in your phone. Options in the Menu: Open, List view/Grid view, Move, Move to folder, New folder, App. downloads, Memory details, Help and Exit. Copyright © 2004 Nokia. All rights - Nokia 6260 | User Guide - Page 30
left and right to navigate the Menu. Opening applications or folders • Scroll to an application or a folder and press the centre of the scroll key to open it. Closing applications • Press Back or Exit as many times as at a time, you first need to mark them. Copyright © 2004 Nokia. All rights 30 - Nokia 6260 | User Guide - Page 31
are several ways to select the selection, stop the scrolling with the scroll key and then release . After you have selected all the items that you want, opens and you can also see the root level of the application (for moving an item out of a folder). Select the location Nokia. All rights 31 - Nokia 6260 | User Guide - Page 32
loudspeaker allows you to speak and listen to the phone from a short distance without having to hold the phone to your ear, for example, having it on a table nearby. The loudspeaker can be used during a call, with sound and video applications, and when viewing multimedia messages. Sound and video - Nokia 6260 | User Guide - Page 33
when you have connected a headset to the phone. WARNING! Do not hold the device near your ear when the loudspeaker is in use, because the volume may be extremely loud. To turn off the loudspeaker when you have an active call, select Options→Activate handset. Copyright © 2004 Nokia. All rights 33 - Nokia 6260 | User Guide - Page 34
phone number. 2. Press to call the number. 3. Press or close the fold to end the call (or to cancel the call attempt). Pressing ends a call even if another application is active and displayed has more than one phone number, scroll to the number and press to start the call. Copyright © 2004 - Nokia 6260 | User Guide - Page 35
mode. • If the phone asks for the voice mailbox number, key it in and press OK. You can obtain this number from your service provider. • To change the phone number of your voice to six participants (network service). 1. Make a call to the first participant. Copyright © 2004 Nokia. All rights 35 - Nokia 6260 | User Guide - Page 36
to the desired participant and press Private. The conference call is put on hold in your phone, and the other participants can still continue talking with each other. Press Cancel to return to a call comes in, press Silence to quickly mute the ringing tone. Copyright © 2004 Nokia. All rights 36 - Nokia 6260 | User Guide - Page 37
(if a compatible Bluetooth headset is attached), and the network services End active call, End all calls, Hold/Unhold, New call Swap - Switch between the active call and the call on hold. Transfer - Connect an incoming call or a call on hold with an active call and to © 2004 Nokia. All rights 37 - Nokia 6260 | User Guide - Page 38
To end the active call, press . Diverting calls Go to Menu→Settings→Call divert. When this network service is activated, you can direct your incoming calls to another number, for example, to your voice mailbox number same time. See "Call barring" on page 142. Copyright © 2004 Nokia. All rights 38 - Nokia 6260 | User Guide - Page 39
Push to talk Go to Menu→Push to talk. Push to talk over cellular is a two-way radio service (network service) available over a GSM/GPRS cellular network. Push to talk provides direct voice communication connected with pressing . You can use push to talk to have a conversation with one person or with - Nokia 6260 | User Guide - Page 40
talk service Go to Menu→Push to talk. Alternatively, press and hold for a few seconds to connect to the service. The push to talk application automatically attempts to connect to the push to talk service. If the login is successful, the push to talk sessions view opens. Copyright © 2004 Nokia. All - Nokia 6260 | User Guide - Page 41
connection. If you have added group(s) to the phone, you are automatically joined to the active groups, and the name of the default group is displayed in standby mode. indicates that the service is temporarily unavailable. The phone to talk call immediately. Copyright © 2004 Nokia. All rights 41 - Nokia 6260 | User Guide - Page 42
. Wait until your phone receives a speech turn signal. When the phone displays Talk, you have 30 seconds to talk on your speech turn. Press and hold the entire time you are talking, and hold the phone in front of you so that you can see the display. When you have finished, release the key. Talking - Nokia 6260 | User Guide - Page 43
displayed. Callback requests Go to Options→PTT contacts or PTT log. Sending a callback request If you make a one-to-one call and do not get a response, you can send a request for the person to call you back. You can send a callback request in different ways .. Copyright © 2004 Nokia. All rights 43 - Nokia 6260 | User Guide - Page 44
the call simultaneously. Each member in the groups is identified by a user name given by the service provider. Group members can choose a nickname for within each group, which is shown as a caller level. 5. Key in your own nickname in Nickname in group. Copyright © 2004 Nokia. All rights 44 - Nokia 6260 | User Guide - Page 45
and to send an invitation to the group, press Yes when the phone requests for Send group invitation to all members now?. This opens existing group For group detail information, contact your network operator or service provider. You may receive the details over the air. 1. Press Nokia. All rights 45 - Nokia 6260 | User Guide - Page 46
only if the network supports these functions, and the phone is switched on and is within the network's service area. Options in the Missed, Received, and Dialled views: Call, Create message, Use number, Delete, Clear list, Add to Contacts, Help, and Exit. Copyright © 2004 Nokia. All rights 46 - Nokia 6260 | User Guide - Page 47
most recently accepted calls (network service), go to Log→Recent calls→Received calls. Dialled numbers To view the 20 phone numbers that you have most : The actual time invoiced for calls by your service provider may vary, depending on network features, rounding off for billing, and so forth. - Nokia 6260 | User Guide - Page 48
phone number, name of the service provider, or access point. Sub-events, such as a text message sent in more than one part and packet data connections, remain in the phone memory for a set number of days after which they are automatically erased to free memory. Copyright © 2004 Nokia. All rights 48 - Nokia 6260 | User Guide - Page 49
delivery reports are permanently deleted. • Show call duration. See "Call duration" on page 47. GPRS data counter Go to Menu→Log→GPRS counter. The GPRS data counter allows you to check the amount of data sent and received during packet data (GPRS) connections. Copyright © 2004 Nokia. All rights 49 - Nokia 6260 | User Guide - Page 50
text input. ■ Using traditional text input The indicator is shown on the top right of the display when you are writing text using traditional text input. • Press a number key ( - ), the next line, press • To switch between upper and lower case, press . Copyright © 2004 Nokia. All rights 50 - Nokia 6260 | User Guide - Page 51
select Dictionary on. This activates predictive text input for all editors in the phone. The indicator is shown at the top of the display. 1. Write the desired word by pressing the keys - . Press each and clear characters one by one from the word, press . Copyright © 2004 Nokia. All rights 51 - Nokia 6260 | User Guide - Page 52
(max. 32 letters) to the dictionary by using traditional text input. When the dictionary becomes full, a new word replaces the oldest added word. Copyright © 2004 Nokia. All rights 52 - Nokia 6260 | User Guide - Page 53
Off - To turn off predictive text input for all editors in the phone Writing compound words • Write the first half of a compound word and the same time press or 2. To end the selection, release pressing the scroll key while still holding . 3. To copy the text to the © 2004 Nokia. All rights 53 - Nokia 6260 | User Guide - Page 54
Contacts Go to Menu→Contacts. In Contacts, you can store and manage contact information, such as names, phone numbers, and addresses. You can also add a personal ringing tone, voice tag, or a thumbnail image . 3. Fill in the fields you want and press Done. Copyright © 2004 Nokia. All rights 54 - Nokia 6260 | User Guide - Page 55
, listing the different options. • To copy names and numbers from a SIM card to your phone, select Options→SIM directory, scroll to the name(s) you want to copy and select Options→Copy to Contacts. • To wish to use for the contact or group and press Select. Copyright © 2004 Nokia. All rights 55 - Nokia 6260 | User Guide - Page 56
tone, select Default tone from the list of ringing tones. Voice dialling Go to Menu→Contacts. You can make a phone call by saying a voice tag that has been added to a contact card. Any spoken word(s) can be a voice tag to, and select Options→Add voice tag. Copyright © 2004 Nokia. All rights 56 - Nokia 6260 | User Guide - Page 57
be used when a data call or a GPRS connection is active. Assigning speed-dialling keys Speed dialling is a quick way to call frequently used numbers. You can assign speed-dialling keys to eight phone numbers. The number 1 is reserved for the voice mailbox. Copyright © 2004 Nokia. All rights 57 - Nokia 6260 | User Guide - Page 58
settings of that service. You may receive the settings in a special text message, called a smart message, from the service provider that offers the Presence service. See "Receiving smart messages" on page 91. For more information, contact your service provider. Copyright © 2004 Nokia. All rights - Nokia 6260 | User Guide - Page 59
The Presence application allows you to change your phone is in silent profile. Changing who can view your Presence information Go to Options→Viewers and select: • Public pres. - Displays limited information, for managing ways for to the presence server. Copyright © 2004 Nokia. All rights 59 - Nokia 6260 | User Guide - Page 60
Connect to or disconnect from the presence server. See "Chat and Presence servers" on page 113. • Settings - Manage the publishing of your presence information. • Private pres. - Displays your availability information. Logo files are stored in the Gallery Login/Logout - Connect to or disconnect from - Nokia 6260 | User Guide - Page 61
your Contacts directory. • Reload lists - Connect to the presence server to update the viewer Viewers→Private list to see the names, phone numbers, or user IDs of the viewers and select: • Add new - Adds a new viewer manually or from your Contacts directory. You can only select a Nokia. All rights 61 - Nokia 6260 | User Guide - Page 62
- Connect to the your private presence. • Add new - Add a new viewer manually or from your Contacts directory. You can only select a contact of the viewer. • Reload lists - Connect to the presence server to update the viewer Menu→Presence. Once the connection has been established: 1. Key in your - Nokia 6260 | User Guide - Page 63
are not changed, even if you change your profile. • On - Both My availability and Private message are changed when you change your profile. Copyright © 2004 Nokia. All rights 63 - Nokia 6260 | User Guide - Page 64
the network. To enable positioning in your phone, select Settings→Positioning→On. When you receive a Position request, a message is displayed showing the service that is making the request. Press . To clear the Recv. requests list, select Options→Clear list. Copyright © 2004 Nokia. All rights 64 - Nokia 6260 | User Guide - Page 65
has a specific date and time. • Memo - Write a general entry for a day. • Anniversary - Reminds you of birthdays or special dates. Anniversary • Start time, End time, Start date, and End date. • Alarm - Press to activate the fields for Alarm time and Alarm date. • Repeat - Press the Day view - Nokia 6260 | User Guide - Page 66
date of a weekly course you are taking. This option is shown only if you have selected to repeat the event. • Synchronisation - Private - After synchronisation the calendar entry can be seen only by you and it will not be shown to others even if they have online calendar online. None today's date. - Nokia 6260 | User Guide - Page 67
in the Subject field. Press to add special characters. • To set the due date for the task, scroll to the Due date field and key in a date. • To set a priority for the to-do note, scroll to the Priority note, scroll to it and select Options→Delete or press . Copyright © 2004 Nokia. All rights 67 - Nokia 6260 | User Guide - Page 68
data from compatible Nokia phones You can move calendar, contacts, and to-do data from compatible Nokia phones to your phone using the Nokia PC Suite 6.2 Content Copier application on a compatible PC. Instructions for using the application can be found in the help function of PC Suite on the CD - Nokia 6260 | User Guide - Page 69
with the phone's built-in Camera application. The images are automatically saved in the Gallery application, where you connection. The camera produces images in JPEG and video clips in 3GP file format. Taking a picture or recording a video clip Options available before taking a picture when the phone - Nokia 6260 | User Guide - Page 70
fold to Imaging mechanical mode. You can also use the Camera application in Work or Browse mechanical mode. 2. Press or to select the camera mode (Standard, Portrait, Night or Video). By default, the camera is in Standard mode. Note that when the phone seconds. Copyright © 2004 Nokia. All rights 70 - Nokia 6260 | User Guide - Page 71
a video clip. Press to zoom out. The zoom indicator on the display shows the zoom level. The camera goes into battery saving mode if there has been no key presses within a minute. on the selected camera mode and the phone's mechanical mode. See "Mechanical modes" on page 23. Copyright © 2004 - Nokia 6260 | User Guide - Page 72
are saved in 128x96 (sub-QCIF) pixel format. Camera settings Go to Options→Settings. In the Camera application settings, you can adjust the image quality setting, change the default image name, and change the memory to set a name for the video clips stored. Copyright © 2004 Nokia. All rights 72 - Nokia 6260 | User Guide - Page 73
. Pictures taken with the Camera application are stored as images in the connection. After receiving an image in the Inbox, you need to save it in the phone display the image. When viewing an image, pressing or takes you to the next or previous image in the current folder. Copyright © 2004 Nokia - Nokia 6260 | User Guide - Page 74
see the name of the image. You can view animated GIF files in the same way as other images. Zooming on a saved image 1. Select Options→Zoom in or Zoom out. You can see the zooming ratio at the top of the display. See "Shortcuts during zooming" on page 74. 2. Press to return to - Nokia 6260 | User Guide - Page 75
during a browsing session or stored in the phone memory or memory card. Media files are video, music or audio clips. Files with the extensions .3gp, .aac, .amr, .mp3, .mp4, .rm and .ram are supported by RealPlayer. RealPlayer does not necessarily support all file formats or all the variations of - Nokia 6260 | User Guide - Page 76
Before your live content begins streaming, your phone connects to the site and loads the file. • Open the link to a file in the browser. To stream live content, you must first configure your default access point. See "Access points" on page 133. Many service providers require you to use an Internet - Nokia 6260 | User Guide - Page 77
slider view to change the contrast. • Repeat - Choose On to have the currently playing video or audio file restart automatically once it has finished. Select Connection to change the connection settings. ■ Radio Go to Menu→Radio. You can listen to FM radio on your phone 2004 Nokia. All rights 77 - Nokia 6260 | User Guide - Page 78
is automatically turned on. Sending or receiving data over an (E)GPRS or HSCSD connection may interfere with the radio. Note that the quality of location of a channel by pressing the corresponding key 1 to 9. The display shows four graphic buttons: • and . Select to scroll to the Nokia. All rights 78 - Nokia 6260 | User Guide - Page 79
you to speak and listen to radio or audio files without having to hold the phone to the ear. When the integrated handsfree is To save the channel, see Save channel below. • Manual tuning - Set the channel frequency manually. Briefly press or to move the channel search 0.05 Nokia. All rights 79 - Nokia 6260 | User Guide - Page 80
channel list only shows the channel frequencies. • Rename - Change the name of the highlighted channel. Key in the channel name and press OK. Copyright © 2004 Nokia. All rights 80 - Nokia 6260 | User Guide - Page 81
to see a list of the folders in the phone memory. Press the folders on the memory card, if date and time a file was saved or the size of the file • subfolders, if present. Options: Open (folder or item), Send, Delete, Create new, Move to folder, New folder, Mark/Unmark, Rename, Gallery downloads - Nokia 6260 | User Guide - Page 82
application. See "RealPlayer™" on page 75. • Video clips, RAM files, and streaming links - Open and play in the RealPlayer application. See "RealPlayer™" on page 75. • Subfolders - open to display , Delete, Mark/Unmark, Rename, View details, Help, and Exit. Copyright © 2004 Nokia. All rights 82 - Nokia 6260 | User Guide - Page 83
162. To download files, you must first configure your default access point. See "Access points" on page 133. For more information on downloading, See "Downloading" on page 165.. Once items have been downloaded, the browser closes and the phone returns to Gallery view. Copyright © 2004 Nokia. All - Nokia 6260 | User Guide - Page 84
. You can send your pictures to an image server to allow others to share your pictures online (network service). Before you can upload images, you must enter the settings for the image server. You can the image server that the images are stored in and press . Copyright © 2004 Nokia. All rights 84 - Nokia 6260 | User Guide - Page 85
messages and data via an infrared or Bluetooth technology connection, receive service messages, cell broadcast messages, and send service commands. Note that only devices that offer picture message features can receive and display picture messages. Text messages and multimedia messages use shared - Nokia 6260 | User Guide - Page 86
connection to the mailbox), SIM messages, Cell broadcast, Service cell broadcast messages by selecting Options→Cell broadcast. My folders - For organising your messages into folders. Mailbox - When you open this folder, you can either connect or Bluetooth technology connection are not saved in the - Nokia 6260 | User Guide - Page 87
Reports (network service) - You can request the network to you can create a multimedia message, or write an e-mail, or connect to your remote mailbox, you must have the correct connection settings in place. See "Settings for e-mail" on page 89. one text message. Copyright © 2004 Nokia. All rights 87 - Nokia 6260 | User Guide - Page 88
Press to select the recipient(s) from the Contacts directory or write the phone number or e-mail address of the recipient in the To: field if object, select Options→Insert new→Image, Sound clip, Video clip or Slide. Select the item you wish to add. When sound has been added Nokia. All rights 88 - Nokia 6260 | User Guide - Page 89
supported by your network operator or service provider. Only devices that offer picture message features can receive and display picture messages. Only devices that offer compatible multimedia message or e-mail features can receive and display IAP) correctly. See "Connection settings" on page 133. - Nokia 6260 | User Guide - Page 90
Follow the instructions given by your remote mailbox and Internet service provider. ■ Inbox - receiving messages Go to Menu→Messaging→Inbox. Options in the Inbox: Open, Create message, open the message and select Options→Objects. In the Objects view you Copyright © 2004 Nokia. All rights 90 - Nokia 6260 | User Guide - Page 91
file in your phone or to send it, for example, via infrared or Bluetooth technology to another compatible device. Important: Exercise caution opening messages. Messages may contain malicious software or otherwise be harmful to your device or PC to Calendar. Copyright © 2004 Nokia. All rights 91 - Nokia 6260 | User Guide - Page 92
is added to the Bookmarks list in browser services. If the message contains both browser access you can receive a text message service number, voice mailbox number, profile or Save to e-mail sett.. Receiving service messages Service messages (network service) are notifications of, for example, - Nokia 6260 | User Guide - Page 93
, you can connect to your remote mailbox (network service) to: • phone asks you if you want to Connect to mailbox? Select Yes to connect to your mailbox or No to view previously retrieved e-mail messages offline. Another way to start a connection is to select Options→Connect Nokia. All rights 93 - Nokia 6260 | User Guide - Page 94
When you are online, select Options→Disconnect to end the data call or GPRS connection to the remote mailbox. Retrieving e-mail messages from the mailbox Go to Options→Connect. This starts a connection to a remote mailbox. 1. When you have an open connection to a remote mailbox, select Options→ - Nokia 6260 | User Guide - Page 95
in supported formats. software or otherwise be harmful to your device or PC. Deleting e-mail messages • To delete an e-mail from the phone phone and the remote mailbox: Select Options→Delete→Phone and server. If you are offline, the e-mail is deleted first from your phone. During the next connection - Nokia 6260 | User Guide - Page 96
mailbox. • To cancel deleting an e-mail from both the phone and server, scroll to an email that has been marked to be deleted during the next connection ( ), and select Options→Undelete. ■ Outbox Go to message and check that the Sending settings are correct. Copyright © 2004 Nokia. All rights 96 - Nokia 6260 | User Guide - Page 97
a folder in your phone. See "Actions common to all applications" on page 30. ■ Cell broadcast Go to Menu→Messaging→Options→Cell broadcast. You may be able to receive messages on various topics, such as weather or traffic conditions from your service provider (network service). For available topics - Nokia 6260 | User Guide - Page 98
(GPRS) connection may prevent cell broadcast reception. Contact your network operator for the correct GPRS settings. ■ Service command editor Go to Menu→Messaging→Options→Service command. Key in and send service requests (also known as USSD commands) such as activation commands, for network services - Nokia 6260 | User Guide - Page 99
the message is removed from the message service centre. Note that the network must support this feature. Maximum time is the maximum amount of connection - You can send text messages via the normal GSM network or via GPRS, if supported by the network. • Reply via same ctr.(network service) - Nokia 6260 | User Guide - Page 100
advertisements at all. • On receiving msg. - Select: • Retr. immediately - To let the phone try to retrieve multimedia messages instantly. If there are messages with Deferred status, they are retrieved as Pending, Failed, Delivered) to be shown in the Reports. Copyright © 2004 Nokia. All rights 100 - Nokia 6260 | User Guide - Page 101
want your phone to send delivery reports of received multimedia messages. • Message validity (network service) - If pixels). The default setting of the multimedia message service is generally on. The appearance of a multimedia service provider): • Mailbox name - Write a descriptive name for - Nokia 6260 | User Guide - Page 102
- Write the IP address or host name of the computer that sends your e-mail. • Send message (network service) - Define how e-mail is sent from your phone. Immediately - The phone tries to connect to the mailbox immediately after you have selected Send. During next conn. - E-mail is sent the next time - Nokia 6260 | User Guide - Page 103
- To limit the number of e-mail headers you want to retrieve to your phone. The options are All and User defined. Used with the IMAP4 protocol only. Service messages Go to Service message. The following list of settings opens: • Service messages - Choose whether or not you want to allow reception of - Nokia 6260 | User Guide - Page 104
service provider whether Cell broadcast (network service) is available and what the available topics and related topic numbers are. Go to Cell broadcast to change the settings: • Reception - On or Off. • Language - All allows you to receive cell is deleted. Copyright © 2004 Nokia. All rights 104 - Nokia 6260 | User Guide - Page 105
groups) with specific topics. Once you have registered with a chat service, you can log into the service provider's chat server. Check the availability of chat services, pricing, and tariffs with your network operator and/or service provider. Service providers also give you instructions on how to - Nokia 6260 | User Guide - Page 106
phone is not connected to the chat server and you cannot send or receive messages. To log in later, select Options→Login. You obtain the user ID and password from your service provider. To log out, select Options→Logout. Modifying your chat settings Go to Options→Settings→Chat settings. • Use - Nokia 6260 | User Guide - Page 107
by Group name, Topic, and Members (user ID). For groups that you have found you can select New search, Join and Save group. Copyright © 2004 Nokia. All rights 107 - Nokia 6260 | User Guide - Page 108
Phone number, and E-mail address. For users that you have found you can select New search, Open conversation, Add to Chat contact to save the contact, Send invitation, and Add to blocked list to block (or unblock) messages from the contact. When the search result is displayed who are online to join - Nokia 6260 | User Guide - Page 109
files are saved to Notes. See "Notes" on page 154. Blocking messages To prevent receiving messages from certain chat users, select Options→Blocking options and then select: • Add to blocked list - To block messages from the currently selected user. • Add ID to list manually Nokia. All rights 109 - Nokia 6260 | User Guide - Page 110
online. Scroll to the contact and press . • Enter user ID - Key in the user ID and press . The user ID is provided by the service provider to those who register to the service next to contacts that are currently online, and indicates contacts that are offline. Copyright © 2004 Nokia. All rights 110 - Nokia 6260 | User Guide - Page 111
the chat contact has joined. • Reload user availab. - Update information about whether contacts are online or offline. This option is not available if you have set the Availability reloading to Automatic Define if others can find the chat group by searching. Copyright © 2004 Nokia. All rights 111 - Nokia 6260 | User Guide - Page 112
the group. • Group members - See "Restricting access to a chat group" on page 112. • Banned - Displays a list of banned users. • Allow private msgs. - Allow or prevent private messaging between members. • Group users to join the group again select Remove all. Copyright © 2004 Nokia. All rights 112 - Nokia 6260 | User Guide - Page 113
chat server, your User ID and login Password. See "Connection settings" on page 133. You obtain the user ID and password from your service provider when you register for the service. If you do not know your user ID or password, contact your service provider. Copyright © 2004 Nokia. All rights 113 - Nokia 6260 | User Guide - Page 114
applications (SIS files) and Java™ applications (Java MIDlets and MIDlet suites) on your phone. You can also update and uninstall applications from the phone, and monitor the installation history. Your phone supports J2ME™Java applications. Do not download PersonalJava™ applications to your phone - Nokia 6260 | User Guide - Page 115
operator and/or the service provider. • Go to Menu→Web→Download. Select to download an appropriate application or game. • Use the Nokia Application installer from PC Suite to download the applications to your phone. Important: Only install and use applications and other software from sources that - Nokia 6260 | User Guide - Page 116
technology from another device, for example, a phone or a compatible PC. Important: Use only services that you trust and that offer adequate security and protection against harmful software. To increase protection, the application installation system uses digital signatures and certificates for - Nokia 6260 | User Guide - Page 117
to continue or cancel the installation. Once the phone has checked the integrity of the application, it is installed on your phone. Installing a Java™application The .JAR file is required for installation. If it is missing, the phone may ask you to download it. If there is no access point defined - Nokia 6260 | User Guide - Page 118
applications in the selected application set is displayed. To launch a single application, scroll to the desired application and press Options and select Open, or press . Note that running some applications may consume the phone's battery faster (and you may need to connect the phone to the charger - Nokia 6260 | User Guide - Page 119
stop working. Refer to the documentation of the installed application for details. ■ File manager Go to Menu→Tools→File manager. In the File manager, you can browse, open, and manage files and folders in the phone memory or on the memory card, if you use one. Copyright © 2004 Nokia. All rights 119 - Nokia 6260 | User Guide - Page 120
→Receive via infrared. Files are automatically received into the root level of the folder structureand can be moved or copied to other folders. See "Infrared connection" on page 174. Viewing memory consumption Go to Options→Memory details. If you have a memory card installed in your phone, you have - Nokia 6260 | User Guide - Page 121
files, Video clips, Applications, Mem. in use, and Free memory. If the phone memory is getting low, remove some files, or move them to the memory card. See "Troubleshooting your phone's display. You record a word, or words (voice command) and then pronounce this voice command to open an application, - Nokia 6260 | User Guide - Page 122
in the Voice commands main view, select Options→New application, scroll to the application that you want to add and press Select. 2. The text Press 'Start', then speak after tone is displayed. • Press Start to record a voice command. The phone sounds a starting tone and the note Speak now is - Nokia 6260 | User Guide - Page 123
press and hold Speak now is displayed. . A short tone is played and the note 2. When you are starting an application by saying a voice command, hold the phone a short distance away from your . • Change - Record a new voice command. Press Start to record. Copyright © 2004 Nokia. All rights 123 - Nokia 6260 | User Guide - Page 124
. / Disable config., View log, Help, and Exit. This feature is operator dependent and may not be available on all phones. Contact your service provider for information and availability. A device manager profile must be defined before you can connect to a server. The third party who is assisting you - Nokia 6260 | User Guide - Page 125
or approved device management on this server. Select Yes to allow synchronisation without your verification, or select No to verify each synchronisation attempt. Copyright © 2004 Nokia. All rights 125 - Nokia 6260 | User Guide - Page 126
phone tones for different events, environments, or caller groups. You can see the currently selected profile at the top of the display in standby mode. If the General profile is in use, only the current date increases level by level to the set volume level. Copyright © 2004 Nokia. All rights 126 - Nokia 6260 | User Guide - Page 127
groups, if you have created them). ■ Themes Go to Menu→Themes. Options in the Themes main view are: Preview, Apply, Edit, Help, and Exit. You can change the look of your phone's display by activating a theme. A theme can include the idle screen wallpaper, colour palette, screen saver, and background - Nokia 6260 | User Guide - Page 128
• Wallpaper - Select an image from one of the available themes, or select your own image from the Gallery, to use as a background image in standby mode. • Colour palette - Change the colour palette used on the display. • Screen saver - Select what is shown on the screen saver bar: the time and date - Nokia 6260 | User Guide - Page 129
restore the currently selected theme to its original settings, select Options→Restore orig. theme when editing a theme. ■ Settings Changing • open a slider view and press or to increase or decrease the value respectively. You may be able to receive some settings from your service provider in a short - Nokia 6260 | User Guide - Page 130
to the information on your SIM card. After you have changed the display text language, you must restart the phone. Changing the settings for Phone language or Writing language affects every application in your phone and the change remains effective until you change these settings again. • Writing - Nokia 6260 | User Guide - Page 131
"Security" on page 139. After resetting the settings, the phone may take a longer time to power up. All documents and files that you have created are left have shortcuts to pre-installed applications and functions. Display • Brightness - Adjust the brightness of the display. • Screen saver timeout - Nokia 6260 | User Guide - Page 132
service) • Set your phone number to be displayed (Yes) or hidden (No) from the person whom you are calling. Or, the value may be set by your network operator or service provider when you make a subscription. Call waiting (network service your phone makes a maximum of ten attempts to connect the - Nokia 6260 | User Guide - Page 133
, , and . Ans. by opening fold • Select Yes, and the phone automatically answers an incoming callbwhen the fold is opened. Line in use (network service) • This setting is shown only if the SIM card supports two subscriber numbers, that is, two phone lines. Select which phone line (Line 1 or Line - Nokia 6260 | User Guide - Page 134
, or with an asterisk. Other fields can be left empty, unless you have been instructed otherwise by your service provider. To be able to use a data connection, the network operator or service provider must support this feature, and if necessary, activate it for your SIM card • Access point name (for - Nokia 6260 | User Guide - Page 135
, ISDN v.110, or ISDN v.120 defines whether the phone uses an analogue or digital connection. This setting depends on both your GSM network operator and Internet Service Provider (ISP), because some GSM networks do not support certain types of ISDN connections. For details, contact your ISP. If ISDN - Nokia 6260 | User Guide - Page 136
this number is the data-call phone number of your phone. • Use PPP compression - When set to Yes, this option speeds up data transfer, if supported by the remote PPP server. If you have problems with establishing a connection, try setting this to No. Contact your service provider for guidance. • Use - Nokia 6260 | User Guide - Page 137
specified by your service provider or Internet service provider. GPRS Go to GPRS. The GPRS settings affect all access points using a packet data connection. GPRS connection - If you select When available and you are in a network that supports packet data, the phone registers to the GPRS network and - Nokia 6260 | User Guide - Page 138
mode. See "Clock" on page 154. • Auto time update - To allow the network to update time, date, and time zone information to your phone (network service). For the Auto time update setting to take effect, the phone needs to be restarted. Check any alarms as these may be affected by Auto time update - Nokia 6260 | User Guide - Page 139
in a number for the time-out in minutes or select None to turn off the autolock period. • To unlock the phone, key in the lock code. Lock if SIM changed - Select Yes if you want the phone to prompt for the lock code when an unknown, new SIM card is inserted into your - Nokia 6260 | User Guide - Page 140
When security features that restrict calls are in use (such as call barring, closed user group and fixed dialing) calls still may be possible to the official emergency number programmed into your device. Confirm SIM services (network service) - To set the phone to display confirmation messages when - Nokia 6260 | User Guide - Page 141
be needed when you, for example: • want to connect to an online bank or another site or remote server for actions that involve transferring confidential information, or • want to be sure of the authenticity of software when downloading and installing software. Important: Note that even if the use of - Nokia 6260 | User Guide - Page 142
certificate is shown. For example: Application manager/Yes - The certificate is able to certify the origin of new software. Internet/Yes - The certificate is able to certify e-mail and imaging servers. Call barring Go to Call barring. Call barring (network service) allows you to restrict the making - Nokia 6260 | User Guide - Page 143
the connection to the manually selected network is lost, the phone sounds an error tone and asks you to select a network again. The selected network must have a roaming agreement with your home network, that is, the operator whose SIM card is in your phone. Cell info display • On - Set the phone to - Nokia 6260 | User Guide - Page 144
photos, video clips, notes, Recorder sound files, and browser bookmarks. The default shortcuts are: - opens the Notes editor, - opens the Calendar at the current date, and - opens the Messaging Inbox. Shortcuts can be added only from some of the functions. Applications do not have this functionality - Nokia 6260 | User Guide - Page 145
• To delete a shortcut, scroll to the shortcut that you want to remove and select Options→Delete shortcut. Removing a shortcut does not affect the file it is referring to. • To change the shortcut name, select Options→Edit shortcut name. Write the new name. This change affects only the shortcut, not - Nokia 6260 | User Guide - Page 146
in the wallet can be easily retrieved while browsing to automatically complete online forms on browser pages, for example, when the service asks for credit card details. Data in the wallet are encrypted and first time, you must create your own access code: Copyright © 2004 Nokia. All rights 146 - Nokia 6260 | User Guide - Page 147
, the wallet application is blocked for online services. • Address cards - Basic contact details for home/office. • User info cards - Customised personal preferences for online services. 3. Select Options→New card. A blank form opens. 4. Fill in the fields and press Done. Copyright © 2004 Nokia - Nokia 6260 | User Guide - Page 148
You can also receive card information directly to the phone from a card issuer or service provider (if they offer this service). You are notified which category the card belongs to. Either save or . 2. Select Options→New card. A new wallet profile form opens. Copyright © 2004 Nokia. All rights 148 - Nokia 6260 | User Guide - Page 149
or Off. Defines whether or not your unique phone identification is sent with the wallet profile (for future development dependent on RFID-based ticketing). Retrieving information from the wallet to your browser When using online mobile services supporting the wallet functionality, you can upload the - Nokia 6260 | User Guide - Page 150
date each time you need them (depending on the content being browsed). Also, you can retrieve your user name and password stored as an access card when connecting to a mobile service can receive notifications of tickets purchased online via the browser. Received notifications Nokia. All rights 150 - Nokia 6260 | User Guide - Page 151
gain access to the contents. Resetting the wallet and wallet code To reset both the contents of the wallet and the wallet code: 1. Key in *#7370925538# in standby mode. 2. Enter the phone's lock code, and press OK result, Memory, Clear screen, Help, and Exit. Copyright © 2004 Nokia. All rights 151 - Nokia 6260 | User Guide - Page 152
and rounding errors may occur. Converting units Options in Converter: Conversion type, Currency rates (not applicable to other units), Help, and Exit. To make currency conversion you must first set the exchange from which you want to convert and press OK. Copyright © 2004 Nokia. All rights 152 - Nokia 6260 | User Guide - Page 153
you have selected. 4. After you have inserted all the required exchange rates, you can make currency conversions. See "Converting units" on page 152. Copyright © 2004 Nokia. All rights 153 - Nokia 6260 | User Guide - Page 154
link notes to Go to and send them to other devices. Plain text files (TXT format) you receive can be saved to Notes. • Press - clock settings Options in Clock: Set alarm, Reset alarm, Remove alarm, Settings, Help, and Exit. • To change the time or date, select Options→Settings in Clock. Setting an - Nokia 6260 | User Guide - Page 155
Yes to make and receive calls. Do not press Yes when wireless phone use may cause interference or danger. Personalising the alarm tone 1. To personalise conversation, both parties hear a tone every 5 seconds during recording. Recorded files are stored in the Gallery. See "Gallery" on page 81. Options - Nokia 6260 | User Guide - Page 156
video clips and sound files, photos, and messaging data, and to back up information from your phone's memory. Included with your Nokia phone is a Reduced Size MultiMedia Card (RS-MMC) that may contain add-on applications from independent developers. These applications are designed by the developers - Nokia 6260 | User Guide - Page 157
Details of how you can use the memory card with other features and applications of your phone are given in the sections describing these features and applications. Keep all memory cards out of the reach of small children. Formatting the memory card When a memory card is formatted, all data on the - Nokia 6260 | User Guide - Page 158
unlocked and can be used on another phone without a password. Checking memory consumption You can check the memory consumption of different data groups and the available memory for installing new applications or software on your memory card: • Select Options→Memory details. Copyright © 2004 Nokia - Nokia 6260 | User Guide - Page 159
, Slide, Thumb, and Notes views. Note: Quickpoint is designed to support presentations created in Microsoft Powerpoint 97, 2000, and XP file formats (.ppt). Note that this application does not necessarily support all variations or features of the mentioned file formats. Copyright © 2004 Nokia - Nokia 6260 | User Guide - Page 160
in standby mode. Various service providers maintain pages specifically designed for mobile phones, offering services that can be, for example, news, weather reports, banking, travel information, entertainment, and games. With the mobile browser, you can view these services as WAP pages written in - Nokia 6260 | User Guide - Page 161
smart messages" on page 91. For more information, contact your network operator or service provider. Keying in the settings manually Follow the instructions given to you by your service provider. 1. Go to Menu→Settings→Connection→Access points and define the settings for an access point. See - Nokia 6260 | User Guide - Page 162
, the starting page is changed accordingly. - The last visited page. When the phone is disconnected from the service, the address of the last visited page is kept in memory until a new page is visited during the next connection. When you scroll through bookmarks, you can see the address of the - Nokia 6260 | User Guide - Page 163
Adding bookmarks manually 1. In the Bookmarks view, select act as links have a blue border around them. Options when browsing: Open, Service options, Bookmarks, Save as bookmark, View image, Navigation options, Advanced options, Send a session is closed. Copyright © 2004 Nokia. All rights 163 - Nokia 6260 | User Guide - Page 164
list of commands or actions for the currently open browser page, select Options→Service options. • To disconnect from a browser service and to quit browsing, press and hold . Saving bookmarks • To save indicated by the following icon: - The saved browser page. Copyright © 2004 Nokia. All rights 164 - Nokia 6260 | User Guide - Page 165
as ringing tones, images, operator logos, software, and video clips using the mobile browser. These items can be provided free or you can purchase them. Once downloaded, items are handled by the respective applications on your phone, for example, a downloaded photo is saved in the Gallery. Important - Nokia 6260 | User Guide - Page 166
include the price, a brief description and size. • Scroll to the link and select Options→Open. Details about the item are displayed on your phone. • If you want to continue with the downloading, press Accept, or if you want to cancel the download, press Cancel. Copyright © 2004 Nokia. All rights - Nokia 6260 | User Guide - Page 167
available access points. The current default access point is highlighted. See "Connection settings" on page 133. • Show images - Choose whether to • Default encoding - To make sure your browser pages display text characters correctly, select the appropriate language type. • Nokia. All rights 167 - Nokia 6260 | User Guide - Page 168
display area for viewing pages. • Rendering - Choose the image quality for the pages. With the high image quality, the page download Games Go to Menu→Games. To start a game, scroll to the game icon and press play the game, select Options→Help. . For instructions on how to Copyright © 2004 Nokia - Nokia 6260 | User Guide - Page 169
12. Connectivity ■ Bluetooth connection Go to Menu→Connectivity→Bluetooth. This device is compliant with Bluetooth wireless technology Specification 1.1 supporting the following profiles: Hands-free, Object Push Profile, File Transfer Profile, Dial Up Networking Profile and Fax Profile. To ensure - Nokia 6260 | User Guide - Page 170
be within a maximum of 10 metres of each other, although the connection can be subject to interference from obstructions such as walls or from other electronic devices. Using Bluetooth technology consumes the battery and the phone's operating time is reduced. Take this into account when performing - Nokia 6260 | User Guide - Page 171
are within range start to appear on the display one by one. You can see a device icon, the device's name, the device type, or a short name. Paired devices are shown with . A paired device is one where a Bluetooth connection already exists between your phone and the other device. • To interrupt the - Nokia 6260 | User Guide - Page 172
folder in Messaging does not store messages sent via Bluetooth connection. Checking the status of the Bluetooth connection • When is shown in standby mode, the Bluetooth connection is active. • When is blinking, your phone is trying to connect to the other device. • When is shown continuously, the - Nokia 6260 | User Guide - Page 173
the device and select Options→Set as authorised - Connections between your phone and this device can be made without your PC, or devices that belong to someone you trust. The icon is added next to authorised devices in the Paired devices view. Set as unauthorised - Connection Nokia. All rights 173 - Nokia 6260 | User Guide - Page 174
port of your phone to receive data via infrared, go to Menu→Connectivity→Infrared. 3. The user of the sending device selects the desired infrared function to start data transfer. To send data via infrared, select Options→Send→Via infrared in an application. Copyright © 2004 Nokia. All rights 174 - Nokia 6260 | User Guide - Page 175
default settings to prevent unauthorized file transfer. Checking the status of the infrared connection • When blinks, your phone is trying to connect to the other device or a connection has been lost. • When is shown continuously, the infrared connection is active and your phone is ready to send and - Nokia 6260 | User Guide - Page 176
. • Amount of data uploaded and downloaded for each connection (GPRS connections only). • The duration of each connection (Data call connections only). Note: The actual time invoiced for calls by your service provider may vary, depending on network features, rounding off for billing, and so - Nokia 6260 | User Guide - Page 177
per second). • Dial-up (GSM) - The dial-up number used, or Name (GPRS) - access point name used. • Shared (not displayed if the connection is not shared) - The number of applications using the same connection. Ending connections • Scroll to a connection and select Options→Disconnect to end that - Nokia 6260 | User Guide - Page 178
to connect to the Internet with a compatible PC, or to send and receive faxes. Detailed installation instructions can be found in Quick guide for Modem Options for Nokia 6260 on the CD-ROM supplied with the phone. ■ Remote synchronisation Go to Menu→Connectivity→Sync. The Sync application enables - Nokia 6260 | User Guide - Page 179
book application you want to synchronise your phone data with and Exit. 1. If no profiles have been defined, the phone asks you if you want to create a new profile. connection. Host address - Contact your service provider or system administrator for the correct values. Port - Contact your service - Nokia 6260 | User Guide - Page 180
wish to synchronise. The available applications that you can synchronise may vary. Contact your service provider for more information. 3. After synchronisation is complete, select Options→View log to open a log file showing the synchronisation status (Complete or Incomplete) and how many calendar - Nokia 6260 | User Guide - Page 181
13. Troubleshooting Memory low When the following notes are shown, the phone memory is low phone memory. • Saved browser pages. • Images and photos in Images. To delete contact information, calendar notes, call timers, call cost timers, game scores, or any other data, go to the respective application - Nokia 6260 | User Guide - Page 182
go to Settings→Log duration→No log. Different ways to store data: • Use Nokia PC Suite 6.2 to make a backup copy of all data to a compatible computer. • Send images to your e-mail address and then save the images to your computer (network service). • Send data via infrared or Bluetooth technology to - Nokia 6260 | User Guide - Page 183
• Q: Why can't I end a Bluetooth connection? A: If another device is connected to your phone, you can either end the connection using the other device or by deactivating Bluetooth. data groups consume, go to File manager and select Options→Memory details. Copyright © 2004 Nokia. All rights 183 - Nokia 6260 | User Guide - Page 184
• Q: How can I end the data connection when the phone starts a data connection again and again? The brief notes on the display state that the phone is retrieving or trying to retrieve a message. What is happening? A: The phone is trying to retrieve a multimedia message from the multimedia messaging - Nokia 6260 | User Guide - Page 185
see all events, select Options→Filter→All communication. PC connectivity • Q: Why do I have problems in connecting the phone to my PC? A: Make sure that Nokia PC Suite 6.2 is installed and running on your PC. See the Quick Guide for Nokia PC Suite on the CD-ROM. For further information on Copyright - Nokia 6260 | User Guide - Page 186
how to use Nokia PC Suite, see the help function on PC Suite or visit the support pages at www.nokia.com. Access codes • Q: What is my password for the lock, PIN, or PUK codes? A: The default lock code is 12345. If you forget or lose the lock code, contact your phone dealer. If you forget or lose a - Nokia 6260 | User Guide - Page 187
than normal, buy a new battery. Use only Nokia-approved batteries, and recharge your battery only with Nokia-approved chargers designated for this device. Unplug the charger from the electrical plug and the device when not in use. Do not leave the battery connected to a charger. Overcharging may - Nokia 6260 | User Guide - Page 188
battery. (These look like metal strips on the battery.) This might happen, for example, when you carry a spare battery in your pocket or purse. Short-circuiting the terminals may damage the battery or the connecting object. Leaving the battery batteries, chargers, and enhancements approved by Nokia - Nokia 6260 | User Guide - Page 189
and enhancements out of the reach of small children. • When you disconnect the power cord of any accessory or enhancement, grasp and pull the plug, not the cord. • Check regularly that enhancements installed in a vehicle are mounted and are operating properly. • Installation of - Nokia 6260 | User Guide - Page 190
that corrode electronic circuits. If your device does get wet, remove the battery and allow the device to dry completely before replacing it. • Do . • Do not attempt to open the device other than as instructed in this guide. • Do not drop, knock, or shake the device. Rough 2004 Nokia. All rights 190 - Nokia 6260 | User Guide - Page 191
All of the above suggestions apply equally to your device, battery, charger, or any enhancement. If any device is not working properly, take it to the nearest authorized service facility for service. Copyright © 2004 Nokia. All rights 191 - Nokia 6260 | User Guide - Page 192
your device in health care facilities when any regulations posted in these areas instruct you to do so. Hospitals or health care facilities may be using .3 cm) be maintained between a wireless phone and a pacemaker to avoid potential interference with Copyright © 2004 Nokia. All rights 192 - Nokia 6260 | User Guide - Page 193
may interfere with some hearing aids. If interference occurs, consult your service provider. ■ Vehicles RF signals may affect improperly installed or inadequately shielded electronic systems in motor vehicles in the area over the air bag or in the air Copyright © 2004 Nokia. All rights 193 - Nokia 6260 | User Guide - Page 194
obey all signs and instructions. Potentially explosive atmospheres include points such as near gas pumps at service stations. Observe restrictions on the use including flashing lights or patterns that may appear in video games. epileptic seizures while watching video games. These seizures may have a - Nokia 6260 | User Guide - Page 195
of your fingers, hands, wrists, or arms. ■ Emergency calls Important: Wireless phones, including this device, operate using radio signals, wireless networks, landline networks, and user-programmed functions. Because of this, connections in all conditions cannot be guaranteed. You should never rely - Nokia 6260 | User Guide - Page 196
features off before you can make an emergency call. If the device is in offline or flight mode you must change the profile to activate the phone function before you can make an emergency call. Consult this guide or your service for mobile devices employs a unit of measurement known as the Specific - Nokia 6260 | User Guide - Page 197
files or messages may be delayed until such a connection is available. Ensure the above separation distance instructions are followed until the transmission is completed. * The SAR limit for mobile regions look under product information at www.nokia.com. Copyright © 2004 Nokia. All rights 197
-
 1
1 -
 2
2 -
 3
3 -
 4
4 -
 5
5 -
 6
6 -
 7
7 -
8
-
9
-
10
-
11
-
12
-
13
-
14
-
15
-
16
-
17
-
18
-
19
-
20
-
21
-
22
-
23
-
24
-
25
-
26
-
27
-
28
-
29
-
30
-
31
-
32
-
33
-
34
-
35
-
36
-
37
-
38
-
39
-
40
-
41
-
42
-
43
-
44
-
45
-
46
-
47
-
48
-
49
-
50
-
51
-
52
-
53
-
54
-
55
-
56
-
57
-
58
-
59
-
60
-
61
-
62
-
63
-
64
-
65
-
66
-
67
-
68
-
69
-
70
-
71
-
72
-
73
-
74
-
75
-
76
-
77
-
78
-
79
-
80
-
81
-
82
-
83
-
84
-
85
-
86
-
87
-
88
-
89
-
90
-
91
-
92
-
93
-
94
-
95
-
96
-
97
-
98
-
99
-
100
-
101
-
102
-
103
-
104
-
105
-
106
-
107
-
108
-
109
-
110
-
111
-
112
-
113
-
114
-
115
-
116
-
117
-
118
-
119
-
120
-
121
-
122
-
123
-
124
-
125
-
126
-
127
-
128
-
129
-
130
-
131
-
132
-
133
-
134
-
135
-
136
-
137
-
138
-
139
-
140
-
141
-
142
-
143
-
144
-
145
-
146
-
147
-
148
-
149
-
150
-
151
-
152
-
153
-
154
-
155
-
156
-
157
-
158
-
159
-
160
-
161
-
162
-
163
-
164
-
165
-
166
-
167
-
168
-
169
-
170
-
171
-
172
-
173
-
174
-
175
-
176
-
177
-
178
-
179
-
180
-
181
-
182
-
183
-
184
-
185
-
186
-
187
-
188
-
189
-
190
-
191
-
192
-
193
-
194
-
195
-
196
-
197
 |
 |
User’s Guide for Nokia 6260
9231815
Issue 2