Nokia 8801 Nokia 8801 Quick Start Guide English
Nokia 8801 Manual
 |
View all Nokia 8801 manuals
Add to My Manuals
Save this manual to your list of manuals |
Nokia 8801 manual content summary:
- Nokia 8801 | Nokia 8801 Quick Start Guide English - Page 1
images are simulated. 1 INSTALL THE SIM CARD AND BATTERY. The SIM Card a. Your Nokia 8801 phone uses a SIM card that provides access to your wireless service. A SIM card allows you to transfer b. your service to a compatible mobile phone and maintain access to the information stored on your - Nokia 8801 | Nokia 8801 Quick Start Guide English - Page 2
, and screensavers are among the display items included in a theme. From the mobile web, you can download new themes designed specifically for your Nokia 8801 phone. Tones In the Tones menu, you can choose from 20 preloaded ringtones and alerts, some from award winning composer and musician Ryuichi
-
 1
1 -
 2
2
 |
 |
Welcome to the Nokia 8801 phone!
Use this guide to
Install the SIM card and battery
Review parts of the phone
Listen to the radio
Take a picture and save a photo ID
Customize the phone display
Check out Bluetooth connectivity capabilities
Care for your phone
All screen images are simulated.
9241880
Printed in Mexico
QUICK START GUIDE
Reinforced
Glass Display
Stainless
Steel Cover
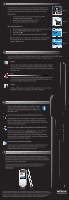
Get familiar with the Nokia 8801 phone. Start with the spring loaded slider
that provides quick access to the keypad. With the phone cradled in your
fingers, press the slider knob up with your thumb. The phone extends,
revealing the keypad (fig. 2.1).
Parts of the phone
1 Power key
2 Left selection key
3 Call key
4 Navigation key
5 Middle selection key
6 End key
7 Right selection key
8 Slider knob
Navigation key shortcuts
From the Start screen:
Press up to activate the camera
Press right to access the calendar
Press down to access contacts
Press left to access the text editor
5
4
6
7
8
3
2
1
fig. 2.1
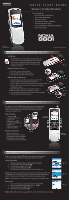
INSTALL THE SIM CARD AND BATTERY.
INSTALL THE SIM CARD AND BATTERY.
1
CHECK IT OUT!
CHECK IT OUT!
2
fig. 1.2
fig. 1.1
The SIM Card
Your Nokia 8801 phone uses a SIM card that provides access
to your wireless service. A SIM card allows you to transfer
your service to a compatible mobile phone and maintain
access to the information stored on your SIM card, such
as contact information.
Remove the battery cover
(fig. 1.1)
1
Locate the two cover release buttons.
2
Press and hold both cover release buttons.
3
Slide the back cover down and off the phone.
Install the SIM card and battery
1
Locate the SIM card slot. The cut-out and arrow reflect the
direction of SIM card installation, beveled edge first.
2
Insert the SIM card until it is flush with the battery compartment (fig. 1.2).
3
Align the gold-colored contacts of the battery with the battery
compartment contacts.
4
Slide the battery into the slot, contact side first (fig. 1.3).
5
When the contacts meet, press the battery into place.
6
Turn the battery lock clockwise until it snaps and locks into place.
7
Slide and lock the back cover into place.
fig. 1.3
battery
lock
a.
b.
b.
a.
a.
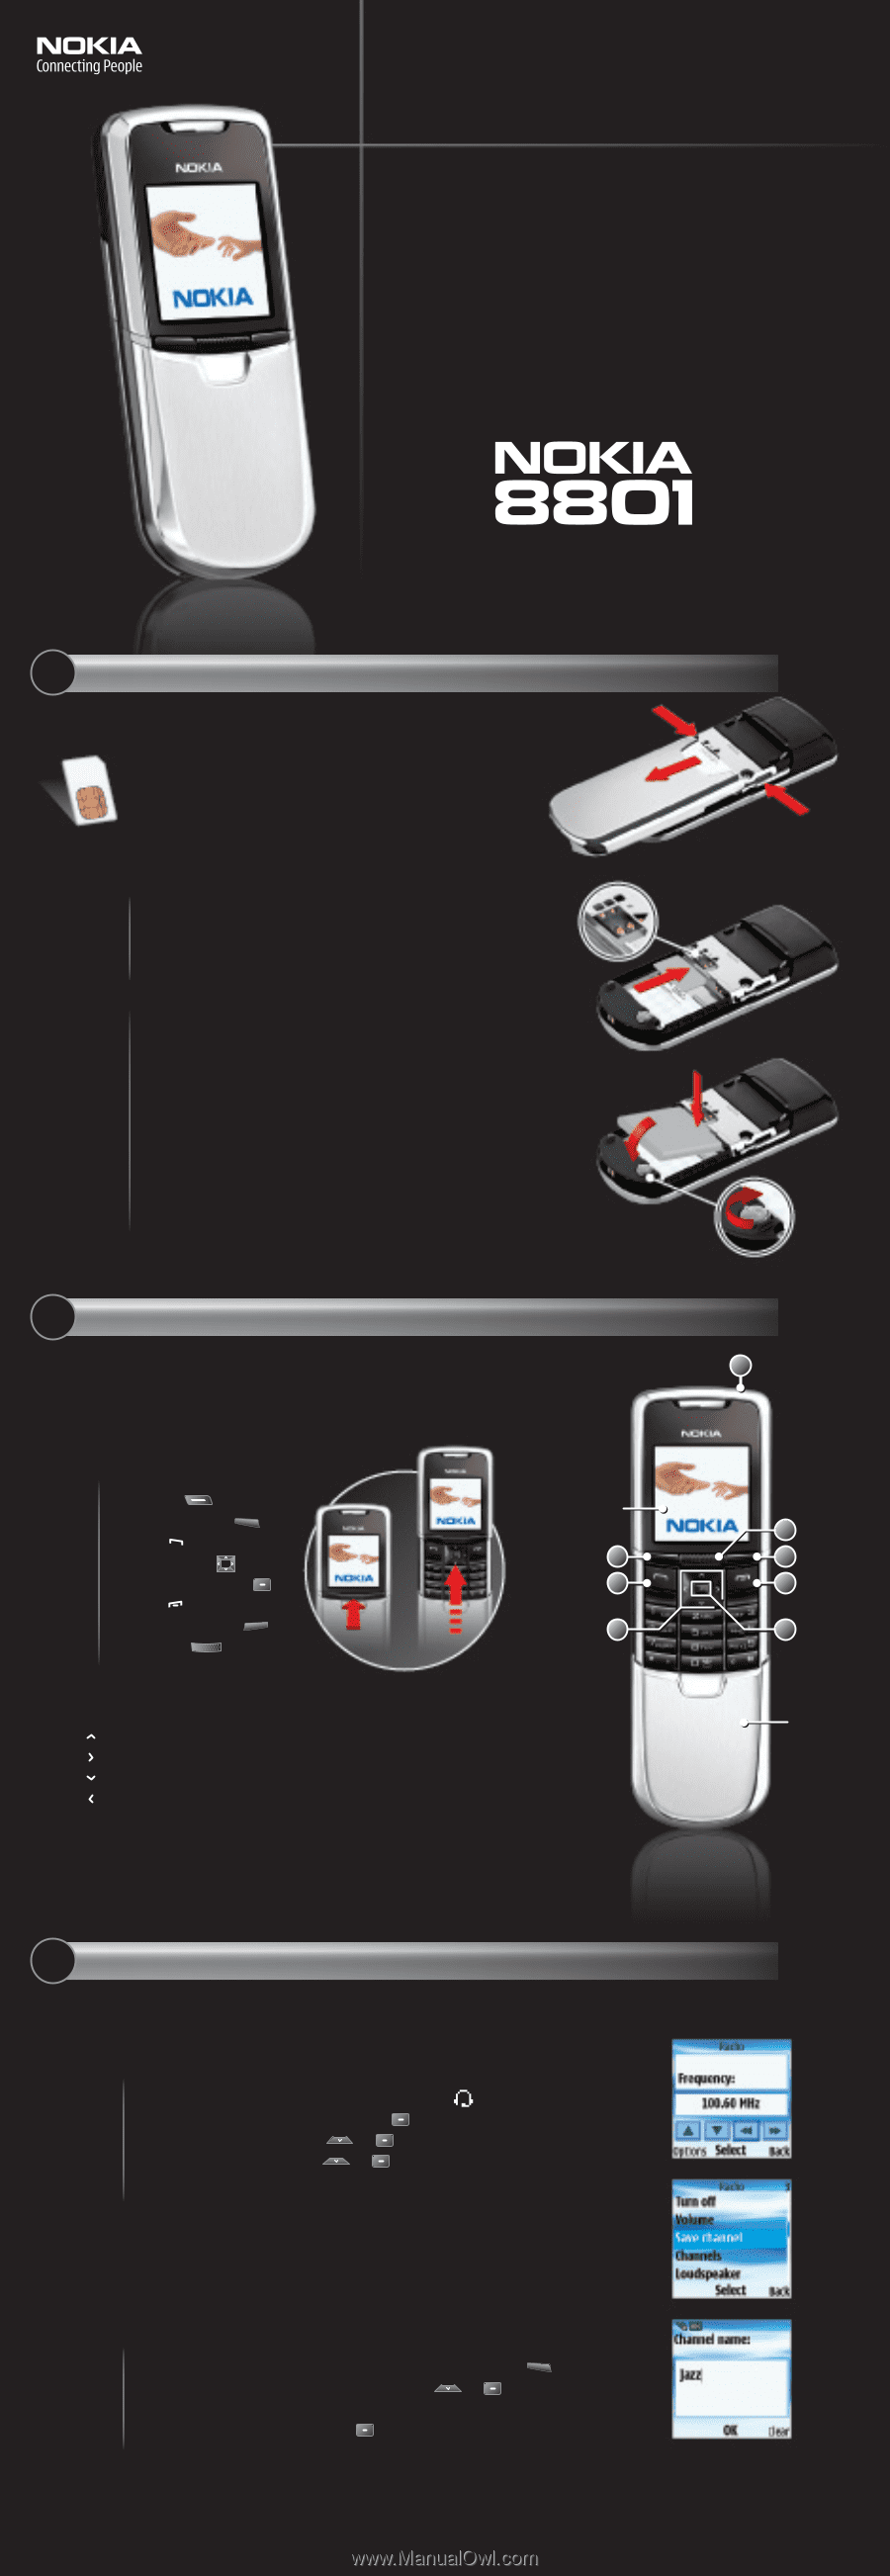
LISTEN TO THE RADIO.
LISTEN TO THE RADIO.
3
fig. 3.1
fig. 3.2
fig. 3.3
Listen to the radio on the Nokia 8801 phone. Just connect the Nokia headset
accessory (included) and digitally tune-in using up to 20 preset stations.
Turn on the FM radio
1
Connect a headset accessory. A headset icon (
) appears.
2
From the Start screen, select
Menu
. (
)
3
Scroll to and select
Media
. (
) (
)
4
Scroll to and select
Radio
. (
) (
)
The radio powers on and displays the current station (fig. 3.1).
Navigate the radio by using the arrows at the bottom of the frequency display. Scroll
to highlight the up or down arrows and press
Select
to navigate through the preset
stations. To tune the radio, highlight the left or right arrows and press
Select
.
TIP!
Press and hold
Select
on the tuning arrow to seek to the next available station.
Save a preset
1
Tune to the station you want to save and select
Options
. (
)
2
Scroll to and select
Save channel
(fig. 3.2). (
) (
)
3
Enter a nickname for the station (fig. 3.3).
4
Select
OK
to save the channel. (
)
Note:
The Nokia 8801 phone also supports MP3 music files. See the User Guide for details.