Nokia 9000i Nokia 9000i User Guide in English
Nokia 9000i Manual
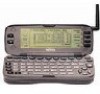 |
View all Nokia 9000i manuals
Add to My Manuals
Save this manual to your list of manuals |
Nokia 9000i manual content summary:
- Nokia 9000i | Nokia 9000i User Guide in English - Page 1
Owner's Manual 9357106 Issue 1.1 US - Nokia 9000i | Nokia 9000i User Guide in English - Page 2
guide without prior notice. Nokia Mobile Phones is not responsible for any loss of data, income or any consequential damage howsoever caused. Geoworks ® application software and GEOS® operating system software or services; loss of use, data, or products described in this manual conform to the European Council - Nokia 9000i | Nokia 9000i User Guide in English - Page 3
backup copies of all important data. INFRARED PRECAUTIONS Do not point the IR beam at anyone's eye or allow it to interfere with other IR devices. CONNECTING TO OTHER DEVICES When connecting the communicator to any other device, read its user's guide for detailed safety instructions. Do not connect - Nokia 9000i | Nokia 9000i User Guide in English - Page 4
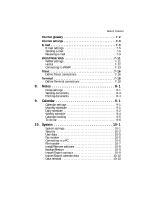
2-1 First start-up 2-1 SIM card 2-2 Connectors 2-4 Battery 2-5 Communicator interface 2-7 Communicator applications 2-9 Indicators 2-10 Special features 2-12 Useful settings information 2-15 3. Contacts 3-1 Contacts settings 3-1 Contact cards 3-2 Records 3-4 4. Telephone 4-1 Telephone - Nokia 9000i | Nokia 9000i User Guide in English - Page 5
9-2 Weekly schedule 9-4 Calendar booking 9-5 To-do list 9-6 10. System 10-1 System settings 10-1 Security 10-2 User data 10-5 Fax modem 10-5 Connecting to a PC 10-6 File transfer 10-7 Install/Remove software 10-8 Backup/Restore 10-9 Import/Export contacts 10-9 Import/Export calendar - Nokia 9000i | Nokia 9000i User Guide in English - Page 6
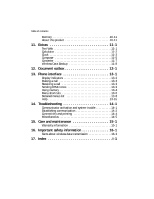
. Phone interface 13-1 Display indicators 13-2 Making a call 13-3 Receiving a call 13-3 Sending DTMF tones 13-3 Using memory 13-4 Menu shortcuts 13-6 Detailed menus list 13-8 Help 13-15 14. Troubleshooting 14-1 Communicator activation and system trouble 14-1 Establishing communication 14 - Nokia 9000i | Nokia 9000i User Guide in English - Page 7
the Nokia 9000i Communicator by explaining the "start up procedure" as well as outlining the special features. A list of commonly used functions and their corresponding pathways is found at the end of Chapter 2. The rest of this manual deals with the communicator interface applications and the phone - Nokia 9000i | Nokia 9000i User Guide in English - Page 8
In order to utilize the communication capabilities of the Nokia 9000i Communicator, you may have to subscribe to certain services, such as fax, SMS or data services, separately. If the service requires a separate phone number or specific settings for any of these services, they must be stored in - Nokia 9000i | Nokia 9000i User Guide in English - Page 9
user names to protect from unauthorized use of your Internet services. To change the password for an Internet access point, go to the Internet main screen, press Settings outbox To help with wireless data transmission, the communicator has an outgoing communications manager called the Document outbox - Nokia 9000i | Nokia 9000i User Guide in English - Page 10
the following: • Nokia 9000i Communicator • This User's Manual and the combined Quick Guide and Accessories Guide • Extended Li-Ion Battery, see the Accessories Guide • Adapter, see the Accessories Guide • Rapid Travel Charger, see the Accessories Guide • Nokia Connectivity software on diskette (see - Nokia 9000i | Nokia 9000i User Guide in English - Page 11
mm-dd-yy. ... Accept or change the time shown and press OK. † Enter your personal user data and press OK. The start-up procedure is now completed. Changing start-up settings You may change any of these settings at any time after the initial start-up. To change the Home location, Date or Time - Nokia 9000i | Nokia 9000i User Guide in English - Page 12
communicator's memory. If the phone interface is switched off, the question will be asked the next time the phone interface is on and you activate the communicator off the phone (use ): • Remove the battery: Press the catch (1) at the bottom of the battery (2) and lift away the battery (Figure 2-1). - Nokia 9000i | Nokia 9000i User Guide in English - Page 13
SIM card is not correctly installed. Do not force the battery into place! Check that Connectors Connectors you have inserted the and for the adapter (Figure 2-6) (4) Adapter for connecting the charger and the RS-232 cable to the communicator. The connector on the left side (5) of the adapter is - Nokia 9000i | Nokia 9000i User Guide in English - Page 14
Nokia 9000i Communicator is powered by a rechargeable Lithium-Ion battery. The Extended Li-Ion Battery provides up to three hours of talk/ fax/terminal time or up to 30 hours of standby time. Use only batteries approved by the communicator manufacturer. Charging the battery Use only those chargers - Nokia 9000i | Nokia 9000i User Guide in English - Page 15
or user data will be lost if the battery is removed or completely discharged. User data is automatically retained by the flash memory and is unaffected by the status of the battery. Using the battery Use only batteries approved by the communicator manufacturer. With approved chargers and accessories - Nokia 9000i | Nokia 9000i User Guide in English - Page 16
display will activate automatically when the cover is opened and automatically power down when the cover is closed. Communicator display Display - The screen where applications are run. Indicators - Show application and system related information (see "Indicators" on page 2-10). Selection - Nokia 9000i | Nokia 9000i User Guide in English - Page 17
When a value appears on a dotted line with a cursor, enter a new value manually via the keyboard. Figure 2-12: Example of a pop-up box (3) When a pop-up box appears, choose an item and press OK or Cancel. When a setting with next to it is selected, pressing Change toggles the value (e.g. on/off) or - Nokia 9000i | Nokia 9000i User Guide in English - Page 18
. Information need not be specifically saved (there is no "Save" command). The Nokia 9000i Communicator saves all data automatically. To send or receive with any of the communications applications, remember that the phone interface must be switched on and in a service area with adequate GSM1900 - Nokia 9000i | Nokia 9000i User Guide in English - Page 19
can talk to the phone from a short distance away (see Chapter 4 "Telephone: Telephone settings" on page 4-1). - A voice call with the handsfree off (the loudspeaker and microphone are muted). - An open data connection, see Chapter 7 "Internet" on page 7-1. - The communicator is receiving or sending - Nokia 9000i | Nokia 9000i User Guide in English - Page 20
). - Battery is fully charged (five bars displayed). Field strength - The communicator is connected to a GSM1900 network. When all five indicator bars in screens which require you to move from field to field (like the User data page). When editing your own texts, the tab key moves the cursor to - Nokia 9000i | Nokia 9000i User Guide in English - Page 21
you may press Enter instead of the OK command. In options and settings, when a value can be toggled, you may press Enter instead of Change. 9. Help Press the Help key to activate a context-sensitive help. Special features Communicator help The texts in the Help section deal with issues relating to - Nokia 9000i | Nokia 9000i User Guide in English - Page 22
. Settings and Menus Most applications have Settings as one of the main view commands. The values of these settings will underlining Adds current time Adds current date Adds user's name Moves cursor to beginning or end of The communicator will suggest a name for the document. The name can be - Nokia 9000i | Nokia 9000i User Guide in English - Page 23
2-14 Special features Figure 2-14: Received communications note Received communications When you open the cover of the communicator and have new received faxes, short messages, unsent documents or missed calls, a note will be shown (Figure 2-14). To read received documents or to check - Nokia 9000i | Nokia 9000i User Guide in English - Page 24
Internet access point2 Define remote mailbox information3 Create folders User data (set own information) Set distinct ringing tones for individual applications Set time and date format (mm-dd-yy, dd.mm.yy) Set time and date Reset home location Telephone Telephone Telephone Telephone Fax SMS SMS - Nokia 9000i | Nokia 9000i User Guide in English - Page 25
into the template's fields. Record duration - The Record duration settings define how long communication data will be listed in the General and Individual record lists. The possible values are: Zero / 10 days / 30 days (default) / 1 Year / User defined: days (0 - 365 days). To change the Contact - Nokia 9000i | Nokia 9000i User Guide in English - Page 26
duration and press Change. , Choose the duration you want and press OK. The contact manager will keep a record of all incoming and outgoing communication for the length of time you specify. ƒ When you are satisfied with the Record duration, press Close. Contact cards Contacts directory The main - Nokia 9000i | Nokia 9000i User Guide in English - Page 27
the area code and phone number. As the communicator has a specific place for GSM telephone modify the field settings of all future contact cards, you must edit the contact card template, see "Contacts settings" on page or scroll down to the user-defined field and write the label text, e.g., - Nokia 9000i | Nokia 9000i User Guide in English - Page 28
Phone interface: Using memory Dialing shortcuts" on page 13-5. To set speed dials: • Press Speed dials in an opened contact card. All phone Frequency (DTMF) tones are the touch tones you hear when you make a call. DTMF tones allow you to communicate used if the DTMF service requires them Inserts a - Nokia 9000i | Nokia 9000i User Guide in English - Page 29
calls. Remote mailbox, Terminal and Internet connections are recorded as data calls. SIM and phone memory The communicator contains contact information accessible from either the phone interface (when the cover is closed) or the communicator interface (when the cover is open). You may copy contact - Nokia 9000i | Nokia 9000i User Guide in English - Page 30
). In order to send SMS messages, the recipient's GSM phone number must be stored in the Tel(GSM) field. You will need to edit this information from the communicator interface. Whenever you enter or edit numbers from the phone interface, check that the phone numbers are in the correct fields in the - Nokia 9000i | Nokia 9000i User Guide in English - Page 31
the call after activating the handsfree mode (see "Telephone settings" on page 4-1). • When you make a call via the communicator interface, the handsfree mode is activated automatically. Note: In some US networks, to make a long distance call to another GSM phone you need to add +1 and the area code - Nokia 9000i | Nokia 9000i User Guide in English - Page 32
text will appear only if your network operator supports this feature. Voice call forward The voice call forward network service allows you to direct your incoming voice calls to another phone number (fax forward is activated via the Fax application settings). Note: The network will store the number - Nokia 9000i | Nokia 9000i User Guide in English - Page 33
any calls, you must set your phone to some answering mode. The available modes are Voice, Fax, Data and Voice/Fax. Other settings Call cost display - This setting turns the charge counter on or off. The counter is shown only if the network operator supports this feature. Speakerphone when cover - Nokia 9000i | Nokia 9000i User Guide in English - Page 34
five seconds) you can dial the emergency number (e.g. 911). ƒ Press . Voice mailbox number - Set a new or change the current voice mailbox phone number you to adjust the volume level and to activate the communicator's loudspeaker for handsfree operation. Note: The speakerphone audio control - Nokia 9000i | Nokia 9000i User Guide in English - Page 35
Figure 4-3), that caller will be identified by his/ her name (if supported by the network). There are two ways to answer a call: phone calling card is a credit or debit card especially for phone charges. The calling card service you subscribe to is most often separate from your mobile phone service - Nokia 9000i | Nokia 9000i User Guide in English - Page 36
to five remote service is available and the call cost setting is on). Call costs are calculated according to the currency or charging units set in the phone interface (see Chapter 13 "Phone communicator, you will be asked for it at this time. You can also call your voice mailbox from the phone - Nokia 9000i | Nokia 9000i User Guide in English - Page 37
network service, contact your local network operator to check if this service is available. In a conference call, you and up to five remote quality is achieved by closing the cover and continuing the call via the phone interface. To end the call with a conference call participant: • Press Conference - Nokia 9000i | Nokia 9000i User Guide in English - Page 38
data calls cannot be transferred). 4. None of the calls is a conference call. There are two ways to transfer voice calls from the phone field to the contact cards of the services of your alternating calls (see Chapter Dual Tone Multi Frequency (DTMF) tones allow you to communicate with voice - Nokia 9000i | Nokia 9000i User Guide in English - Page 39
stored sequences, you can manually enter the DTMF string into the field. Press Send to send the DTMF sequence shown in the input field, at the bottom of the display. Incoming faxes, short messages and data To receive faxes, short messages and incoming data: • The phone interface must be on. • You - Nokia 9000i | Nokia 9000i User Guide in English - Page 40
button labeled "Fax" on the communicator interface keyboard. To send and receive faxes the following requirements must be met: • The phone interface must be on. • The network you are using must support fax calls. • Your SIM card must be activated for fax service. Contact your network operator for - Nokia 9000i | Nokia 9000i User Guide in English - Page 41
services, like normal call restrictions and call forwarding. Fax restrictions allow you to prevent certain outgoing and incoming faxes. Fax forwarding allows you to forward incoming faxes to another fax. For more information and instructions on how to change forwarding and restrictions settings - Nokia 9000i | Nokia 9000i User Guide in English - Page 42
according to the information in the System application's User data card (see Chapter 10 "System: User data" on page 10-5). Sending faxes You can send a printout of your documents. Note: Forward options allows you to select the specific pages you want to send (All pages, This page, or Pages ___ ). - Nokia 9000i | Nokia 9000i User Guide in English - Page 43
communicator. For information on file transfer, see Chapter 10, "System: File transfer - Transferring files to the communicator" on page 10-8. • Press Settings cover page will open. • To enter the recipient's name and fax number manually, press Enter number. The fax cover page will open. • To obtain - Nokia 9000i | Nokia 9000i User Guide in English - Page 44
row. If you do not wish to receive the fax, close the cover and press on the phone interface. When a new fax has been received, you will hear a tone (unless the system is set to silent service mode) and a note is shown on the screen. Unread faxes in the Received faxes folder are - Nokia 9000i | Nokia 9000i User Guide in English - Page 45
) must be supported by the network you are using. • Your SIM card must be activated for SMS. • You must store the Short Message Service Center (SMSC) phone number in the SMS application's settings. Your network operator may be able to send a special SMS to your communicator which will set the SMSC - Nokia 9000i | Nokia 9000i User Guide in English - Page 46
local network operator must support Cell Broadcast. Contact your network operator for details and availability. Info service mode- Display and save (default)/ Display only / Save only. If this is set time the communicator is rebooted (e.g. the battery is removed and replaced). Info service topics - - Nokia 9000i | Nokia 9000i User Guide in English - Page 47
Press Change to set a new value for the current message. Sending contact cards When sending contact cards from the communicator, you can set which fields will message that contains the phone number you want to call and press Menu, then Use number. The first number or set of numbers contained in the - Nokia 9000i | Nokia 9000i User Guide in English - Page 48
The contact must have a phone number in the Tel (GSM) contact card field. or 2. Enter the phone number manually. Press Enter number to display conversion and Request delivery report) are the same as the SMS settings, see "SMS settings" on page 6-2. To send previously created documents: • Go to - Nokia 9000i | Nokia 9000i User Guide in English - Page 49
You may Select your recipient from the SMS directory, enter the number manually (press Enter number), or view the numbers available from the Recent numbers is set to silent service mode) and an information note is shown on the display (both the phone interface as well as the communicator interface). - Nokia 9000i | Nokia 9000i User Guide in English - Page 50
local network operator must support this service. Contact your network operator for details and availability. Info messages can be displayed as they are received, saved in the Info messages folder, or both. To define info message topics, see "SMS settings that supports the Nokia 9000i Communicator - Nokia 9000i | Nokia 9000i User Guide in English - Page 51
do not need to have an Internet service provider, but you must have your SIM card activated for data service. Getting Internet service Information concerning settings must be obtained from the Internet service provider. Your service provider will give you instructions on how to enter the Internet - Nokia 9000i | Nokia 9000i User Guide in English - Page 52
networking software protocol making it possible for any computer with a modem and a phone line to connect directly to the Internet. Post Office Protocol, version 3 (POP3) Another common mail protocol that can be used for accessing a remote mailbox. Protocol A formal set of rules that govern how data - Nokia 9000i | Nokia 9000i User Guide in English - Page 53
as add-on software. Check the material delivered in the sales package, or contact the Nokia HelpLine or http:// www.forum.nokia.com for further information about latest SSL support. Transmission Control Protocol/Internet Protocol (TCP/IP) A protocol that governs the data communi- cation in - Nokia 9000i | Nokia 9000i User Guide in English - Page 54
The Internet access settings are: Provider name - The Internet service provider's name which appears on the access point list. Phone number - Telephone number of the Internet access point. User name - Used in the PPP authentication process if required by the Internet service provider. Prompt - Nokia 9000i | Nokia 9000i User Guide in English - Page 55
Internet 7-5 E-mail The Nokia 9000i Communicator e-mail system is settings - Changing this setting opens a new set of options, described below. Own e-mail address - A standard Internet format address. The address must contain the @ character. This entry is obligatory if Internet mail services - Nokia 9000i | Nokia 9000i User Guide in English - Page 56
e-mail system to read the character set used in your communicator. Only when text containing special characters settings - Changing this setting opens a new set of options, described below. Your remote mailbox service provider will supply you with the required information. Remote mailbox user - Nokia 9000i | Nokia 9000i User Guide in English - Page 57
directory will open and you may select an address from the list or manually enter the address on the line provided (see "Sending e-mail: E-mail ument is loaded in the e-mail editor using the font chosen in E-mail settings. If the document contains text formatting, before you can edit the document, - Nokia 9000i | Nokia 9000i User Guide in English - Page 58
from the E-mail directory, and press Select. You can also manually enter standard Internet addresses. The basic format of an Internet address connection option (set in E-mail settings)- instead of the default Immediately option - so that you may send all your e-mail during the same data call. To - Nokia 9000i | Nokia 9000i User Guide in English - Page 59
status will be sent with one command (and one data call). Receiving e-mail Your incoming e-mail is received hear a tone (unless the system is set to silent service mode) and see a note when new messages that have not yet been opened in the communicator are marked with . , Highlight the e-mail - Nokia 9000i | Nokia 9000i User Guide in English - Page 60
amount of information shown in the header fields, go to the E-mail main view, select Settings, and scroll down to Show header fields. From the Received mail folder, when you open a received e-mail the following command buttons are displayed: Menu - Opens - Nokia 9000i | Nokia 9000i User Guide in English - Page 61
Internet service provider. To open the World Wide Web (WWW) application: ¿ Go to the Internet application main view. ¡ Select WWW and press Select. To exit the WWW application, press Hang up in the WWW main view (the Hotlist). This will end the data call and close the WWW application. WWW settings - Nokia 9000i | Nokia 9000i User Guide in English - Page 62
item: ¿ Press Define. A new set of commands is activated. ¡ Press New. ¬ Enter the Item name you want for your new Hotlist item, then tab to the URL field. Ð Enter the HTTP address (e.g., www.nokia.com). ƒ The Autoselect IAP field is for those who want to use a specific Internet access point (IAP - Nokia 9000i | Nokia 9000i User Guide in English - Page 63
the information manually. Note: Stored passwords to individual web sites are removed when the communicator is rebooted (i.e., when the battery is "Connecting to WWW: Locally stored WWW pages" on page 7-14). Back returns the previous set of commands. Off line ends the data call and disconnects from - Nokia 9000i | Nokia 9000i User Guide in English - Page 64
store downloaded WWW pages locally (i.e., on your communicator): ¿ From the WWW page you have retrieved, press Save. A new set of commands is activated. Wide Web. Hotspots (such as selection lists, text entry fields and reset/submit buttons) enable you to input information into the World Wide Web. - Nokia 9000i | Nokia 9000i User Guide in English - Page 65
with the WWW page (see the option Autoload images in the WWW settings), but will be displayed as icons. To download an image, select Fax: Received faxes" on page 5-5). Plug-ins The Nokia 9000i Communicator is capable of accepting software plug-ins which can increase web browser functionality. To - Nokia 9000i | Nokia 9000i User Guide in English - Page 66
order to be able to use the services provided by the host computer. The Telnet you can define the following settings: Connection name - Edit service provider from those currently defined. To change the preferred service which are not available on the communicator keyboard. The special keys include: - Nokia 9000i | Nokia 9000i User Guide in English - Page 67
be used in remote systems that support them): Interrupt - For interrupting the up to close the connection to the host, end the data call and return to the Telnet application main view. The (send) texts between a host computer and the communicator. This feature can be used, to send pre set of commands. - Nokia 9000i | Nokia 9000i User Guide in English - Page 68
can be defined freely. Phone number - Enter the phone number to access the service. The phone number may include spaces and hyphens. Data bits - Enter the service/host specific communication parameter: 7/8 (default). Parity - Enter the service/host specific communication parameter: None (default - Nokia 9000i | Nokia 9000i User Guide in English - Page 69
the Internet settings (Modem initialization special keys which are not available on the communicator keyboard. The special keys include: • Four ) • The following VT100 functions: reset terminal, Ctrl-\, Ctrl-], Ctrl-~. connection to the host, end the data call and return to the Terminal application - Nokia 9000i | Nokia 9000i User Guide in English - Page 70
is used for writing notes and managing various documents stored on the communicator. All folders as well as the Document outbox are shown in the again in the Settings view. Font: URW Roman / URW Sans (default) / URW Mono Size: 10 points / 12 (default) / 14 / 18 / 24 / 36 / User defined Margins - - Nokia 9000i | Nokia 9000i User Guide in English - Page 71
/ 12 (default)/ 14 / 18 / 24 / 36 / User defined (measured in points) Bold (Ctrl-B) - On / Off settings, however, apply to the whole document. To change the settings permanently, you must do it in the main view settings (see Chapter 10 "System: System settings transferred to the communicator with the - Nokia 9000i | Nokia 9000i User Guide in English - Page 72
Internet: Connecting to WWW - Navigating in WWW" on page 7-14). Note: A list of shortcuts is included in Chapter 2 "Getting started: Special features - Settings and Menus" on page 2-13. Special characters The special character key Chr (on the keyboard) is used to create letters that are not included - Nokia 9000i | Nokia 9000i User Guide in English - Page 73
communicator sales package, or see the Club.Nokia home page at www.club.nokia.com. For specific information on the printer you are using, please refer to the manufacturer's User's Guide Press Start to start printing. Printing problems Though the communicator may detect a connected printer, certain - Nokia 9000i | Nokia 9000i User Guide in English - Page 74
of scheduled events, keep a list of tasks in the To-do list, set calendar alarms and link memos to events (see "Daily schedule: Memos" on page appear as asterisks. Default alarm leadtime - 10 minutes (default). Used when you set an alarm to an event. The alarm will go off 10 minutes before the - Nokia 9000i | Nokia 9000i User Guide in English - Page 75
the date using the scroll keys and pressing Day. • Events which are not be associated with a specific time are indicated with a horizontal bar in the daily schedule (e.g., Mom's birthday in Figure 9-1). To event starts. The default date is the selected day. The year is always given using two digits. - Nokia 9000i | Nokia 9000i User Guide in English - Page 76
- The date the event ends (optional). End time - The time the event ends (optional). Alarm - You can set an alarm for the selected event (see "Daily schedule: Alarms" on page 9-3). Frequency - Lets you define how often the event repeats. The options are Once only (default) /Daily /Weekly /Monthly - Nokia 9000i | Nokia 9000i User Guide in English - Page 77
alarm occurs, an alarm note is shown on both the phone and communicator interface displays. The alarm sound can be turned off by pressing any key. If you have set the communicator to silent mode (in the System application's System settings), only the alarm note will be shown. Weekly schedule The - Nokia 9000i | Nokia 9000i User Guide in English - Page 78
's contact card before sending a reservation. You can give your own booking password to those who may send reservations to your calendar. If you do not set a password, your communicator accepts all reservations. Define your booking password (by default you have no password) in the Calendar - Nokia 9000i | Nokia 9000i User Guide in English - Page 79
or weekly schedule. or 2. Press Menu in any of the schedules. The To-do list is a list of tasks that are not connected to any specific time or day. After a calendar alarm has occurred, you have the opportunity to move the event to the To-do list by pressing the Move - Nokia 9000i | Nokia 9000i User Guide in English - Page 80
application's main view before you can start another. The Nokia 9000i Communicator's applications for PC connectivity include: • File transfer • Install/Remove software • Backup/Restore • Import/Export contacts • Import/Export calendar data The Security application lets you determine the level of - Nokia 9000i | Nokia 9000i User Guide in English - Page 81
code (provided in the sales package) to change the setting status. If autolock is on, the communicator will lock automatically after the defined inactivity period. Press Lock system to lock the device manually at any time. You can also lock the system from the phone interface Menu 5 8 (see Chapter - Nokia 9000i | Nokia 9000i User Guide in English - Page 82
locks itself until the lock code, supplied with the communicator sales package, is correctly entered. The communi-cator recognizes five different SIM cards as the owner's cards. PIN code When the phone interface is switched on, this setting allows you to change the PIN code. The changing - Nokia 9000i | Nokia 9000i User Guide in English - Page 83
phone interface Security options menu (Menu 5 6 1). The lock code is needed to: • Lock the communicator (except when the autolock period is in use). • Unlock the communicator. • Change the SIM change security setting to the service. When the phone interface is switched on, the setting in the - Nokia 9000i | Nokia 9000i User Guide in English - Page 84
business card. Fax modem The Nokia 9000i Communicator can be used as a 9600 bps PC fax modem if: • Data calls are supported by the network you are using. • This service is activated for your SIM card. • You have the proper fax driver software (for either cable or infrared connection) installed on - Nokia 9000i | Nokia 9000i User Guide in English - Page 85
PC. Check that the COM port reported by the connectivity software is correct. To establish a serial cable connection (the RS-232 adapter cable is included in the sales package): • Connect the adapter to the communicator (for instructions on how to do this, see Chapter 2 "Getting started: Connectors - Nokia 9000i | Nokia 9000i User Guide in English - Page 86
to make backup copies of all important data. File transfer To select the serial connection type (infrared or cable) and the PC drive used, press Settings in File transfer application's main view. To connect to a PC: • Make sure that the connectivity software (Nserver) has been installed on your PC - Nokia 9000i | Nokia 9000i User Guide in English - Page 87
communicator later. The Install/Remove software main view displays the serial connection type and the PC drive used. Press Settings to change the connection type or to redefine the PC drive used. The connection type is changed by pressing Change. The directory name and path can be edited manually - Nokia 9000i | Nokia 9000i User Guide in English - Page 88
database compatible with the Nokia 9000i Communicator's contact card format. The main view shows the connection type used and the default path in the PC. To change the connection settings, press Settings. Before using this application, make sure that the connectivity software has been installed on - Nokia 9000i | Nokia 9000i User Guide in English - Page 89
sure that the connectivity software has been installed on your PC and is running (see "Connecting to a PC" on page 10-6). To import calendar data: Press Import in the Import/Export calendar data main view. When the data in the defined PC directory has been copied to the communicator you will be - Nokia 9000i | Nokia 9000i User Guide in English - Page 90
the amount of available free memory for storing data and for installing new software. Pressing Details will open up a list of folders and other data in the communicator and the amount of memory each of them PC. About this product This view displays information about the Nokia 9000i Communicator. - Nokia 9000i | Nokia 9000i User Guide in English - Page 91
by your network operator and Nokia. As Text Web is a network service, please, contact your local network operator to check if this service is available. The Text Web main view includes the following items: • Nokia services • Operator services • (User-defined services) • Saved forms To select one - Nokia 9000i | Nokia 9000i User Guide in English - Page 92
11-2 Calculator the service, the server number (SMSC phone number for this service) and the access number. To retrieve information: • In the Text Web main view, scroll to one of the service access points that you have defined and press Select. , Enter in the space provided a word (keyword) that - Nokia 9000i | Nokia 9000i User Guide in English - Page 93
again (the alarm interval is set in the clock settings) for five times or until you press the OK button. Note: If your communicator is locked when the alarm goes off, the first key press turns the alarm off, but the alarm will go off again until you unlock the communicator and press the OK button - Nokia 9000i | Nokia 9000i User Guide in English - Page 94
city cards, press Edit city. The city information is presented in the form of a data card. The city data card contains the following fields: City - The name shown in the Cities list. Can be entered manually. Country/State - The name of the country or state associated with the city. Area code - Nokia 9000i | Nokia 9000i User Guide in English - Page 95
Composer application enables you to create your own, customized ringing tunes. You can change the phone ringing tune in the Tel. application settings (see Chapter 4 "Telephone: Telephone settings - Ringing settings" on page 4-1). Scroll to the Composer and press Select. To compose a new tune press - Nokia 9000i | Nokia 9000i User Guide in English - Page 96
button until the value you want is shown. Note: Although you compose tunes in the Extras application, the settings for the communicator sounds are found in the System application, under Settings, System sounds. While in the editing mode, you can use the following shortcuts: Enter Plays the tune - Nokia 9000i | Nokia 9000i User Guide in English - Page 97
field (see Figure 11-4). The darkened frames within the lists indicate the specific measurement that is currently being converted. To make a conversion: • Press will appear. As there are no pre-set exchange rates in the communicator, you will have to set the base currency and the exchange rate before - Nokia 9000i | Nokia 9000i User Guide in English - Page 98
base currency will clear all set exchange rates. Wireless Data Backup Wireless Data Backup allows you to backup and restore data over the GSM network via a data call. To use this application, you must first obtain this service from a service provider. Contact your local network operator to check - Nokia 9000i | Nokia 9000i User Guide in English - Page 99
there until it is successfully sent or you manually cancel the send. Access the Document outbox from when the phone interface is switched on, network signal strength becomes adequate, previous phone call have this status if the Send email setting has been set to Upon request (see Chapter 7 "Internet: - Nokia 9000i | Nokia 9000i User Guide in English - Page 100
will be sent during the same connection. To speed up the process and manually send documents that have the Waiting, Retry or Upon request status: • outbox only if: 1. Sending succeeds. or 2. You cancel the sending manually by pressing Cancel send. or 3. Sending fails ten times or fails because - Nokia 9000i | Nokia 9000i User Guide in English - Page 101
and memory functions. and are used to scroll through menus, submenus or settings. If there are no active calls, the scroll keys can be used to a call is active, pressing the scroll keys adjusts the volume level. dials a phone number and answers a call. ends any active call or cancels a dialed call. - Nokia 9000i | Nokia 9000i User Guide in English - Page 102
selection keys When this user's manual instructs you to "press" service area. and bar. Indicates how much charge there is left in the battery. The higher the bar, the more charge in the battery. With regard to network signal strength and charge level, both the phone interface and the communicator - Nokia 9000i | Nokia 9000i User Guide in English - Page 103
the following requirements are met: • The phone interface is switched on. • The communicator has a valid SIM card fitted. • The communicator is located in the network service area ( is shown). To make a call from the phone interface: • Key in the area code and the phone number of the person you wish - Nokia 9000i | Nokia 9000i User Guide in English - Page 104
phone interface stores all contact information on the SIM card and cannot access the Contacts directory. Therefore, the use of the communications applications of the communicator interface will be less convenient (you will have to enter most contact information manually). This users's manual will - Nokia 9000i | Nokia 9000i User Guide in English - Page 105
dialing Speed dialing is a handy way to call frequentlyused phone numbers by keying one digit and the key. You can define up to eight speed dial numbers in the communicator memory ("B" memory). For information on how to assign phone number speed dials, see Chapter 3 "Contacts: Contact cards - Speed - Nokia 9000i | Nokia 9000i User Guide in English - Page 106
Last number redial The communicator stores the phone numbers you dial, i.e., call or attempt to call. However, only the last twenty phone numbers (and asso the menu functions even during a call. All the menus, submenus and settings are numbered. This index number is shown in the upper right corner - Nokia 9000i | Nokia 9000i User Guide in English - Page 107
in Phone settings: Menu list (Menu 4 14). These menus are indicated by the 4 symbol in the following menu list. Some menu functions are network services, indicated by the symbol in the following menu list. These functions can be utilized only if provided by your local network service provider - Nokia 9000i | Nokia 9000i User Guide in English - Page 108
Service (SMS) function is a network service and may not be supported by your network. Contact your home service provider for details. The phone indicator will be displayed and a tone will sound (if the communicator has not been set to silent service within Menu 10). A note is also shown when you - Nokia 9000i | Nokia 9000i User Guide in English - Page 109
may enter a new or edit an existing phone number. The number will be used until you change the number again. Info service (Menu 2 5 2) This menu allows you to control the info service settings. On - Activates the reception of topics that are pre-defined in the communicator and which can also be seen - Nokia 9000i | Nokia 9000i User Guide in English - Page 110
the communicator is used as a handportable phone or is connected to a charger, this setting battery charge is too low. If you have set the communicator to silent service (Menu 10), the warning tones will not be heard. One touch dialing (Menu 4 7) When this function is set on, you can dial phone - Nokia 9000i | Nokia 9000i User Guide in English - Page 111
restrictions made via the phone interface only apply to voice calls. Fax restrictions are made in the Fax application's settings (Chapter 5) and data restrictions are made in the Internet main settings (Chapter 7). View fixed dial list (Menu 5 4) Within this submenu, you can review the contents of - Nokia 9000i | Nokia 9000i User Guide in English - Page 112
Set- Use a particular user group. Calls can be made to or received from the members of the selected group only. System lock (Menu 5 8) When the system lock is activated in this menu, the communicator will lock immediately. Even if you remove and replace the battery and switch on the phone interface - Nokia 9000i | Nokia 9000i User Guide in English - Page 113
functions (Menu 8) Memory selection (Menu 8 1) Choose A: SIM Card, or B: Phone (recommended). Within this submenu, you can set the phone interface to use either the SIM card memory ("A memory") or the communicator's internal memory ("B memory"). The letter indicating the currently selected memory is - Nokia 9000i | Nokia 9000i User Guide in English - Page 114
SIM card memory status (Menu 8 2) Within this submenu, you may review the number of empty and full memory locations on the SIM card. Copy between memories (Menu 8 3) Within this submenu, you can copy phone numbers and names between the communicator memory and the SIM card memory. You can copy: From - Nokia 9000i | Nokia 9000i User Guide in English - Page 115
: System settings" on page 10-1). Ring - A ringing tone will sound. Beep - One short beep will sound and the phone interface will flash its display lights. Silent - Turns on the silent service: the communicator will flash its display lights. No tones will be heard, including keypad and warning tones - Nokia 9000i | Nokia 9000i User Guide in English - Page 116
13-16 Help Once you have read the text, either press Select to enter the function or press Quit to return to the title screen. While reading a help text, you can move to the next or previous menu function by pressing or . - Nokia 9000i | Nokia 9000i User Guide in English - Page 117
Chapter 14 - Troubleshooting 14-1 14. Troubleshooting For questions about specific topics, please see the index of this Owner's Manual. For additional support, see www.forum.nokia.com, or contact the Nokia HelpLine. Nokia HelpLine USA: 1-888-665-4228 (1-888-NOKIA2U) Hours of operation 8:00AM - 6: - Nokia 9000i | Nokia 9000i User Guide in English - Page 118
the same state it was in at the time of purchase. Remember that backed up data can be restored in all cases. If these measures do not help, contact your local Nokia retailer. Establishing communication 5. Calls cannot be made or received The phone interface is off. Close the cover and switch the - Nokia 9000i | Nokia 9000i User Guide in English - Page 119
are set in the Internet main settings (data cannot be forwarded). 7. Common reasons why faxes, short messages or e-mail cannot be sent or received • The phone interface is off. • You have no subscription to the specific network service. • The communicator is low on memory (see problem 16 - Nokia 9000i | Nokia 9000i User Guide in English - Page 120
problems establishing a data connection with the remote modem, you can try fixing the data transmission rate by using an AT command, for example, ATS35=6, which defines the remote modem as a V.32 modem. Common AT commands (based on the ETSI 07.07 standard) supported by the Nokia 9000i Communicator - Nokia 9000i | Nokia 9000i User Guide in English - Page 121
stop bits/parity settings are different from those defined to the data service by the operator, characters may look distorted on the display. 14. Access code problems The lock code is included in the communicator sales package. If you forget or lose the lock code, contact your Nokia retailer. If you - Nokia 9000i | Nokia 9000i User Guide in English - Page 122
solution. If the communicator or any of its accessories are not working properly, take them to your nearest qualified service facility. The personnel there will assist you, and if necessary, arrange for service. Warranty information NOKIA One-Year Limited Warranty Nokia Mobile Phones, Inc. ("NMPI - Nokia 9000i | Nokia 9000i User Guide in English - Page 123
c) The Product serial number plate or the accessory date code has been removed, defaced, or altered by the external antenna. 8. If a problem develops during the limited warranty period, the Service Department at NMPI, at the phone number listed on the bottom of the next page for further instructions - Nokia 9000i | Nokia 9000i User Guide in English - Page 124
to the Customer Service Department at Nokia, 6200 Courtney Campbell Causeway, Suite 900, Tampa, FL 33630. Telephone (813) 288-3800 or 1-800-456-5553, Fax: (813) 287-6612. 14. The limited warranty period for Nokia Product Corp. supplied attachments and accessories are specifically defined within - Nokia 9000i | Nokia 9000i User Guide in English - Page 125
copies of all important data to protect against its possible loss or alteration. • When connecting the communicator to a PC or printer, please refer to the User's Guides of those devices for detailed safety instructions. • The infrared beam of the communicator may interfere with the functioning - Nokia 9000i | Nokia 9000i User Guide in English - Page 126
these instructions may lead to suspension or denial of cellular telephone services to the offender, or legal action or both. Emergency calls IMPORTANT! The Nokia 9000i Communicator, like any mobile phone, operates using radio signals, cellular and landline networks, as well as user-programmed - Nokia 9000i | Nokia 9000i User Guide in English - Page 127
wireless data transmission The Nokia 9000i Communicator employs the digital data transmission capabilities of the GSM network to send faxes, short messages, e-mail and to establish connections with remote computers. Wireless data connections can be made from most locations where your mobile phone - Nokia 9000i | Nokia 9000i User Guide in English - Page 128
restricting 4-2 transferring 4-8, 13-14 Index Cleaning the communicator 15-1 Clock alarms 11-3 settings 11-5 Connectivity software 10-6 Contact card 3-2 creating 3-2 customizing 3-3 editing 3-2 settings 3-1 template 3-1 Contacts directory 3-2 D Data removal 10-10 Date format 10-2 Deleting temporary - Nokia 9000i | Nokia 9000i User Guide in English - Page 129
10-6 infrared drivers 10-5 Install/Remove software 10-8 Internet glossary 7-2 Internet application access requirements 7-1 data call restrictions 7-3 e-mail 7-5 settings 7-3 Telnet 7-16 Terminal 7-18 World Wide Web 7-11 L Lock code 4-3, 10-4 Locking communicator 10-2 keypad 13-15 M Margins - Nokia 9000i | Nokia 9000i User Guide in English - Page 130
record 3-5 Resetting the communicator 14-2 Ringing and tones composing 11-5 keypad tones 10-2 ring, beep, silent 13-15 settings 13-10 Ringing tones 10-2 S Safety information 16-1 Security 10-2 lock/unlock system 10-2, 13-12 passwords 10-4 Settings Internet access 7-3 network services 4-2 Remote - Nokia 9000i | Nokia 9000i User Guide in English - Page 131
setting number 4-4, 13-9 Volume phone interface 13-10 speakerphone 4-4 W World time 11-4 WWW downloading software 7-15 Hotlist 7-12 Navigation index 7-14 saving information 7-13 settings 7-11 URL addresses 7-12 viewing images 7-15
-
 1
1 -
 2
2 -
 3
3 -
 4
4 -
 5
5 -
 6
6 -
 7
7 -
8
-
9
-
10
-
11
-
12
-
13
-
14
-
15
-
16
-
17
-
18
-
19
-
20
-
21
-
22
-
23
-
24
-
25
-
26
-
27
-
28
-
29
-
30
-
31
-
32
-
33
-
34
-
35
-
36
-
37
-
38
-
39
-
40
-
41
-
42
-
43
-
44
-
45
-
46
-
47
-
48
-
49
-
50
-
51
-
52
-
53
-
54
-
55
-
56
-
57
-
58
-
59
-
60
-
61
-
62
-
63
-
64
-
65
-
66
-
67
-
68
-
69
-
70
-
71
-
72
-
73
-
74
-
75
-
76
-
77
-
78
-
79
-
80
-
81
-
82
-
83
-
84
-
85
-
86
-
87
-
88
-
89
-
90
-
91
-
92
-
93
-
94
-
95
-
96
-
97
-
98
-
99
-
100
-
101
-
102
-
103
-
104
-
105
-
106
-
107
-
108
-
109
-
110
-
111
-
112
-
113
-
114
-
115
-
116
-
117
-
118
-
119
-
120
-
121
-
122
-
123
-
124
-
125
-
126
-
127
-
128
-
129
-
130
-
131
 |
 |

Owner’s Manual
9357106
Issue 1.1 US