Nokia Car Kit CK-100 User Guide
Nokia Car Kit CK-100 Manual
 |
View all Nokia Car Kit CK-100 manuals
Add to My Manuals
Save this manual to your list of manuals |
Nokia Car Kit CK-100 manual content summary:
- Nokia Car Kit CK-100 | User Guide - Page 1
Nokia Car Kit CK-100 User and Installation Guide 9209908 Issue 1 - Nokia Car Kit CK-100 | User Guide - Page 2
Accessories logo are trademarks or registered trademarks of Nokia Corporation. Other product and company names mentioned herein may be trademarks or tradenames of their respective owners. Bluetooth is a registered trademark of Bluetooth SIG, Inc. Reproduction, transfer, distribution, or storage of - Nokia Car Kit CK-100 | User Guide - Page 3
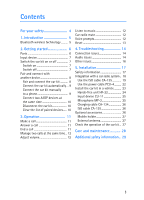
prompts 12 Reset 13 4. Troubleshooting 14 Connection issues 14 Audio issues 14 Other issues 16 5. Installation 17 Safety information 17 Integration with a car radio system .. 18 Use the ISO cable CA-135 19 Use the power cable PCU-4.......... 22 Install the car kit in a vehicle .......... 23 - Nokia Car Kit CK-100 | User Guide - Page 4
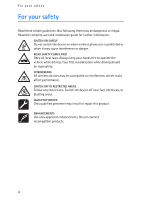
Not following them may be dangerous or illegal. Read the complete user and installation guide for further information. SWITCH ON SAFELY Do not switch the device fuel, chemicals, or blasting areas. QUALIFIED SERVICE Only qualified personnel may install or repair this product. ENHANCEMENTS Use only - Nokia Car Kit CK-100 | User Guide - Page 5
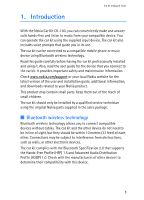
small children. The car kit should only be installed by a qualified service technician using the original Nokia parts supplied in the sales package. ■ Bluetooth wireless technology Bluetooth wireless technology allows you to connect compatible devices without cables. The car kit and the other device - Nokia Car Kit CK-100 | User Guide - Page 6
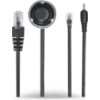
all sales packages) 3. ISO cable CA-135 (not included in all sales packages) 4. Loudspeaker SP-3 (not included in all sales packages) 5. Input device CU-11 with NaviTM wheel 6. Charging cable CA-134 with a Nokia 2.0-mm plug 7. Microphone MP-2 8. CD that contains this user and installation guide 6 - Nokia Car Kit CK-100 | User Guide - Page 7
on or off If you are not certain whether the ignition sense wire is connected or not, consult with the technician who installed the car kit. Switch on If the ignition sense wire is connected, turn on the car ignition. When the car kit is switched on, the indicator light of the input device turns on - Nokia Car Kit CK-100 | User Guide - Page 8
using the car kit. To charge the battery in your compatible Nokia device while using the car kit, connect the device to the car kit using the supplied charging cable. You can pair the car kit with up to eight devices but connect it to only one device supporting the HFP Bluetooth profile and another - Nokia Car Kit CK-100 | User Guide - Page 9
search for Bluetooth devices. See the user guide of your device for instructions. 3. Select the car kit (Nokia CK-100) from the list of found devices, or follow the related instructions in the user guide for your device. 4. Enter the Bluetooth passcode 0000 to pair and connect the car kit with your - Nokia Car Kit CK-100 | User Guide - Page 10
To manually connect your music device to the car kit, see the user guide of the device. Connect two A2DP devices at the same time You can use the car kit with a mobile phone and a music device that support the A2DP Bluetooth profile at the same time. If your phone supports the A2DP Bluetooth profile - Nokia Car Kit CK-100 | User Guide - Page 11
phone supports this feature with the car kit), press and hold the Navi wheel for about 2 seconds when no call is in progress, and proceed as described in the user guide of your phone. To cancel voice dialling, press the Navi wheel. To switch an active call between the car kit and your compatible - Nokia Car Kit CK-100 | User Guide - Page 12
level is saved separately for the phone and music device. ■ Listen to music To listen to music, connect the car kit to a mobile phone or music device that supports the A2DP Bluetooth profile. The available music functions depend on the connected device. If you receive or make a call while listening - Nokia Car Kit CK-100 | User Guide - Page 13
language. 4. To save the language setting, press the Navi wheel within 10 seconds. ■ Reset To reset the car kit if it stops functioning during a call or voice dialling, press and hold the Navi wheel for over 5 seconds. The car kit plays a short beep. The reset does not clear the pairing settings. 13 - Nokia Car Kit CK-100 | User Guide - Page 14
as the CD changer connector) for stereo sound. I cannot pair my compatible music device with the car kit. Check that the Bluetooth passcode of the music device is 0000. If this is not the case, change the passcode to 0000 as instructed in the user guide of the music device. ■ Audio issues The caller - Nokia Car Kit CK-100 | User Guide - Page 15
stereo input on your car radio. See "Integration with a car radio system," p. 18, or consult with the technician who installed the car kit. The car radio is not muted when I answer a call. Ask the technician who installed the car kit to ensure that the car radio mute wire is properly connected. 15 - Nokia Car Kit CK-100 | User Guide - Page 16
Troubleshooting ■ Other issues The car kit does not switch on when I turn on the car ignition. Ask the technician who installed the car kit to ensure that the ignition sense wire is properly connected. The battery of the mobile phone does not charge when the device is connected to the car kit. Check - Nokia Car Kit CK-100 | User Guide - Page 17
or service may be dangerous and may invalidate any warranty which may apply to the car kit. End users should remember that the car kit comprises complex technical equipment that requires professional installation using special tools and expert know-how. • Instructions given in this guide are - Nokia Car Kit CK-100 | User Guide - Page 18
of such a system, contact your car dealer. • Ensure that cables are placed so that they will not be subject to mechanical wear and tear (for example, not laid under car seats or over sharp edges). ■ Integration with a car radio system The car kit can be connected to a car radio system in three - Nokia Car Kit CK-100 | User Guide - Page 19
In this setup, the car radio is muted when you make or receive a call or listen to music from a connected device that supports the A2DP Bluetooth profile. The built-in amplifier of the car kit is used for calls and music played on the A2DP device. 1. To connect the ISO cable to the car radio, do as - Nokia Car Kit CK-100 | User Guide - Page 20
unit. After you have connected the ISO cable, connect the external input device CU-11 and the microphone MP-2 to the respective connectors on the hands-free unit. To charge a compatible Nokia mobile phone through the car kit, connect one end of the supplied charging cable CA-134 to the hands-free - Nokia Car Kit CK-100 | User Guide - Page 21
music played on a connected device that supports the A2DP profile. The built-in amplifier of the car kit is used for calls. 1. To connect the ISO cable to the car radio, do as follows: • Unplug the appropriate cables from the car radio, and insert the ISO cable plug instead. Connect the open ends - Nokia Car Kit CK-100 | User Guide - Page 22
not supplied with the car kit). After you have connected the ISO cable and the stereo output cable, connect the external input device CU-11 and the microphone MP-2 to the respective connectors on the hands-free unit. To charge a compatible Nokia mobile phone through the car kit, connect one end of - Nokia Car Kit CK-100 | User Guide - Page 23
a compatible Nokia mobile phone through the car kit, connect one end of the charging cable CA-134 to the hands-free unit and the other end to the 2.0-mm (0.08 inch) charging connector of the mobile phone. ■ Install the car kit in a vehicle This section describes how to install the car kit parts - Nokia Car Kit CK-100 | User Guide - Page 24
to music from a device that supports the A2DP Bluetooth profile and that is connected to the car kit. 6. Connector for power cable PCU-4 7. Connector for ISO cable CA-135 8. Connector for loudspeaker SP-3 When you install the hands-free unit, ensure that the cables for the microphone and loudspeaker - Nokia Car Kit CK-100 | User Guide - Page 25
Install the hands-free unit in the car using suitable mounting material (not supplied in the sales package). Ensure that the hands-free unit stays securely in place. Input device CU-11 The input device should be located so that it is within easy reach of the user. Ensure that the input device cable - Nokia Car Kit CK-100 | User Guide - Page 26
compatible Nokia devices. To connect the charging cable to your mobile phone, carefully insert one end of the cable to the respective connector on the hands-free unit HF-22 and the other end to the charger connector on your phone. ISO cable CA-135 If the ISO cable CA-135 is supplied with the car kit - Nokia Car Kit CK-100 | User Guide - Page 27
20 centimetres (8 inches) can be maintained between the external antenna and all persons, with external antenna gain not exceeding 3 dBi. ■ Check the operation of the car kit After the car kit has been installed, check that it is mounted and working properly. See also "Troubleshooting," p. 14. 27 - Nokia Car Kit CK-100 | User Guide - Page 28
paint the device. Paint can clog the moving parts and prevent proper operation. These suggestions apply equally to your device or any enhancement. If the car kit is not working properly, take the vehicle to an authorised service facility for the car kit to be serviced. 28 - Nokia Car Kit CK-100 | User Guide - Page 29
, or its representative, of your vehicle or any equipment that has been added. Only qualified personnel should service the device or install the device in a vehicle. Faulty installation or service may be dangerous and may invalidate any warranty that may apply to the device. Check regularly that all
-
 1
1 -
 2
2 -
 3
3 -
 4
4 -
 5
5 -
 6
6 -
 7
7 -
8
-
9
-
10
-
11
-
12
-
13
-
14
-
15
-
16
-
17
-
18
-
19
-
20
-
21
-
22
-
23
-
24
-
25
-
26
-
27
-
28
-
29
 |
 |

Nokia Car Kit CK-100
User and Installation Guide
9209908
Issue 1