Oki B4350n PrintSuperVision Configuration Guide
Oki B4350n Manual
 |
View all Oki B4350n manuals
Add to My Manuals
Save this manual to your list of manuals |
Oki B4350n manual content summary:
- Oki B4350n | PrintSuperVision Configuration Guide - Page 1
PrintSuperVision Configuration Guide 59318401 - Oki B4350n | PrintSuperVision Configuration Guide - Page 2
referred to in this guide will not affect the drivers and manuals are available from the web site: http://www.okiprintingsolutions.com. Trademark Information Oki is a registered trademark of Oki Electric Industry Company, Ltd. Oki Printing Solutions is a registered trademarks of Oki Data Corporation - Oki B4350n | PrintSuperVision Configuration Guide - Page 3
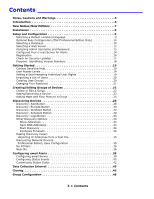
Timeouts 34 Making Discovery Easier: Importing IP Addresses from a Text File 35 Discovering Network Devices: Professional Edition, Easy Configuration 35 My Printers 36 Near Me 36 Configuring email Alerts 38 Configuring email Server 39 Configuring Status Events 40 Customizing Status Codes 42 - Oki B4350n | PrintSuperVision Configuration Guide - Page 4
the Device Properties Displayed 70 Searching for a Device 72 Changing Languages 72 Downloading Oki Drivers 73 Print to Remote Locations 74 Creating a Maintenance Log / Managing Supplies Inventory 75 Viewing a Login Log 76 Clearing (Deleting) Logs 77 Public Web Services 78 4 • Contents - Oki B4350n | PrintSuperVision Configuration Guide - Page 5
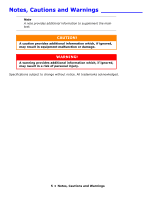
Notes, Cautions and Warnings ___________ Note A note provides additional information to supplement the main text. CAUTION! A caution provides additional information which, if ignored, may result in equipment malfunction or damage. WARNING! A warning provides additional information which, if ignored, - Oki B4350n | PrintSuperVision Configuration Guide - Page 6
easy configuration option is designed for very small offices and does not support the automatic delivery of device Alerts through email. Some of the common • Helps pinpoint devices on the network • Assists in remote trouble shooting • Automatically identifies device status and can email alerts • - Oki B4350n | PrintSuperVision Configuration Guide - Page 7
have similar base functionality and a consistent look-and-feel. Each edition supports 32 and 64-bit versions of Windows XP, Vista and Windows Server or from the Professional edition to the Enterprise Edition without loss of data. Note Upgrading from the Single-user Easy Configuration Option to the - Oki B4350n | PrintSuperVision Configuration Guide - Page 8
to auto-run. A standard licensing agreement is presented. To install PrintSuperVision Professional Edition, locate the executable file that was downloaded from the Oki website, and click on it. A standard licensing agreement is presented. If you agree with the license agreement click Next. The PSV - Oki B4350n | PrintSuperVision Configuration Guide - Page 9
are not running. For example, in order to change the web server component from "embedded" to "IIS" the web service application must not be running. Selecting a Default Location/Language 1. The PSV setup tool displays the location/language selection screen first. 2. Select a default location/language - Oki B4350n | PrintSuperVision Configuration Guide - Page 10
as well. If you do not wish to use the built in Access database, PSV provides an option to install and select SQL Compact Edition 3.5 (supported in the Pro version) as well as SQL Server 2005 Express edition 10 • Setup and Configuration - Oki B4350n | PrintSuperVision Configuration Guide - Page 11
site. The database section also allows you to apply the following options to a previously used database: • back up • export • erase • copy • trim data. 1. Click the Data tab to view these options. 2. From the Setup tab, select the desired database from the dropdown menu and click Apply. 11 • Setup - Oki B4350n | PrintSuperVision Configuration Guide - Page 12
switch to an existing database without saving any data click Change. • To create a new database and copy existing data to the new database click Migrate. Back at to move to the next setup module. Selecting a Web Server PSV supports Microsoft IIS web server and an Embedded Web Server that is packaged - Oki B4350n | PrintSuperVision Configuration Guide - Page 13
Panel and select Add/Remove programs and Add/Remove Windows components from the left sidebar. 2. Check the box associated with Internet Information Services and click Next. When IIS is selected from the dropdown menu, an Authentication option appears. If you select Integrated Windows Authentication - Oki B4350n | PrintSuperVision Configuration Guide - Page 14
1. Click Apply after a new username and password have been created. 2. Click Next to go on to the next setup module. Configuring Your e-mail Server for Alerts In order for PSV to send out device related alerts via email, you must first enter the necessary information such as the address of your - Oki B4350n | PrintSuperVision Configuration Guide - Page 15
/copy devices. Finally, another added convenience allows the admin to start and stop the PrintSuperVision Service from the set up menu and select whether the PSV Services should start automatically, manually or are disabled. 7. Test the email connection by clicking the Test button. PSV will attempt - Oki B4350n | PrintSuperVision Configuration Guide - Page 16
Registration You can register your new PrintSuperVision software with Oki Americas or Oki Europe by clicking the Register button. Registering your name and email address with Oki Printing Solutions will help us keep you informed of new product releases and PSV related information. All registration - Oki B4350n | PrintSuperVision Configuration Guide - Page 17
Check for Security Updates As a convenience, PSV provides links to check for Microsoft security updates before completing the setup process. 1. Click on the Windows Updates Link to go to: http://update.microsoft.com/microsoftupdate/v6/default.aspx?ln=en-us Or Click the IIS Lockdown Wizard link to go - Oki B4350n | PrintSuperVision Configuration Guide - Page 18
Program: Identifying Version Numbers The Program tab is provided as a means to quickly identify the version numbers of each major component in PrintSuperVision. Click Run to complete the setup process and begin using the PSV application. 18 • Setup and Configuration - Oki B4350n | PrintSuperVision Configuration Guide - Page 19
, click the icon located in the upper right hand corner (next to the printer icon) on every page. User Access Levels One of the first things to does not log in, the two areas that are not accessible are Reports and Services and the following functionality will not be available: • Cannot view, add, - Oki B4350n | PrintSuperVision Configuration Guide - Page 20
the Import Users feature to save time. You can import users into the application from a text file using a comma separated format. The fields available for data import are the same fields listed in the Add User section. Fields cannot be left empty with the exception of Password. If passwords are not - Oki B4350n | PrintSuperVision Configuration Guide - Page 21
6. Click Save. A list of groups will be displayed. You will notice that the new group name is automatically added to the Add to Group drop down menu when adding an individual user. For convenience, the All Users button has been provided in the User Groups area to help identify if an individual has - Oki B4350n | PrintSuperVision Configuration Guide - Page 22
assigned to it such as location, contact person, SNMP community and even images of maps and floor plans which are used to quickly locate individual when groups are displayed. Create or Edit a Group 1. Click Printers from the main menu and Printer Groups,Maps from the drop down menu to view a list - Oki B4350n | PrintSuperVision Configuration Guide - Page 23
add a device to an existing Group 1. Click Printers from the main menu and Printer Groups,Maps from the drop down menu to view a list of groups already created. 2. Click Edit in the Edit Column. 3. Click Add Printer. 4. Select the appropriate device from the Printer drop down menu and click Save. 23 - Oki B4350n | PrintSuperVision Configuration Guide - Page 24
grouped devices displayed on the Edit Printer Group screen. Adding Maps and Floor Plans to a Group Groups can also have images of maps, floor plans, etc. popular image file formats for maps and floor plans are supported, such as .gif, .jpg, .bmp, or .png. You can assign a map or floor plan image to - Oki B4350n | PrintSuperVision Configuration Guide - Page 25
or floor plan. Note Remember the individual device must be a member of a group before it can be placed on the map. 4. Click Printers/Printer Groups from the main menu. If you have successfully linked an image with a group, you will see an icon in the map column. 5. Click the map icon and the - Oki B4350n | PrintSuperVision Configuration Guide - Page 26
7. Click on the image and the device icon will be placed where your mouse pointer is positioned. To move the device icons at any time, click the Place on - Oki B4350n | PrintSuperVision Configuration Guide - Page 27
from the Device Status Page by clicking the On Map button you will only see that device's icon on the image. To see all devices on the map or floor plan, click Printers > Printer Groups, Maps from the main menu and click the map icon associated with a particular group. 27 • Creating/Editing Groups - Oki B4350n | PrintSuperVision Configuration Guide - Page 28
tab from the main menu and select Discovery from the drop down menu. PSV is capable of discovering any device that is compliant with Public Printer MIB Specification RFC 3805. Click Start Discovery if you want to discover all of the compatible devices on your network (for large organizations, see - Oki B4350n | PrintSuperVision Configuration Guide - Page 29
the device to a specific group of devices and associate the group to a specific SNMP community. Enter an IP address, select a group name from the Printer Group drop down menu and type the desired SNMP community. Click Add to save your changes. Similar to adding a single IP Address to a database - Oki B4350n | PrintSuperVision Configuration Guide - Page 30
Discovery: Exclude Button Use the Exclude to exclude a specific IP address or IP address range from the discovery process. 1. Click the Exclude button and select either Exclude IP address or Exclude IP range. Notice that PSV displays all IP Addresses and IP Address Ranges that have been excluded - Oki B4350n | PrintSuperVision Configuration Guide - Page 31
2. Enter the desired IP address to exclude and click Save or for IP Range, enter the range of IP addresses to exclude and click Save. 3. To include an IP address or IP Address Range that was previously excluded, return to the Discovery section, click the Exclude button, click the IP Address or range - Oki B4350n | PrintSuperVision Configuration Guide - Page 32
Start Discovery button. As an added convenience, PSV can create a group of devices called My Printers (accessible from the Printer tab in the main menu) by clicking the Add to My Printers check box and then clicking Start Discovery. Discovery: Schedule Button Discoveries can be scheduled by clicking - Oki B4350n | PrintSuperVision Configuration Guide - Page 33
box, indicate time frame by entering desired dates and click Show to display the log. Note This feature creates activity logs for all other activities supported in the drop down box. 33 • Discovering Devices - Oki B4350n | PrintSuperVision Configuration Guide - Page 34
timeout value sets the time interval that PSV waits for a response from a device before turning the status icon gray (status icon is displayed in the Printers List). Notice that after 34 • Discovering Devices - Oki B4350n | PrintSuperVision Configuration Guide - Page 35
the file is delimited by selecting comma, semi colon or tab. 3. Select an appropriate group name from the Printer Group dropdown box (or leave blank). Click Preview to view the data before importing it or click Import to add the imported devices immediately. For more information on Device Groups see - Oki B4350n | PrintSuperVision Configuration Guide - Page 36
from the drop down menu. You will see a list of devices that have been added to the My Printers group. 2. To add a device to the My Printers group, click Add Printer, choose the desired device and click Save. 3. To delete a device, click the trash can icon listed in the right column. Near Me - Oki B4350n | PrintSuperVision Configuration Guide - Page 37
browser enabled device) being used to access the PSV application and automatically includes those devices in the Near Me group. From the main menu select Printers > Near Me from the drop down menu. Device status in the Near Me group will be displayed. Note Devices cannot be added or deleted from - Oki B4350n | PrintSuperVision Configuration Guide - Page 38
be processed immediately upon receiving updated status from the device, or processed at specified time intervals. 1. To add an email Alert, select Services > Email Alerts from the main menu. 2. Click the Add Email Alert button. 3. Adding an alert requires the following information: • Select a device - Oki B4350n | PrintSuperVision Configuration Guide - Page 39
• Select the format of email messages (text or html) 4. Click Save after the information has been entered. Configuring email Server 1. To set the parameters for sending alerts in email, click the Configure Email button from the Email Alerts page. 2. Enter the following information and click Save: • - Oki B4350n | PrintSuperVision Configuration Guide - Page 40
to Admin button. PSV will attempt to send an email to the address specified. For a description of Email Methods see installation/setup instructions described earlier. 3. Click the Select Properties Button to customize the email message to include additional device information in the Alert message - Oki B4350n | PrintSuperVision Configuration Guide - Page 41
1. To add an event, go back to the Email Alerts page and click the Status Events button. A list of default events is displayed: 2. You can click the name of the Event to see a list of conditions included in that event category. Note PrintSuperVision translates difficult to understand error codes - Oki B4350n | PrintSuperVision Configuration Guide - Page 42
4. Assign a severity level to the event by selecting one of the options from the drop down box. Select one or more conditions to assign to the event by selecting the check boxes in the left margin. 5. Click the Add Event button at the bottom of the page (not shown in the screenshot above) to save - Oki B4350n | PrintSuperVision Configuration Guide - Page 43
1. To modify status codes return to the Email Alerts main page and click the Status Codes button. 2. Scroll through the list of conditions or type in a filter (search) word to narrow your choices. 3. Click on the severity icon listed in the Edit Severity column. 4. Select the new severity level from - Oki B4350n | PrintSuperVision Configuration Guide - Page 44
The default severity level and the changed severity level are displayed in the Status Codes page. 5. Click your browsers back button to return to the Email Alerts main page. For convenience and quick navigation, a Users button and Process Alerts Now button have been included on the Email Alerts page - Oki B4350n | PrintSuperVision Configuration Guide - Page 45
interval time in hours for basic usage information and in minutes for processing Alerts. To set the data collection interval, 1. Click Services > Data Collection Services from the main menu. 2. Indicate the desired data collection interval times and click Save. To display a log of previous - Oki B4350n | PrintSuperVision Configuration Guide - Page 46
settings of one device and saves the same settings to a group of similar devices. Note both the origin device and the target devices must be Oki branded devices and must be the same make and model number. 1. Select Tools from the main menu and Cloning from the dropdown box. 2. Locate and - Oki B4350n | PrintSuperVision Configuration Guide - Page 47
4. Select the radio button for the "origin" device and click Next. 5. Select a compatible "destination" device that will be configured with the same parameters and click Next. 6. Select properties to be cloned and click the Start Cloning button. PSV will apply the values of the selected properties - Oki B4350n | PrintSuperVision Configuration Guide - Page 48
selected. 4. Make desired configuration changes and click Apply. The other sample Group Configuration template changes a web server password on an Oki B6300 monochrome printer. Select the B6300 Password Change option from the drop down menu. Enter a new password, verify it. 5. Click Continue. 48 - Oki B4350n | PrintSuperVision Configuration Guide - Page 49
The new password will be saved to each B6300 device in the selected group as well as in the PSV database for future use and reference. 49 • Group Configuration - Oki B4350n | PrintSuperVision Configuration Guide - Page 50
: • Search for supply item • Create an order manually • Configure the URL for all on-line ordering related supply items. Select Printers, Then Items 1. Click the Select printers< then items radio The default e-commerce site is http://esales.okidata.com, which can be changed to any ecommerce - Oki B4350n | PrintSuperVision Configuration Guide - Page 51
Printers Click this option for a list of supply items related to the devices that PSV is currently monitoring. Use the list to obtain a description of the supply item and Oki part have the option to manually create a printable supplies order page that contains the supply part number, description and - Oki B4350n | PrintSuperVision Configuration Guide - Page 52
list that is integrated into the PSV application. You can: • Use the existing supplies list which obtains its information from http://esales.okidata.com • Edit and add to the existing supplies list • Point PSV to another list • Disable supplies ordering entirely Default Selecting Default continues - Oki B4350n | PrintSuperVision Configuration Guide - Page 53
/Disabling on-line Supplies Ordering To enable on-line ordering select the Online Link check box. This will add the Order Online button into the printer status page and allows users to order supplies on-line. To disable on-line ordering, uncheck the Online Link box. This removes the Order Online - Oki B4350n | PrintSuperVision Configuration Guide - Page 54
part number or SKU, enter the new number in the Code field. 7. Click the Save button to save your changes. Note This procedure must be replicated for each supply item if you intend to use an e-commerce site other than http:// esales.okidata.com. As an alternative to editing each supply item manually - Oki B4350n | PrintSuperVision Configuration Guide - Page 55
Disable Ordering Supplies To completely disable the ability to order supplies either on-line or by manually printing a supplies order page (discussed earlier), click the Disable Supplies Ordering button and click Save. Editing the Supplies List (Optional Link) The Edit Supplies List - Oki B4350n | PrintSuperVision Configuration Guide - Page 56
from the main menu and Calendar from the drop down menu. 2. Select the Picture radio button if you wish to display and/or print an image with the calendar. 3. Select a date range for the calendar. 4. Select Show expected Empty from the supplies report and Show maintenance items if you wish to - Oki B4350n | PrintSuperVision Configuration Guide - Page 57
generate several reports that identify supplies use, predict toner replacement dates, indicate pages printed and export device properties available depend on the PSV edition installed and user access rights. Available Reports • Toner Changes Report (see page 58) • Schedule Log Report (see page 60) - Oki B4350n | PrintSuperVision Configuration Guide - Page 58
the screen (not shown in screen shot) to save your selections. Toner Changes Report The "Toner Changes" Report shows the dates of the last toner cartridge replacement for a group of devices and indicates if there was any toner remaining at the time of replacement. This report is particularly helpful - Oki B4350n | PrintSuperVision Configuration Guide - Page 59
results; by month or by various table sizes to make the data more readable. 3. Indicate either HTML or Excel format and click Show to generate the report. Additional details for toner replacement are available by clicking the toner type links (highlighted in blue). This presents a sub-report that - Oki B4350n | PrintSuperVision Configuration Guide - Page 60
Select a starting date and time, select a recurring interval for the report to be generated and sent, indicate email recipients and click Save. The toner changes report will be generated and sent to the recipient on the dates and times indicated. Schedule Log Report The Schedule Log Report provides - Oki B4350n | PrintSuperVision Configuration Guide - Page 61
Supplies Usage Report The Supplies Usage report displays current levels of toner as well as drum, transfer belt and fuser usage. • The report can be created for a group of devices or a single device. • Report data can be formatted into an HTML table, placed into an HTML-based chart, auto imported - Oki B4350n | PrintSuperVision Configuration Guide - Page 62
3. Click the Schedule button to schedule this report to run and be sent to a user via email. 4. Click Schedule Logsto view a running log of scheduled events. Printed Pages Report The printed pages report displays the number pages printed over a period of time by an individual device or by a group of - Oki B4350n | PrintSuperVision Configuration Guide - Page 63
7. Click the Show button to run the report. A sample report is displayed below. 8. The Printed Pages Report can also be scheduled and sent to a user at predetermined intervals. Click the Schedule button to configure the delivery frequency of the report. 9. Click Schedule Logs for a running log of - Oki B4350n | PrintSuperVision Configuration Guide - Page 64
2. Select Color/Mono Pages Report from the drop down menu. 3. Select an individual or group of printers. 4. Enter a desired date range. 5. Choose how the data should be displayed. 6. Click the Counter Values radio button to display mono, color and total page counts as a snapshot on a particular day - Oki B4350n | PrintSuperVision Configuration Guide - Page 65
number of times a consumable has been replaced. Note In most Oki devices, the Usage Report feature can be disabled from the operator enabled in the device and is reporting page count data to PrintSuperVision. • The Collect Data option instructs PSV to obtain the latest information from the device - Oki B4350n | PrintSuperVision Configuration Guide - Page 66
Feature. Select a group of devices and click Start. Exporting Properties and Attributes The Export Printers Data option allows you to save all device properties and attributes for all devices PSV monitors. The data can be exported in several formats including Text, Excel, CSV, XML, Compact XML and - Oki B4350n | PrintSuperVision Configuration Guide - Page 67
are not reported by the device, so as a user you must manually enter data into the attribute fields. To add attribute data 1. Select Printers from the main menu. 2. Select Printers from the drop down menu. 3. Click on any status icon (printer icon in the left margin) to link to a print device - Oki B4350n | PrintSuperVision Configuration Guide - Page 68
an Admin can always link to the device's on-board web page remotely to make even more configuration settings. 1. From the main menu select Printers. 2. Click Printers from the drop down menu to display a list of print devices. 3. Click on the highlighted IP address of a device and enter the Username - Oki B4350n | PrintSuperVision Configuration Guide - Page 69
manually run reports. Viewing device status To view a list of devices that were previously discovered, select Printers from the main menu and click either Printers, My printers, or Near Me. • Printers indicates an event has occurred, such as toner or drum replacement, cassette drawer is open or the - Oki B4350n | PrintSuperVision Configuration Guide - Page 70
At any time, you may customize the device properties you wish to display on the Printers Page, with the exception of IP address which is always displayed. 1. Select Printers from the main menu. 2. Select Printers from the drop down menu. 3. Click the Select Properties link located just above the - Oki B4350n | PrintSuperVision Configuration Guide - Page 71
4. Select the properties that you wish to display for each device. Notice too that you may select the device attributes that have been entered manually such as the city, state or postal code that pertains to the location of the device. 5. Click on the desired check boxes . 6. Click Save at - Oki B4350n | PrintSuperVision Configuration Guide - Page 72
Searching for a Device From the Printers Page you can use two methods to locate a particular device. 1. Click Models for a list of devices. 2. Select the model name of the device and click - Oki B4350n | PrintSuperVision Configuration Guide - Page 73
, PSV provides a built in search mechanism for Oki device drivers and quick links to download a specific driver. This feature saves time by eliminating the need to navigate, locate, and download drivers from the appropriate Oki website. Note The driver search and download feature is only available - Oki B4350n | PrintSuperVision Configuration Guide - Page 74
Print to Remote Locations PrintSuperVision can even send print jobs from a centralized location to many remote devices at one time. For example, an in-house graphic designer can create marketing material for their branch offices and use PrintSuperVision's Multi-File Printing Feature to distribute - Oki B4350n | PrintSuperVision Configuration Guide - Page 75
The Maintenance Log feature allows you to keep track of services performed on individual devices and acts as tool to help keep track of supply items kept in your inventory including the price you paid for the item. All of the data in this area must be entered by the user. 1. Select - Oki B4350n | PrintSuperVision Configuration Guide - Page 76
, reduce the amount of inventory or delete the supply item. Click the brown box icon in the edit column to edit supply items. To record a service call, click the Maintenance Log button and you will return to the main Maintenance Log screen. Click the Add Note button. Select the appropriate device - Oki B4350n | PrintSuperVision Configuration Guide - Page 77
2. Select Login Log from the drop down box. 3. Enter the date interval and click Show. Clearing (Deleting) Logs To save disk space you may choose to clear (delete) all report logs, maintenance logs and login logs. 4. Select Options from the main menu. 5. Select Clear Logs from the drop down box. 6. - Oki B4350n | PrintSuperVision Configuration Guide - Page 78
from the main menu. 2. Select Public Web Services from the drop down box. Six samples test applications are provided and explained below: Sample Test Applications • AboutVersion - Shows the PSV version number • Address2 printers - Provides the details of a specific device • GetProperties - Shows
-
 1
1 -
 2
2 -
 3
3 -
 4
4 -
 5
5 -
 6
6 -
 7
7 -
8
-
9
-
10
-
11
-
12
-
13
-
14
-
15
-
16
-
17
-
18
-
19
-
20
-
21
-
22
-
23
-
24
-
25
-
26
-
27
-
28
-
29
-
30
-
31
-
32
-
33
-
34
-
35
-
36
-
37
-
38
-
39
-
40
-
41
-
42
-
43
-
44
-
45
-
46
-
47
-
48
-
49
-
50
-
51
-
52
-
53
-
54
-
55
-
56
-
57
-
58
-
59
-
60
-
61
-
62
-
63
-
64
-
65
-
66
-
67
-
68
-
69
-
70
-
71
-
72
-
73
-
74
-
75
-
76
-
77
-
78
 |
 |

59318401
PrintSuperVision
Configuration Guide