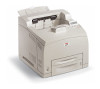
Oki B6300n B6200/6300 Technical Reference/User's Guide
Oki B6300n Manual
 |
View all Oki B6300n manuals
Add to My Manuals
Save this manual to your list of manuals |
Oki B6300n manual content summary:
- Oki B6300n | B6200/6300 Technical Reference/User's Guide - Page 1
- Oki B6300n | B6200/6300 Technical Reference/User's Guide - Page 2
to change without prior notice. ƒ We welcome any comments on ambiguities, errors, omissions, or missing pages. „ Never attempt any procedure on the machine that is not specifically described in this manual. Unauthorized operation can cause faults or accidents. Oki Data is not liable for any problems - Oki B6300n | B6200/6300 Technical Reference/User's Guide - Page 3
handy for a quick reference on using the printer. The illustrations used in this guide are based on B6300. This guide is written with the assumption that you are familiar with the basics kof operating your computer and network. In this manual, safety instructions are marked with the symbol . Always - Oki B6300n | B6200/6300 Technical Reference/User's Guide - Page 4
. 3. The following conventions are used in this guide: Refer to "xxx" : The cross-reference is within this guide. Refer to YYY : The cross-reference is not within this guide. [ ] : Indicates items displayed on the computer and the printer control panel. Also indicates the title of printed - Oki B6300n | B6200/6300 Technical Reference/User's Guide - Page 5
14 Cancelling Printing of Data Being Printed or Received at the Printer 14 Cancelling Printing of All Print Data Received at the Printer 15 Cancelling Print Data That Are Being Processed at the Computer 15 Checking Status of Print Data 15 Checking in Windows 15 Checking in OkiWebRemote - Oki B6300n | B6200/6300 Technical Reference/User's Guide - Page 6
59 Admin Menu ...62 Network/Port ...62 System Settings 74 Printer Settings ...77 Allocate Memory*3 (refer to P. 83 79 Init/Del Data ...81 Display Language 82 4.3 Menu list ...84 5 Troubleshooting 89 5.1 When Paper Jams 89 Inside Cover A ...90 Inside Paper Tray 90 5.2 When Problems Occur 91 - Oki B6300n | B6200/6300 Technical Reference/User's Guide - Page 7
99 List of Error Codes 102 5.5 Network Related Troubles 107 Using TCP/IP ...107 For Windows 95/Windows 98/Windows Me 107 For Windows NT 4. 0/Windows 2000/Windows XP 108 Using OkiWebRemote 109 5.6 Mail Related Troubles 110 6 Daily Care 111 6.1 Replacing the Drum/Toner Cartridge 111 Caution on - Oki B6300n | B6200/6300 Technical Reference/User's Guide - Page 8
Functional Parts 139 A.4 Output Size and Memory Capacity 140 PCL driver ...140 PostScript printer driver 141 A.5 Precautions and Limitations 142 Precautions and Limitations of This Printer 142 Optional Hard Disk 142 When Print Result Is Different From the Settings 142 Optional Accessories - Oki B6300n | B6200/6300 Technical Reference/User's Guide - Page 9
Contents 5 - Oki B6300n | B6200/6300 Technical Reference/User's Guide - Page 10
Oki Data confirms this printer stops power to the fuser and saves power. The default low power mode start time is set at 5 minutes. You can set the low power mode start time between 5 and 60 minutes in 1 minute intervals. For details on how to set the time, refer to "Admin Menu - Oki B6300n | B6200/6300 Technical Reference/User's Guide - Page 11
Illegal Copies and Printouts Copying or printing certain documents may be illegal in your country. Penalties of fines or imprisonment may be imposed on those found guilty. The following are examples of items that may be illegal to copy or print in your country. q Currency q Checks q Bank and - Oki B6300n | B6200/6300 Technical Reference/User's Guide - Page 12
150 tray. 250 tray is set for B6200 and 550 tray for B6300. Switches the power of the printer on and off. Pressing the switch to the < > position switches duplex unit. For connecting the power cord. For connecting the parallel cable. For connecting the network cable when connecting this printer to - Oki B6300n | B6200/6300 Technical Reference/User's Guide - Page 13
installed to B6300. Enables 2 sided printing. When paper is jammed inside the duplex unit, it is described as cover C. When the rear tray has been installed tray. Can install up to two levels of an Letter/A4 universal tray (550) to this printer. Remove this when installing optional accessories such - Oki B6300n | B6200/6300 Technical Reference/User's Guide - Page 14
Drum/toner cartridge 3 Cover A 4 Fuser unit 5 Transfer roll cartridge 6 Cover B Description Raise this when printing on paper larger than Letter/A4 size. Contains the toner and the photosensitive drum. Open this when replacing the drum/toner cartridge and removing jammed paper. Fixes the toner - Oki B6300n | B6200/6300 Technical Reference/User's Guide - Page 15
6 9 87 No. Name Description 1 button Press to move to menu operation. 2 button Press to set the menu candidate values. Use this to print report/ list also. 3 indicator When the light is on, the printer is ready to receive data from the computer. 4 LCD display - Oki B6300n | B6200/6300 Technical Reference/User's Guide - Page 16
differs according to the options installed and setting status. Print Screen The Print screen appears when the machine is printing or waiting for data. The following contents are shown on the screen. Printer status Port for receiving data Feeding tray Menu Screen Screen for configuring settings - Oki B6300n | B6200/6300 Technical Reference/User's Guide - Page 17
will be displayed on the control panel. Check that this display changes to "Ready to print". Note • When "Please wait..." is displayed, the printer is in the process of warming up. Printing is unavailable during this period. When the printer is ready for printing, "Ready to print" will be displayed - Oki B6300n | B6200/6300 Technical Reference/User's Guide - Page 18
data is received for 5 minutes, the printer will enter the low power mode. When no data is received for a further 10 minutes (a total of 15 minutes lapse (default settings) since the last received data mode and the procedure to change the settings, refer to "Example: Changing the Low Power/Sleep Mode - Oki B6300n | B6200/6300 Technical Reference/User's Guide - Page 19
name that you wish to delete and press the key. Checking Status of Print Data Checking in Windows Double-click the printer icon on the task bar at the bottom right of the screen. From the displayed window, check the column, [Status]. Checking in OkiWebRemote You can check the status of the - Oki B6300n | B6200/6300 Technical Reference/User's Guide - Page 20
SNMP port (default: [Enable]) on the printer using the control panel. • For Windows NT 4. 0/Windows 2000/Windows XP, only users with administrator's rights can change the settings. Users without administrator's rights can only check the contents. 1. From the [Start] menu, click [Printers and Faxes - Oki B6300n | B6200/6300 Technical Reference/User's Guide - Page 21
the PCL driver as an example. 1. From the [File] menu of the application software, select [Print]. 2. Select this printer as the printer to be the printer driver. Important • If the paper tray information is not correct, change the settings on the [Options] tab of the printer driver before carrying - Oki B6300n | B6200/6300 Technical Reference/User's Guide - Page 22
that the flaps are turned to the right side. 2. Slide the length guide and right width guide to the size of the loaded envelopes. 3. Close the lid of the paper tray and push the tray completely into the printer. 4. On the control panel, change the paper type to [Heavyweight 1]. For details, refer to - Oki B6300n | B6200/6300 Technical Reference/User's Guide - Page 23
procedure using WordPad on Windows XP as an example. Note • The way to display the printer properties dialog box differs according to the application software. Refer to the manual of each application software. 1. From the [File] menu, select [Print]. 2. Select this printer as the printer to be used - Oki B6300n | B6200/6300 Technical Reference/User's Guide - Page 24
7. From [Output Size], select the envelope size. 8. If necessary, set [Turn Image by 180deg] and then click [OK]. 9. Click [Print] in the [Print] dialog box to start printing. 20 2 Printing - Oki B6300n | B6200/6300 Technical Reference/User's Guide - Page 25
] tab. This section explains the procedure using WordPad on Windows XP as an example. Note • The way to display the printer properties dialog box differs according to the application software. Refer to the manual of your respective application software. • Printing transparencies continuously may - Oki B6300n | B6200/6300 Technical Reference/User's Guide - Page 26
6. From [Paper Size], select the size of the original document. 6 7 7. From [Output Size], select the size of the transparency, and then click [OK]. 8. Click [Print] in the [Print] dialog box to start printing. 22 2 Printing - Oki B6300n | B6200/6300 Technical Reference/User's Guide - Page 27
custom size paper such as long paper. The paper sizes that can be set on this printer are as follows: n For tray 1 n For trays 2 - 4 Long edge: 127 : 98 to 216 mm (3.8" to 8.5") Important • Print quality on the part of the paper that extends beyond 356 mm cannot be guaranteed. Loading Custom - Oki B6300n | B6200/6300 Technical Reference/User's Guide - Page 28
width paper. On the printer driver, set the custom size in the [Custom Paper Size] dialog box. This section explains the procedure using Windows XP as an example. Note • For Windows NT 4.0/Windows 2000/Windows XP, only users with administrator's rights can change the settings. Users without the - Oki B6300n | B6200/6300 Technical Reference/User's Guide - Page 29
under [Change Setting For Windows XP as an example. Note • The way to display the printer properties dialog box differs according to the application software. Refer to the manual of your respective application software. 1. From the [File] menu, select [Print]. 2. Select this printer as the printer - Oki B6300n | B6200/6300 Technical Reference/User's Guide - Page 30
3. Click the [Tray/Output] tab. 4. Select the appropriate tray from [Paper Source]. 4 5. Click the [Basic] tab. 6. From [Paper Size], select the size of the original document. 6 7 7. From [Output Size], select the registered custom size, and then click [OK]. 8. Click [Print] in the [Print] dialog - Oki B6300n | B6200/6300 Technical Reference/User's Guide - Page 31
You can also store the print data in the printer without attaching a password. By storing frequently-used data in the printer, you can print the data out by just operating this printer, without sending them from the computer again and again. Send data Store in printer Use control panel to output - Oki B6300n | B6200/6300 Technical Reference/User's Guide - Page 32
Windows XP as an example. The procedure is the same for other OSs. Note • The way to display the printer properties dialog box differs according to the application software. Refer to the manual of your respective application software. 1. From the [File] menu, select [Print]. 2. Select this printer - Oki B6300n | B6200/6300 Technical Reference/User's Guide - Page 33
Printing will start. 9. Press the button when printing has completed. Note • The user ID displayed (up to eight characters) is the [User ID] set in the [Secure Print] dialog box of the [Basic] tab of the printer driver. • For the password, enter the [Password] set in the [Secure Print] dialog - Oki B6300n | B6200/6300 Technical Reference/User's Guide - Page 34
installed, you can use the proof print feature. Important • The hard disk may be damaged and erase important data saved in the hard disk. We recommend you back up your data using the control panel Send data Store in printer If result is not OK Stop printing using the control panel 30 2 Printing - Oki B6300n | B6200/6300 Technical Reference/User's Guide - Page 35
print data. At the Computer This section explains the procedure using WordPad on Windows XP as an example. Note • The way to display the printer properties dialog box differs according to the application software. Refer to the manual of your respective application software. 1. From the [File] menu - Oki B6300n | B6200/6300 Technical Reference/User's Guide - Page 36
Control Panel This section explains the procedure to print and delete data stored in the printer by Proof Print. 1. Press the < > button. MENU> button. Note • The user ID displayed (up to eight characters) is the [User ID] set in the [Proof Print] dialog box of the [Basic] tab of the printer driver - Oki B6300n | B6200/6300 Technical Reference/User's Guide - Page 37
send the data for printing. Registering Delayed Print The procedure to configure Delayed Print is as follows. This section explains the procedure using WordPad on Windows XP as an example. The procedure is the same for other OS. 1. From the [File] menu, select [Print]. 2. Select this printer as the - Oki B6300n | B6200/6300 Technical Reference/User's Guide - Page 38
of the document to be printed will become the Document Name. However, if the printer cannot recognize a document name, it will become the date/time (e.g. 09/03 or printed. 6. After the document is deleted or printed, press the button. Note • The document name displayed (up to 12 characters) - Oki B6300n | B6200/6300 Technical Reference/User's Guide - Page 39
printer for printing without using the printer driver. As the print data is sent directly to the printer, the printing process is simpler than printing with the printer driver port on the printer. Refer to • "Network/Port" (P. 62) Target OS Windows NT 4.0/Windows 2000/Windows XP Printing PDF File - Oki B6300n | B6200/6300 Technical Reference/User's Guide - Page 40
" (P. 117) for details on checking the web browser settings. 3. Click [Login] to login to the OkiWebRemote. Note • The user name (administrator's name) for login to the OkiWebRemote is fixed at "root". And the password is the last six characters of the MAC address (factory default). 36 2 Printing - Oki B6300n | B6200/6300 Technical Reference/User's Guide - Page 41
• Print features that are not set here will be printed according to the following settings at the printer receiving the data: • TIFF file: The logical printer value set at [Printer] > [Printer Config] > [TIFF] > [Memory Settings] of OkiWebRemote. • PDF file: Value set at [PDF] on the control panel - Oki B6300n | B6200/6300 Technical Reference/User's Guide - Page 42
Electronic Mail - E-mail Printing When the hard disk (optional) has been installed and the printer is connected to a network, enabling it to receive e-mails via TCP/IP communication, e-mails can be sent from the computer to this printer. Printing of e-mail contents and TIFF or PDF attachments can be - Oki B6300n | B6200/6300 Technical Reference/User's Guide - Page 43
printer to reboot. • Select the [Enable] at [Maintenance] > [Services Option] > [Receive E-mail] and switch off/on the printer server address automatically from the DHCP server. • Manual* • DHCP DNS Address Set the DNS server (hyphen). *: Default Required settings for the Receiving Protocol SMTP POP3 - - Oki B6300n | B6200/6300 Technical Reference/User's Guide - Page 44
*: Default Item Item to be set Description Value Required settings for the and "_" (underscore). POP User Set the password for POP User. Up to 64 alphanumeric - Password Enter the password again in characters can be entered. [Confirm Password]. SMTP Select the [POP before SMTP] • - Oki B6300n | B6200/6300 Technical Reference/User's Guide - Page 45
• PDF file created by Adobe Acrobat 4 and Adobe Acrobat 5 (except one part of the features added by PDF1.4) • TIFF file Note • The PDF files file in this printer, refer to "2.8 Direct Printing of PDF Files" (P. 35). • For details on the format of the TIFF file supported by this printer, refer to " - Oki B6300n | B6200/6300 Technical Reference/User's Guide - Page 46
POP, always apply an exclusive e-mail account for the printer. Using a common e-mail account shared with other users will result in errors. • When the internet connection speed is slow, it takes time to receive huge data such as image data. • There are also providers that allow reception of e-mails - Oki B6300n | B6200/6300 Technical Reference/User's Guide - Page 47
that is not recommended, contact our Printer Support Desk. Usable Paper The types of paper that can be used on this printer are as follows. When printing size settings be done on the control panel and the printer driver. *3: Print quality on the part of the paper that extends beyond 356 mm cannot be - Oki B6300n | B6200/6300 Technical Reference/User's Guide - Page 48
Standard Paper The following table shows the standard paper for this printer. Paper name FX P XEROX 4024 XEROX 4200 RX 80 (3R 91720) Weight 64 g/m2 (17 lb) 75 g/m2 (20 lb) 75 g/m2 (20 lb) 80 g/m2 (21.3 lb) Paper type Paper characteristics and caution on usage Plain Plain - Oki B6300n | B6200/6300 Technical Reference/User's Guide - Page 49
following types of paper can be used for printing on this printer. These types of paper are called special media. Paper name special media, such as heavyweight not listed in the table, contact our Printer Support Desk. • For details on printing transparencies and envelopes, refer to "2 Printing" - Oki B6300n | B6200/6300 Technical Reference/User's Guide - Page 50
color transparencies (example: V556, V558, V302) • Paper exclusively for ink-jet printer use • Paper that is too thick or thin • Paper that has been fibrous paper • If acid paper is used, the characters might appear fuzzy. Replace it with alkaline paper. • Envelopes that are not flat or have metal - Oki B6300n | B6200/6300 Technical Reference/User's Guide - Page 51
Storing and Handling Paper Even for suitable papers, poor storage conditions may lead to a change in the paper quality, paper jams, poor print quality and machine breakdown. Take note of the following points when storing paper: • Store paper in the - Oki B6300n | B6200/6300 Technical Reference/User's Guide - Page 52
4. Hold the grip of the paper tray and pull its extendable part to the front until it reaches its maximum. 5. Squeeze the length guide and slide it to the desired paper size (1). Squeeze the right width guide and slide it to the desired paper size (2). 6. Load the paper with the side to be printed - Oki B6300n | B6200/6300 Technical Reference/User's Guide - Page 53
printer driver and select a paper type for [Specify Paper Type] and [Auto] for [Paper Source] on the [Tray/Output] tab for printing, this printer automatic tray selection, an error message prompting for replenishment of paper will be displayed. You can configure the printer not to display this - Oki B6300n | B6200/6300 Technical Reference/User's Guide - Page 54
panel. You may also need to set it on the printer driver, depending on the paper size. This section explains how to set MENU> button to display the Menu screen. 2. Press the < > or < > button until [Admin Menu] is displayed, then press the < > button. 3. Press the < > or < > button until [Printer - Oki B6300n | B6200/6300 Technical Reference/User's Guide - Page 55
in the trays. Otherwise, image quality cannot be processed accurately. Toner may not fuse properly on the paper, resulting in dirty and poor quality printouts. • Changes in paper type settings on the printer driver are not reflected in this printer. Refer to • Paper and paper types that can be - Oki B6300n | B6200/6300 Technical Reference/User's Guide - Page 56
set the specific items for each print mode. The common menu has the following structure: • Common menu > Menu item > Item > Candidate value The following diagram shows some parts of the common menu structure. Menu Meter Reading Admin Menu Network/Port Parallel Meter 1 Meter 2 Meter 3 Port Status - Oki B6300n | B6200/6300 Technical Reference/User's Guide - Page 57
HP-GL, and HP-GL/2 emulation modes, refer to each emulation settings guide. The [Report/List] menu is used to print and check the internal data of this printer such as the emulation mode settings, system settings, error history, job history, font information, and the total count of outputs. Refer - Oki B6300n | B6200/6300 Technical Reference/User's Guide - Page 58
Changing Menu Settings Basic Operations Press one of the following buttons to display the menu screen or set the printer by browsing though each menu structure. Ready to print 1. To display the menu screen, press the button at the print screen. Menu Print Language 2. To move between items, - Oki B6300n | B6200/6300 Technical Reference/User's Guide - Page 59
: Changing the Low Power/Sleep Mode Settings This section describes how to set the common menu. In this example, you set the transitional time to the low power mode to 15 minutes and the time to the sleep mode to 30 minutes. Ready to print 1. Press the button to display the Menu screen. Menu - Oki B6300n | B6200/6300 Technical Reference/User's Guide - Page 60
Continued from previous page Low Power Mode Enable 9. Press the button. This confirms the low power mode setting and "*" is displayed. Low Power Mode Enable * 10. Press the < > button to return to [Low Power Mode]. System Settings Low Power Mode 11. Press the < > or < > button until [ - Oki B6300n | B6200/6300 Technical Reference/User's Guide - Page 61
. Press the button. This sets the transition time to the sleep mode and "*" is displayed. Sleep Mode Timer 30 Mins * 25. Press the button. Ready to print 4.1 Overview of the Common - Oki B6300n | B6200/6300 Technical Reference/User's Guide - Page 62
be set with this menu, refer to the HP-GL, HP-GL/2 Emulation Settings Guide. PDF Makes settings for printing PDF file by sending it directly to a printer. Refer to • "2.8 Direct Printing of PDF Files" (P. 35) Quantity Specifies the copies to be printed between 1 to 999. The default is [1 Sets]. Note - Oki B6300n | B6200/6300 Technical Reference/User's Guide - Page 63
Password * No. 1, to 4 of 4 are available (refer to P. 83). If a password has been set for a PDF file, specify the password here in advance. Printing will be performed only when the password ] under [Printer Settings] of Admin Menu. The default of [Tray installed. 4.2 Description of Menu Items 59 - Oki B6300n | B6200/6300 Technical Reference/User's Guide - Page 64
default) [Rear Tray] [OffsetCatchTray] Note • [Rear Tray] is available only when the printer is B6300. • [OffsetCatchTray] is available only when the optional offset catch tray is installed (the number of lines per form). This default setting varies from [64] to [60] depending on the countries. You - Oki B6300n | B6200/6300 Technical Reference/User's Guide - Page 65
ASCII code corresponding to the hexadecimal notation format in order to check the data contents. The default is [Disable]. Draft Mode Specifies whether to print in draft mode. The default is [Disable]. Line Termination Sets the line termination. The default is [Off]. 4.2 Description of Menu Items - Oki B6300n | B6200/6300 Technical Reference/User's Guide - Page 66
from a computer as the specified data type. n PJL *2 (refer to P. 83) This printer supports PJL commands that are independent from any printer languages. The PJL commands are used to control print jobs and are required for printing using a printer driver. In this menu, specify whether to enable or - Oki B6300n | B6200/6300 Technical Reference/User's Guide - Page 67
from the computer as the specified data type. n PJL*2 (refer to P. 83) This printer supports PJL commands that are independent from any printer languages. The PJL commands are used to control print jobs and are required for printing using a printer driver. In this menu, specify whether to enable or - Oki B6300n | B6200/6300 Technical Reference/User's Guide - Page 68
from a computer as the specified data type. n PJL *2 (refer to P. 83) This printer supports PJL commands that are independent from any printer languages. The PJL commands are used to control print jobs and are required for printing using a printer driver. In this menu, specify whether to enable or - Oki B6300n | B6200/6300 Technical Reference/User's Guide - Page 69
from a computer as the specified data type. n PJL *2 (refer to P. 83) This printer supports PJL commands that are independent from any printer languages. The PJL commands are used to control print jobs and are required for printing using a printer driver. In this menu, specify whether to enable or - Oki B6300n | B6200/6300 Technical Reference/User's Guide - Page 70
from a computer as the specified data type. n PJL *2 (refer to P. 83) This printer supports PJL commands that are independent from any printer languages. The PJL commands are used to control print jobs and are required for printing using a printer driver. In this menu, specify whether to enable or - Oki B6300n | B6200/6300 Technical Reference/User's Guide - Page 71
from a computer as the specified data type. n PJL *2 (refer to P. 83) This printer supports PJL commands that are independent from any printer languages. The PJL commands are used to control print jobs and are required for printing using a printer driver. In this menu, specify whether to enable or - Oki B6300n | B6200/6300 Technical Reference/User's Guide - Page 72
not using or change the memory allocation from [Allocate Memory]. n PJL *2 (refer to P. 83) This printer supports PJL commands that are independent from any printer languages. The PJL commands are used to control print jobs and are required for printing using a printer driver. In this menu, specify - Oki B6300n | B6200/6300 Technical Reference/User's Guide - Page 73
from a computer as the specified data type. n PJL *2 (refer to P. 83) This printer supports PJL commands that are independent from any printer languages. The PJL commands are used to control print jobs and are required for printing using a printer driver. In this menu, specify whether to enable or - Oki B6300n | B6200/6300 Technical Reference/User's Guide - Page 74
from a computer as the specified data type. n PJL *2 (refer to P. 83) This printer supports PJL commands that are independent from any printer languages. The PJL commands are used to control print jobs and are required for printing using a printer driver. In this menu, specify whether to enable or - Oki B6300n | B6200/6300 Technical Reference/User's Guide - Page 75
protocol used for SNMP. IPX, UDP, or both protocols can be specified. The default is [UDP]. Note • When using UDP, both the IP addresses of a computer and the printer are required. • Refer to the application's manual for the protocol to be used: IPX or UDP. n Community (R) * No.1 to 3 characters - Oki B6300n | B6200/6300 Technical Reference/User's Guide - Page 76
of WINS server that is required for using WINS (Windows Internet Name Service). If you do not set it to automatically retrieve the IP address, contact your network administrator for the addresses you need to set manually. The default is [On]. Note • Changing from [On] to [Off] may display the IP - Oki B6300n | B6200/6300 Technical Reference/User's Guide - Page 77
check the addresses that has been automatically obtained or to set the addresses manually. Enter the address in the format of xxx.xxx.xxx.xxx. Frame Type Sets the operational frame type of IPX/SPX. [Auto] (default) Select this to automatically set the frame type. [Ethernet II] Select Menu Items 73 - Oki B6300n | B6200/6300 Technical Reference/User's Guide - Page 78
Tone Specifies whether to turn on the alarm when an error occurs in the printer. The default is [Off]. You cannot adjust the sound volume. Panel Settings *3 (refer to P. 83) n Panel Lock Specifies whether to limit the menu operations with a password. Selecting [On] requires the operator to enter the - Oki B6300n | B6200/6300 Technical Reference/User's Guide - Page 79
default is [10 Mins]. Refer to • "Example: Changing the Low Power/Sleep Mode Settings" (P. 55) Auto Job History Specifies whether to automatically print information about the printed data that has been processed in the printer banner sheet is output from trays 1 to 4. 4.2 Description of Menu Items 75 - Oki B6300n | B6200/6300 Technical Reference/User's Guide - Page 80
printing after the replacement time has passed may affect the print image quality and the printer performance. It is recommended to install a new drum/toner cartridge. mm/inch Specifies the unit that is used on the control panel from [Millimeter (mm)] and [Inch (")]. This default setting varies - Oki B6300n | B6200/6300 Technical Reference/User's Guide - Page 81
this to replace the paper with the nearest size paper before printing. This may shrink the images automatically as required. Note • If a computer issues the instruction about paper selection, it overwrites this setting. Paper Type Specifies the paper type to be loaded in trays. The default is [Plain - Oki B6300n | B6200/6300 Technical Reference/User's Guide - Page 82
of 1 mm (0.1"). Paper Name You can change Customs 1 to 5 displayed in [Paper Priority installed. [Offset Per Set] (default data. [Auto] (default) Select this mode when you want to use our PostScript driver. Selecting this will print on the paper loaded in the tray specified by the printer driver - Oki B6300n | B6200/6300 Technical Reference/User's Guide - Page 83
[Output Size] setting of the each print mode to [A4] or [8.5×11"]. This default setting varies depending on the country where the printer is sold. Allocate Memory*3 (refer to P. 83) [Allocate Memory] menu is used to change the capacity of the memory for each interface and the form memory. In this - Oki B6300n | B6200/6300 Technical Reference/User's Guide - Page 84
speed of a computer may not be changed due to the data volume sent from a computer. n Parallel, Serial, NetWare Memory, IPP Memory, USB Memory, Port9100 Memory Specify the memory capacity between 64 and 1024 KB in increments of 32 KB. The default is [64 K] for parallel and USB memories and - Oki B6300n | B6200/6300 Technical Reference/User's Guide - Page 85
. [IPP Memory] is displayed when the hard disk (optional) is not installed. Init/Del Data [Init/Del Data] menu is used to delete data such as the printer setting values stored in the NV memory and the form data registered in this printer. It is also used to initialize the hard disk and meter reports - Oki B6300n | B6200/6300 Technical Reference/User's Guide - Page 86
when the hard disk (optional) is installed. Compact Flash Select this to initialize the printer meter reports. Initialization will change the meter count to "0". Refer to • "Initializing Print Meter Data the fonts for PCL emulation. All the downloaded PCL fonts are deleted. Stored Documents Select - Oki B6300n | B6200/6300 Technical Reference/User's Guide - Page 87
and the printer detects a printer language that is not installed in this printer or an unsupported printer language, the data will be deleted. *2 If a printer language that is not installed in this printer is specified by PJL commands, the data will be deleted. *3 When you are changing the candidate - Oki B6300n | B6200/6300 Technical Reference/User's Guide - Page 88
can be set when accessories are installed. (1): Hard Disk (2): Duplex Unit (3): Letter/A4 Universal Tray (4): Offset Catch Tray (5): Rear Tray (6): Network Software Kit (7): Compact Flash Disk (Only when the network function is optional) • * indicates default value. Continued on next page - Oki B6300n | B6200/6300 Technical Reference/User's Guide - Page 89
Continued from previous page Continued on next page 4.3 Menu list 85 - Oki B6300n | B6200/6300 Technical Reference/User's Guide - Page 90
Continued from previous page 86 4 Settings on the Control Panel - Oki B6300n | B6200/6300 Technical Reference/User's Guide - Page 91
From P. 85 From P. 85 4.3 Menu list 87 - Oki B6300n | B6200/6300 Technical Reference/User's Guide - Page 92
From P. 85 88 4 Settings on the Control Panel - Oki B6300n | B6200/6300 Technical Reference/User's Guide - Page 93
Troubleshooting dealers or our Printer Support Desk. Following part marked with and open the cover of the fuser unit (2) and remove any jammed paper. Cover A When the optional offset catch tray is installed, fold the tray first before opening cover A. When a message to remove the drum/toner cartridge - Oki B6300n | B6200/6300 Technical Reference/User's Guide - Page 94
holding the drum/toner cartridge by the grip, remove it from the printer (1). 2. Turn the roll as shown in the diagram and remove any jammed paper inside (2). 3. Return the drum/toner cartridge and cover A to their original positions. Note • When the optional offset catch tray is installed, close - Oki B6300n | B6200/6300 Technical Reference/User's Guide - Page 95
Occur Before treating the problem as a machine breakdown, refer to the following table and check the printer condition again. WARNING • Never open or remove machine covers that are secured with screws unless specifically instructed in the user guide. A high voltage component can cause electric - Oki B6300n | B6200/6300 Technical Reference/User's Guide - Page 96
and rectify the error. Refer to • "5.4 Message List" (P. 99) An error that you cannot rectify yourself has occurred. Record the displayed error message or error code, switch off the power, pull out the power plug from the outlet, and then contact our Printer Support Desk. 92 5 Troubleshooting - Oki B6300n | B6200/6300 Technical Reference/User's Guide - Page 97
Download the necessary fonts when using PostScript. Did you change the TrueType font settings to printer fonts? Change to TrueType font printing for [Specify Font] on the [Detailed Settings] tab of the printer driver buffer size according to the volume of data to be printed. You are also recommended - Oki B6300n | B6200/6300 Technical Reference/User's Guide - Page 98
printer on a stable surface. Refer to • Setup and Quick Reference Guide Safety Notes Are the paper tray guides set in the correct positions? Set the length guide and right width guide in the correct positions. Refer to • "Loading Paper in a Paper Tray" (P. 47) Have you used any picture papers? Clean - Oki B6300n | B6200/6300 Technical Reference/User's Guide - Page 99
ends of the fuser unit. The wrinkles can be reduced. Strange noise. After printing the envelope, remember to return the levers to their original positions. Is the printer placed on a flat location? Place the printer on a stable surface. Refer to • Setup and Quick Reference Guide Safety Notes Is - Oki B6300n | B6200/6300 Technical Reference/User's Guide - Page 100
Help for the printer driver Levers on both sides of the fuser unit are raised. Open cover B of this printer and push down the levers at both ends of the fuser unit. Black spots or streaks are printed. The drum/toner cartridge is defective or damaged. Replace with a new drum/toner cartridge. Dirt - Oki B6300n | B6200/6300 Technical Reference/User's Guide - Page 101
Refer to • "Usable Paper" (P. 43) The drum/toner cartridge is defective or damaged. Replace with a new drum/toner cartridge. Refer to • "6.1 Replacing the Drum/Toner Cartridge" (P. 111) This may be due to breakdown of high voltage power. Contact our Printer Support Desk. Multiple sheets of paper are - Oki B6300n | B6200/6300 Technical Reference/User's Guide - Page 102
Loading Paper" (P. 47) The drum/toner cartridge is defective/damaged or there is no more toner inside the cartridge. Replace with a new drum/toner cartridge. Text or images are printed at an angle. Refer to • "6.1 Replacing the Drum/Toner Cartridge" (P. 111) The paper tray guides are not set in - Oki B6300n | B6200/6300 Technical Reference/User's Guide - Page 103
The hard disk will be initialized. Important • Initializing the hard disk will delete data for registered forms, logos, secure print, and PostScript downloaded fonts. When the hard disk (optional) is installed, the printer assumes that data in the hard disk is corrupted if power is cut off when the - Oki B6300n | B6200/6300 Technical Reference/User's Guide - Page 104
Refer to • "List of Error Codes" (P. 102) Paper of the type specified under [Paper Type] in the printer driver is not loaded in the trays printer cannot receive any print data from the computer while it is offline. Paper jam has occurred around the printer fuser unit. Open cover A or B of the printer - Oki B6300n | B6200/6300 Technical Reference/User's Guide - Page 105
and change the output destination to the rear tray. The printer is ready to receive print data from computers. An error has occurred in the printer. Switch off the power. After the control panel display is turned off, switch on the power again. If the error code appears again, check the error code - Oki B6300n | B6200/6300 Technical Reference/User's Guide - Page 106
even when this message is displayed. It is about time to replace parts. Contact and inform our Printer Support Desk of the error code "010-420". Paper jam has occurred at the bottom of the drum/toner cartridge. Remove the drum/ toner cartridge and remove the jammed paper. Refer to • "Inside Cover - Oki B6300n | B6200/6300 Technical Reference/User's Guide - Page 107
printer driver and [Auto] for [Paper Size] in trays 1 to 4 on the control panel. Check the print parameters. Time to replace parts. Contact and inform our Printer Support Desk or dealers of the error code "010 Failed to login to POP3 server. Check whether the POP3 user name and password are correct - Oki B6300n | B6200/6300 Technical Reference/User's Guide - Page 108
it contains features that are not supported in this printer. Open PDF file using Adobe Acrobat Reader and select [Print] from the [File] menu to print. Cannot print due to insufficient hard disk space. Reduce the number of print pages such as splitting the print data or printing one copy at a time - Oki B6300n | B6200/6300 Technical Reference/User's Guide - Page 109
check box of the printer driver. Received data has exceeded the spool size of HP-GL and HP-GL/2. The printer may not be able to determine the original size accurately. Increase the auto layout memory allocation for HP-GL and HP-GL/2 or install the hard disk (optional). Command error in HP-GL and - Oki B6300n | B6200/6300 Technical Reference/User's Guide - Page 110
feeding tray to its normal status. Or, change the banner sheet feeding tray at the control panel. Refer to • "System Settings" (P. 74) E-mail attachment error in received e-mails. Check the attachment. Refer to • "2.10 Printing via Electronic Mail - E-mail Printing" (P. 38) 106 5 Troubleshooting - Oki B6300n | B6200/6300 Technical Reference/User's Guide - Page 111
how to identify the cause and fix an error when a problem occurs in the TCP/IP environment. For the troubles that occur in other environments, refer to the Network Print Environment User Guide. For Windows 95/Windows 98/Windows Me n When the printer is not printing This section explains how to - Oki B6300n | B6200/6300 Technical Reference/User's Guide - Page 112
0/Windows 2000/Windows XP n When the printer is not printing Cause Verification Action Incorrect IP address. When [LPD Spool] is set to [Memory], the print data sent from a computer in a single print instruction has exceeded the upper limit of the receiving capacity. An irrecoverable error has - Oki B6300n | B6200/6300 Technical Reference/User's Guide - Page 113
"no data" or "the server has returned invalid or unrecognizable response". Refer to • On-line Help for the web browser Wait for a while as instructed. If the problem persists, refresh the Web browser. If nothing happens, check if the printer is working properly. Are you using the supported OS and - Oki B6300n | B6200/6300 Technical Reference/User's Guide - Page 114
explains how to fix the troubles when the mail notification services and E-mail Printing features are used. Symptom Reason/Action Cannot perform E-mail printing. Check the following settings in [Maintenance] or [Network] of OkiWebRemote. • Is the printer e-mail address specified? • Is [Enable - Oki B6300n | B6200/6300 Technical Reference/User's Guide - Page 115
It is recommended to install a new drum/toner cartridge. • You can set whether to stop printing when the drum/toner cartridge is due for replacement. For details, refer to "System Settings" (P. 74). • Before ordering a new drum/toner cartridge, check the product code listed in "Appendix A.2 Product - Oki B6300n | B6200/6300 Technical Reference/User's Guide - Page 116
Replacing the Drum/Toner Cartridge 1. Remove any output paper and open cover A. Note • When the offset catch tray (optional) is installed, fold the tray first before opening cover A. Important • Do not touch any parts inside the printer. 2. Hold the drum/toner cartridge by the grip and pull it out - Oki B6300n | B6200/6300 Technical Reference/User's Guide - Page 117
5. Hold the drum/toner cartridge by the grip and insert it into the slot inside the printer. Important • Do not touch any parts inside the printer. • Ensure that the drum/toner cartridge is firmly set. • After opening cover A, remove any dust or stains inside the printer with a dry clean cloth. 6. - Oki B6300n | B6200/6300 Technical Reference/User's Guide - Page 118
not actually installed. Prints information on printing result, such as whether data from the errors are printed in the [Job Status] column. For details on the error description, refer to "List of Error Codes" (P. 102). Prints information of up to the latest 50 errors that occurred in this printer - Oki B6300n | B6200/6300 Technical Reference/User's Guide - Page 119
in the printer when using the Secure Print/Proof Print/Delayed Print feature. This list can be printed when the hard disk (optional) has been installed. Refer /2® Settings List] and [HP-GL/ 2® Logical Printers/Stored Jobs List], refer to the Emulation Settings Guides. 6.2 Printing Reports/Lists 115 - Oki B6300n | B6200/6300 Technical Reference/User's Guide - Page 120
Logical Printers List • PDF Settings List • PCL Settings List • PCL Form List 4. Press the button. The selected report/list will be printed. Note • Reports/lists cannot be output to the rear tray. When the rear tray is installed, lower the rear output tray lever. 5. Press the - Oki B6300n | B6200/6300 Technical Reference/User's Guide - Page 121
is not available when the printer is used as a local printer. Computer OSs • Microsoft® Windows® 95 Operating System (Service Pack 1 or later) • Microsoft® Windows® 98 Operating System • Microsoft® Windows® Me Operating System • Microsoft® Windows NT® Workstation 4.0 (Service Pack 4 or later - Oki B6300n | B6200/6300 Technical Reference/User's Guide - Page 122
it or the setting that checks it every time Internet Explorer starts is selected. Setting the Printer To use OkiWebRemote, the IP address of this printer must be set and [OkiWebRemote] activated (default: [Enable]). When [OkiWebRemote] is disabled, set it to [Enable] on the control panel. Refer to - Oki B6300n | B6200/6300 Technical Reference/User's Guide - Page 123
each settings of the printer, press [Login] to login to this printer. Note • The user name (administrator's name) for login to the printer is fixed at "root". And the password is the last six characters of the MAC address (factory defaults). 6.3 Checking/Managing the Printer Status on the Computer - Oki B6300n | B6200/6300 Technical Reference/User's Guide - Page 124
be used in this printer. This will limit IP address used for receiving print data. 1. Click [Maintenance]. 2. Click [IP Filtering] from the left menu. 3. Select the [ and the [IP Mask] is 255.255.255.0, the IP address for receiving print data is 129.249.110.* (* is from 1 to 254). This means that IP - Oki B6300n | B6200/6300 Technical Reference/User's Guide - Page 125
Mail Notice Service are listed below. Types of information Description Job Completion Notifies the status of print jobs (completed, cancelled or confirm) from the computer. (This is only used for the PCL printer driver.) Regular Notice Notifies the conditions leading to errors that need - Oki B6300n | B6200/6300 Technical Reference/User's Guide - Page 126
the PCL printer driver in order to receive e-mails regarding print job results. This section explains the procedure using Windows XP as an example. 1. Click [Start] on the task bar, then select [Printers and Faxes]. 2. Click the icon of this printer, and then select [Properties] from the [File] menu - Oki B6300n | B6200/6300 Technical Reference/User's Guide - Page 127
Black/White Printing Meter 2 Normally not used. Meter 3 Color printing Not available on this printer. The following procedure shows how to check the meter. 1. Press the button to display the Menu screen. 2. Press the < > or < > button until [Meter Reading] is displayed and then press - Oki B6300n | B6200/6300 Technical Reference/User's Guide - Page 128
administrator name is set at [Specify Job Owner] on the printer driver. When the job owner is not specified, or when the Data" (P. 81). For details on the procedure, refer to "Initializing Print Meter Data" (P. 125). How to Print the Print Meter Report 1. Press the button to display the Menu - Oki B6300n | B6200/6300 Technical Reference/User's Guide - Page 129
machine before accessing the interior of the machine for cleaning, maintenance, or fault clearance. Access to a live machine's interior can cause electric shock. Cleaning the Exterior Clean the exterior of the printer about once a month. Wipe the parts with a wet but wellwrung soft cloth. Then wipe - Oki B6300n | B6200/6300 Technical Reference/User's Guide - Page 130
Cleaning the Interior After clearing paper jams or replacing the drum/toner cartridge, inspect the inside of the printer before closing cover A. CAUTION • Never touch a machine immediately, and contact our Printer Support Desk. • Remove any remaining pieces of paper. • Remove any dust or stains with - Oki B6300n | B6200/6300 Technical Reference/User's Guide - Page 131
in the interior of this printer (two locations, total of four), tray module (one location) and paper tray (one location). Feed roll Inside of machine (two locations) Tray module (one location) Paper tray (one location) Open cover A and after removing the drum/toner cartridge, clean the feed roll - Oki B6300n | B6200/6300 Technical Reference/User's Guide - Page 132
1. Pull the paper tray out of the printer. 2. While pushing the retard part (see right diagram) down (1), widen the tab on the feed roll to loosen it (2) and then slowly remove the feed roll from the shaft of the paper tray (3). 3. Wipe the rubber parts with a wet but wellwrung soft cloth. 4. Turn - Oki B6300n | B6200/6300 Technical Reference/User's Guide - Page 133
facing the back, should firmly grip the recessed areas on the bottom part of both sides of the machine. Never try to lift the machine by unit (optional) or Letter/A4 universal tray (optional) has been installed, uninstall it before moving the printer. If these are not fixed securely to the printer - Oki B6300n | B6200/6300 Technical Reference/User's Guide - Page 134
A. Important • Do not touch any parts inside the printer. 7. Hold the drum/toner cartridge by the grip and pull it out slowly. Important • It is necessary to uninstall the drum/toner cartridge. If you move the printer with the drum/toner cartridge installed, the toner may spill out inside of the - Oki B6300n | B6200/6300 Technical Reference/User's Guide - Page 135
22°C, 72°F) *12 seconds or less for the printer model that the network function is optional (when the options are not installed). Paper feed from trays 1 to 4*1 B6200: resolution: 1200 dpi (47.2 dots/mm), 600 dpi (23.6 dots/mm) Data processing resolution: 1200 dpi (47.2 dots/mm), 600 dpi (23.6 dots/ - Oki B6300n | B6200/6300 Technical Reference/User's Guide - Page 136
(for monochrome printing), heavyweight 1 (such as envelopes, labels), heavyweight 2 Duplex unit (optional): Plain paper of 60 - 190 g/m2 (16 - 50 lb bond . B6200: Standard: Center output tray: About 250 sheets (face down) B6300: Standard: Center output tray: About 500 sheets (face down) Rear tray - Oki B6300n | B6200/6300 Technical Reference/User's Guide - Page 137
but the switch is switched off.) Dimensions B6200: 421.8 (W) × 454.6 (D) × 324.3 (H) mm (16.6" x 17.9" x 12.8") B6300: 421.8 (W) × 465.4 (D) × 404.3 (H) mm (16.6" x 18.3" x 15.9") Weight (including drum/toner cartridge) B6200: 20.4 kg (45 lb) B6300: 22.6 kg (49.8 lb) A.1 Specifications 133 - Oki B6300n | B6200/6300 Technical Reference/User's Guide - Page 138
Printable Area Top edge 4 mm Left 4 mm Printable area Unprintable area Right 4 mm 4mm = 0.16" Bottom edge 4 mm 134 A Appendix - Oki B6300n | B6200/6300 Technical Reference/User's Guide - Page 139
A.2 Product Code List Printers Product code B6200 Product name B6200 B6200 B6200 B6200 B6300 B6300 Reference Printing speed: 24-ppm Country: America Voltage: 120 V Second tray: 250-sheet Output tray: 250-sheet Network function: Optional 2-sided printing function: Optional Printing - Oki B6300n | B6200/6300 Technical Reference/User's Guide - Page 140
Product code B6300 Product name B6300 B6300 Reference Printing speed: 34-ppm Country: Europe Voltage: 220 - 240 V Second tray: 550-sheet Output tray: 500-sheet Network function: Optional 2-sided printing function: Optional - Oki B6300n | B6200/6300 Technical Reference/User's Guide - Page 141
. Choose the type of duplex unit appropriate to your printer. Refer to • For details about installing the duplex unit: Setup and Quick Reference Guide Installing Duplex Unit Allows you to shift the output position for each job (offset output). Can be installed to B6300. Refer to • For details about - Oki B6300n | B6200/6300 Technical Reference/User's Guide - Page 142
of the consumables first before contacting our Printer Support Desk or dealers to order. Regular Replacement Parts The regular replacement part is as follows. Product code Product name Maintenance kit Reference Maintenance kit includes the fuser unit, transfer roll cartridge, and feed roll 138 - Oki B6300n | B6200/6300 Technical Reference/User's Guide - Page 143
of switching on/off the power of the printer. • The drum/toner cartridge (6K) is provided with the printer. The drum/toner cartridge (6K) cannot be ordered separately. Life of Regular Replacement Parts Product name Fuser unit Transfer roll cartridge Feed roll Life-size About 200,000 sheets - Oki B6300n | B6200/6300 Technical Reference/User's Guide - Page 144
may not be sufficient depending on the print data. Install sufficient memory to handle large jobs. Note • The required memory capacity differs according to the type of printer driver. • The memory capacities shown in the table are factory defaults. Required memory capacity differs according to the - Oki B6300n | B6200/6300 Technical Reference/User's Guide - Page 145
PostScript printer driver Memory capacity 1 sided print (Unit: MB) Memory capacity 2 sided print (Unit: MB) Print mode Output size Possible output Guaranteed*1 output Possible output 600 A5 64 64 64 dpi Letter (8.5" × 11") 64 64 64 A4 64 64 64 Legal (8.5" × 13") 64 64 64 - Oki B6300n | B6200/6300 Technical Reference/User's Guide - Page 146
when the printer is in use. • When the hard disk is installed, the hard disk can be specified as a storage location for print data from LPD, SMB and IPP. PCL, ESC/P, HP-GL and HP-GL/2 forms are stored in the hard disk. The storage location for the forms cannot be changed. • Data that will - Oki B6300n | B6200/6300 Technical Reference/User's Guide - Page 147
as IP address) on computers under NIS (Network Information Service) management. Switching Off the Power Take note of the following points when switching off the power of the printer. When [LPD Spool] is set to [Memory] Data spooled to the printer memory, including those that are being printed, will - Oki B6300n | B6200/6300 Technical Reference/User's Guide - Page 148
may be sent again immediately when the data volume exceeds the receiving capacity. This means that the computer is backing up data. To solve this problem, cancel the print job at the computer. When [LPD Spool] is set to [Off] The printer cannot accept print jobs from two different computers at the - Oki B6300n | B6200/6300 Technical Reference/User's Guide - Page 149
TIFF File Format Supported TIFF formats are as follows. Bit per Sample Photometric Interpretation 1 WhiteIsZero BlackIsZero 4 WhiteIsZero BlackIsZero 8 WhiteIsZero BlackIsZero ITULAB RGB Palette (3) Compression Uncompressed (1) G3 FAX (3) G4 FAX (4) LZW (5) PackBits (32773) Uncompressed - Oki B6300n | B6200/6300 Technical Reference/User's Guide - Page 150
Bit per Sample Photometric Interpretation 8,8,8,8 CMYK (5) 8,8,8 RGB (2) YCbCr (6) ITULAB (10) Compression Uncompressed (1) LZW (5) JPEG (6) JPEG (7) PackBits (32773) Uncompressed (1) LZW (5) JPEG (6) JPEG (7) PackBits (32773) Uncompressed (1) LZW (5) JPEG (6) - Oki B6300n | B6200/6300 Technical Reference/User's Guide - Page 151
the print job includes binary data) DTR Control: Active-High (when the host computer is Windows) Note • Change [Adobe Protocol], [Baud rate], [Stop Bit], and [Parity] as needed. It is necessary to accommodate the port setting of the printer driver to that of the printer. • When doing hardware flow - Oki B6300n | B6200/6300 Technical Reference/User's Guide - Page 152
Settings on the Printer Driver The procedure here explains with Windows XP as an example. 1. Set the port that is used when installing to COM n (n=1, 2, 3,...). 2. After installation, click [Start] on the task bar, then select [Printers and Faxes]. 3. Click the icon of this printer, and then select - Oki B6300n | B6200/6300 Technical Reference/User's Guide - Page 153
CD) with data such as software and graphics stored to be used by a computer. Click To press the mouse button once and then release. In this manual, clicking the network/port settings, memory settings, initialize/delete data and printer settings. It is a menu where common settings can be made in all - Oki B6300n | B6200/6300 Technical Reference/User's Guide - Page 154
driver into the computer system as well as incorporating the network extension card into the printer. In this manual, "install" is mainly used to describe incorporating software into the computer. Interface The part that connects different systems (series). It is often used when describing the - Oki B6300n | B6200/6300 Technical Reference/User's Guide - Page 155
TCP/IP network. The format of an IP address is a 32-bit numeric address written as four numbers separated by periods. IPP A protocol for this unit of job. Local printer In this manual, a printer that is directly connected to a computer via parallel or USB cables is known as a "local printer". Login - Oki B6300n | B6200/6300 Technical Reference/User's Guide - Page 156
/Windows Me, the OKI LPR Utility must be installed. For Windows 2000/Windows XP, Port9100 can be used on the standard TCP/IP port monitor. Print page buffer Location that actually processes and stores print data. Printable area Area of a sheet of paper that can actually be printed on. Printer driver - Oki B6300n | B6200/6300 Technical Reference/User's Guide - Page 157
supports the"Hot Plug" feature (allows connection to be made with power switched on) that can connect the computer and peripherals easily. Web screen In this manual, the screen that displays data using the web browser is known as the "web screen". WINS Abbreviation of Windows Internet Name Services - Oki B6300n | B6200/6300 Technical Reference/User's Guide - Page 158
154 A Appendix - Oki B6300n | B6200/6300 Technical Reference/User's Guide - Page 159
10, 89 cover B 10, 89 cover C 9, 89 cover D 9, 89 D date settings 76 Delayed Print 33 direct printing of PDF files 35 domain list 115 drum/toner cartridge 10, 138, 139 duplex unit 9, 137 E E-mail Printing 38 Error History Report 114 ESC/P Settings List 114 ESC/P User Definition List 115 ESCP 58 155 - Oki B6300n | B6200/6300 Technical Reference/User's Guide - Page 160
Letter/A4 universal tray 9, 137 list of error codes 102 loading paper loading custom size paper 23 loading envelope 18 loading paper in paper tray 47 loading transparencies 21 long size 23 low power mode 14, 74 LPD 64 M Mail Notice Service 121 memory capacity 140 button 11, 84 message list 99 - Oki B6300n | B6200/6300 Technical Reference/User's Guide - Page 161
9, 137 OkiWebRemote 72 procedure 119 settings 117 troubles in use 109 button 11 Online Help (printer driver) 17 optional accessories 137 [Options] tab 16 is printed 97 printed image smudges when rubbed with your finger/the toner is not fixed on the paper 97 printing is light (faded, - Oki B6300n | B6200/6300 Technical Reference/User's Guide - Page 162
buffer capacity 80 regular replacement parts 139 replacing the drum/toner cartridge 111 S Secure Print 27 Serial 63 setting custom paper size 24 setting custom paper size (control panel) 50 setting on the control panel Menu list 84 changing menu settings 54 description of menu items 58 display - Oki B6300n | B6200/6300 Technical Reference/User's Guide - Page 163
priority 77 troubleshooting 89 types of reports/lists 114 U UPnP 71 USB 68 W when moving the printer 129 when paper jams 89 when problems occur 91 cannot print 92, 107, 108 envelope is wrinkled 95 light of indicator is blinking 92 light of indicator is on 92 mail related troubles 110
-
 1
1 -
 2
2 -
 3
3 -
 4
4 -
 5
5 -
 6
6 -
 7
7 -
8
-
9
-
10
-
11
-
12
-
13
-
14
-
15
-
16
-
17
-
18
-
19
-
20
-
21
-
22
-
23
-
24
-
25
-
26
-
27
-
28
-
29
-
30
-
31
-
32
-
33
-
34
-
35
-
36
-
37
-
38
-
39
-
40
-
41
-
42
-
43
-
44
-
45
-
46
-
47
-
48
-
49
-
50
-
51
-
52
-
53
-
54
-
55
-
56
-
57
-
58
-
59
-
60
-
61
-
62
-
63
-
64
-
65
-
66
-
67
-
68
-
69
-
70
-
71
-
72
-
73
-
74
-
75
-
76
-
77
-
78
-
79
-
80
-
81
-
82
-
83
-
84
-
85
-
86
-
87
-
88
-
89
-
90
-
91
-
92
-
93
-
94
-
95
-
96
-
97
-
98
-
99
-
100
-
101
-
102
-
103
-
104
-
105
-
106
-
107
-
108
-
109
-
110
-
111
-
112
-
113
-
114
-
115
-
116
-
117
-
118
-
119
-
120
-
121
-
122
-
123
-
124
-
125
-
126
-
127
-
128
-
129
-
130
-
131
-
132
-
133
-
134
-
135
-
136
-
137
-
138
-
139
-
140
-
141
-
142
-
143
-
144
-
145
-
146
-
147
-
148
-
149
-
150
-
151
-
152
-
153
-
154
-
155
-
156
-
157
-
158
-
159
-
160
-
161
-
162
-
163
 |
 |