Oki B8300n Guide: User's, B8300n (English)
Oki B8300n Manual
 |
View all Oki B8300n manuals
Add to My Manuals
Save this manual to your list of manuals |
Oki B8300n manual content summary:
- Oki B8300n | Guide: User's, B8300n (English) - Page 1
USER'S GUIDE B8300 - Oki B8300n | Guide: User's, B8300n (English) - Page 2
18 Cancelling a print job and deleting print data 19 To delete print data of a reserved job (jobs stored in the printer 19 Loading Paper 20 Loading paper in paper tray 1 20 Changing the paper size in paper tray 1 20 Specifications of paper trays 21 Applicable plain paper 22 Applicable special - Oki B8300n | Guide: User's, B8300n (English) - Page 3
in the duplex module 61 Misfeed in the bypass tray 61 Troubleshooting 62 Duplex module 65 Part names 65 Specifications 65 Loading paper in the bypass tray 66 Setting the printer driver for duplex module, bypass tray and exit tray 67 Troubleshooting the duplex module 68 Mail-bin stacker 69 - Oki B8300n | Guide: User's, B8300n (English) - Page 4
scrap 84 Misfeed in the saddle stitch finisher 85 Stapling position quick reference guide for duplex output 87 Relationship between print image and saddle stitch 88 Printer specifications 89 List of principal printer driver functions 90 List of combination of peripheral devices 91 Notice - Oki B8300n | Guide: User's, B8300n (English) - Page 5
CONTENTS - 4 - Oki B8300n | Guide: User's, B8300n (English) - Page 6
the use of this operation manual. © Copyright Oki 2002. All rights reserved. Reproduction, adaptation or translation without prior written permission is prohibited, except as allowed under copyright laws. Trademark Acknowledgments Microsoft Windows, MS-DOS, and Windows - Oki B8300n | Guide: User's, B8300n (English) - Page 7
the configuration being is installed is the printer unit and the 500-sheet multipurpose tray (B83MP) only. Improper installation may around the machine for servicing and proper ventilation. 80cm 30cm 60cm 60cm A small amount of ozone is produced within the printer during operation. The emission - Oki B8300n | Guide: User's, B8300n (English) - Page 8
Moving the machine Lift this machine at the positions shown in the illustration below and carry it horizontally. > CAUTION Two people are required to lift and carry this machine. The centre of gravity of the machine is slightly to the left of the centre of the machine when viewed from the front. If - Oki B8300n | Guide: User's, B8300n (English) - Page 9
this machine to a computer, be sure to turn both computer and printer off before connecting the devices. 7. Do not print anything which is stss>poarP > Dir ver's licens es 8. Do not throw toner or a toner cartridge into FOR NORTH AMERICA SAFETY PRECAUTIONS This Digital Equipment is rated - Oki B8300n | Guide: User's, B8300n (English) - Page 10
, if not installed and used in accordance with the instructions, may cause harmful interference to radio communication. However, cover or attempt to gain access to the inside of the product. Refer all servicing to qualified personnel. Wave length Pulse times Output power 785 nm +10 nm /-15nm Europe - Oki B8300n | Guide: User's, B8300n (English) - Page 11
Laser cautions - 10 - Oki B8300n | Guide: User's, B8300n (English) - Page 12
recommended that the user studies this manual to familiarise themselves with the main functions of the product and to take notice of the various safety recommendations. A minimum level of computer literacy is necessary for the installation of the printer drivers and Oki recommends that if the user - Oki B8300n | Guide: User's, B8300n (English) - Page 13
be obtained by using the smoothing function. High speed monochrome printing The printer achieves high speed printing at 45 A4 (or letter) size pages mode is the first level of power reduction.The power is reduced to the fuser unit a preset time after the machine has completed a job and no further - Oki B8300n | Guide: User's, B8300n (English) - Page 14
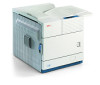
1. Bypass tray paper guide 2. Exit tray 3. Duplex module/bypass tray Module for two-sided printing. 4. Upper paper output area Finished sheets are deposited here. 5. Upper exit tray extension Provides support for large size paper. 6. Operation panel 7. Front cover Open to add toner. 8. Main - Oki B8300n | Guide: User's, B8300n (English) - Page 15
cartridge contains developer and must be removed and replaced by a new cartridge when indicated on the operation panel. 17. Toner cartridge (drum/toner cartridge) The toner cartridge must be replaced when indicated on the operation panel. 18. Photoconductive drum Images are formed on the photo drum - Oki B8300n | Guide: User's, B8300n (English) - Page 16
PART NAMES AND FUNCTIONS Peripheral devices included Overview - 15 - Oki B8300n | Guide: User's, B8300n (English) - Page 17
stapled or unstapled. 4. Mail-bin stacker (B83MB) This unit is an output sorter that has seven receiving bins. The bin to receive printed output can be selected in the printer driver module/bypass tray (B83DB) This module is basically the same as above with the addition of a manual bypass paper - Oki B8300n | Guide: User's, B8300n (English) - Page 18
the keys and display panel. 1. Message display Displays the current status of the printer. [ i ] displayed in any message indicates that the [INFORMATION] key should be pressed. 2. [ERROR] indicator Lights up when paper or toner must be added or when a misfeed has occurred in the machine. Blinks - Oki B8300n | Guide: User's, B8300n (English) - Page 19
. (Display example) WARMING UP. The printer is warming up. READY. The printer is ready to print. FROM TRAY # The printer is currently printing. CHANGE THE TONER CARTRIDGE. PAPER JAM. Out of toner. Replace the toner cartridge. See the relevant user manual. A misfeed has occurred. ADD PAPER - Oki B8300n | Guide: User's, B8300n (English) - Page 20
[BACK/C] key. Printing will resume. To delete print data of a reserved job (jobs stored in the printer) Print data transmitted from computers will be stored in this printer (up to 99 jobs) and will be printed sequentially. To delete print data of a reserved job before starting printing: 1. Press the - Oki B8300n | Guide: User's, B8300n (English) - Page 21
quality paper designed for use in page printers. > When you change the paper type and size in paper tray 1, set the paper type and size referring tray 1. If paper remains in the tray, remove it. 2. Adjust the guide plates A and B in the tray to the length and width of the paper. The guide plates - Oki B8300n | Guide: User's, B8300n (English) - Page 22
of paper trays The specifications for types and sizes of paper for loading paper trays are shown below. Tray Tray Applicable paper types No. (tray name) Applicable paper sizes Paper weight Paper tray Tray 1 1 Multipurpose drawer/ bypass tray Tray 2/ bypass tray Stand/3 x 500 sheet - Oki B8300n | Guide: User's, B8300n (English) - Page 23
suppliers (Avery, 3M, etc.) which are described as being suitable for digital printers ● Failing to do so may leave adhesive residue in the printer, causing paper misfeeds, smudges on prints or other problems ● Applicable standard envelopes: COM-10, Monarch, DL, C5, ISO B5 ● Envelopes can - Oki B8300n | Guide: User's, B8300n (English) - Page 24
type from the operation panel on the main printer When the paper size or type is changed in a paper tray, set them up by referring to the key repeatedly until the desired paper size appears. PLAIN OK > Depending on the selected tray, a selection for AUTO-AB and AUTO-INCH may appear. AUTO-AB: Select - Oki B8300n | Guide: User's, B8300n (English) - Page 25
Loading envelopes Load postcards print side up to the rear left of the tray as shown. Envelopes can only be printed on the address side. Be windows, linings, selfadhesive patches or synthetic materials. Attempting to print on these may cause misfeeds, inadequate toner adherence or other problems - Oki B8300n | Guide: User's, B8300n (English) - Page 26
prints may occur even if envelopes within specification are used. In this case, the problem may be reduced by shifting the fusing normal position when finished feeding envelopes. If not, inadequate toner adherence, paper misfeeds or other problems may occur. 1. Unlatch the duplex module and slide it - Oki B8300n | Guide: User's, B8300n (English) - Page 27
(H) Approx. 11 kg (24.3 lb) Specifications are subject to change without notice. Loading paper in the stand/3 x 500 sheet paper drawer ● Upper paper tray The upper tray is the same as the multi-purpose drawer. Use the upper tray according to the instructions for the multi-purpose drawer. ● Middle - Oki B8300n | Guide: User's, B8300n (English) - Page 28
sure to return the paper guide. 4. Gently push the large capacity paper tray firmly all the way into the printer. 5. Set the paper type drawer Paper size/weight See specifications of paper trays Paper capacity Upper tray: 500 sheets 80g/m2 (20 lb) (ordinary paper) Lower tray: 2,000 sheets 80g/m2 - Oki B8300n | Guide: User's, B8300n (English) - Page 29
damp, resulting in misfeeds. Supply list Product 27k Printer cartridge 100k Developer cartridge Staple Pack for Finisher Staple Pack for Saddle Stitcher European part no. North American part no. TONER-B8300 DVLPR-B8300 STAPLE-B8300-FNR STAPLE-B8300-SSF 56115001 57100101 57100201 57100801 > If - Oki B8300n | Guide: User's, B8300n (English) - Page 30
range of 0-25 per cent prepare a new printer cartridge. The machine as shipped does not have a cartridge installed. Follow the steps below for instructions for installing the first cartridge omitting step 4. ● The print cartridge contains toner and a photoconductive drum. The photoconductor on the - Oki B8300n | Guide: User's, B8300n (English) - Page 31
the duplex module. If the machine is not equipped with the duplex module, close the side cover. 9. Remove the drum protective sheet from the printer cartridge. 11. Return the cartridge lock lever and close the front cover. > Do not touch or damage the surface of the photo drum. Photoconductive - Oki B8300n | Guide: User's, B8300n (English) - Page 32
Developer cartridge replacement When the cartridge needs replacing, a message indicating the need to replace it will appear in the display. Follow the procedure below to replace the developer cartridge. The machine as shipped from the factory does not have a cartridge installed. Follow the procedure - Oki B8300n | Guide: User's, B8300n (English) - Page 33
Overview - 32 - Oki B8300n | Guide: User's, B8300n (English) - Page 34
730B (D29) female connector or equivalent. For the specifications of the parallel interface connector on the computer, see your computer manual. Software for Windows When using this product in a Windows environment, you must install a printer driver in your computer system. Use the CD-ROM supplied - Oki B8300n | Guide: User's, B8300n (English) - Page 35
Select the language which you want to use. 6. Select [Online Manuals, Driver Installation or Network Utilities] and choose the item you want to Windows 95 Windows 98 Windows 2000 Windows NT 4.0 Windows Me Windows XP When using Plug and Play or using the Add Printer Wizard to install printer drivers - Oki B8300n | Guide: User's, B8300n (English) - Page 36
. 9. Enter the file path as follows: G:\OkiB8300\Drivers\English\ w9598\pcl5e G:\OkiB8300\Drivers\English\ w9598\pcl6 10. Click the [OK] button. 11. Select the printer model to be used and click the [Next] button. Follow the instructions displayed by the [Add Printer Wizard]. Plug and play or Add - Oki B8300n | Guide: User's, B8300n (English) - Page 37
printer, select [Properties], and then open the [Configuration] tab. If you click the [Get Tray Status] button in the [Detail] dialogue box of the [Paper] tab, the current tray information (paper size, paper type, and quantity of paper remaining) will be displayed. Setting drivers using Windows - Oki B8300n | Guide: User's, B8300n (English) - Page 38
PRINTER CONFIGURATION THROUGH A NETWORK If you access the Web pages of this product from your computer using a Web browser such described in detail. 4. Close [Help]. Click the button. The display will return to the Web page information of this product. Printer configuration through a network - 37 - Oki B8300n | Guide: User's, B8300n (English) - Page 39
The alert message is transmitted when a problem such as a supplies requirement (toner or paper) or error(device failure or paper misfeed) occurs. SNMP Trap Setup IP addresses, trap community, and authentic community are set here. Confidential reception Data - Oki B8300n | Guide: User's, B8300n (English) - Page 40
problem occurs with the printer (such as paper misfeed or toner out), the print start operation is completed on the computer and printing will be executed on the printer. 2. Hold after print can also delete the data of the printer as needed. You If a password is set in the printer driver setting, a - Oki B8300n | Guide: User's, B8300n (English) - Page 41
. Press the Sor Tkey until the desired choice appears. PRINT AND DELETE DATA - OK? T PRINT AND SAVE DATA - OK? T DELETE THE DATA OK? T Data will be deleted after printing. Data will be held after printing. Data will be deleted without printing. If this item is selected, the operation - Oki B8300n | Guide: User's, B8300n (English) - Page 42
case, the number of printed pages will be accumulated in [OTHERS]. The job control screen will always appear when a print operation is executed from the printer driver if the [Auto Job Control Review] check box in the [Main] tab of the printer driver is set. 41 - Job control - Oki B8300n | Guide: User's, B8300n (English) - Page 43
LaserWriter printer driver for printing. OKI PPD Utility The OKI PPD Utility Printer driver LaserWriter 8 version 8.4.1 or later. For other conditions such as CPU and RAM printer driver versions. 1. Turn on the computer . 2. Insert the supplied Drivers and Manuals window, select the features to be - Oki B8300n | Guide: User's, B8300n (English) - Page 44
] from the [File] menu of application software.The following display will appear. (The display varies with the operating system versions, printer driver versions, and application software.) 2. Adjust each setting. The following display will appear. Number of copies, page range, and other settings - Oki B8300n | Guide: User's, B8300n (English) - Page 45
folder of your computer. Should any problem occur due to the installation of this utility, open the [Oki B8300 Extras] folder on your printer again through the [Chooser]. Use the procedure described in [Selecting the Printer]. 2. Click the [Select] button and select the PPD files for your printer - Oki B8300n | Guide: User's, B8300n (English) - Page 46
PostScript settings Defines whether a PostScript error page is printed or not when a PostScript error has occurred. Operation procedure common to all printer configuration settings (Items that can be set from the operator panel) When the machine is being operated from the operator panel: 5. Press - Oki B8300n | Guide: User's, B8300n (English) - Page 47
either in the printer driver or on the operator panel, values set in the printer driver override those set on the panel. Use the printer driver to set punched paper or colour paper can be set. Default output tray The output tray to be used for printing under normal conditions is set. Printed - Oki B8300n | Guide: User's, B8300n (English) - Page 48
Clock The date and time of the built-in clock of the printer can be set. Tray settings The paper type and paper size for each tray are set here. Auto tray switching Used to automatically switch the paper tray to another tray of the same paper size when paper runs out during continuous printing - Oki B8300n | Guide: User's, B8300n (English) - Page 49
printed. > PostScript font list printing. A list of fonts that can be used with the PostScript printer driver is printed. If test page printing is disabled with key operator program DISABLE TEST PAGE PRINTING, the printer test pages cannot be printed. Clock The date and time of the built-in clock - Oki B8300n | Guide: User's, B8300n (English) - Page 50
KEY OPERATOR PROGRAMS Using the programs When using the key operator programs for the first time, register a key operator code number. When the machine is being operated from the operator panel: 1. Press the [MENU] key. Press the [MENU] key repeatedly until the message "KEY OPERATOR PROGRAMS" - Oki B8300n | Guide: User's, B8300n (English) - Page 51
Structure of the setting method for key operator programs The sequence for selection and setting of key operator programs are shown below. The [OK] and [BACK/C] keys allow navigation in either direction through the setting steps along a program setting path. Program steps start from the major - Oki B8300n | Guide: User's, B8300n (English) - Page 52
[OK] [BACK/C] ENERGY SAVE [OK] [BACK/C] AUTO POWER SHUT-OFF TIMER (60 min.*) AUTO POWER SHUT-OFF (ENABLE*) PREHEAT MODE (NO*) TONER SAVE (OFF*) OPERATION PANEL SETTINGS [OK] [BACK/C] AUTO CLEAR SETTING (60 sec.*) MESSAGE DISPLAY TIME (6 sec.*) LANGUAGE SETTING (ENGLISH*) DEVICE SETTINGS - Oki B8300n | Guide: User's, B8300n (English) - Page 53
areas will be printed as halftone. (This setting is effective only for printing without use of a printer driver. If the printer driver is used, the printer driver setting will override the setting of this program.) Print data Example of print in the toner save mode Key operator programs - 52 - Oki B8300n | Guide: User's, B8300n (English) - Page 54
operation on the operator panel. Auto clear will not function when the printer is in configuration setting mode, custom setting mode or key operator program . Saddle stitch adjust This program is used to adjust the stapling position (folding position) when using the saddle stitch function of - Oki B8300n | Guide: User's, B8300n (English) - Page 55
in place of A4. Interface settings These programs are used to control data transmitted to the parallel port or network port of this printer. Hexadecimal dump mode This program is used to output the print data from a computer in the hexadecimal dump format with corresponding characters (ASCII). This - Oki B8300n | Guide: User's, B8300n (English) - Page 56
transmit data for a length of time exceeding the timeout, the job will cancel and the next job will start processing. The allowable range of the time is 1 to 999 seconds. Port switching This program is used to set the switching method of the parallel port and network port of this printer. Setting - Oki B8300n | Guide: User's, B8300n (English) - Page 57
, use the program Restore configuration. Restore configuration Use this program to recall the configuration settings that have been stored in the printer's non-volatile memory by the program Store current configuration. > After this program is set, exit the key operator program, turn off the main - Oki B8300n | Guide: User's, B8300n (English) - Page 58
TROUBLESHOOTING AND MAINTENANCE This chapter describes misfeed removal, user maintenance, and similar issues. Please call your authorised dealer if you fail to cure the problem after reading this section. Misfeed removal All messages will appear on the display panel of the main unit. When a misfeed - Oki B8300n | Guide: User's, B8300n (English) - Page 59
The middle and lower trays cannot be installed in the upper tray position and the upper tray cannot be installed to the middle and lower tray positions. (These cannot be pushed into the machine. ) Take care not to re-install a tray wrongly after removing it. Troubleshooting and maintenance - 58 - Oki B8300n | Guide: User's, B8300n (English) - Page 60
guide. 5. Gently close the duplex module. If the machine is not equipped with a duplex module, close the side cover. After closing, confirm that the misfeed 3. Gently close the large capacity tray. Push the paper tray all the way into the machine. Gently close the duplex module. Troubleshooting - Oki B8300n | Guide: User's, B8300n (English) - Page 61
Roller rotating knob A Fusing unit open tab 6. If the duplex module is equipped with an exit tray and paper is misfed in the exit area, remove the misfed paper as shown in the illustration. the misfeed message has been cleared and the normal display appears. Troubleshooting and maintenance - 60 - Oki B8300n | Guide: User's, B8300n (English) - Page 62
tray, rotate it up out of the way and open the cover of the duplex module. If no exit tray is attached, just open the cover of the duplex module and ignore any reference to the tray the bypass tray 1. Unlatch the duplex the exit tray up, exit tray. 2. Remove the misfeed from the bypass tray. Be - Oki B8300n | Guide: User's, B8300n (English) - Page 63
desired paper size. Paper selection of driver set to [AUTO]? Ensure that the desired paper is set in a paper tray of the printer and select [Auto] in the paper selection of the printer driver. Printer resident font cannot be selected Resident printer installed? from the application. Install (or - Oki B8300n | Guide: User's, B8300n (English) - Page 64
Problem Check Solution or cause Smudges on printed sheets. Is a message indicating a need of maintenance See the Operation Manual ( to printer driver or on the copier operation operation panel on the printer? Setting the paper size and type when you panel. change the paper size in tray 1. - Oki B8300n | Guide: User's, B8300n (English) - Page 65
Troubleshooting and maintenance - 64 - Oki B8300n | Guide: User's, B8300n (English) - Page 66
descriptions in this manual are for the duplex module/bypass tray. Part names Exit tray Duplex module Bypass tray Exit tray The tray is extendable to support large size paper. Extend the tray when 11" x 17", 8½" x 14", 8½" x 13", A3 or B4 paper is being used. Bypass tray This tray can also be - Oki B8300n | Guide: User's, B8300n (English) - Page 67
soon as possible. • For transparency film, use Oki recommended film. 3. Insert the paper all the way into the bypass tray. Set the paper face down. If there is a clearance between the paper and the paper guides, the paper may not be fed correctly. Adjust the guides so that they contact the edges of - Oki B8300n | Guide: User's, B8300n (English) - Page 68
the "Paper" tab shown in the illustration below and select "Left Side Tray" in the "Output" drop down. The settings screens shown will appear only if the devices have been set properly in the printer driver configuration. The combination of paper selection and other functions may not be compatible - Oki B8300n | Guide: User's, B8300n (English) - Page 69
Troubleshooting the duplex module Check the list below before calling for service.. Problem The printer will not print duplex the printer driver? Bypass tray extension not extended? Printed images on to paper Does the number of sheets exceed the limit? from the bypass tray are Paper guides properly - Oki B8300n | Guide: User's, B8300n (English) - Page 70
sheets (A4 or 8½" x 11" size, 80 g/m2 or 20 lb Mail bins: 100 sheets each (A4 or 8½" x 11", 80 g/m2 or 20 lb) Top tray: same as the specifications of paper for feeding in the main unit. Mail bins: 11 x 17, 8½ x 14, 8½ x 13, 8½ x 11, 8½ x 11R, 7¼ x 10½, A3, B4, A4, A4R, B5, B5R - Oki B8300n | Guide: User's, B8300n (English) - Page 71
of output is not required, the top tray can be selected for delivery. Using the mail-bin stacker Top tray Mail bin 1 . . . Product printer driver. The illustration below shows the screen for a PCL printer driver in the Windows 98 environment as an example. 2. Select "Properties" in the printer driver - Oki B8300n | Guide: User's, B8300n (English) - Page 72
. Be careful not to tear the paper during removal. 3. If the misfed paper is not found in step 2, open the front cover. 7. Close the paper guide securely.. 8. Close the front cover. 4. Turn the roller rotating knob in the direction of the arrow to remove the misfed paper. 5. Open the paper - Oki B8300n | Guide: User's, B8300n (English) - Page 73
be installed together with some other devices. Specifications Name Number of trays Paper output Tray type Tray capacity Paper sizes Paper weight Paper types Tray full detection Offset function Paper sizes for stapling Stapling capacity Staples Power supply Dimensions Weight Finisher Two Print - Oki B8300n | Guide: User's, B8300n (English) - Page 74
"Top " under "Binding Edge" 3. Select "1 Staple" or "2 Staples" under "Staple". The settings screens to the right will appear only if the devices have been set properly in the printer driver configuration. This example screen is for a Windows 98 PCL printer driver. The combination of paper selection - Oki B8300n | Guide: User's, B8300n (English) - Page 75
the operation panel. Follow the procedure below to replace the staple cartridge. 1. Open the front cover. 5. Insert a new staple cartridge into the staple box aligning the arrow of the staple cartridge with that of the staple box. 2. Turn the staple unit face up. NOTES: > Do not remove the tape - Oki B8300n | Guide: User's, B8300n (English) - Page 76
Be careful not to tear the misfed paper during removal. 7. Raise the lever at the end of the staple box. Remove the top staple if it is bent. If bent staples remain, a staple jam will occur again.. 3. Close the finisher compiler 8. Return the lever to its original position. 4. Open the finisher - Oki B8300n | Guide: User's, B8300n (English) - Page 77
open the top cover.. Top cover 4. Release the latch to open the finisher compiler. 5. Raise the paper guide and remove the misfed paper. Do not remove paper from the stapler compiler. Paper guide 6. Close the finisher compiler. 3. Remove the misfed paper. Be careful not to tear the misfed paper - Oki B8300n | Guide: User's, B8300n (English) - Page 78
Troubleshooting finisher problems Check the list below before calling for service. Problem Check Cause or solution or Stapling position is not correct. The finisher does not operate. Stapling position not set correctly? Check the stapling position setting. Are any finisher covers open? - Oki B8300n | Guide: User's, B8300n (English) - Page 79
reference guide for duplex output The orientation of the printed copy and the binding position selection are all interrelated. The table below shows these relationships. Orientation of original or original data Page 1 Page 2 Page 1 & Page 2 Duplexed Output result One-position stapling Two - Oki B8300n | Guide: User's, B8300n (English) - Page 80
stitch finisher. Certain configurations will not work. Specifications Name Number of trays Paper output Tray system Tray capacity Paper size Paper weight Paper types Tray full detection Offset function Paper sizes for stapling Stapling capacity Staples Power supply Dimensions Weight Name Number of - Oki B8300n | Guide: User's, B8300n (English) - Page 81
When saddle stitching is selected, the prints will be stapled at the centre and delivered to the saddle stitch tray. The stapling positions, orientation, paper size for stapling, and stapling capacity are shown below. Stapling positions Top left corner of printouts Portrait orientation Landscape - Oki B8300n | Guide: User's, B8300n (English) - Page 82
Then select "2 Staples" in the "Staple" drop down under the "Finishing" heading. Original 2 Punch positions The settings screens to the right will appear only if the devices have been set properly in the printer driver configuration. This example screen is for a Windows 98 PCL printer driver. The - Oki B8300n | Guide: User's, B8300n (English) - Page 83
knob until the triangle mark is aligned with the index. Roller rotating knob A After inserting the staple cartridge, press down on the staple box cover to lock the cartridge in place. When reinstalling the staple box, push it in until it clicks into place. Do not remove the tape from the cartridge - Oki B8300n | Guide: User's, B8300n (English) - Page 84
Staple jam removal 1. Unlatch the saddle stitch finisher and slide it away from the printer. 2. Open the front cover. 6. Remove the Turn roller rotating knob A in the direction of the arrow to move the staple unit to the front. Turn the roller rotating knob until the triangle mark is aligned - Oki B8300n | Guide: User's, B8300n (English) - Page 85
of hole punch scrap 1. Unlatch the saddle stitch finisher and slide it away from the printer. 11. Raise the lever at the end of the staple box. Remove the top staple if it is bent. If bent staples remain, a staple jam will occur again. 2. Pull out the punch scrap collecting container and empty it - Oki B8300n | Guide: User's, B8300n (English) - Page 86
in the saddle stitch finisher, remove the misfed paper following the procedure below. 1. Unlatch the saddle stitch finisher and slide it away from the printer. 2. Remove the misfed paper from the main unit. After removing the misfed paper, open and close the duplex module to reset the jam indicator - Oki B8300n | Guide: User's, B8300n (English) - Page 87
stitch tray. Be careful not to tear the misfed paper during removal. 13. Close the front cover. 14. Push the saddle stitch finisher back against the printer. Troubleshooting (saddle stitch finisher problems) Check the list below before calling for service. Problem Check Stapling position - Oki B8300n | Guide: User's, B8300n (English) - Page 88
quick reference guide for duplex output The orientation of the original data and binding position selection are all interrelated. The table below shows these relationships. Orientation of original or original data Page 1 Page 2 Page 1 & Page 2 Duplexed Output result One-position stapling Two - Oki B8300n | Guide: User's, B8300n (English) - Page 89
table below shows these relationships. Orientation of original or original data Page 1 Page 2 Page 1 & Page 2 Duplexed , labels , envelopes and postcards cannot be stapled. ● If mixed paper sizes are selected for stapling jobs, stapling will be automatically cancelled. Saddle stitch finisher - Oki B8300n | Guide: User's, B8300n (English) - Page 90
PRINTER SPECIFICATIONS Type Print system Exposure system Developer system Paper feed system Fusing system CPU Memory capacity (standard) DIMM slots for additional memory Page description language Resident fonts Parallel interface Network interface Warm up time Continuous print speed (A4 or 8½" x 11 - Oki B8300n | Guide: User's, B8300n (English) - Page 91
in the Windows NT 4.0 environment. 3 2/4/6/9/16 is supported in the Windows 2000 environment. 4 Only one size is supported in the Windows 2000 environment. 5 Only 35 fonts are supported in the Windows NT 4.0 environment. 6 This function is limited for PPD. 7 PCL6 only 90 - Printer specifications - Oki B8300n | Guide: User's, B8300n (English) - Page 92
2000 sheet paper drawer Duplex module/bypass tray Duplex module Saddle stitch finisher Finisher Mail-bin stacker Exit tray Upper exit tray extension Punch unit Multi-function controller board Print multi-purpose drawer is installed, the power supply unit is not needed. 91 - Printer specifications - Oki B8300n | Guide: User's, B8300n (English) - Page 93
memory is not available to store the print data. This may happen even if the amount of data for the job is not large when the memory becomes full with data of other jobs. > When a print job is sent to the printer is disabled, punch is disabled, specified exit tray is disabled, etc.) > An invalid - Oki B8300n | Guide: User's, B8300n (English) - Page 94
area of this product is shown below. E C C B E D A Paper size Printable area If a printer driver for Windows or Macintosh is used for printing, the printable area will be smaller. The actual printable area depends on the printer driver to be used. Paper size A3 B4 A4 B5 A5 Japanese postcard - Oki B8300n | Guide: User's, B8300n (English) - Page 95
(Iberica), S.A. Paseo de la Habana, 176 28036 - Madrid Tel: 91-3431620 Fax: 91-3431624 www.oki.es Russia 101000, Russia, Moscow Bolshoy Zlatoustinsky per. d. 1 str. 6 [email protected] www.oki.ru Okidata Oki Data Americas, Inc., 2000 Bishops Gate Blvd., Mt. Laurel, NJ 08054-4620 Tel: 856 235-2600 FAX
-
 1
1 -
 2
2 -
 3
3 -
 4
4 -
 5
5 -
 6
6 -
 7
7 -
8
-
9
-
10
-
11
-
12
-
13
-
14
-
15
-
16
-
17
-
18
-
19
-
20
-
21
-
22
-
23
-
24
-
25
-
26
-
27
-
28
-
29
-
30
-
31
-
32
-
33
-
34
-
35
-
36
-
37
-
38
-
39
-
40
-
41
-
42
-
43
-
44
-
45
-
46
-
47
-
48
-
49
-
50
-
51
-
52
-
53
-
54
-
55
-
56
-
57
-
58
-
59
-
60
-
61
-
62
-
63
-
64
-
65
-
66
-
67
-
68
-
69
-
70
-
71
-
72
-
73
-
74
-
75
-
76
-
77
-
78
-
79
-
80
-
81
-
82
-
83
-
84
-
85
-
86
-
87
-
88
-
89
-
90
-
91
-
92
-
93
-
94
-
95
 |
 |

B8300
USER’S GUIDE