Oki C5150n Memory DIMM Installation (English, Franais, Espa?ol, Portugu
Oki C5150n Manual
 |
View all Oki C5150n manuals
Add to My Manuals
Save this manual to your list of manuals |
Oki C5150n manual content summary:
- Oki C5150n | Memory DIMM Installation (English, Franais, Espa?ol, Portugu - Page 1
Memory DIMM Installation Installation du module de mémoire DIMM Instalación de Memoria DIMM Instalação da memória DIMM 64 MB, Oki 70042801 256 MB, Oki 70042901 59358904 - Oki C5150n | Memory DIMM Installation (English, Franais, Espa?ol, Portugu - Page 2
dont il est question dans ce guide n'affecteront pas l'applicabilité des informations qu'il contient. La mention d'autres produits logiciels fabriqués par d'autres compagnies ne constituent pas nécessairement l'approbation de Okidata pour ces produits. © 2010 par Oki Data Americas, Inc. Tous droits - Oki C5150n | Memory DIMM Installation (English, Franais, Espa?ol, Portugu - Page 3
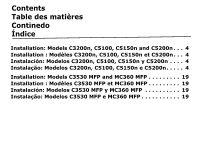
Índice Installation: Models C3200n, C5100, C5150n and C5200n . . . 4 Installation : Modèles C3200n, C5100, C5150n et C5200n . . . 4 Instalación: Modelos C3200n, C5100, C5150n y C5200n . . . . 4 Instalação: Modelos C3200n, C5100, C5150n e C5200n. . . . . 4 Installation: Models C3530 MFP and MC360 MFP - Oki C5150n | Memory DIMM Installation (English, Franais, Espa?ol, Portugu - Page 4
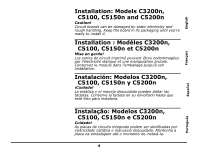
ready to install it. Installation : Modèles C3200n, C5100, C5150n et C5200n Mise en garde! Les cartes de circuit imprimé peuvent êtres endommagées l'emballage jusqu'à son installation. Instalación: Modelos C3200n, C5100, C5150n y C5200n ¡Cuidado! La estática y el manejo descuidado pueden dañar las - Oki C5150n | Memory DIMM Installation (English, Franais, Espa?ol, Portugu - Page 5
(a). 2. Unplug the power cord (b). 3. Detach the interface cable from the back of the printer (c). C53_Off_Unplug_USB.jpg 1. Éteignez l'imprimante (a). 2. Débranchez le cordon d'alimentation (b). 3. Débranchez le câble d'interface à l'arrière de l'imprimante (c). Français Español 1. Apague - Oki C5150n | Memory DIMM Installation (English, Franais, Espa?ol, Portugu - Page 6
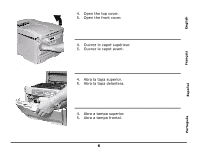
English c53_02a_opencvr.jpg 4. Open the top cover. 5. Open the front cover. 4. Ouvrez le capot supérieur. 5. Ouvrez le capot avant. Français 4. Abra la tapa superior. 5. Abra la tapa delantera. Español Português 4. Abra a tampa superior. 5. Abra a tampa frontal. 6 - Oki C5150n | Memory DIMM Installation (English, Franais, Espa?ol, Portugu - Page 7
Lift up on the ends. Remove the side panel from the printer. c51_07_unscrewpanel.jpg 6. Desserrez les vis à ailettes fixant le couvercle el panel lateral de la impresora. Português 6. Solte o parafuso de aperto manual que prende a cobertura lateral da impressora no lugar. 7. Levante segurando nas - Oki C5150n | Memory DIMM Installation (English, Franais, Espa?ol, Portugu - Page 8
English c51_06_sidenopanel.jpg 8. Locate the DIMM socket. 8. Repérez le connecteur de module de mémoire DIMM. Français 8. Ubique el conector DIMM. Español Português 8. Localize o soquete para memória DIMM. 8 - Oki C5150n | Memory DIMM Installation (English, Franais, Espa?ol, Portugu - Page 9
English 9. Push out the lock tabs at either end of the DIMM socket. c51_04a_dimmtabs.jpg 9. Poussez vers l'extérieur les languettes de blocage aux deux extrémités du connecteur de module de mémoire DIMM. 9. Libere las lengüetas de sujeción a ambos lados del conector DIMM. Français Español - Oki C5150n | Memory DIMM Installation (English, Franais, Espa?ol, Portugu - Page 10
English Français Caution! To avoid damage, ground yourself (touch metal) before handling DIMMs. 10. Remove the DIMM from its shipping package. Mise en garde! Pour ne pas les endommager, reliez-vous à la terre (touchez du métal) avant de manipuler les modules DIMM 10. Retirez le module DIMM de son - Oki C5150n | Memory DIMM Installation (English, Franais, Espa?ol, Portugu - Page 11
English 11. Position the DIMM as shown. 5150_dimm_4.jpg 11. Positionnez le module de mémoire DIMM tel que montré. 11. Coloque la DIMM en la forma que se indica. Français Español Português 11. Posicione a memória DIMM como ilustrado. 11 - Oki C5150n | Memory DIMM Installation (English, Franais, Espa?ol, Portugu - Page 12
. Press the DIMM in firmly, until you feel the tabs snap to lock it in place. Note: You may need to push the tabs in manually to secure the DIMM. 12. Insérez le module dans le connecteur. Appuyez fermement sur celui-ci jusqu'à ce que les languettes de blocage s'enclenchent - Oki C5150n | Memory DIMM Installation (English, Franais, Espa?ol, Portugu - Page 13
English 13. Place the side panel on the printer. Use the thumbscrew to secure the panel. 14. Close the front cover. c51_07_unscrewpanel.jpg tapa delantera. Português 13. Coloque o painel lateral na impressora. Use o parafuso de aperto manual para prender o painel. 14. Feche a tampa frontal. 13 - Oki C5150n | Memory DIMM Installation (English, Franais, Espa?ol, Portugu - Page 14
c53_45_latchcvr.jpg 15. Close the top cover. 16. Attach the interface cable (a). 17. Plug in the power cord b). 18. Turn on the printer (c). Next, go to "Verify the Installa tion" on page 15. 15. Fermez le capot supérieur. 16. Rebranchez le câble d'interface (a). 17. Branchez le cordon d' - Oki C5150n | Memory DIMM Installation (English, Franais, Espa?ol, Portugu - Page 15
Verify the Installa tion Print the MenuMap Note: The MenuMap is a list of the current menu settings. Keypad.eps + 1. Press one or more times until INFORMATION MENU displays. 2. Press ENTER twice. The MenuMap prints. 3. Look at the top of the printout. Find the Total Memory Size. Total Memory Size = - Oki C5150n | Memory DIMM Installation (English, Franais, Espa?ol, Portugu - Page 16
Vérification de l'installation Impression de MenuMap Note: La liste des menus (MenuMap) comprend la liste des paramètres de menu courants. Keypad.eps + 1. Appuyez sur une ou plusieurs fois jusqu'à ce que INFORMATION MENU s'affiche. 2. Appuyez deux fois sur ENTER. La Menu Map s'imprime. 3. Consultez - Oki C5150n | Memory DIMM Installation (English, Franais, Espa?ol, Portugu - Page 17
Verifique la instalación Imprima el MenuMap Note: El MenuMap contiene una lista de las configuraciones actuales del menú. Keypad.eps + 1. Presione el botón una o más veces hasta que aparezca el mensaje INFORMATION MENU (MENU DE INFORMACIÓN). 2. Presione el botón ENTER dos veces. MenuMap se imprime. - Oki C5150n | Memory DIMM Installation (English, Franais, Espa?ol, Portugu - Page 18
Verifique a instalação Imprima a estrutura do menu Note: A estrutura dos menus (MenuMap) é uma lista das configurações atuais dos menus. Keypad.eps + 1. Pressione uma ou mais vezes até que INFORMATION MENU [MENU DE INFORMAÇÕES] seja exibido. 2. Pressione ENTER duas vezes. A estrutura do menu será - Oki C5150n | Memory DIMM Installation (English, Franais, Espa?ol, Portugu - Page 19
English Français Installation: Models C3530 MFP and MC360 MFP Caution! Circuit boards can be damaged by static electricity and rough handling. Keep the board in its packaging until you're ready to install it. Installation : Modèles C3530 MFP et MC360 MFP Mise en garde! Les cartes de circuit imprim - Oki C5150n | Memory DIMM Installation (English, Franais, Espa?ol, Portugu - Page 20
English Français 1. Switch the MFP off (a) and disconnect the AC power cable (b). 2. Lift the scanner. 1. Mettez le MPF hors tension(a) et débranchez le câble secteur (b). 2. Soulevez le scanner. 1. Apague la MFP (a) y desconecte el cable de alimentación de CA (b). 2. Levante el escáner. 1. - Oki C5150n | Memory DIMM Installation (English, Franais, Espa?ol, Portugu - Page 21
English Français 3. Press the cover release (a) and open the top cover (b). Warning! If the MFP has been powered on, the fuser may be hot. This area is clearly labelled. Do not touch this area. 3. Appuyez sur la manette de déverrouillage du capot (a) et ouvrez entièrement le capot supérieur de l' - Oki C5150n | Memory DIMM Installation (English, Franais, Espa?ol, Portugu - Page 22
to protect them from direct light. Do not touch the green image drum surface. 4. Enlevez chaque ensemble tambour photoconducteur en commençant par l'avant. 5. Couvrez les ensembles tambour photoconducteur pour les protéger de la lumière directe. - Oki C5150n | Memory DIMM Installation (English, Franais, Espa?ol, Portugu - Page 23
the belt (b) and the lifting bar (c) at the front end. Turn the two fasteners (a) 90° to the left. This will release the belt from the printer chassis. 7. Unlock the fasteners and remove the belt. 6. Repérez les deux attaches (a) de chaque côté de la courroie (b) et la barre de levage (c) sur le - Oki C5150n | Memory DIMM Installation (English, Franais, Espa?ol, Portugu - Page 24
English Français 8. Identify the RAM expansion slot in the printer. Unclip the plastic cover to open this slot. Warning! If the MFP has been powered on, the fuser may be hot. This area is clearly - Oki C5150n | Memory DIMM Installation (English, Franais, Espa?ol, Portugu - Page 25
English Français 9. The RAM expansion slot already contains a memory board, this board must be removed before you can install the new one. To remove it: a. Identify the locking clips at each end of the RAM expansion slot. 9. Comme le connecteur d'extension pour mémoire vive contient déjà une carte - Oki C5150n | Memory DIMM Installation (English, Franais, Espa?ol, Portugu - Page 26
English Français b. Push the clips outward and back into the printer. The board will pop out slightly. c. Grip the board firmly by its short edges and pull it out of the slot, placing it in the - Oki C5150n | Memory DIMM Installation (English, Franais, Espa?ol, Portugu - Page 27
short edges, so that the edge connector faces in towards the RAM expansion slot, and the small cutout is closer to the bottom of the printer. 10. Tenez la nouvelle carte mémoire par les bords courts de façon à ce que le connecteur plat se trouve en face du connecteur d'extension - Oki C5150n | Memory DIMM Installation (English, Franais, Espa?ol, Portugu - Page 28
English Français 11. Gently push the board into the RAM expansion slot until it latches in and will not go any further. 12. Close the RAM expansion slot. 11. Enfoncez doucement la carte dans le connecteur d'extension pour mémoire libre jusqu'à ce qu'elle se bloque dedans et qu'elle ne s'enfonce - Oki C5150n | Memory DIMM Installation (English, Franais, Espa?ol, Portugu - Page 29
English Français 13. Replace the belt and image drum units. 14. Lower the printer top cover and press down firmly so that the cover latches close. 13. Remettez en place la courroie et les tambours photoconducteurs. 14. Fermez le - Oki C5150n | Memory DIMM Installation (English, Franais, Espa?ol, Portugu - Page 30
English Français 15. Gently lower the scanner. 16. Reconnect the AC power cable and switch the unit on. 15. Abaissez doucement le scanner. 16. Rebranchez le câble secteur et mettez le MPF sous tension. 15. Con cuidado, baje el escáner. 16. Vuelva a conectar el cable de alimentación de CA y - Oki C5150n | Memory DIMM Installation (English, Franais, Espa?ol, Portugu - Page 31
Verify the Installation Check the Memory Status 1. Using the Enter key (1), access the Menu Function. 2. From the drop-down menu select the View Information with the Enter key. 3. From the Configuration menu, scroll down to the System Menu and select using the Enter key. 4. Using the Down arrow key - Oki C5150n | Memory DIMM Installation (English, Franais, Espa?ol, Portugu - Page 32
Vérification de l'installation Vérification de l'état de la mémoire 1. À l'aide de la touche Entrée (1), accédez à la fonction Menu. 2. Dans le menu déroulant, sélectionnez Voir informations avec la touche Entrée. 3. Dans le menu Configuration, faites défiler l'affichage vers le bas jusqu'au menu - Oki C5150n | Memory DIMM Installation (English, Franais, Espa?ol, Portugu - Page 33
Verifique la instalación Comprobación del estado de memoria 1. Pulse la tecla ENTER (1) para acceder a la función Menú. 2. En el menú desplegable, seleccione Ver información con la tecla ENTER. 3. En el menú Configuración, desplácese a Sistema Menú y seleccione con la tecla ENTER. 4. Con la tecla de - Oki C5150n | Memory DIMM Installation (English, Franais, Espa?ol, Portugu - Page 34
Verifique a instalação Verificação do status da memória 1. Usando o botão Enter (1), acesse a função Menu. 2. No menu suspenso, selecione View Information (Exibir informações) com o botão Enter. 3. No menu Configuration (Configuração), acesse System Menu (Menu do sistema) e selecione-o com o botão
-
 1
1 -
 2
2 -
 3
3 -
 4
4 -
 5
5 -
 6
6 -
 7
7 -
8
-
9
-
10
-
11
-
12
-
13
-
14
-
15
-
16
-
17
-
18
-
19
-
20
-
21
-
22
-
23
-
24
-
25
-
26
-
27
-
28
-
29
-
30
-
31
-
32
-
33
-
34
 |
 |

Memory DIMM Installation
Installation du module de mémoire
DIMM
Instalación de Memoria DIMM
Instalação da memória DIMM
64 MB,
Oki 70042801
256 MB, Oki 70042901
59358904